The Corsair Carbide 400Q Case Review
by E. Fylladitakis on April 29, 2016 9:00 AM EST- Posted in
- Cases/Cooling/PSUs
- Corsair
- ATX
- E-ATX
- Carbide
The Exterior of the Corsair Carbide 400Q
Corsair went with a minimalistic refined design with the Carbide 400Q. The entirety of the case, both inside and outside, is satin black. It is worthwhile to mention that the external paint job is immaculate and that the paint is highly resistant to fingerprint marks. All of the case’s panels are flat and metallic, including the faceplate - the top of which is the only part of the case that is making a rounded edge. Measuring 46.4 cm tall, 21.5 cm wide and 42.5 cm deep (18.3 × 8.45 × 16.75 in), the Carbide 400Q is a rather compact midi ATX tower case like Corsair claims it is, falling between the SilverStone Fortress FT05 (7.5% larger) and the NZXT S340 (9.5% smaller). While NZXT managed to make their case nearly 10% more compact, we should note that the Carbide 400Q supports more parts and larger hardware parts, such as EATX motherboards.
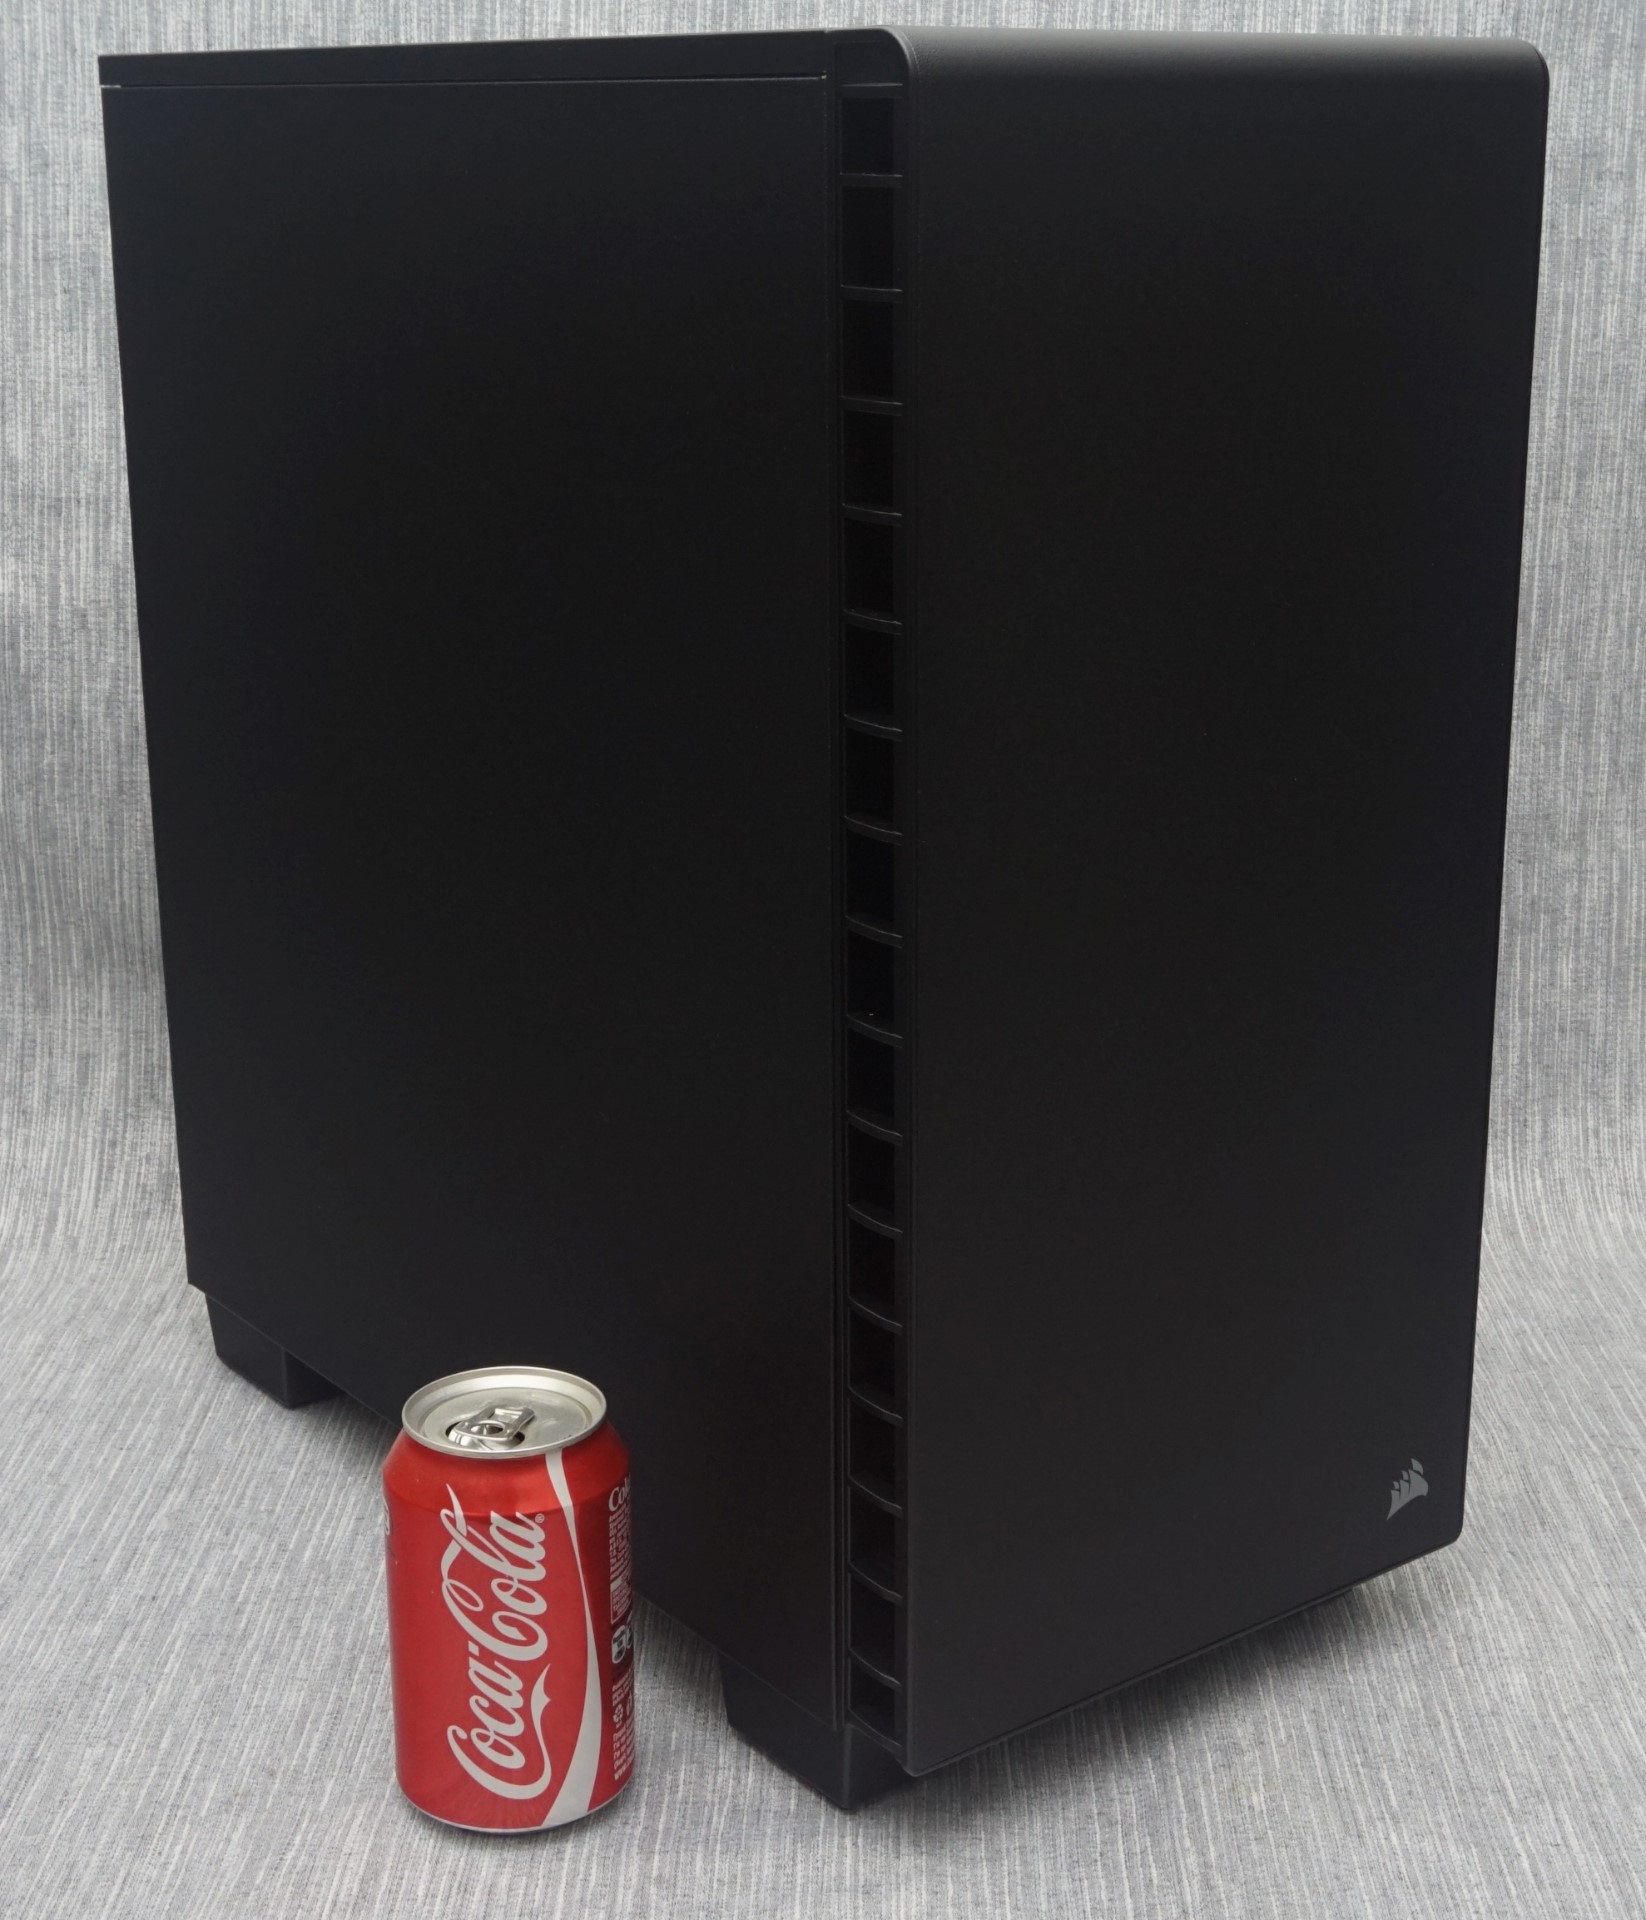
11.2 oz (330ml) can inserted as size reference
The front faceplate cannot be opened, as there are no external drive bays anyway. Its frame is actually plastic, with the metallic plate being just a top cover for aesthetic purposes, and can be removed to clean the front filters and to allow access for the mounting of liquid cooling radiators. Corsair says that it can be simply pulled off, but that was not true for our sample: it required a lot of force to come off and that does not bode well for the longevity of the plastic mounting studs.
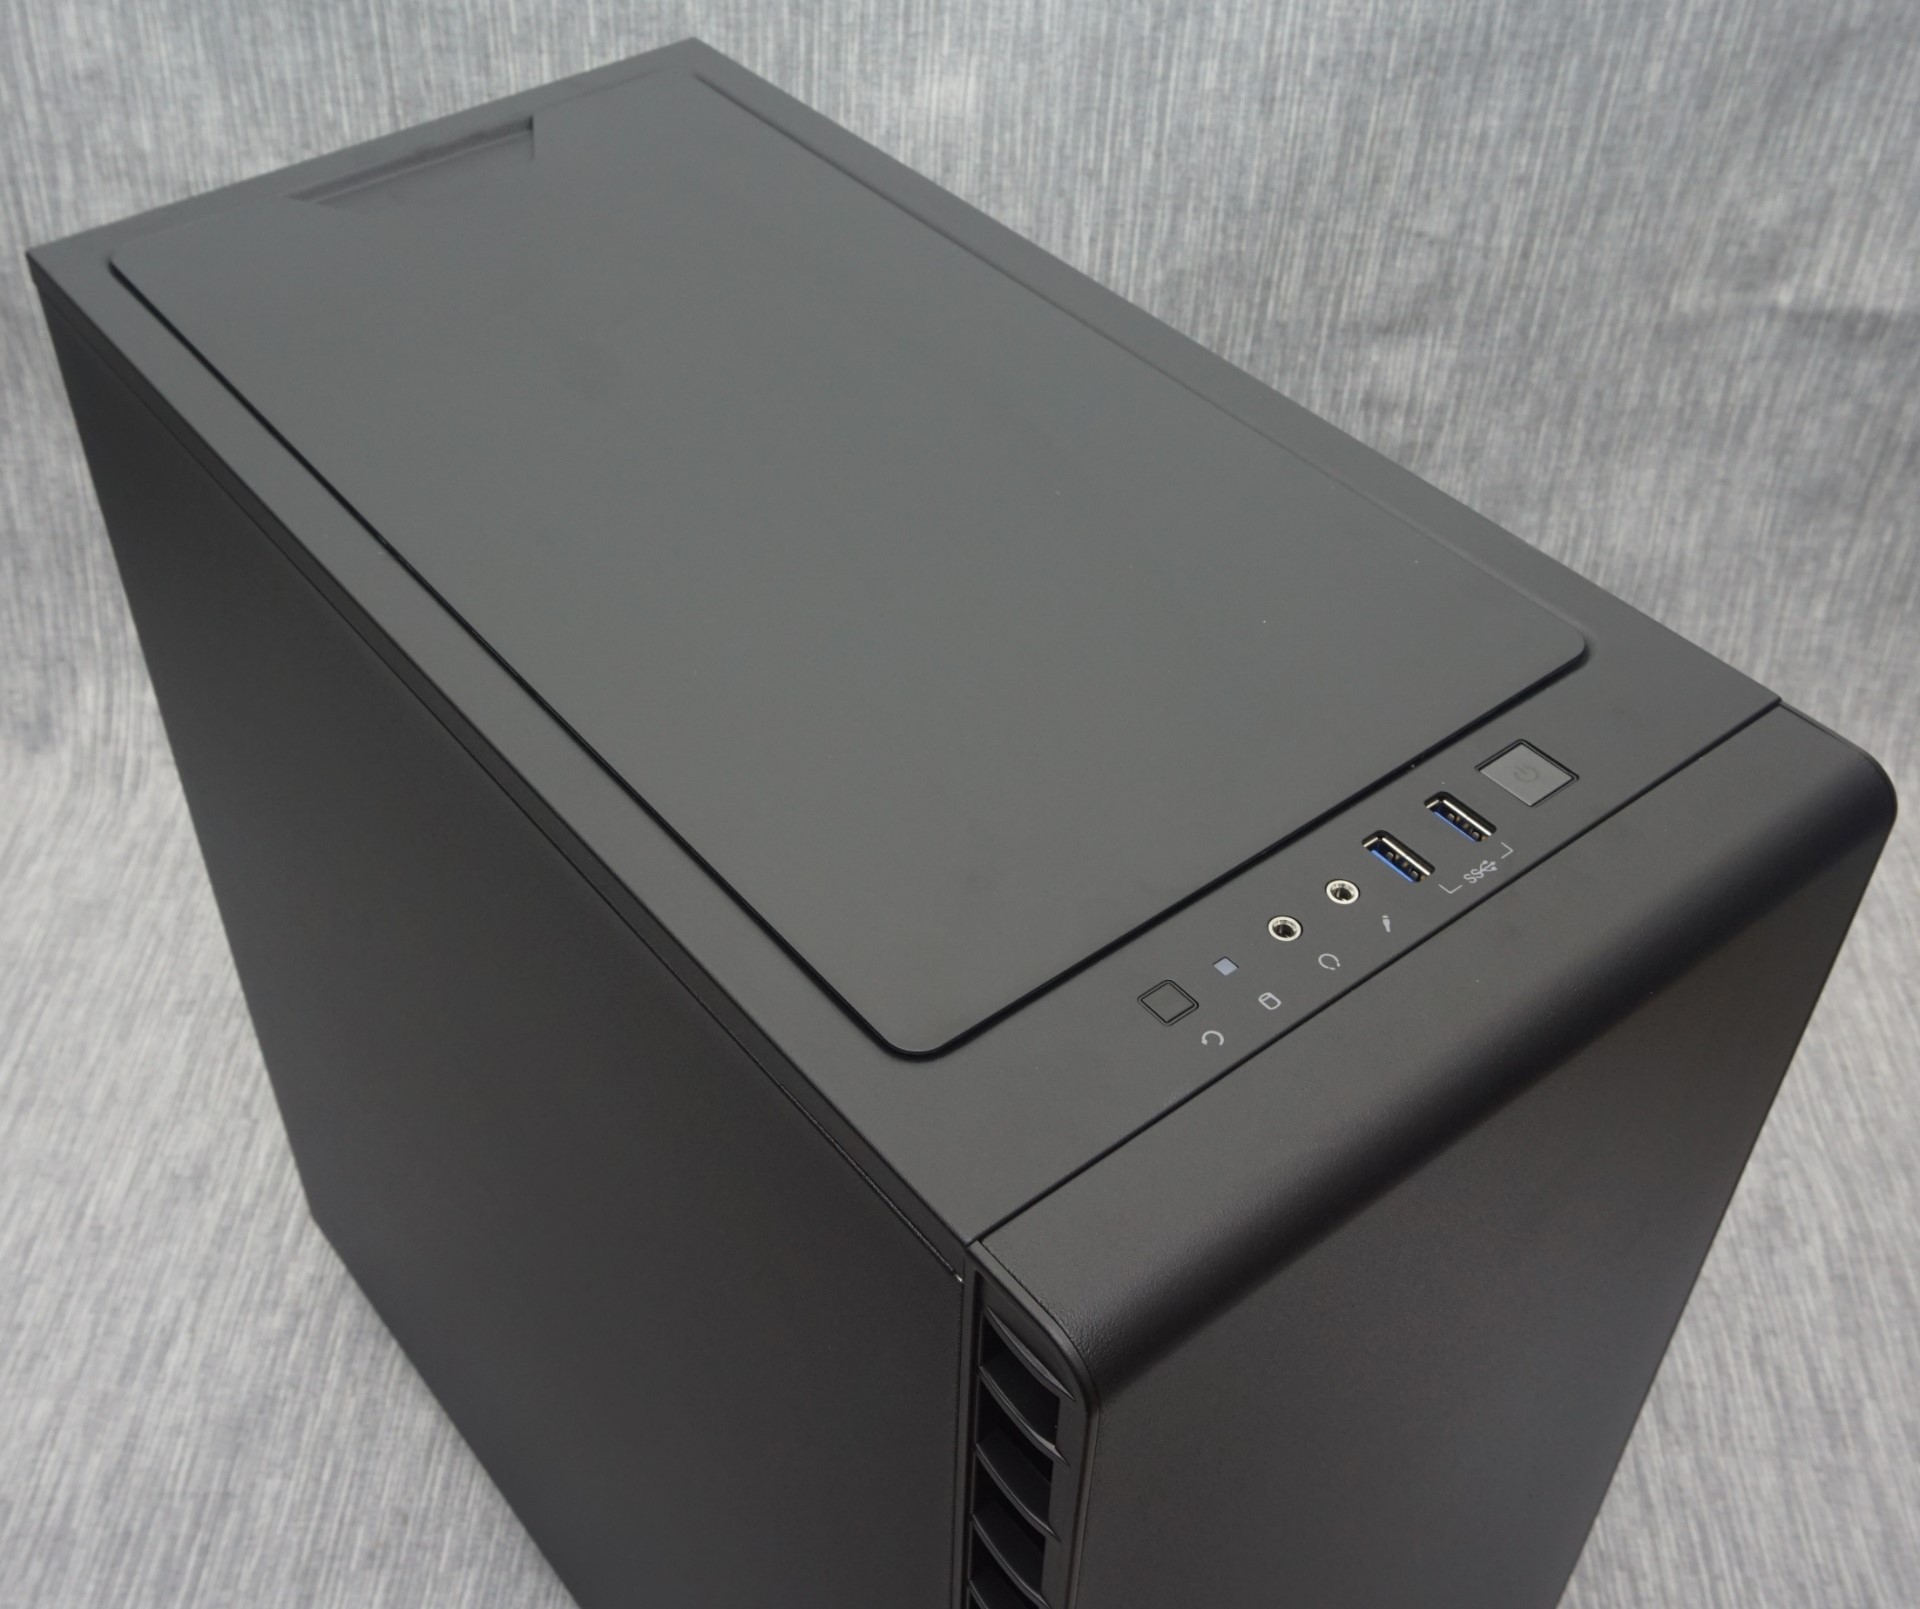
The front I/O ports and buttons are at the top panel, near the front side of the case. Starting from left to right, we can see a small reset button, an activity LED, two 3.5mm headphone jacks, two USB 3.0 ports and one large square power button.
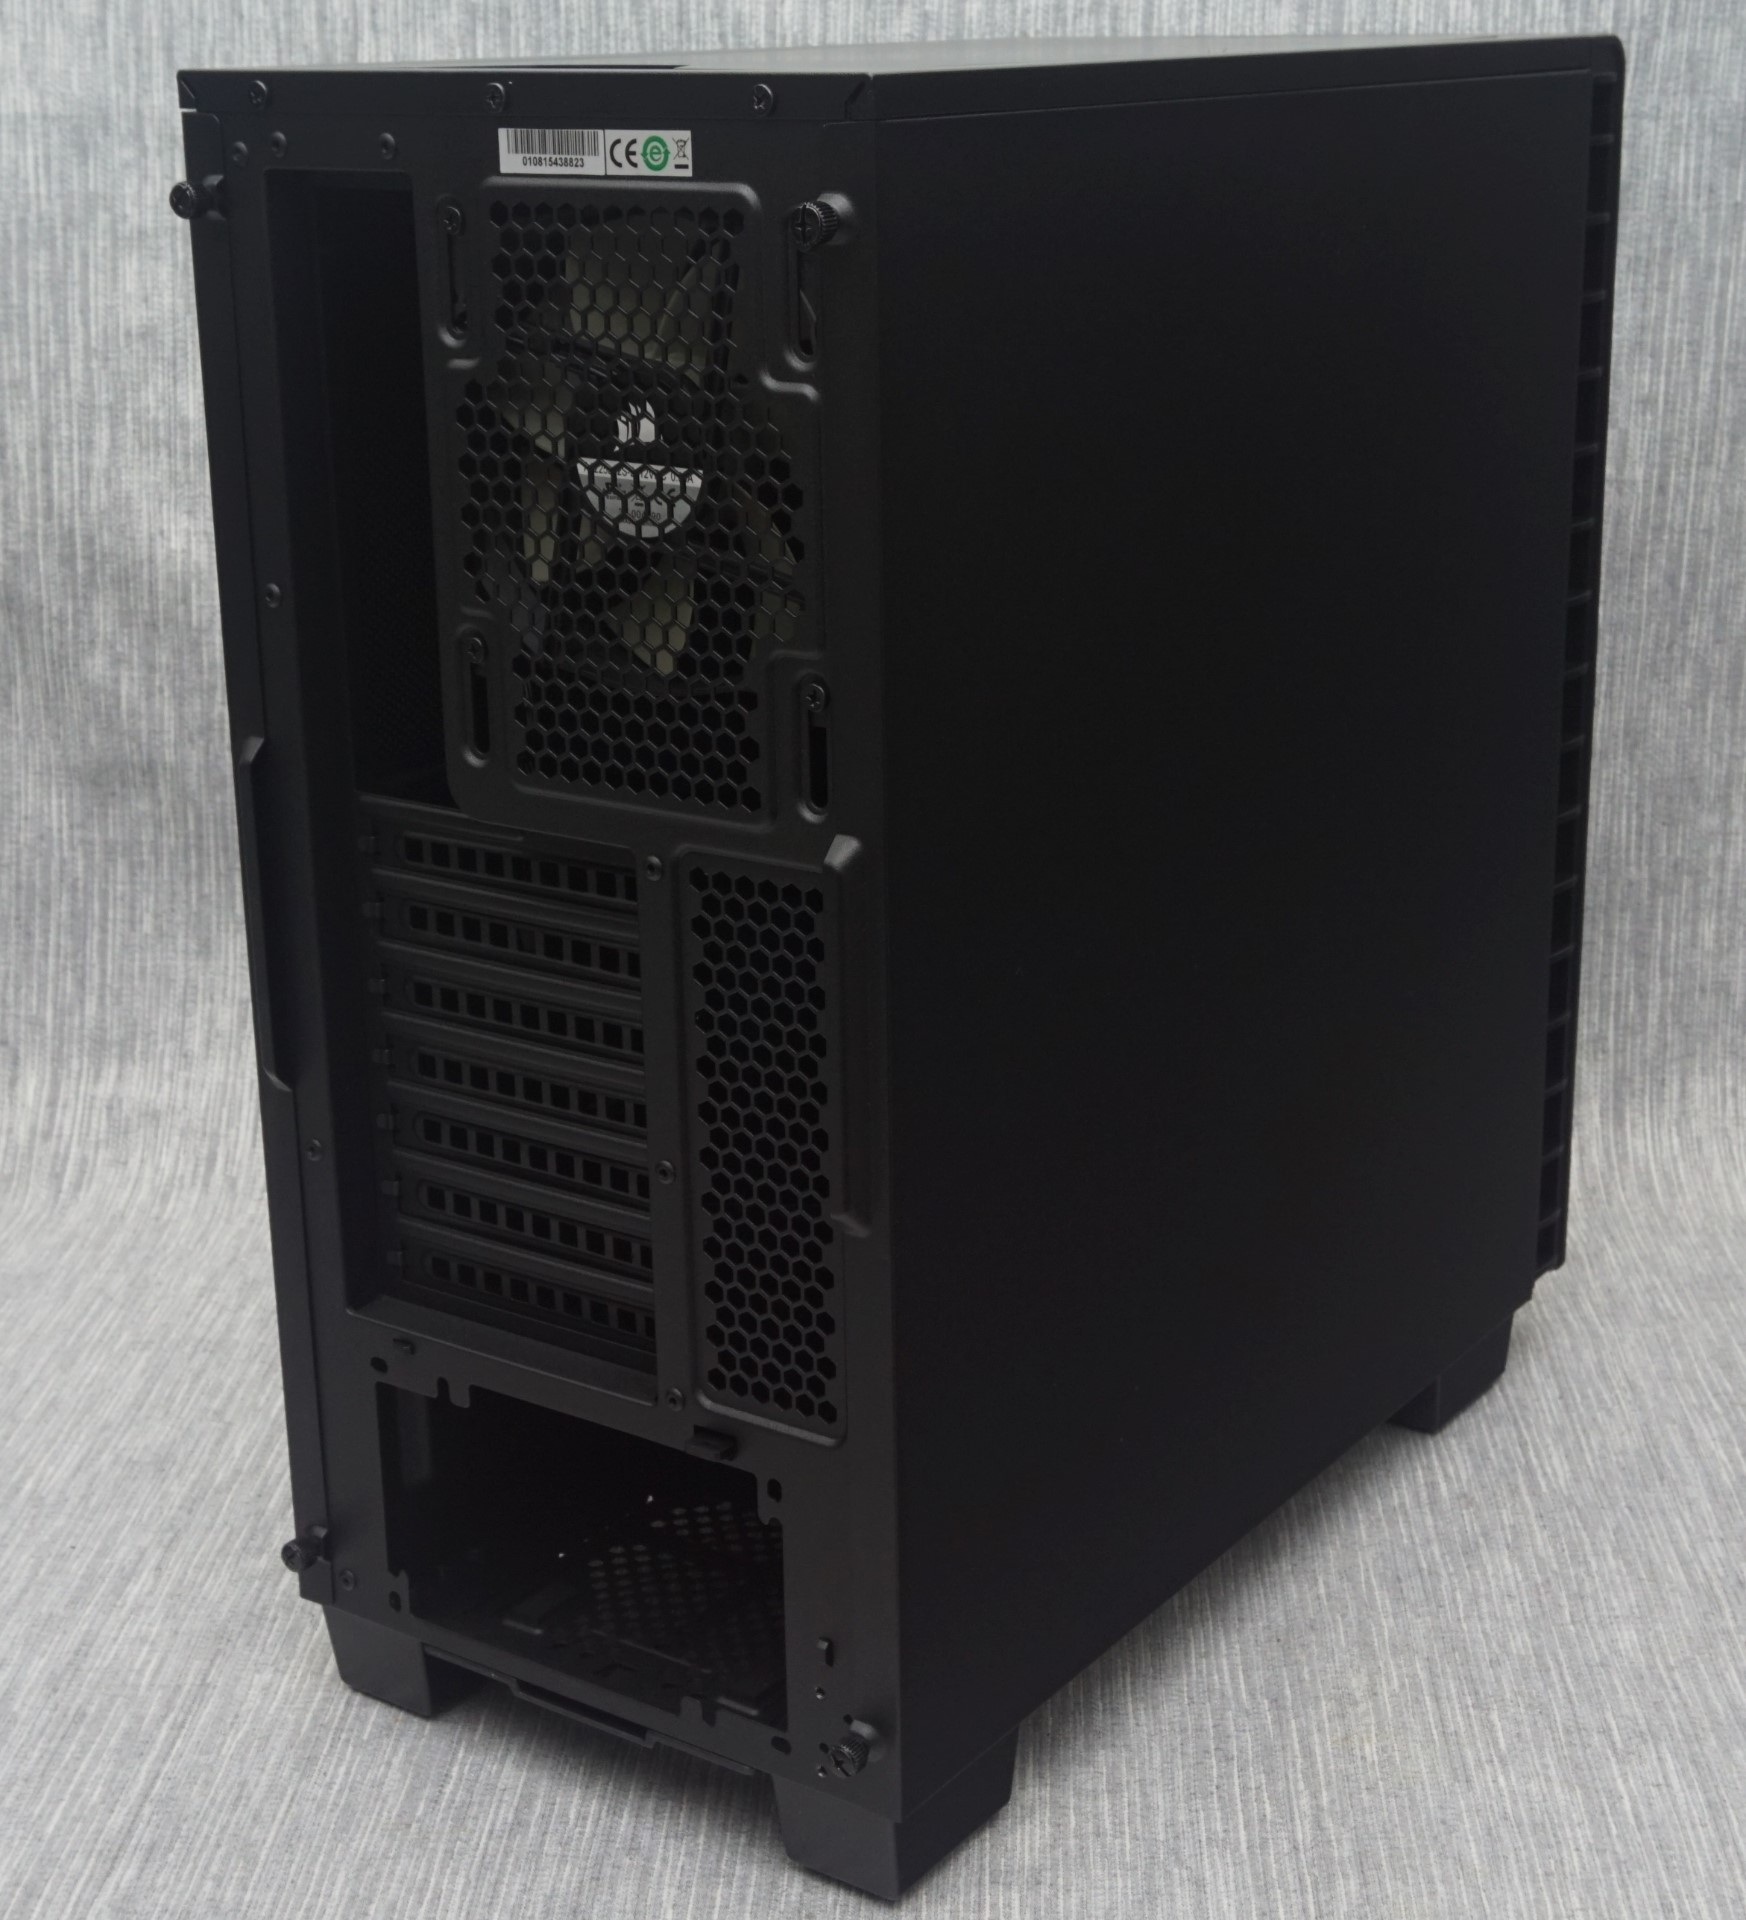
A look at the rear of the Carbide 400Q reveals that the PSU compartment is located at the bottom, a common design feature as of late. We can also see the 120 mm fan, the position of which can be adjusted vertically by about one inch. There are no holes for cables or liquid cooling hoses.
One of the most interesting parts of the Carbide 400Q is the top panel, which features a magnetic cover with a narrow layer of sound dampening material. The case comes without any fans from the factory but, should the user wishes to trade acoustics with thermal performance, the top cover can be simply pulled off to reveal the perforated top of the case.

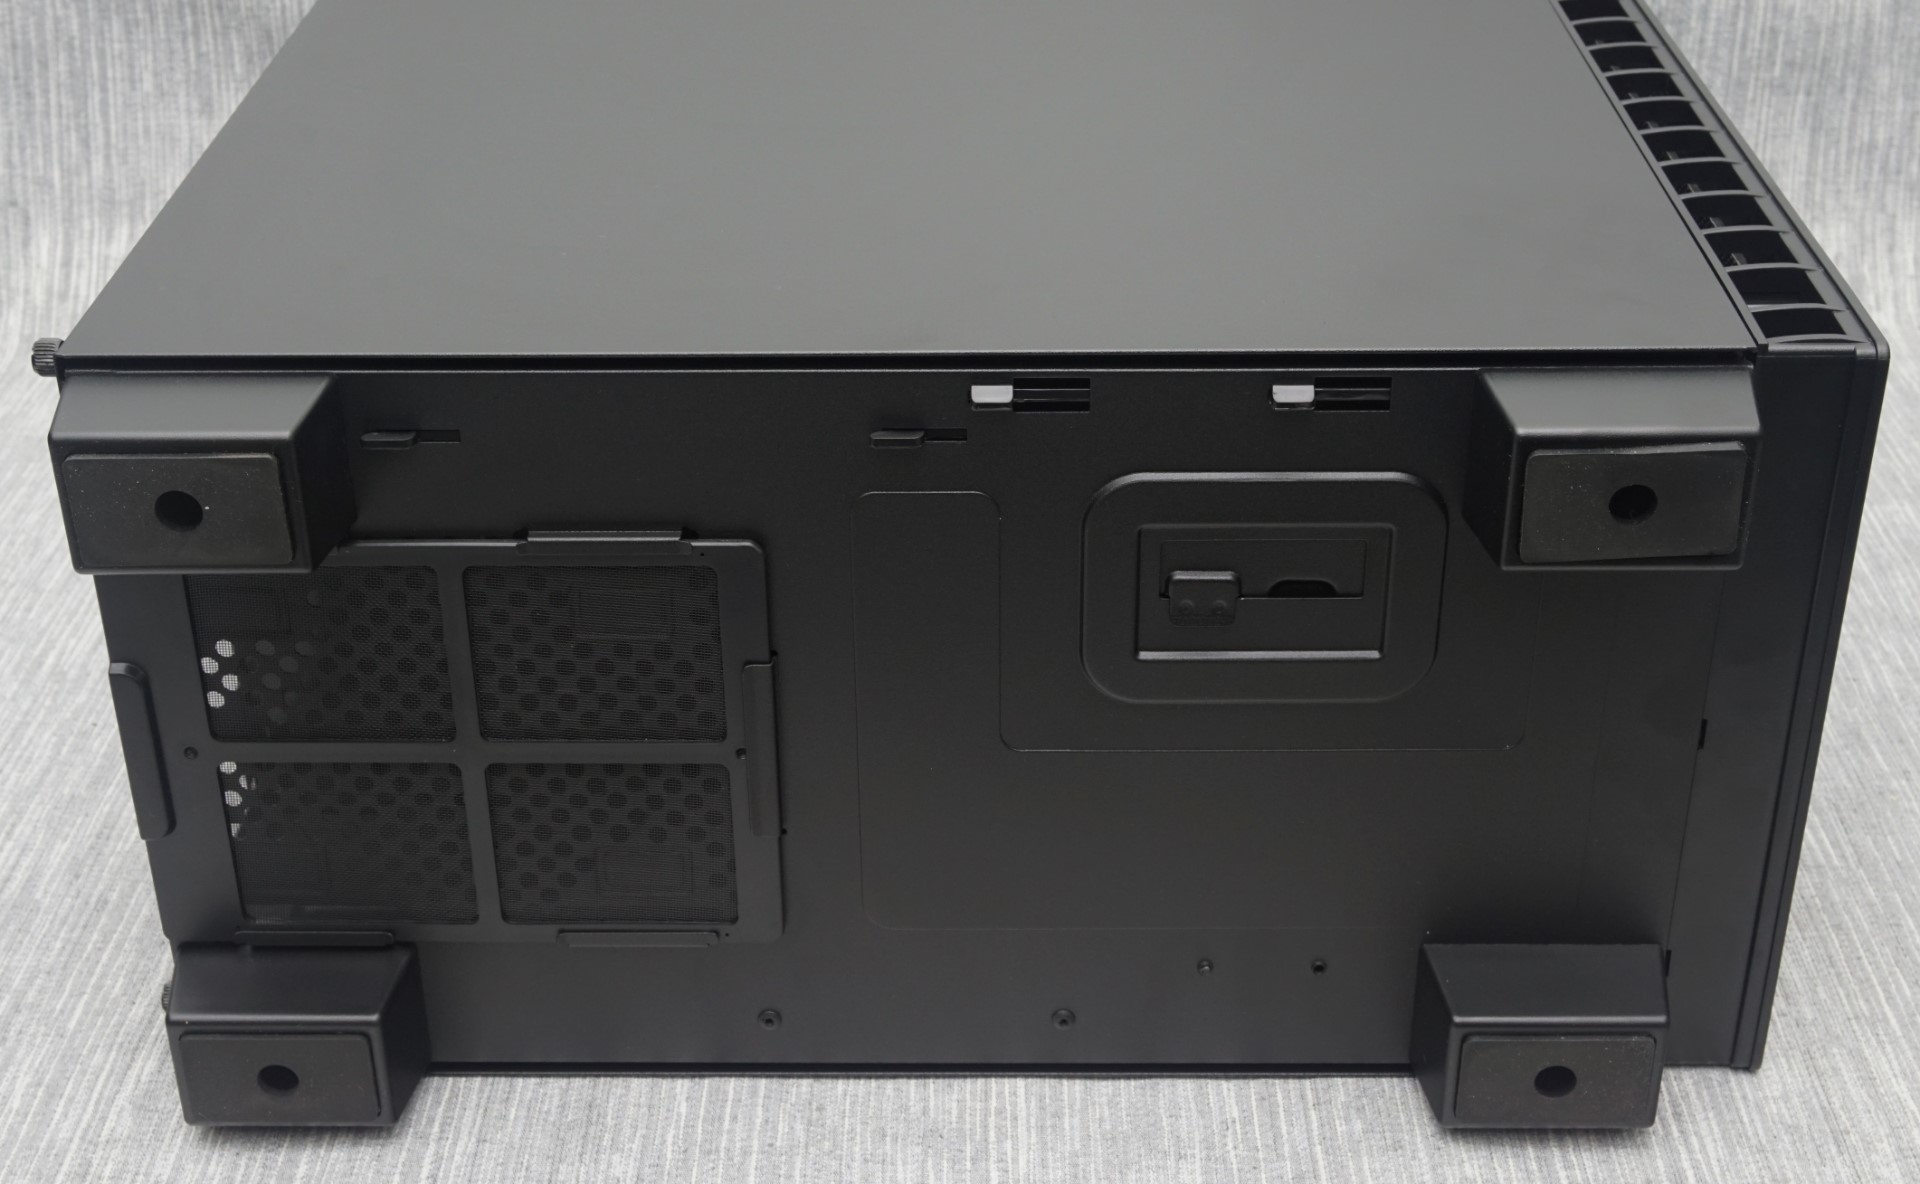
The Carbide 400Q stands on four rather tall plastic feet with rubber anti-slip pads at their bottoms. The feet are particularly tall for a case that has limited underside ventilation (only for the PSU). Although the feet can be removed, the 400Q is designed to function with the feet attached - the PSU intake will be blocked and the furniture will be exposed to many rigid objects that can cause damage. The PSU intake has a nylon filter that can be removed from the back of the case.


63 Comments
View All Comments
ononhk - Monday, May 9, 2016 - link
VERY POOR CASE !!!!! (400Q)<a href="http://www.imagebam.com/image/b50845482435809"... target="_blank"><img src="http://thumbnails116.imagebam.com/48244/b508454824... alt="imagebam.com"></a>
skew88 - Wednesday, May 11, 2016 - link
That's very worrying. When did this problem start? Do you have an idea what might have caused it?I would also like to chime in with a piece of criticism: The latches of the front panel are just extremely prone to breaking off. In fact, I saw a Corsair employee manage to do it at a Corsair booth the day after I did it myself! How did this make it through quality control!?
Earl-J - Saturday, August 6, 2016 - link
* * *Okay, for those of us non-techies who very rarely get inside their own computers, let alone pry and snap things inside to get a better view, the direction. . .
"To remove the two plastic covers that separate the PSU and HDD area from the rest of the case, the HDD cover has to come off first, then the PSU cover."
means absolutely nothing.
I can see the one piece (HDD) on the desk and the second piece (PSU)
still attached to the inside of the main box... I know which one comes out
first just by looking at the picture.
I see the snap-latches that need to be pushed in order to get the covers out.
The HDD latch has a cover of some sort on it that cannot be pushed, slid, or lifted...
I can feel the pins under the chassis... once I get them to a position where I can pull the front up from the bottom, do I yank it up... push something else... or slide it...?
LOL
I've considered myself a logical person for many, many years...
but this box has me stumped...
(sigh)
LOL