Storage Device Installation
Installing your storage devices isn't a difficult task at all. The first thing you want to do is to make sure that all jumpers on your hard drive(s) and CD-ROM drive(s) are configured properly. Provided you have an EIDE/IDE Hard Drive you have three basic jumper options:
Master without a Slave
Master with a Slave
Slave
| If your drive is a Master without a Slave, then it is the only device on its cable and is therefore the only device on its channel. A Master with a Slave would be a drive that isn't the only device on its cable, but happens to be the primary device on its channel. Usually you want all hard drives and other such storage devices to be masters, with all CD-ROM drives set as slaves. A device set as a Slave alone is a drive that has another device on its chain which is set to Master with a Slave. The best route to take is to always try to give all peripherals their own channel, for example, if you're installing a hard drive and a CD-ROM drive you would want both to be Masters without a Slave with one on each of the 2 EIDE channels. Jumper settings can be found in your storage device's documentation. The setup for SCSI drives is a bit more difficult, and in which case you should consult your SCSI controller's User's Manual for a detailed explanation of termination settings and SCSI ID's. | 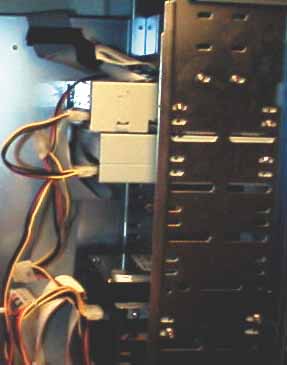 |
Once all the jumpers are set properly you want to find a home for your new hard drive, realistically you can chose just about any area in your case however there are certain places you want to stay away from. It is usually best to keep the CD-ROM drive near the top of your case away from any other devices that generate large amounts of heat as the large size of a CD-ROM drive will tend to act as a heat trap for re-circulated air. Hard drives, regardless of size, should always be kept as far away from other components and storage devices as possible. Hard drives often generate more heat than you would imagine, especially with 7200RPM and 10,000RPM drives growing in popularity, cooling becomes a major issue. You want to place your hard drive in well ventilated and well cooled areas of your case. Some cases do have hard drive bays directly above or below their power supplies, however you should never install a hard drive in a bay close to a power supply. Keep in mind that a power supply is much like a large magnet, and if you place anything magnetic near a magnetic storage device such as a hard drive, well, you know what happens. You can kiss those documents good bye if you plant a hard drive next to a power supply, while the process may be a slow one, data corruption has an incredible chance of resulting in a situation like this one.
Grab a couple of screws, if possible you want to use the ones that came with your hard drive/storage device, and attach the drive to your case. You want to make these screws a bit tighter than the ones you used for your motherboard, but once again, not too tight. Make sure that you line up the front panel of any devices with an opening on the front with the rest of your case. On the inside, connect all cables to your motherboard or controller card keeping in mind that pin-1 of any hard drive cable (the red pin) will always be the one closest to the hard drive's power connector. Pin-1 on the motherboard (or controller card) is usually represented by a small number on the PCB, and of course you'll find it in the manual. SCSI cable connection is a bit different from your standard IDE setup however you shouldn't let it intimidate you. Basically, with SCSI devices, there are two ends to every chain: a start and a finish. Both of those ends must be terminated, which is accomplished by a device known as a terminator. If your SCSI device is connected at the end of your SCSI chain it must either have an on-board terminator or it must have an in-line terminator installed on the cable, if the chain isn't properly terminated you will experience problems during operation (i.e. drives not being detected, diagnostic errors, no host adapter found errors). For your CD-ROM/DVD drive, don't forget to install a CD-Audio cable running from the back of your CD-ROM/DVD drive to your sound card otherwise you won't be able to listen to audio CD's on your computer without the use of headphones. Don't forget to plug in the 4-pin power cables, they can only be installed one way on hard drives so don't worry about screwing something up at this point.
Installing your floppy drive shouldn't pose much of a problem, no jumpers to set, just line it up with the screw holes on your chassis and attach a few screws. The same pin-1 rule applies here, pin-1 of your FDD cable should be the one closest to the power connector. The floppy drive uses a smaller 4-pin power connector, while the connector should only be able to accept power cables in one orientation, with a little force a cable could be inserted the wrong way. Take special precautions to make sure that you don't insert the cable the wrong way, if you smell/see smoke after booting up your machine immediately unplug it and check all power connections especially those that could possibly be backwards.
Peripheral Installation
| There isn't a big trick to installing peripherals, simply find opens slots and occupy them. If possible you don't want to populate the last PCI slot (the one closest to the AGP slot) and the AGP slot at the same time as they share an IRQ, something not all devices are comfortable with. Some devices don't mind sharing an IRQ with an AGP card while others just simply refuse to boot. To stay on the safe side, leave that slot unpopulated if possible, if not, find out which card works best in there and use that card in the slot. | 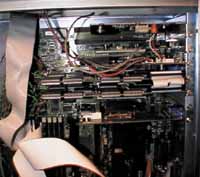 |
You will want to keep hot peripheral cards, such as Voodoo2 boards as close to additional cooling devices as possible. You also want to make sure that they aren't being surrounded by any cables or anything else that may prevent the flow of cooled/re-circulated air throughout the system.
Other than that, just keep in mind that full length cards can only fit in full length slots and that no foreign metal objects should touch the PCB of any of your peripheral expansion cards either, not just the motherboard.
Covering the Case
| Now it's time to cover your case (no need to screw it back together since, if you're anything like most tweakers, you'll be back in there in a few days to check up on things), plug everything in, and fire up your system. That should have new meaning now that you've actually constructed an entire computer yourself, not too difficult now is it? | 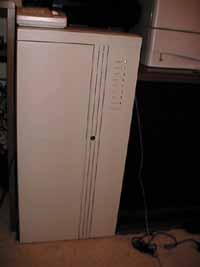 |


1 Comments
View All Comments
Anonymous User - Tuesday, September 16, 2003 - link
this web site is soxy.. i love it