Promise Pegasus R6 & Mac Thunderbolt Review
by Anand Lal Shimpi on July 8, 2011 2:01 AM ESTThe Pegasus: Hardware
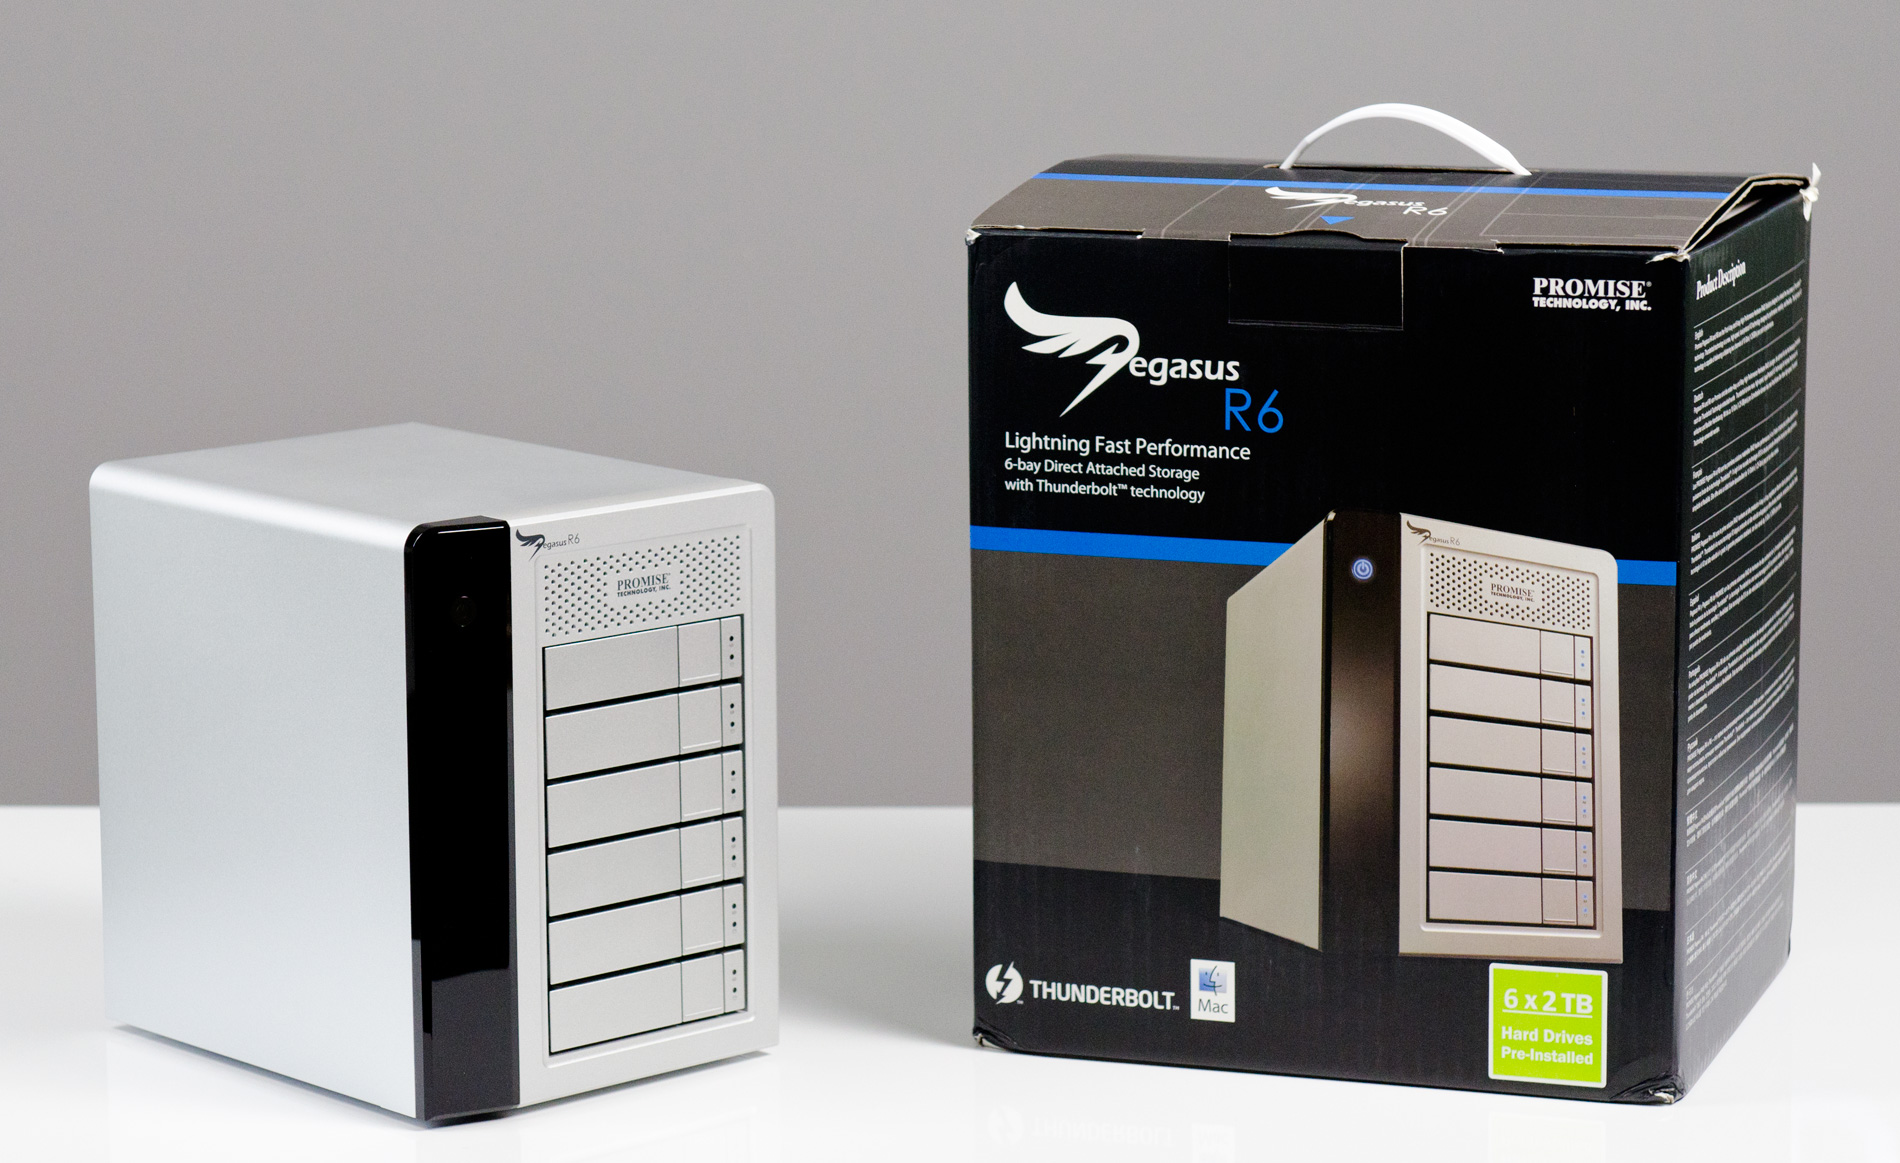
Promise offers two versions of the Pegasus: the R4 and R6. The names are easy enough to understand, they simply refer to the number of drive bays. Through Apple you can buy any of four configurations:
| Promise Pegasus Lineup | ||||||
| # of Bays | Drive Configuration | Default Capacity | Price | |||
| Promise Pegasus R4 4TB | 4 | 4 x 1TB RAID-5 | 2.7TB | $999 | ||
| Promise Pegasus R4 8TB | 4 | 4 x 2TB RAID-5 | 5.7TB | $1499 | ||
| Promise Pegasus R6 6TB | 6 | 6 x 1TB RAID-5 | 4.7TB | $1499 | ||
| Promise Pegasus R6 12TB | 6 | 6 x 2TB RAID-5 | 9.7TB | $1999 | ||
All of the configs ship with 3.5" 7200RPM hard drives and are configured as a single RAID-5 array by default, although Pegasus supports most of the common RAID formats (RAID 0/1/5/50/6/10).
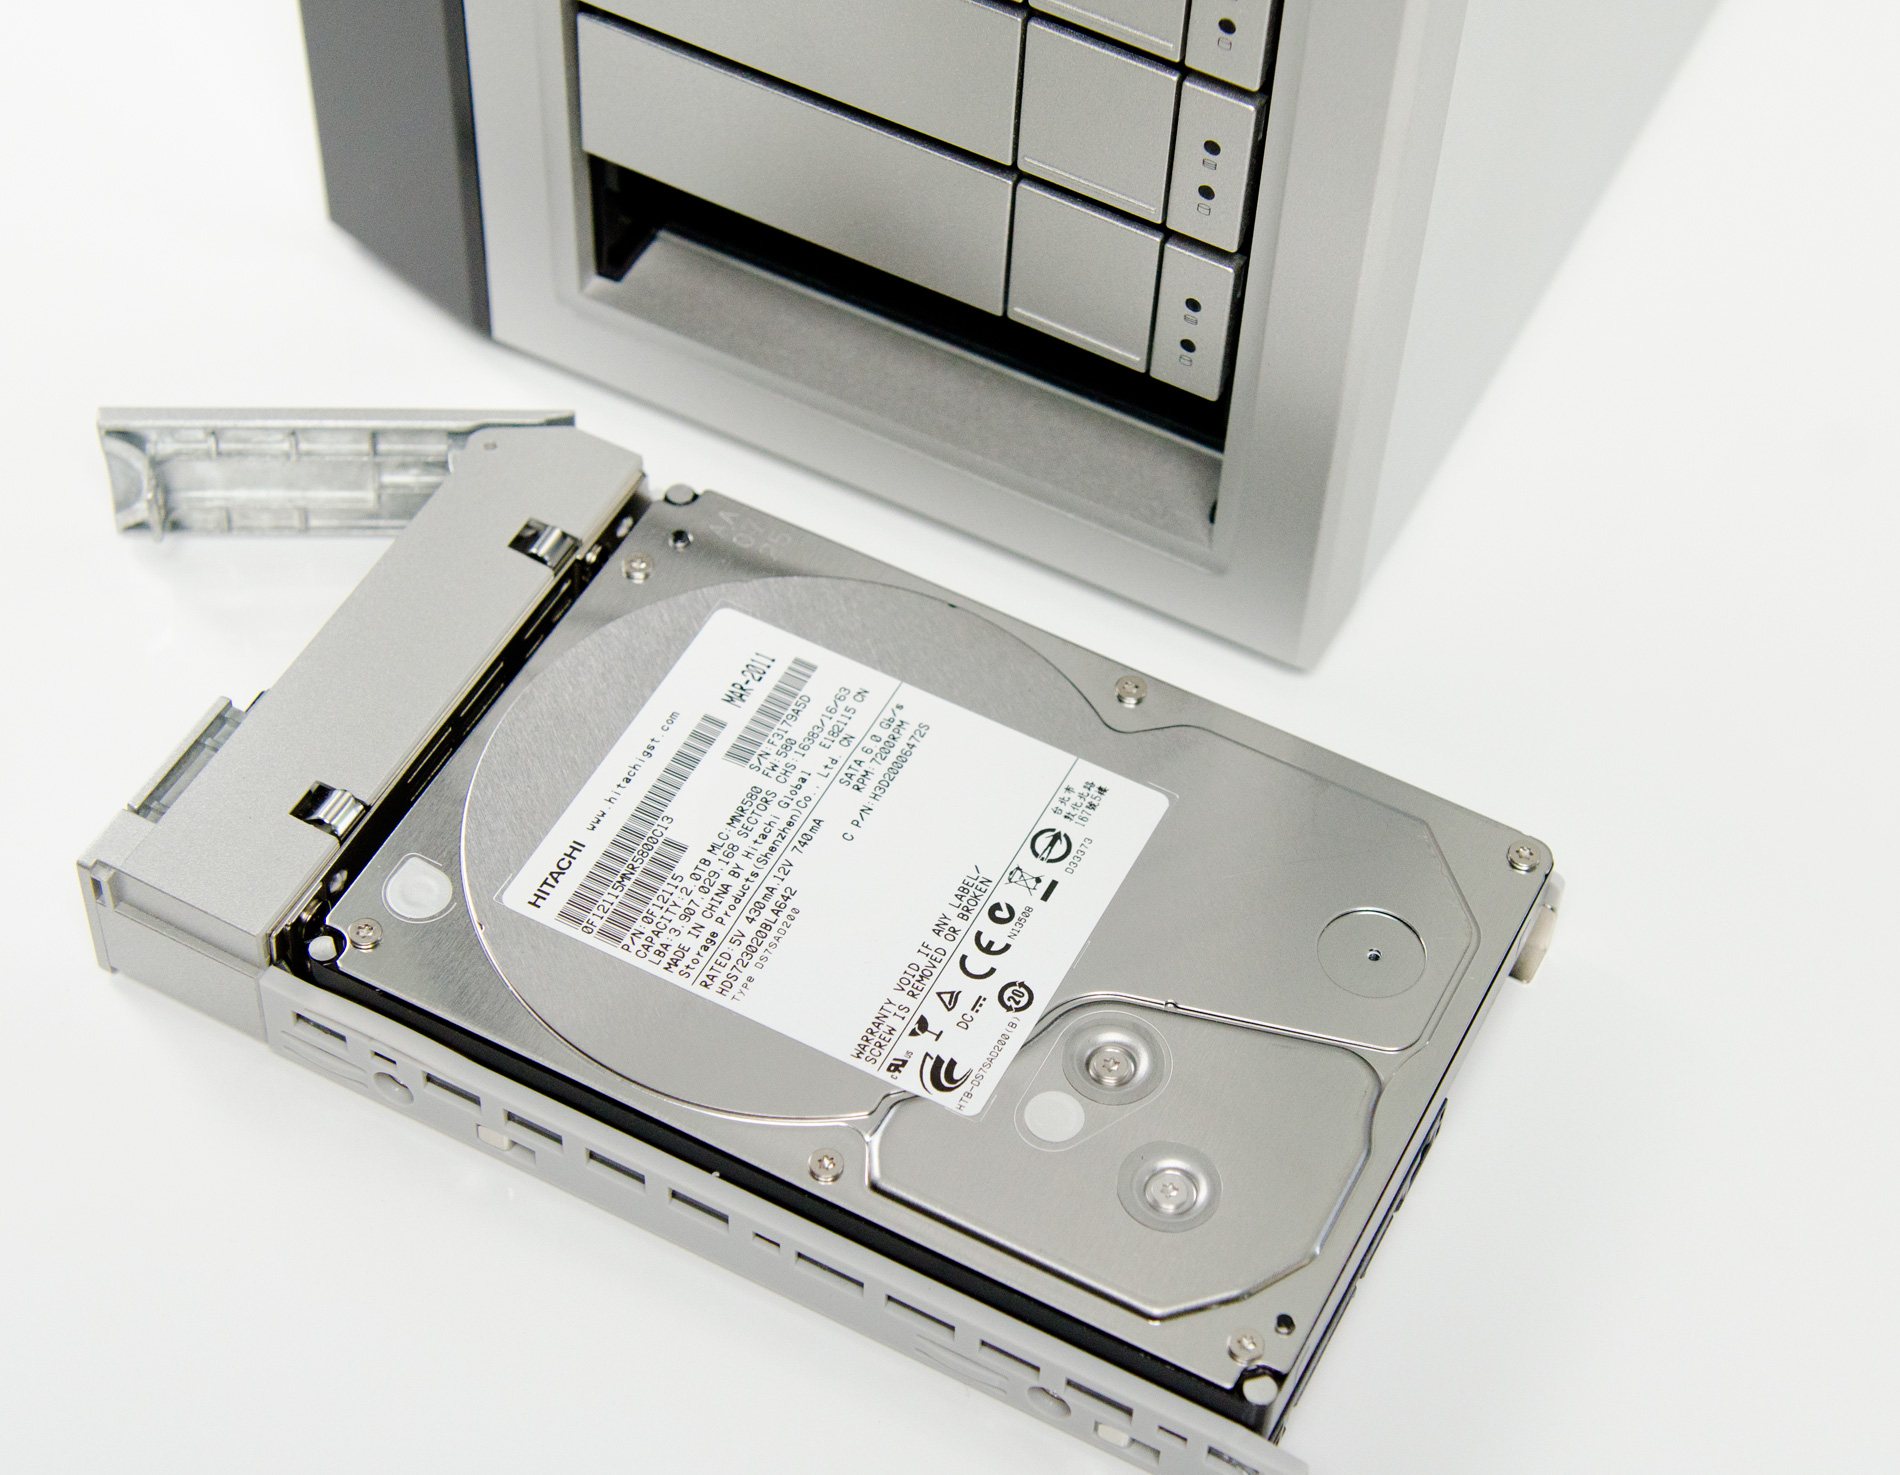
The 12TB Pegasus R6 we received for review came with 6 x 2TB Hitachi Deskstar 7K3000 drives. These are four platter drives with 64MB buffers. I did try installing Seagate 3TB drives and SandForce SF-2281 SSDs in the system, both of which worked. I did run into some reliability issues with the Pegasus R6 configured with 4 x SF-2281 SSDs, however it's unclear whether they were caused by the drives themselves, the Pegasus or a combination of the two.
Internally Promise uses a PMC Sierra PM8011 8-port SAS-2 RAID controller. This is an 8-lane PCIe Gen 2 controller with eight SAS/SATA 6Gbps ports. On the R6 obviously only six of those ports are functional. The PM8011 has an embedded 600MHz MIPS processor and is paired with 512MB of DDR2-533.
The Pegasus chassis is made out of aluminum, similar to the unibody MacBook Pro and iMac but not quite identical. The color is a bit lighter with a more coarse grain. The metal construction combined with the six 3.5" drives gives the Pegasus R6 its 20.4 lbs weight (the R4 weighs in at around 15 lbs).
The front of the chassis is pretty clean. The glossy black strip on the left of the unit is home to the power button and the two Thunderbolt indicators. There are two Thunderbolt ports on the Pegasus, one connects to your Mac while the other connects to any other DisplayPort/Thunderbolt devices in the chain. Occupy a single port and one indicator lights up, occupy both and you get two:
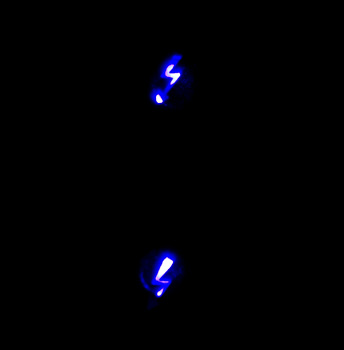
The power button burns blue when everything is functional, orange during startup and red if there's a problem with the array. Powering down the Pegasus requires that you hold the power button for ~10 seconds until the button glows red then release in order to avoid any accidental shutdowns.
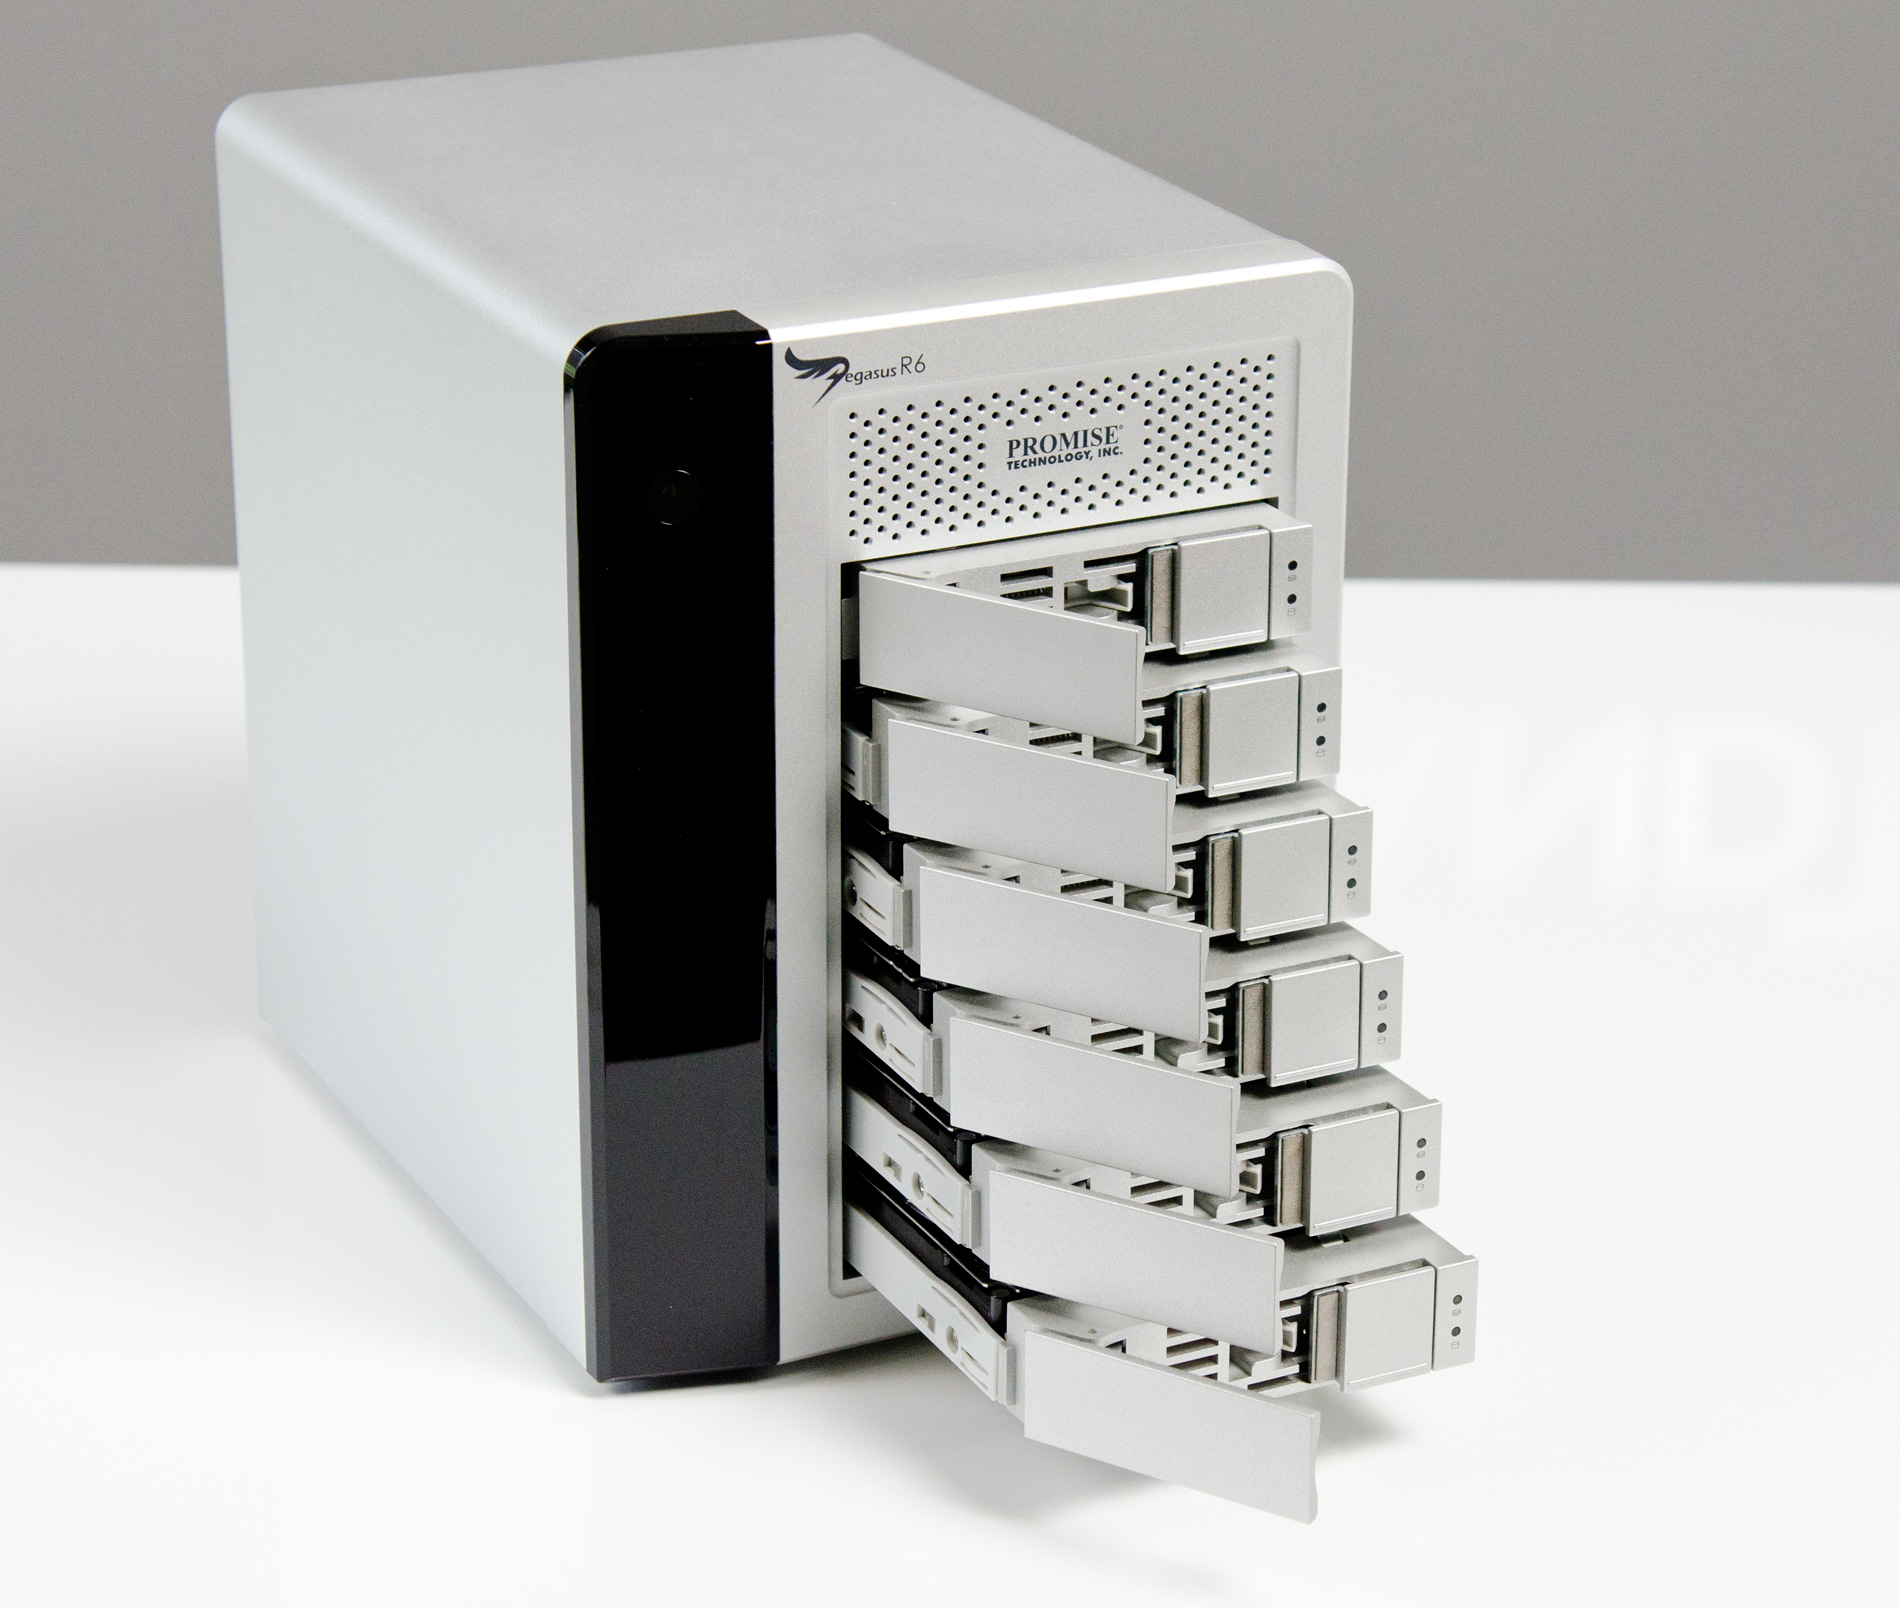
The R6 has six removable 3.5" drive bays that accept 2.5" drives as well. The screws Promise provides with the Pegasus are too large for SSDs so you'll have to supply your own if you want to replace the HDDs with SSDs down the road.

Ejecting and inserting the Pegasus' drives is incredibly smooth. There's a large square eject button on the front of each drive carrier - depress it and the handle pops out. Pull on the handle and the drives slide out perfectly. There's surprisingly little resistance to inserting the drives completely, the entire motion is just very fluid.
Each carrier has two LEDs - status and activity. Blue indicates proper operation while red indicates a problem.
The Pegasus' on-board RAID controller doesn't care about the order in which you install drives for a single array (e.g. you can swap carriers 2 & 5 and your array will still function, provided you do so while the Pegasus is powered down). Note that if you do remove more than one drives from an live RAID-5 array you'll lose all of your data, even if the array was idle when you pulled the drives. You can remove a single drive and be fine, although you'll have to resyncrhonize the array when you insert the missing drive. A full RAID-5 rebuild takes about 7 hours on the Pegasus R6. The array is still usable during its synchronization process.
Around back there are two Thunderbolt ports and a serial port, the latter presumably for firmware updates/direct access to the on-board controller (the port is currently undocumented).

There are two fans in the Pegasus R6: a large ~100mm fan to cool all of the drive bays and a small ~40mm fan to cool the integrated PSU. The Pegasus ships with a 250W 80Plus Bronze certified power supply. The PSU isn't intended to be user serviceable and can't be removed without disassembling the Pegasus.
The Pegasus is powered by a standard 3-pin AC power connector. Promise supplies a cable although any standard PC power cable will work.


88 Comments
View All Comments
Conner_36 - Friday, July 8, 2011 - link
Or even in the office, to able to take your entire project and move between the rooms carrying ALL of the data? That's unheard of!From what I understand with HD movie editing I/O is the bottleneck.
All we need now is an SVN hardware device with thunderbolt to sync across multiple thunderbolt RAIDs. Once thats out you could have a production studio with some real mobile capabilities.
Exodite - Friday, July 8, 2011 - link
I wager pretty much any usage scenario can come up with a high-performance 12TB storage solution for significantly less than 2000 USD.You're right though, it's definitely not the solution for me.
Or anyone I know, or am likely to ever know. *shrug*
Zandros - Friday, July 8, 2011 - link
What happens if you try the Macbook Pro -> Pegasus -> iMac in Target Display Mode -> Cinema Display connection chain?Focher - Saturday, July 9, 2011 - link
Pretty sure the DP monitor has to be the last device in the chain. Maybe that is just a current limitation because there are no Thunderbolt displays.Zandros - Monday, July 11, 2011 - link
AFAICT, the iMac is a Thunderbolt display, since it does not support Target Display Mode from Display Port sources with Display Port cables.tipoo - Friday, July 8, 2011 - link
Is there a way to make it shut off the drives after idling for a while?piroroadkill - Friday, July 8, 2011 - link
But when you saw the file creation maxed out at 9TB, on 10TB array..Since.. uh, Snow Leopard, Apple changed file and drive sizes to display decimal bytes as used by the manufacturers, which is the same as the 10TB array.
However every other thing ever reports in binary bytes, such as windows describing "gigabytes" even though it means gibibytes in reality.
Ugh, anyway, what I'm trying to get at is that maybe you did infact fill the array. That said, the thing shouldn't have fucked up..
CharonPDX - Friday, July 8, 2011 - link
If I had way too much money, my usage model for Target Display Mode would be to use the iMac as a Virtual Machine host/server, connected to either a second iMac or a MacBook Pro as a dual-screen workstation.With the minimum 27" iMac, you're basically buying a 27" Cinema Display plus a $700 Mac mini-on-steroids. If you want a second Apple display for your iMac or MacBook Pro, and want a Mac Mini to use as a server, that is an excellent value to instead just get a second iMac. (That value may drop depending on the next Mac Mini update, of course.)
etamin - Friday, July 8, 2011 - link
in the block diagram on the first page, why is the Thunderbolt Controller connected to the PCH thru PCIe rather than to the processor? I thought PCIe connections came off the processor/NB?repoman27 - Sunday, July 10, 2011 - link
The lanes that come off the processor/NB are usually used for dGPU. On the new MacBook Pros, Apple borrowed four of them for the Thunderbolt controller. Apparently on the new iMacs, however, they decided to give all 16 lanes from the CPU to the graphics card and pulled four from the PCH instead.