Silverstone Fortress FT01
by Christoph Katzer on November 10, 2008 5:00 AM EST- Posted in
- Cases/Cooling/PSUs
Installation
The hard drives fit nicely into the small plastic frames. There are small rubber grommets that work with the special screws that come with the case. The drives will be isolated from the chassis since they don't touch the frame directly, which should reduce vibrations and noise. After installing the hard drive(s) into the frame, you can easily slide it back into its final position inside of the case.
While the case looks very large from the outside, it's surprising how little extra space there is around the motherboard area. You will definitely want to pay attention to what you're doing during system installation. Everything fits okay, but depending on your choice of motherboard you may have a few areas that cause difficulty. Other areas present far fewer problems; optical drives are easy to install: slide them in and push down on the button. That will extend two little pins into the holes where screws normally go. However, you will need to be careful when you connect the IDE and/or Molex connector; if you press too hard the two pins will not hold and the optical drive will most likely fall out of the front.
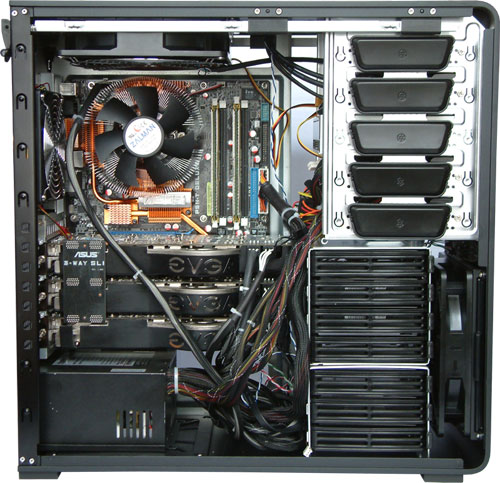


The CPU cooler sits directly below the top 180mm fan, so it should have plenty of airflow and good temperature results. The rear 120mm exhaust fan supplements airflow for this area, so it's entirely possible to go "fan-less" on the CPU. Our three GeForce 8800 Ultras fit nicely inside the case even though there isn't much space to the right. All of the cables from the power supply also need to pass here, which will make this area rather crowded and airflow will definitely be better if fewer cables are at this position. Power supply length will not be an issue in this case, as there is enough space for even the longest units with a little more than 20cm clearance.
The only problem we had was with the SATA connectors on our motherboard. Since the motherboard we use has angled connectors, there is very little space between them and the chassis. If you intend to use all of your SATA ports on such motherboards, it will be difficult but not impossible to install the cables properly. On some motherboards, you might get lucky and the three long openings to the right will line up with the SATA jacks, allowing you to pass cables directly to the hard drive area. However, our motherboard had part of the frame in front of the jacks, which made this impossible. (The use of SATA cables with angled connectors is another option.)


22 Comments
View All Comments
strikeback03 - Monday, November 10, 2008 - link
How hard is it to get to the filter for the PSU fan on the bottom? Does the PSU have to come out? Seems this is a case which would be designed to sit on the floor with the top-mounted ports, and a fan in the bottom would pick up lots of junk.Christoph Katzer - Monday, November 10, 2008 - link
Yeah with the PSU installed you won't be able to change the filter since you would need to remove the screws.http://images.anandtech.com/galleries/269/18.jpg">http://images.anandtech.com/galleries/269/18.jpg