Inside Microsoft's Xbox 360
by Anand Lal Shimpi, Kristopher Kubicki & Tuan Nguyen on November 16, 2005 5:09 AM EST- Posted in
- Systems
Removing the Outer Shell
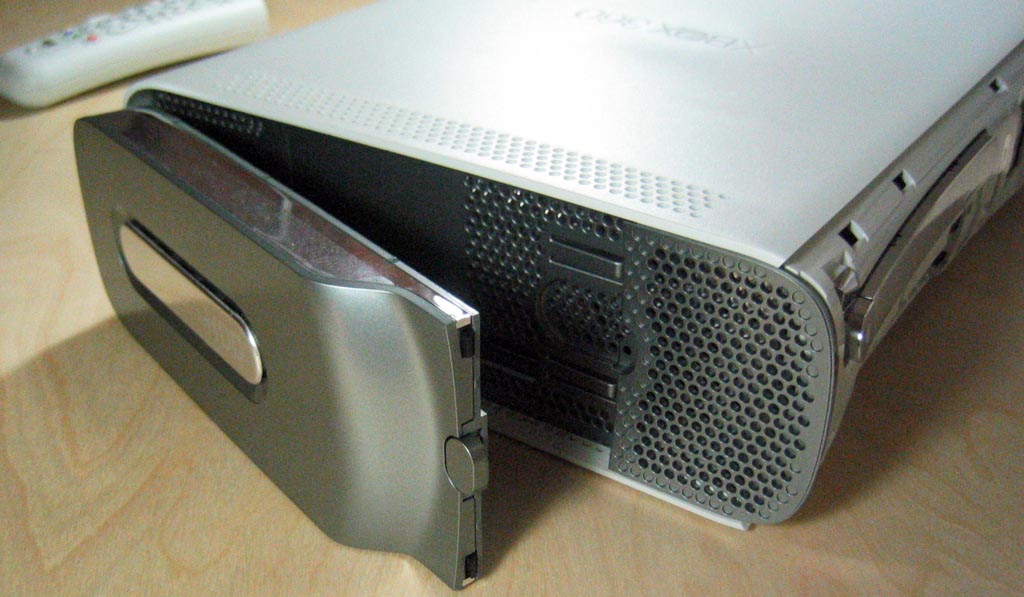
The first step is to remove the outer plastic shell that conceals the innards of the system. To do this, you must start by removing the face plate. Take a look at the front of the Xbox 360 and insert your thumb into the door that covers the two USB ports on the right of the unit. With your other hand squeezing the upper and lower sides of the face plate, pull out the face plate with your thumb. With not much force, the face plate should pop right off.

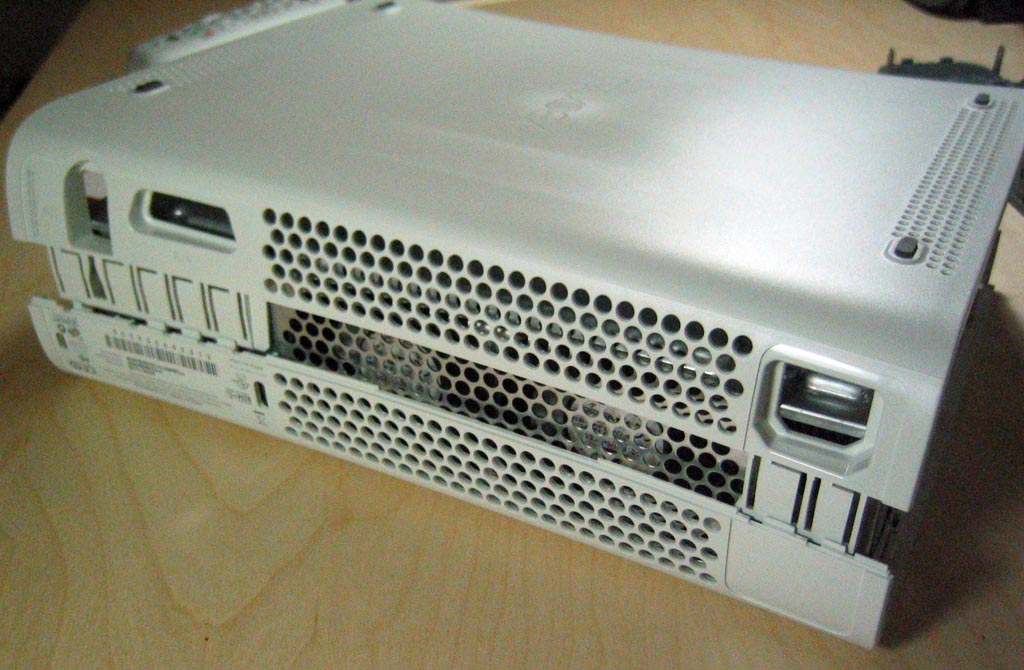
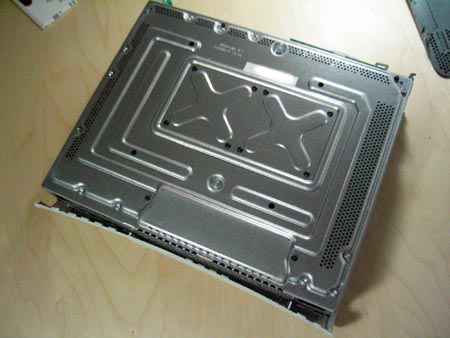
After the face plate has been pulled off you will see a silver Microsoft sticker covering a gap; remove this. You will also see four small clips locking the top half of the plastic shell to the bottom half. Do not attempt to wedge the clips out at this point.
With some care, gently bend outwards, the right gray ventilation shield on the right side of the unit so that you can see a bit inside. You will notice that the gray side piece attaches to both the bottom and top white chassis. Now look through the holes on top of the unit to locate the areas where the gray side pieces attaches to the white body. What you need to do is take the long but thin metal stick and push down, through the white holes (located on both the top and bottom of the Xbox 360) where the clips of the gray side pieces connect. Slowly pull out the gray pieces away from the unit while unlocking the clips and eventually the gray piece will release itself.
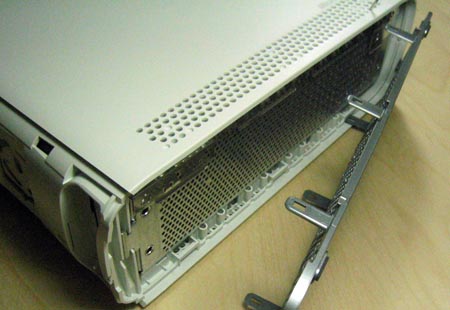
To remove the left gray piece, you must first remove the hard drive unit by pressing the button located on the unit itself. Then apply the same procedure used to remove the right gray ventilation piece -- except when you reach the bottom clip of the piece, you most remove the rubber feet located directly below, to reveal a hole where you can insert the metal stick.
Once you have both side gray pieces removed, you have essentially removed the main locking mechanism that holds the top and bottom shells together. At this point, return to the front of the unit and turn the entire unit upside down. Using a flat head screw driver or wedge, gently pry up the 4 clips holding the top shell to the bottom. Once the clips are unlatched, slowly lift up the front of the bottom shell about an inch.
The last step to removing the bottom shell cover is to insert a thin and small plastic stick into the thin rectangular holes on the rear. The reason the front of the bottom shell needs to be lifted is to prevent the rear latches from reattaching themselves. Slowly insert the stick into each rectangular opening. You should hear a click sound for each clamp you unlatch. Once complete, you may lift off the bottom shell covering.
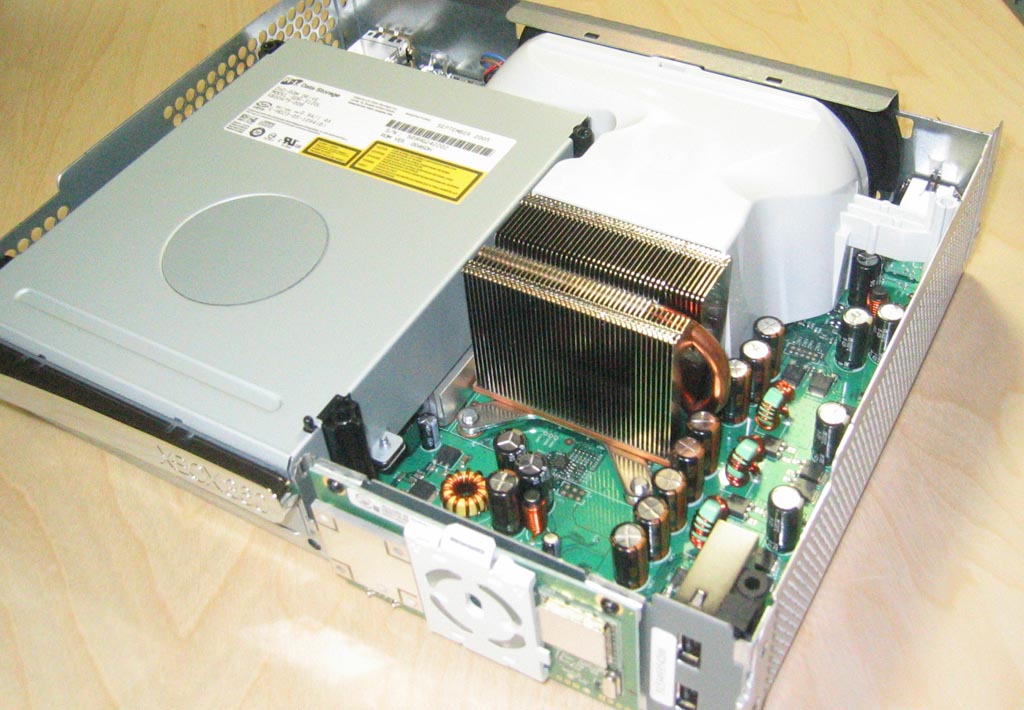
Looking inside the unit, you will notice that there are 14 silver screws (6 of which are long) and 8 black screws. Using your torx screw drivers, remove the silver screws using a size T12 screw driver and the black ones using a size T7. Once you have all the screws removed, flip the Xbox 360 right side up and lift up the top plastic shell. You should now be greeted with the internals of the Xbox 360.


91 Comments
View All Comments
Zebo - Friday, November 18, 2005 - link
I've made this correction before as well but Anand's not listening..that's alright he's the man.Googer - Wednesday, November 16, 2005 - link
I am getting a 404 error when I click on the photographs.Googer - Wednesday, November 16, 2005 - link
Thanks Anand, Kris, and Tuan for taking it apart so we can see what is inside of it. Awesome article, keep up the good work.MAME - Wednesday, November 16, 2005 - link
article is way f'ed up guysKilim - Thursday, November 17, 2005 - link
Don't worry, be happy, bucko. Sorry for being so damn right cheery right now, I had my therapist appointment last night, lol, and I feel good. hahaAnyway, I pre-ordered a 360 for my godson at the local Gamestop, well the one I work at, on June 18th, and he will now be waiting for the second shipment! We are only getting 26! Only 26 "good ones" and two "core" units. Anyone know what exact part of the building process is holding up construction of the 360's.
Is it the video card, cpu, what? Is it the HDD and that is why they created the core unit? Anyone know? Anand?
Imazalil - Thursday, November 17, 2005 - link
As far as I know, Microsoft is keeping the supply really limited to make sure that they have a 'sellout' launch. No real technical issues, just marketing.Shlong - Wednesday, November 16, 2005 - link
Wow that power supply is a beastpossnfiffer - Thursday, December 30, 2010 - link
Hey precioustone very general comment with a link i sense spam how bout a mod removes that one. anywayz nice pix got mine opensteveyoung123456789 - Friday, December 9, 2011 - link
wow guys im learning so much and this is so fin thanks alot!! :).... jk your all fags go diedarckhart - Sunday, April 7, 2013 - link
Update: Just in case anyone else browses here to use as a guide.I cracked open a Zephyr model yesterday using brand new torx key sets. The only required ones are T8 and T10. I posted a photo guide here: http://i.imgur.com/IQzr0k8.jpg