The MSI Z170A SLI PLUS Review: Redefining the Base Line at $130
by Ian Cutress on April 13, 2016 8:00 AM EST- Posted in
- Motherboards
- MSI
- Skylake
- Z170
MSI Z170A SLI PLUS BIOS
A large portion of this page will be identical to the MSI Z170A Gaming M7 review, updated for specific features for the Z170A SLI PLUS.
When MSI launched their second graphical BIOS/UEFI interface, it was quickly praised as implementing more ‘user experience’ than some of the other options on the market. At the time it used more color, different icon placement, and something a bit more than just tabs at the top of the screen. Fast forward a few years and MSI still had the same base layout for Z97 motherboards. There were minor updates – an XMP button, a proper overclocking menu layout, some help menus and fan controls, but it still had the same look and feel when other manufacturers were implementing ‘Easy Mode’ and a few other features to separate the common tools in the BIOS from some of the more esoteric. Now, MSI joins that crowd with their own ‘Easy Mode’ interface.
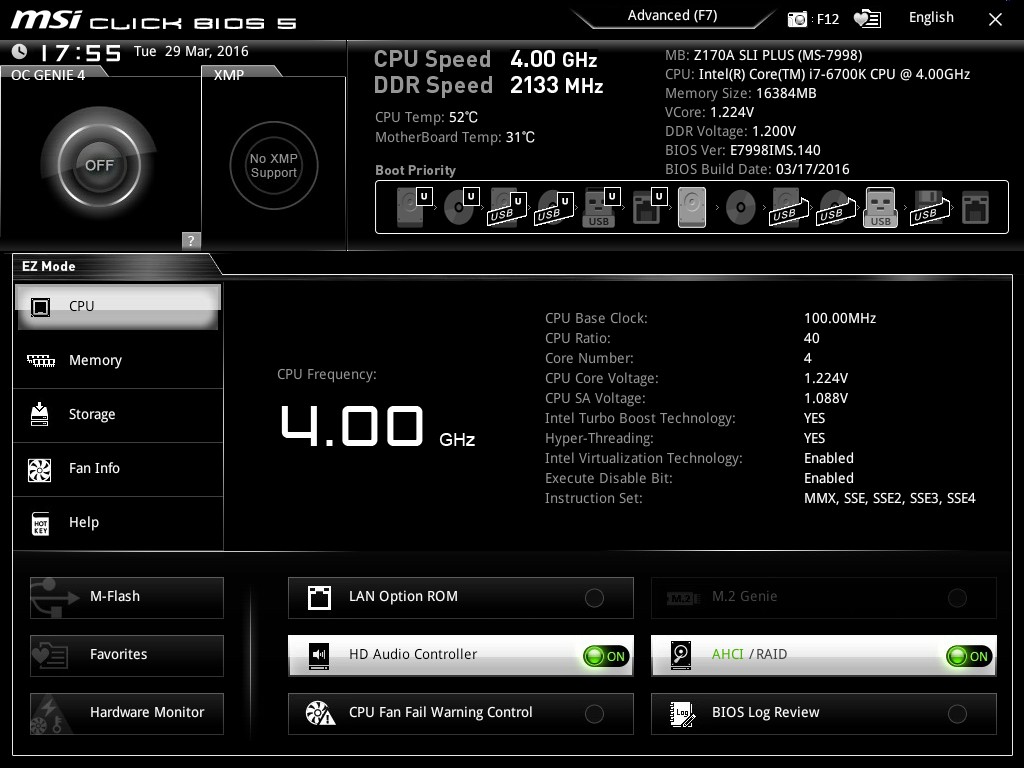
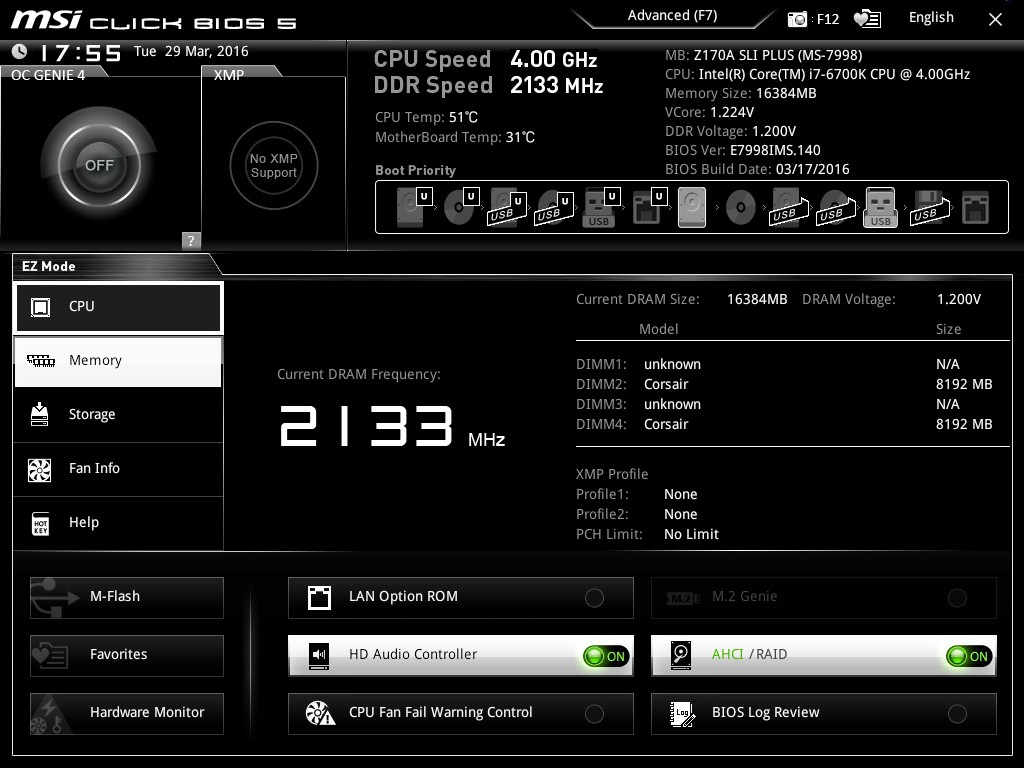
We still have the ClickBIOS nomenclature, but this at first glance looks like a nice ‘Easy Mode’. A BIOS gets plus points for system information on screen one – the motherboard, the processor, the speeds, voltages, BIOS version, temperatures and fan speeds. Rather than apply a thick layer, MSI separates easy mode into a few options on the left, so we have CPU info above, as well as memory info giving a per-module DRAM rundown:
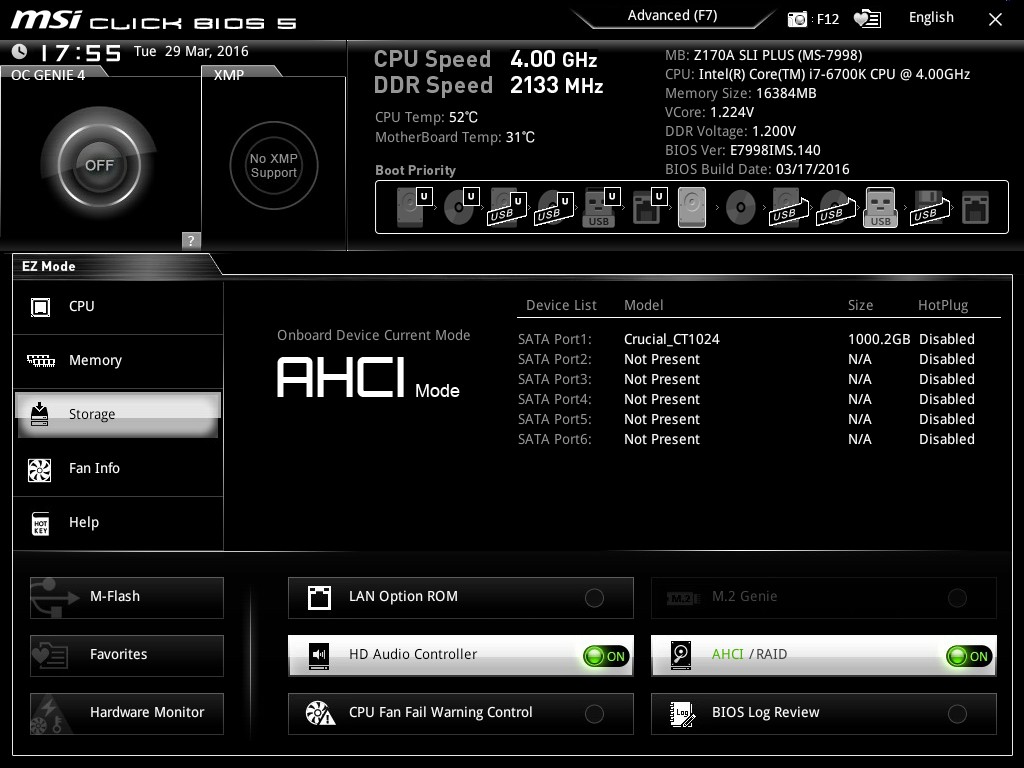
Storage:
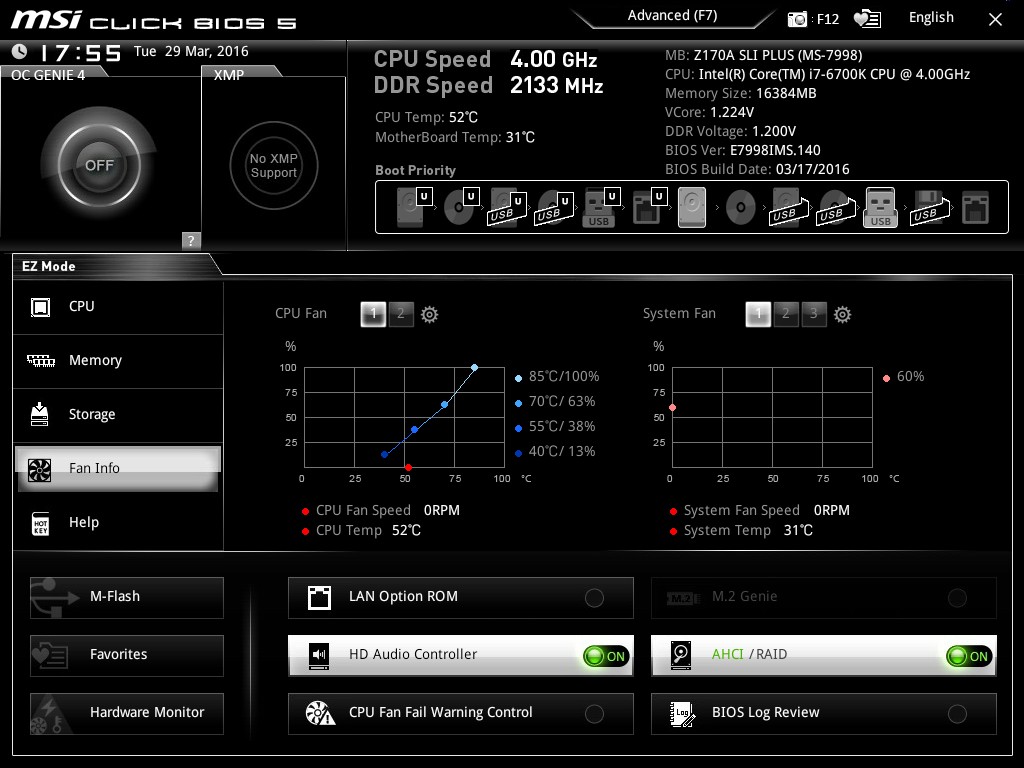
As well as fan controls:
In the top left of the screen is MSI’s OC Genie 4 button, so users can apply the auto-overclock (i7-6700K to 4.4 GHz, i5-6600K to 4.1 GHz) without opening the case and moving the wheel on the motherboard. Next to this is an XMP button for a one-shot XMP enable.
In the fan screen above the fan gradients are not adjustable directly but there is a settings cog next to the fan numbers to take the user to the fan adjustment menu:
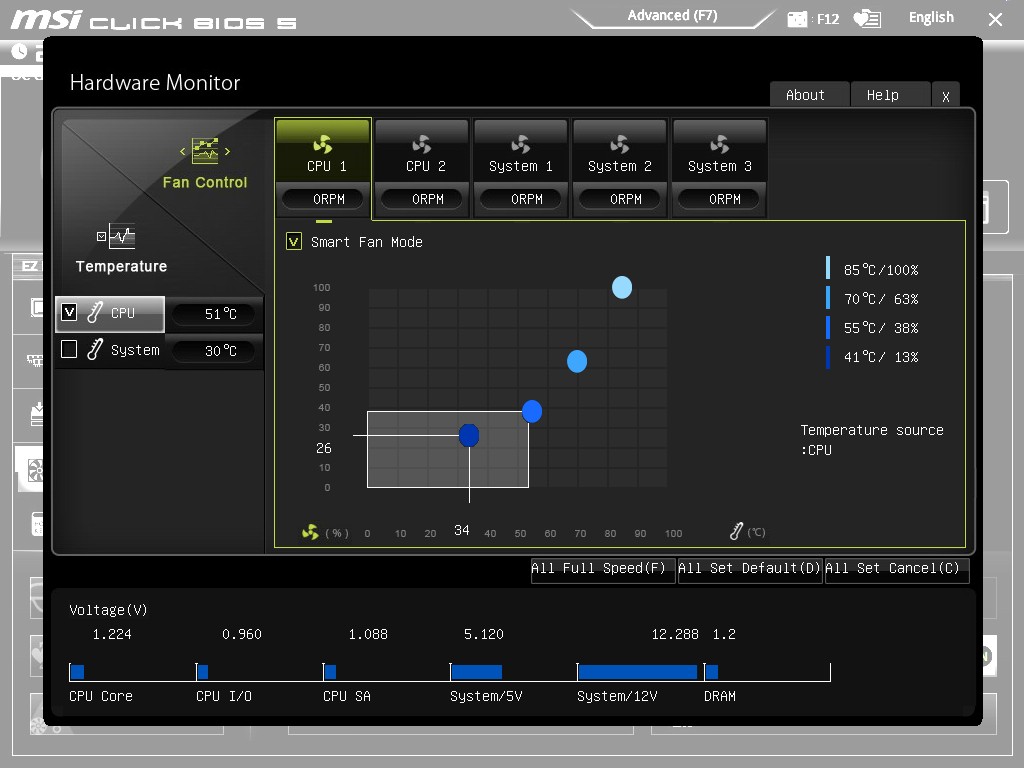
This fan adjustment menu is similar to previous MSI BIOSes, which when released was a nice touch giving users a graphical control over their fans.
Elsewhere in the easy mode is a help guide to show how to navigate.
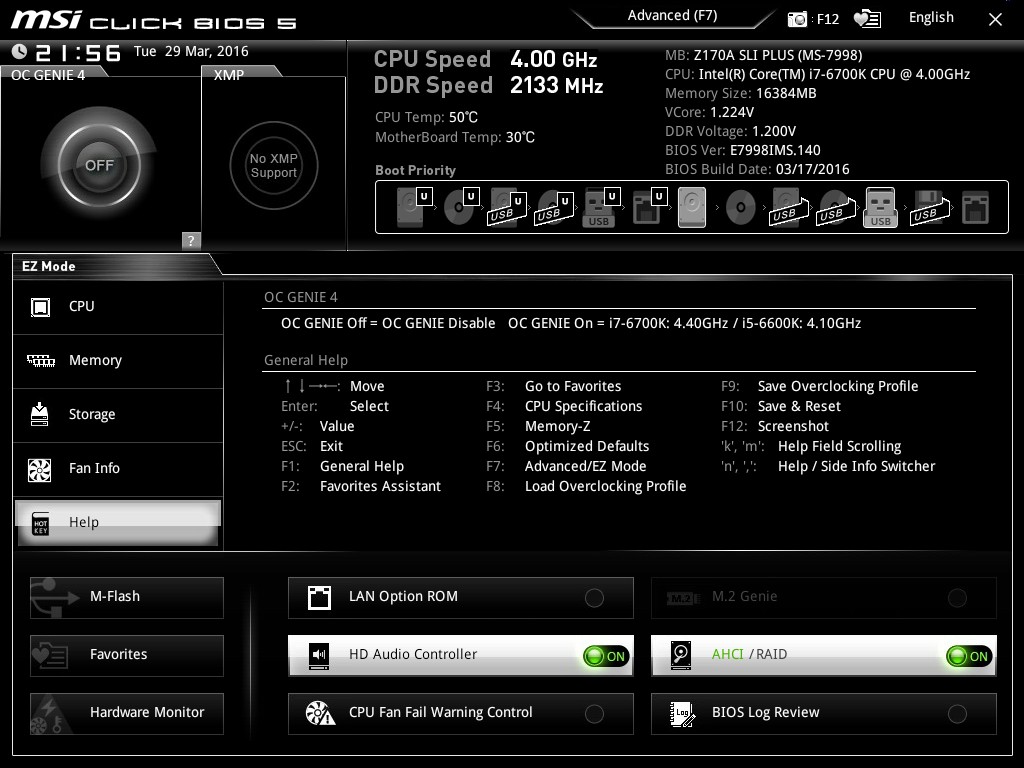
We also get an option to flash the BIOS (M-Flash) and the hardware monitor, which is another link to the fan control. MSI also links to the ‘BIOS Log Review’, which brings up a list of BIOS changes since entry, similar to what we have seen on other motherboards.

Pressing F7 moves into the advanced mode, which gets the SLI PLUS color scheme. MSI puts SLI PLUS in its ‘PRO Series’ line of motherboards, which is another name for what we’d call the consumer channel series.
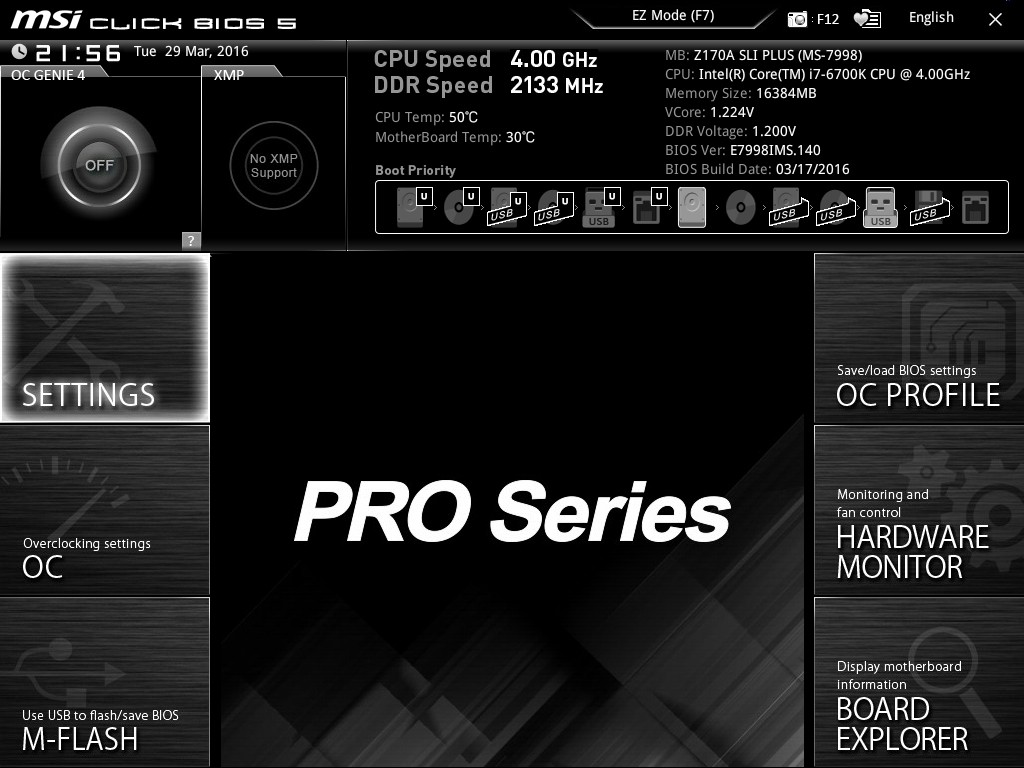
As far as the advanced mode goes, it runs in line with previous MSI BIOSes we have seen before with a singular main upgrade which we’ll get to in a bit. Each of the buttons around the sides of the advanced mode gives access to different sub menus:

Nothing much out of the ordinary here. Although it is worth pointing out how to install Windows 7 on this motherboard – the option is in “Settings/Advanced/Windows OS Configuration”:
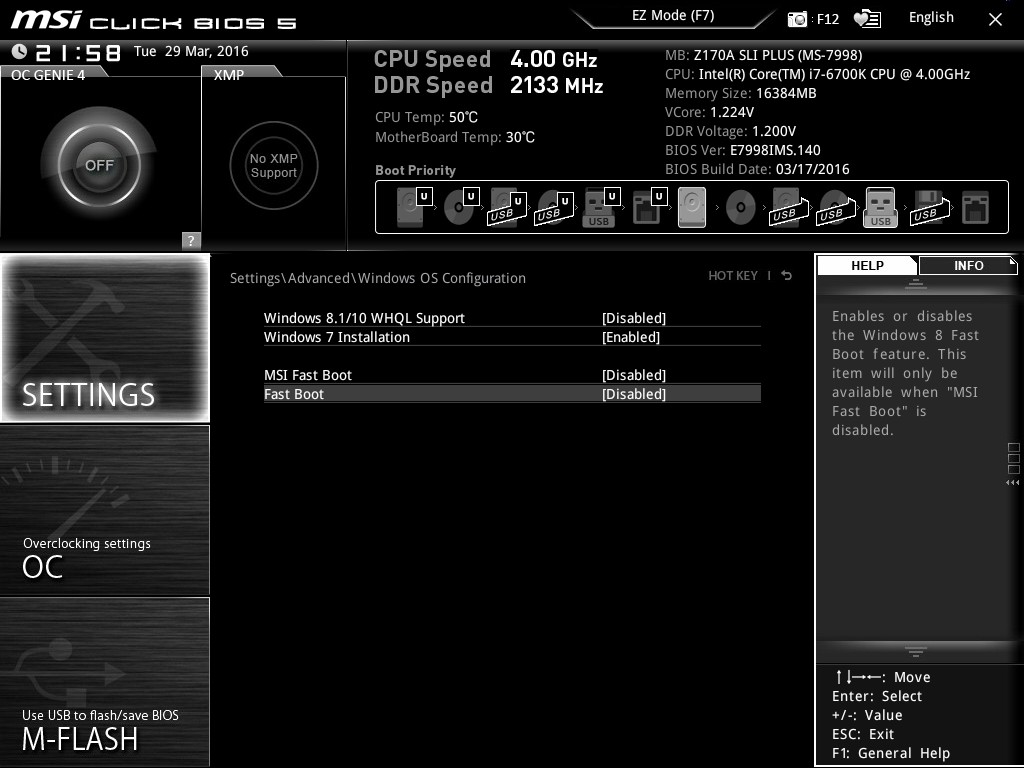
Put ‘Windows 7 Installation’ to enabled, and this will allow the user to use a USB mouse/keyboard during install. It is worth noting that Win7 has to be installed via a CD/DVD in this context as data-based USB drives are disabled. Normally we install an OS via a USB, and while the installation program for Win7 does start up, it refuses to find any OS version to install in an odd twist whereby the BIOS can read the USB stick but the USB stick can’t read itself.
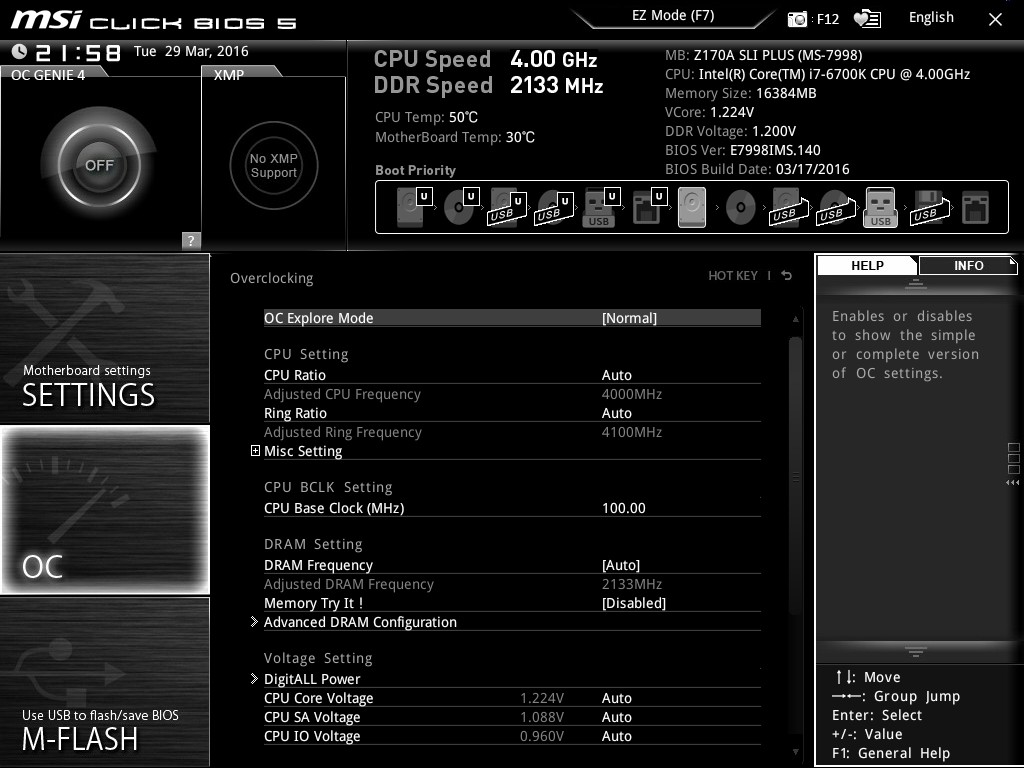
The overclock menu retains the new option we saw on Z97 by offering a ‘Normal’ and ‘Expert’ mode for those that understand the processor to a deeper layer by giving more options. Typically we recommend most users stay with the CPU multiplier and CPU voltage settings, which gives great overclocks for most – however extreme (sub-zero) overclockers always want more control.

I’m going to point out MSI’s awesome fix to an issue I have had with MSI motherboards for years, and it relates to the VDroop control / load-line calibration (LLC).
The concept of this feature is to maintain a constant voltage across the processor (because drawing current causes a drop), and it helps with stability. Current processor design means that a voltage drop occurs when the processor is being used heavily, which is typically compensated for to a variety of levels of LLC. For overclocking stability, the level of LLC can be adjusted with great benefit, ideally providing a constant voltage no matter the load. Previously on MSI motherboards, while there was a setting for the LLC, the adjust option did not make sense, offering % values with no suggestion of base line or effect. This changes, exactly in the way I wanted it to.
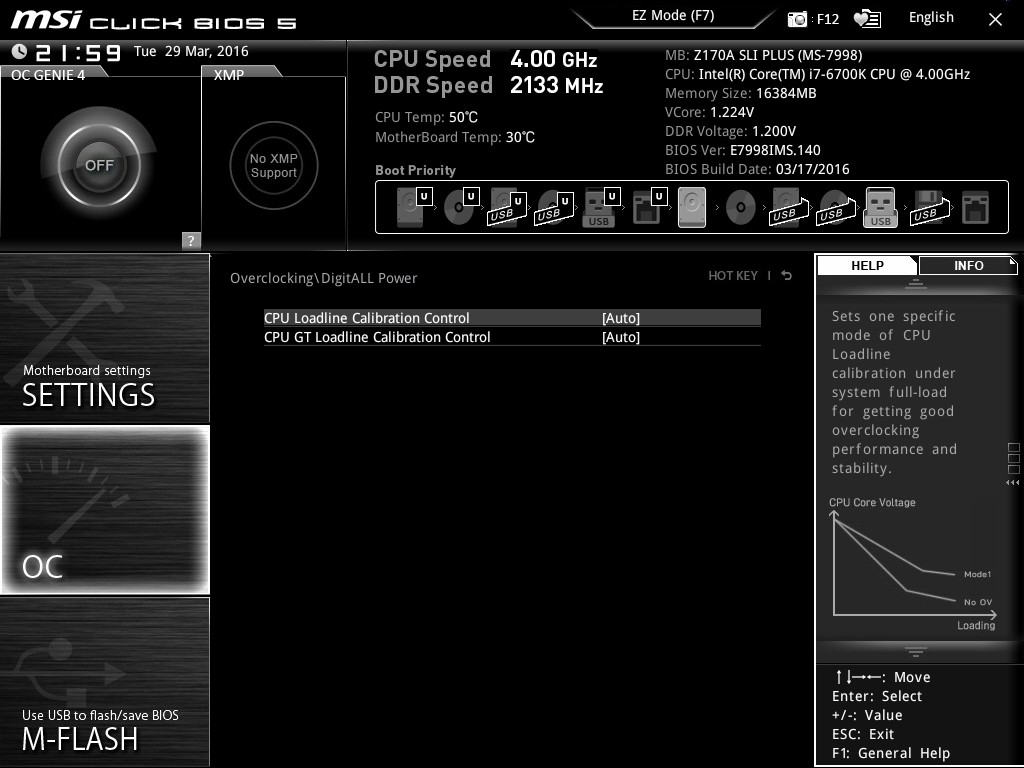
Under the DigitALL Power menu, we get this option for CPU Loadline Calibration Control. Because this is a low end motherboard, we only get two options – Auto and Mode 1, but the diagram to explain what each one does is on the right hand side. Of course, the graph is purely qualitative, but that doesn’t matter. Having this ability to decipher whether an option makes the voltage level more constant or less constant wasn’t shown before, and this minor adjustment (it should have taken less than a couple of hours) crosses off the list one of the major issues I’ve had with MSI overclocking in the past.
Ranting aside, the rest of the BIOS falls in line with flashing tools, fan controls, and Board Explorer:

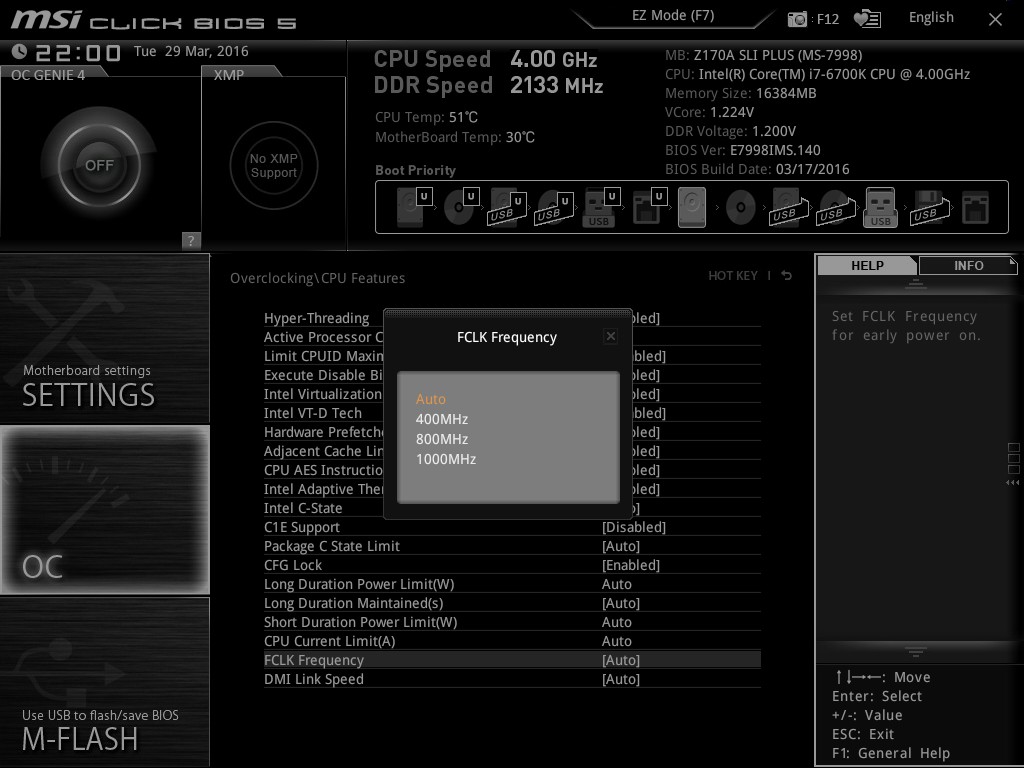
For users looking for FCLK adjustments, navigate to the OC menu and FCLK is in the CPU Features menu near the bottom on the BIOS we tested (1.4).


62 Comments
View All Comments
HollyDOL - Wednesday, April 13, 2016 - link
Price given this board is very impressive piece of hardware...ImSpartacus - Wednesday, April 13, 2016 - link
Yeah, I'm tickled to see gems like this.That was a fun review to read.
jasonelmore - Wednesday, April 13, 2016 - link
Throw in a $20 5 Port USB 3.0 Card and this thing has everything you need.http://smile.amazon.com/dp/B00FCQPVI8
mczak - Wednesday, April 13, 2016 - link
It's missing DisplayPort. Sadly, nearly all cheaper boards miss this. So, if you don't have a need for powerful graphics and are just fine with the IGP, but you still want to hook up one of those quite cheapie 4k monitor, you're out of luck. Really wish they'd ditch those near useless VGA and DVI-D ports in favor of DP (ok the latter isn't useless but all of intel's DVI-D ports are going to be single-link, hence limited to 1920x1200) - or better instead of ditching DVI-D and VGA they should just have one DVI-I port instead for people who really want to hook up that analog monitor there...Manch - Thursday, April 14, 2016 - link
Your use case is very much a niche. 4K monitors are not the norm. Many people still have vga monitors as well. If you're going to drive a 4k display odds are you wont be using igp. I don't really see an issue here.Visual - Thursday, April 14, 2016 - link
To add to that, even if I wanted a 4k monitor, I'd personally not want to use DP for that. A port meant just for computers was a terrible idea from the start and I will never buy anything with it. I'll stick with HDMI and its future versions.And DP has the same limitations as HDMI in regards to 4k@60p - you need newer versions of either to support that.
mczak - Thursday, April 14, 2016 - link
No, you only need DP 1.2 for 4k@60p (with no chroma subsampling). Everybody supports that since like forever. But for the same with HDMI, you need HDMI 2.0, which isn't supported by anything intel ships. All 4k monitors (but, of course, not TVs) support DP 1.2 too (except some very old models). I don't disagree HDMI 2.0 wouldn't be nice, but with Skylake IGP it's just not going to happen.mczak - Thursday, April 14, 2016 - link
To clarify, intel supports DP 1.2 since Haswell.And FWIW there's still quite a lot of 4k monitors you can buy today which actually do not support HDMI 2.0 neither - they _require_ DP for 4k@60p.
(There actually is a way for skylake based systems to do HDMI 2.0 - the Alpine Ridge TB controller can do that. Clearly, not an option for budged oriented boards. Kaby Lake however should support HDMI 2.0.)
mczak - Thursday, April 14, 2016 - link
Well, if you just want a gorgeous looking monitor for web browsing, office work or whatever, the IGP would do just fine with a 4k monitor (fwiw apple ships plenty of exactly such configurations).But sure 4k gaming isn't going to work...
And as for VGA, that's why I suggested a DVI-I port - can still use monitors with VGA port with that (albeit would require an adapter).
Maybe it's a niche (but then things like m2 nvme ssds are a niche too in that price segment), but it could be trivially supported by motherboards with only a tiny cost (no chips or anything required - just the connector).
amrs - Thursday, April 14, 2016 - link
Funny. Last time I was shopping for a motherboard I was cursing. "Do I really have to pay for all those useless video connectors?" Wasn't much choice. One less useless connector now I suppose. I've only used the IGP VGA in my Ivy Bridge board and then only for the initial testing in the garage where my ancient Eizo CRT sits.