DFI PRO875 (875P): Introducing the LAN Party Series
by Evan Lieb on June 10, 2003 2:58 PM EST- Posted in
- Motherboards
DFI PRO875: Board Layout
DFI’s engineers clearly have listened to our requests in terms of laying out components, as the DFI PRO875 is one of the best laid out motherboards we’ve ever come across.
Let’s start off by looking at the position of the ATX (20-pin) connector. DFI very nicely arranges the ATX connector on the right-hand side of the motherboard about one inch from the top of the PCB. If you’re using a standard PSU and not a high-quality PSU, placing the ATX connector here will reduce the clutter and greatly minimize the obtrusive ATX wires from obstructing the installation/uninstallation of the CPU HSF, memory modules, and any other components that you may decide to modify or uninstall in that area. If you’re using a high-quality PSU with an extra-long ATX connector then you have nothing to worry about, but the ATX connector location is still excellent for those users that can’t afford the best PSUs.
Next, we see that the ATX12V connector is located in a fairly unique location, between the DIMM slots and the CPU socket. It too is about one inch low from the top of the PCB. This location is ideal as placing the ATX12V connector here stops the ATX12V cable from running directly over the CPU HSF, which otherwise would mean you would have to unhook the ATX12V line to uninstall your HSF. Again, like the ATX cable, higher quality PSUs have an extra long ATX12V cable, so this won't be an issue with these particular PSUs. Still, there are lots of users using standard PSUs who will be affected by this issue.
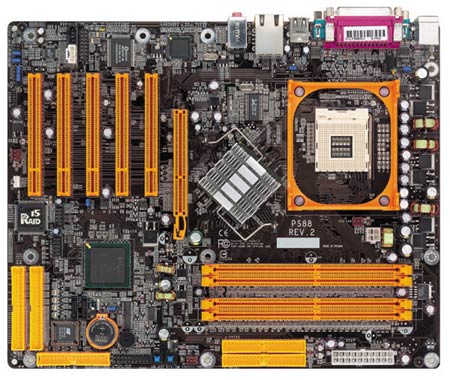
One layout arrangement we always like to see implemented properly on a motherboard is the location of the Primary and Secondary IDE connectors. DFI does an admirable job of placing these two connectors far up on the motherboard, well above the halfway point. By placing these two connectors here you avoid the issue of having your bundled IDE cables unable to reach the upper bays of your ATX case. Otherwise you might be forced to install your optical drives in the 2nd, 3rd, 4th etc. bays, which would make the front of your case look rather ridiculous with the 1st bay missing a drive. The Primary and Secondary IDE connector location on the PRO875 also allows you to maneuver the IDE cables away from the center of the case, which reduces any potential clutter.
We would like the Floppy connector’s location better if the HighPoint RAID connectors weren’t placed so close to and just below the Floppy connector. It will be quite a hassle to organize (and especially remove/replace) your Floppy drive or RAIDed hard drives with the connectors placed the way they are on the PRO875. Clutter will become an issue if you desire to keep things clean, organized, and ready for future upgrade. This is the only complaint we have about the PRO875’s layout, though it’s a relatively large one.
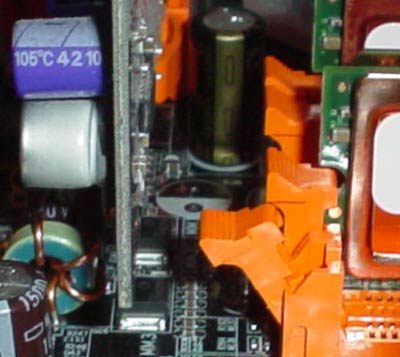
We like the fact that DFI went for a passive North Bridge HSF for the PRO875. There should be enough room between the passive North Bridge heatsink and the AGP slot for users to add additional cooling to their video cards, but certain HSFs may not fit unless you adjust the North Bridge heatsink 45 degrees. Though the heatsink gets quite warm during FSB overclocking, it’s within acceptable levels. If you’re obsessed with keeping your PC quiet and your components cool, you can always opt for a quite additional fan, the Panaflo L1A isn’t a bad choice.
We love the fact that DFI leaves ample room between the DIMM connectors and AGP slot so that users aren’t forced to uninstall their video card if they need to simply install or uninstall some memory. Unscrewing your video card, unplugging your VGA cable, and physically uninstalling your video card from the AGP slot is quite a long task to perform if you’re simply trying to swap memory. This is yet another layout feature DFI implemented as a result of reader and user requests.
The USB 2.0 headers are located almost a full inch from the bottom of the PCB, smack dab between the PCI slots and the Floppy connector. This location is ideal as there are two PCI slots just waiting to be filled if you ever feel the need to expand your options beyond the four rear USB 2.0 ports already available onboard.


1 Comments
View All Comments
AprilLee - Wednesday, April 22, 2020 - link
To understand the popular chip series, this is a really great show. I get some of the best news as it relates to popular chips and I can check more details at https://australian-writing.com/ who assist me well. Technology is changing the modes of living of people day by day. New things will prevail.