Gigabyte Z68X-UD3H-B3 Review
by Brendan van Varik on July 11, 2011 7:01 AM EST- Posted in
- Gigabyte
- Motherboards
- Sandy Bridge
- Z68
Note: There is a pretty big issue with the shipping (F2) BIOS on the board I received. If any memory settings were chosen (including XMP) rather than left at auto, the board would not engage more than a 1x turbo mode, even in single threaded performance. This issue has been addressed, and Gigabyte suggest that users upgrade to the latest BIOS, available from their website.
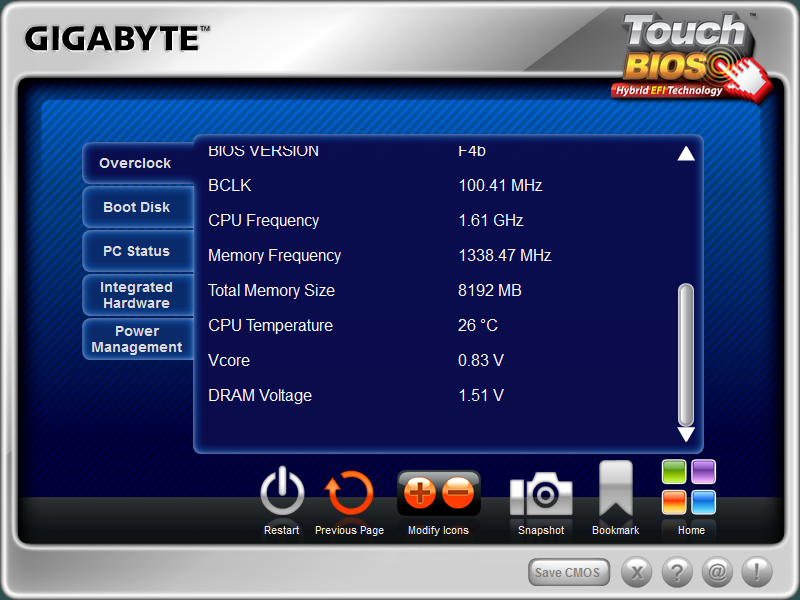
The Touch BIOS – no Graphical UEFI
Gigabyte have yet to adopt a full graphical UEFI BIOS. In fact, they merely have a “hybrid” BIOS which adds support for 2.2TB+ hard drives. In order for the 2.2TB+ hard drives to be detected, you have to ‘activate’ them within Windows. You have to run a program to initialize the drives. For the rest, the layout is exactly like a five year old Gigabyte board I have laying around from the LGA775 age.
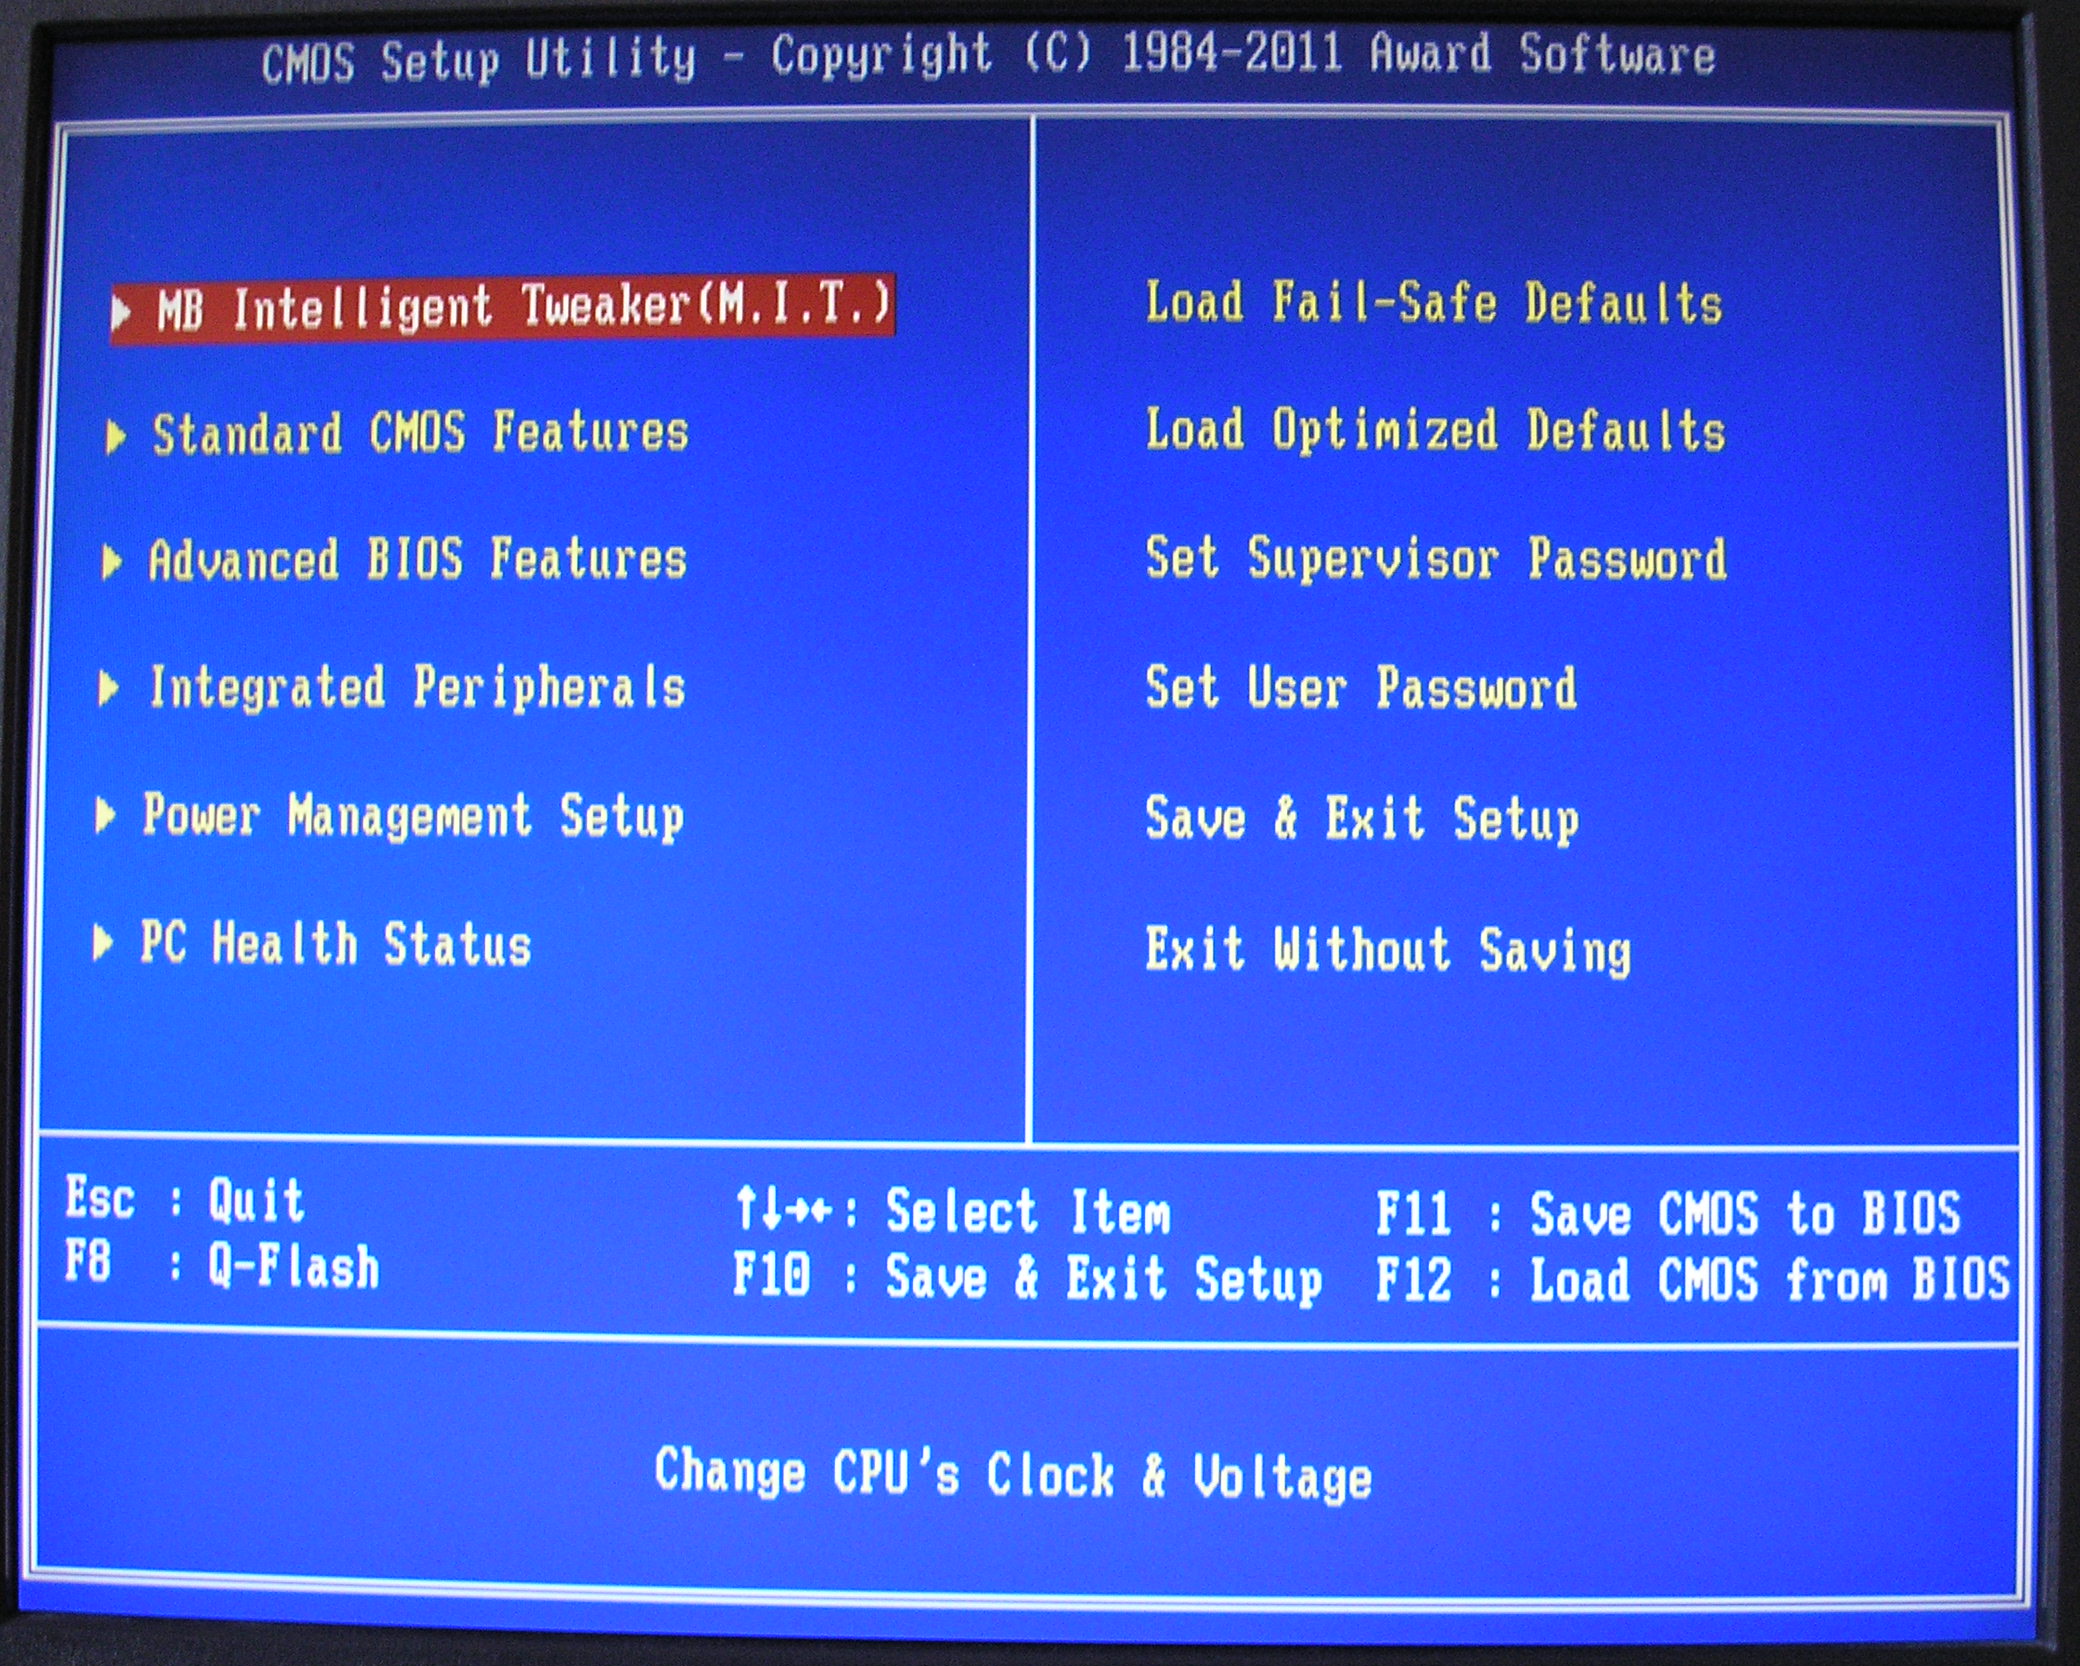
Unfortunately, this is about as interesting as it gets. It’s a shame that Gigabyte have yet to take on a full UEFI style but it may come in the not too distant future. On the plus side however, Gigabyte have put all of the features in their relative submenus that makes them easy to find. For example, all of the system clocks and overclocking features are located in the MB Intelligent Tweaker (M.I.T.) menu and the settings are under their respective menus in there too. This is relevant for all of the menus within this BIOS.
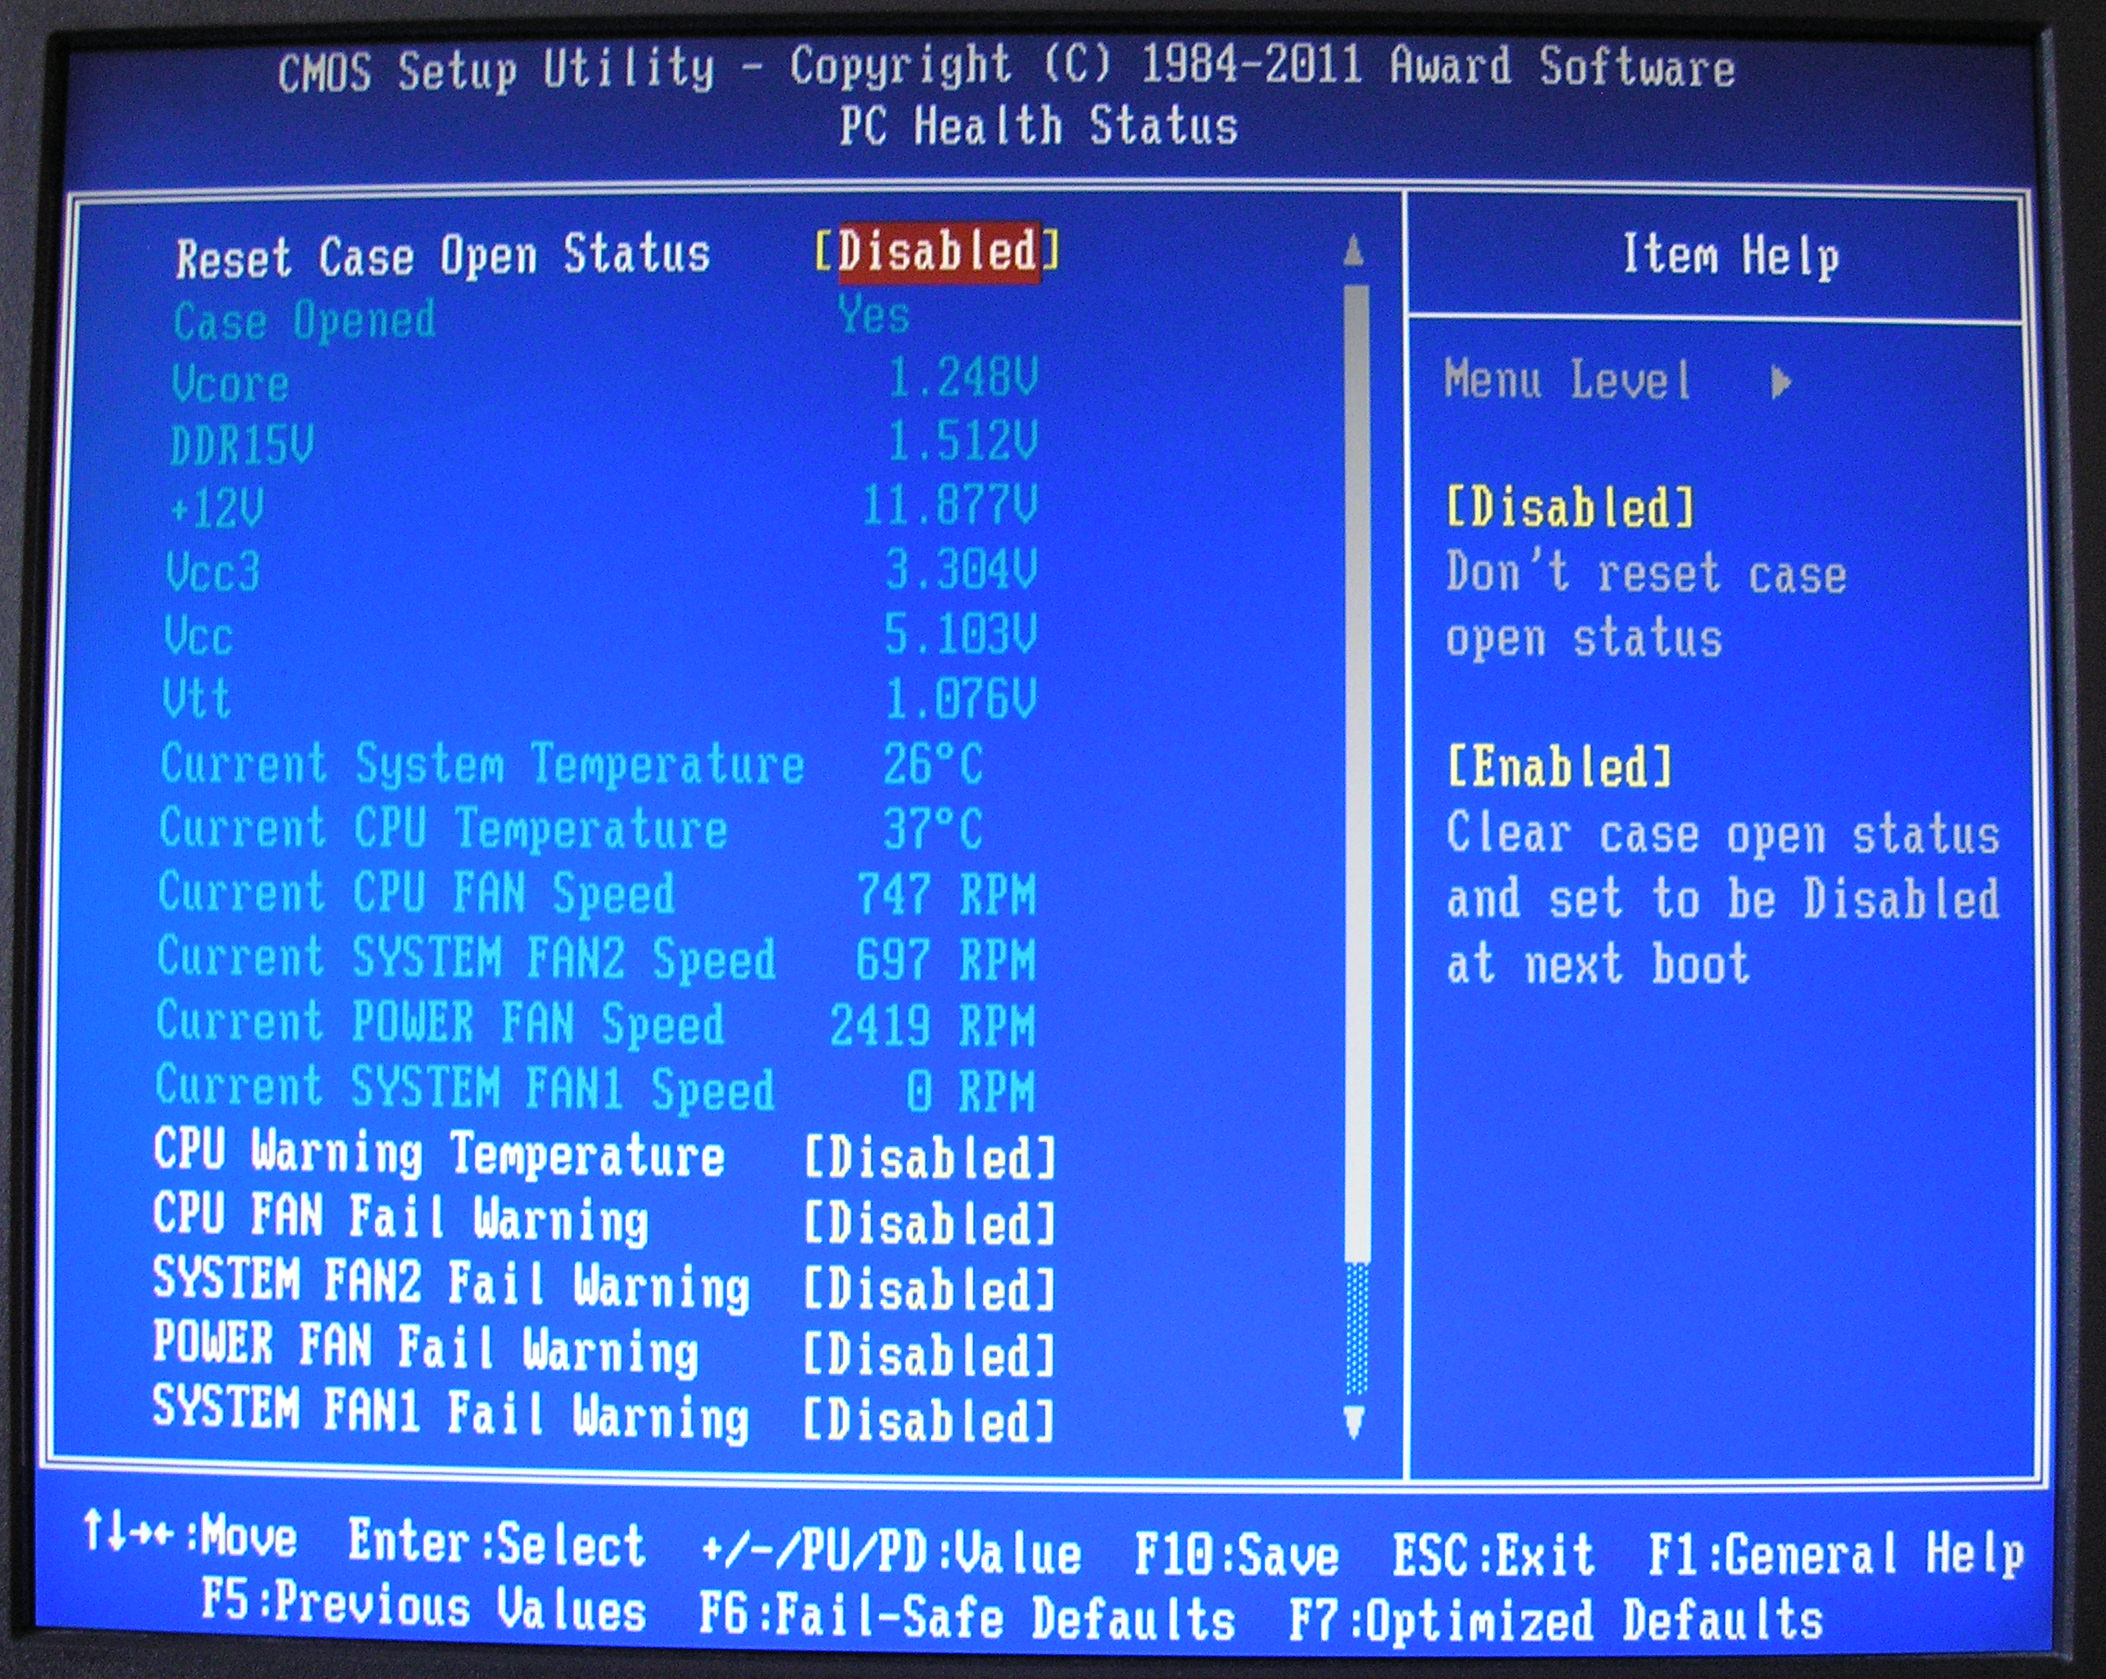
There are no options to change any of the system fan speeds within the BIOS. However, scrolling down in the PC Health Status part of the BIOS reveals a few options for the CPU fan control. When you select CPU Smart FAN Control and enable it, you can alter the CPU Smart FAN Mode. You can either let it automatically adjust the voltage of the fan or you can manually assign it. If you have a 3 pin fan, you can alter the voltage which will correspond to the speed of the fan or if you have a 4 pin fan, you can set it to PWM mode and the BIOS will take care of it for you. There are four different options which you can choose from whilst using the PWM function. They consist of Normal, Silent, Manual and Disabled.


The TOUCH BIOS from within Windows
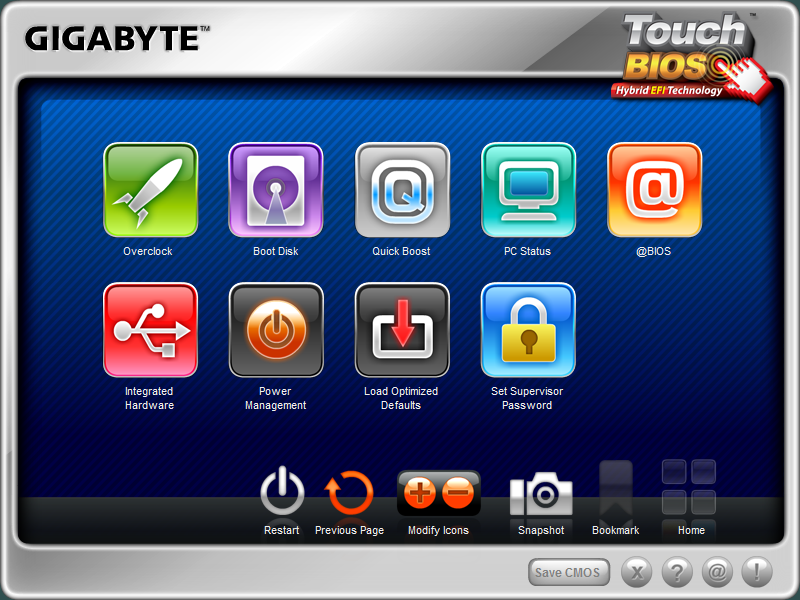
Above is the software, which you can use to change absolutely everything in the BIOS from within Windows.
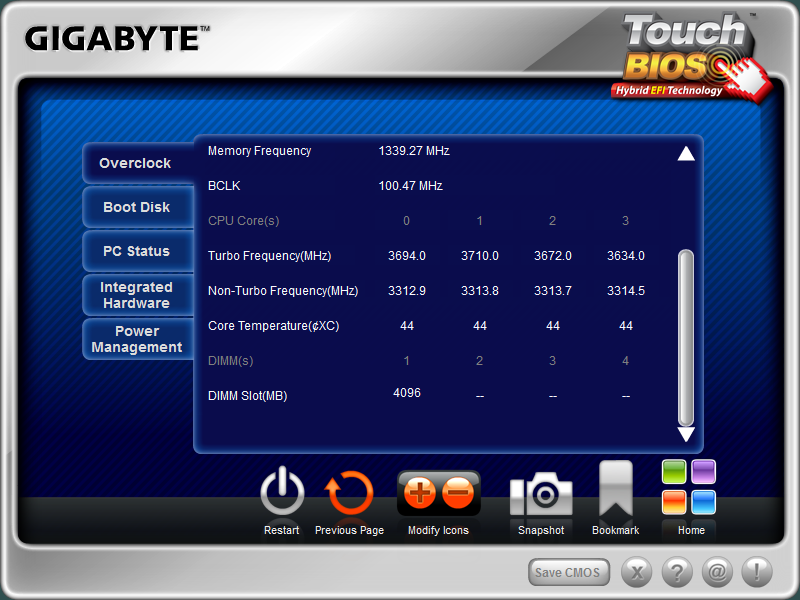
The only obvious issue I found with it is in the M.I.T Status section of this software. It only registers one DIMM no matter which slot it is in but it does register that you are using the correct amount of RAM which is slightly odd.


Overclocking
Just like other manufacturers, Gigabyte have their own software which allows you to overclock your system automatically from within the OS. However, they all vary and some do better than others. We tested out Gigabytes’ offerings before we fiddled and tweaked within the BIOS.
When the EasyTune6 software loads, it loads the Tuner menu by default. There are three different “Quick Boost” options you can choose which consist of a 3.6, 3.8 and 4.1GHz core speed and are labeled 1, 2 and 3 respectively. All three options were tested and proven stable but I will write about the level 3 variable. There are a few things to note here. The voltages set are far too high for the clock speed. A core voltage of 1.4v is set. This particular CPU only requires 1.34v for 4.3GHz. This means there will be excess heat which could be avoided by using less voltage. No Load Line Calibration (LLC) is set during this overclocking procedure, which means the voltage droops to 1.33v when the CPU is highly stressed.
Thankfully, on the RAM side of things it does a little better. The RAM is set to 1866MHz with X.M.P timings and voltages. Our RAM is rated at 2000MHz which isn’t available for selection in the BIOS. There are two options – either 2133MHz or 1866MHz. The safer choice of 1866MHz was chosen to try and eliminate any possible RAM stability issues.
Unfortunately, the CPU core voltage isn’t displayed correctly by CPUZ which means you have to use the EasyTune6 software, which seems to do a better job although I wouldn’t rely on it entirely. The vDroop on this board is something which needs to be addressed. In the BIOS, there are ten levels of LLC, one being the weakest and ten being the strongest. There is no description in the BIOS of how they affect the voltage. When you use no LLC at all, the vDroop on 1.4v can dip right down to 1.33v which is a significant change in voltage. However, when you use level 5, so in the middle of min and max, it will increase the voltage to 1.45v which is far too much again. Gigabyte really do need to sort this out.
Given that the EasyTune6 software only offers a 4.1GHz overclock which uses too much voltage, I was eager to get on and see how well the motherboard overclocks if you set the speeds and voltages on your own accord.
First of all, I tested to see if the CPU would be stable at 4.3GHz with 1.34v just like it is in other motherboard testing. It was semi stable; LLC had to be set to level 3 in order to obtain complete stability. The voltages peaked at 1.36v which isn’t too serious.
After deciding it was stable enough, I pushed on and attempted to find the highest clock speed which could be used to run our benchmarks. The maximum overclock achieved was 102.1x47 which isn’t too shabby at all. The BCLK isn’t as impressive as other motherboards but as you have an unlocked multiplier, you might as well just take advantage of it instead of messing around with the BCLK.
When you push the overclock a touch too far, it sometimes fails to recover from a bad OC without manually simulating the boot cycles. By this, I mean turning the PC on and off by the PSU and letting the board power itself back on. It only takes a few attempts. The motherboard is designed to copy data from the secondary BIOS chip to the first one when the overclock fails in order to recover itself. All this does is restore the BIOS defaults which allows you to either try again or try something different.


70 Comments
View All Comments
Mr Perfect - Tuesday, July 12, 2011 - link
Of course we can do that, but it's time for the industry to move on. Actually, the rest of the industry has moved on. It's just Gigabyte dragging their feet. Put new features on your new boards, or we'll find someone who does!Lord 666 - Monday, July 11, 2011 - link
In the immediate need to build a multi-purpose lab and either this board or the UD4 (need x4 pcie for raid card) are contenders. Other than maybe putting an intel NIC on it, will it work with esxi 4.1?My googling has not found anything conclusive and I trust Anandtech.com before any hack out there.
Taft12 - Tuesday, July 12, 2011 - link
I wouldn't count on support for a bleeding-edge consumer-grade chipset. You're asking for trouble. Google hasn't found anything because nobody has tried it yet.-=Hulk=- - Monday, July 11, 2011 - link
Do you find that smart to use an overdimensioned 1250W PS to measure the power consumption???At max 106W consumption your PSU is only used at less than 10W. At ilde it's even worse. The problem is that under 15% load the PSU has an horrible efficiency even a Gold rated one, why spent so much money if a low power bronze PSU works better in such a power range....
Your power consumption numbers are nothing worse, sorry, and promoting sure overdimensed power supply doesn't help the final consumer because manufacturers don't develop low power PSU, there aren't enough available (under 250-300W Gold) on the market, because site like anandtech promote the "the bigger than better", that's totally stupid especially since our CPU consumes less.
IanCutress - Monday, July 11, 2011 - link
We understand this - it's not an oversight on our part. In order to be consistent through reviews, we like to keep the PSU constant - even when it comes to testing Fusion boards or triple SLI, a comparison between them for readers is always good. With completely different power supplies, no comparison between the numbers could be justified. There's also the fact that we don't have access to a mountain of PSUs available (actually, Brendan had a couple die on him during this review alone and had to keep redoing tests until one worked the whole way through) to test a system with a PSU which has its peak efficiency in this area, which again merits the comment above about providing comparable and meaningful power reading comparisons.JWatson - Monday, July 11, 2011 - link
I got this motherboard a couple of days ago for $130 with a $180 i5-2500k at Microcenter during their $40 off any 1155 motherboard CPU combo deal. So far it's been a great motherboard. I haven't really tried overclocking that much, other than setting the multiplier to 42 to get 4.2ghz but it's been very stable with no issues running prime 95 for several hours. I tried getting it to 4.3ghz using stock voltage but it would crash, so I went back to 4.2 and called it a day.The only issue I've come across was after I installed an Intel 320 120GB SSD. For some reason it would hang at the "Loading Operating System" screen. For whatever reason, in your BIOS, you may want to change the First Boot device to Hard Drive, otherwise it will hang there for a while. If you set the First Boot device to a DVD drive, make sure it has the name of the Device, like "BenQ 20x" instead of "CDROM" otherwise it might hang again. However, once that was changed, the issue stopped.
Another word of advice, don't "Install ALL" from the Gigabyte DVD Driver CD. It will install a bunch of crap you don't want, so install the drivers you need individually.
All in all, for 130 bucks, it's a great board for those that want to do mild overclocking and get a bunch of features for a fantastic price.
PrinceGaz - Monday, July 11, 2011 - link
In the specifications:"1x D-Sub port
1x DVI-D port, supporting a maximum resolution of 1920x1200
*The DVI-D port does not support D-Sub connection by adapter.
1x HDMI port, supporting a maximum resolution of 1920x1200
1x DisplayPort, supporting a maximum resolution of 2560x1600p"
By definition, DVI-D is digital only and cannot support the analogue D-Sub with an adapter (it would have to be DVI-I or the rarely seen DVI-A to support an analogue connection). Besides, as the board has a D-Sub port anyway, why would you use an adapter as it can only degrade the quality? (except the unlikely scenario these days where you are using a monitor with only an analogue input and have only a DVI to D-Sub cable available to connect it with).
Vhozard - Monday, July 11, 2011 - link
Congratz Brendan, awesome article.Couldn't find any mistakes :P
BernardP - Monday, July 11, 2011 - link
Could someone point me to a Gigabyte Z68 mobo that comes with 3.5” front panel USB 3.0 adapter? I couldn't find any on the Gigabyte web site.The only one I can find is a P67 model from Asus: P8P67 Deluxe.
With so few cases coming with the required dual front USB 3.0 connectors plus the cable and motherboard plug, the front panel 3.0 adapter is a big plus.
gevorg - Monday, July 11, 2011 - link
I have this board and its too noisy even at idle since it runs the case fans at near full speed. No way to adjust them in BIOS. Had Intel P67 board with the exact same config/components, and it was silent at idle. It sucks that reviews like these focus primary on price/performance and ignore other important factors.P.S. The non-graphic BIOS is just fine, pretty straight forward, its not like you access BIOS every day.