Clash of the Titans - TT Tai Chi vs. CM Stacker 830
by Joshua Buss on February 23, 2006 12:05 AM EST- Posted in
- Cases/Cooling/PSUs
Thermaltake Tai Chi (cont’d)
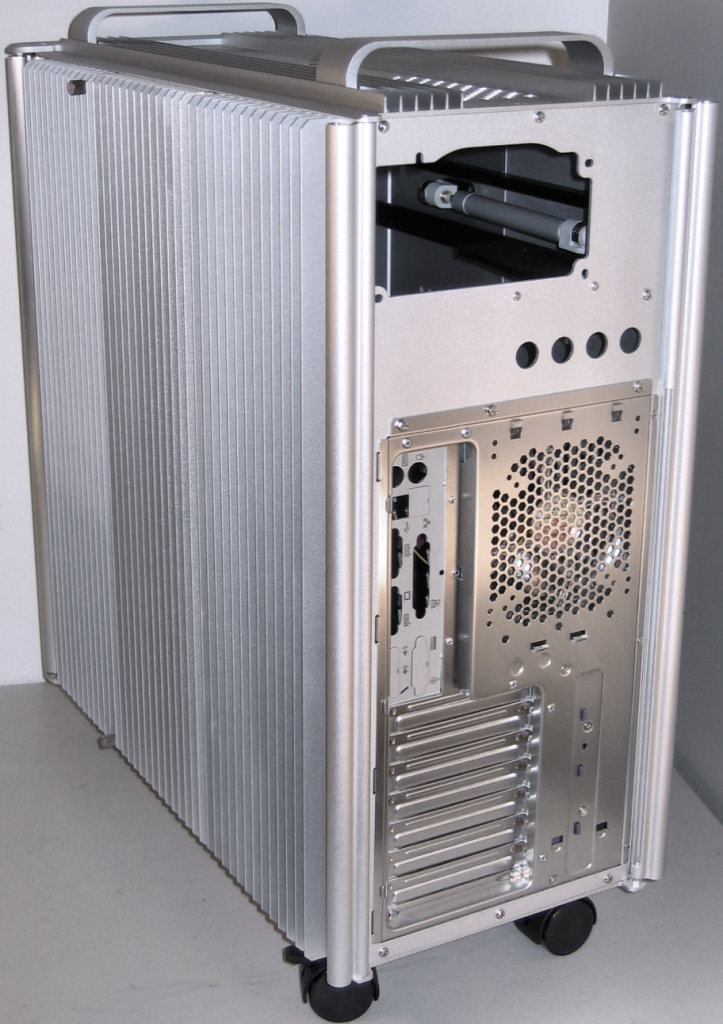
An inch and a half long extended thumbscrews hold each part of the hinged door at the top and bottom, and since it's a double-hinge design on the left side, a total of four thumbscrews can be used – however, the front flap overlaps the main door and thus a single screw on the front panel at the top or bottom is the minimum needed to hold the side shut.
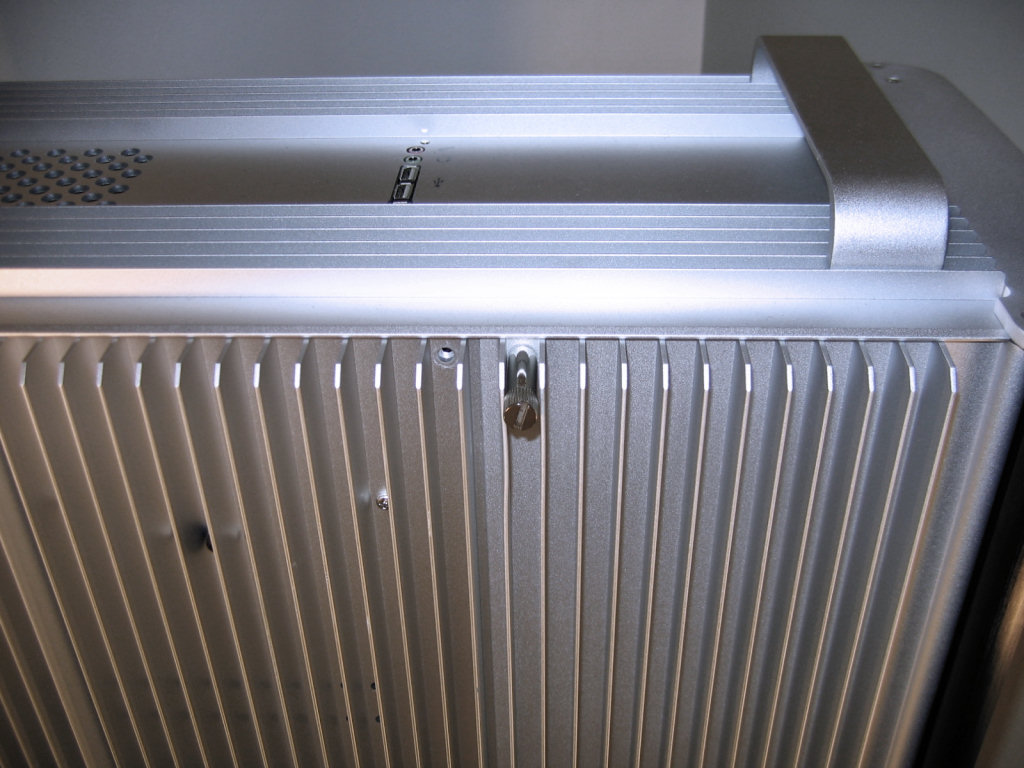
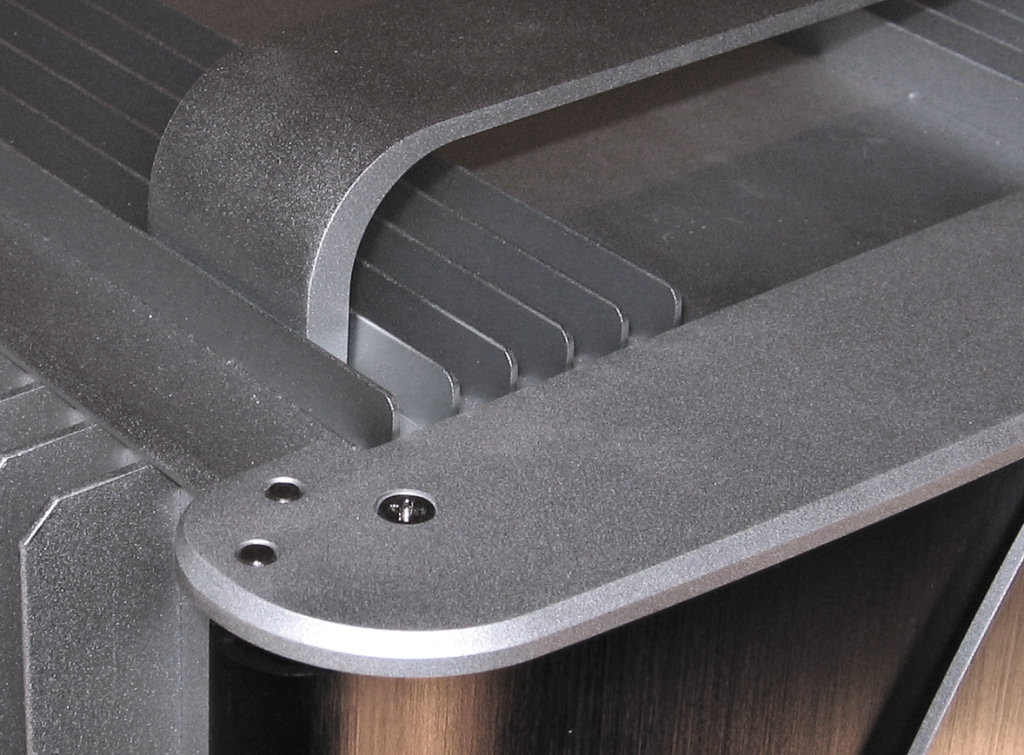
Before opening the case, we really felt that this case deserved an extreme close-up to show off the immaculate finish and heavy thickness of the aluminum used.
An inch and a half long extended thumbscrews hold each part of the hinged door at the top and bottom, and since it's a double-hinge design on the left side, a total of four thumbscrews can be used – however, the front flap overlaps the main door and thus a single screw on the front panel at the top or bottom is the minimum needed to hold the side shut.
Click to enlarge.

Click to enlarge.
Click to enlarge.
Click to enlarge.
Before opening the case, we really felt that this case deserved an extreme close-up to show off the immaculate finish and heavy thickness of the aluminum used.
Click to enlarge.


55 Comments
View All Comments
JoshuaBuss - Thursday, February 23, 2006 - link
What about direct links to images? Does that work?http://images.anandtech.com/reviews/cases/roundups...">http://images.anandtech.com/reviews/cases/roundups...
Jojo7 - Thursday, February 23, 2006 - link
No.JoshuaBuss - Thursday, February 23, 2006 - link
Try a refresh. Sometimes the image server gets a bit bogged down.latino666 - Thursday, February 23, 2006 - link
Still can't get crap. I notice this problem also with the newegg article too. Man oh man did I want to see those pics.ATWindsor - Thursday, February 23, 2006 - link
The tai-chi has gigantic heat-sinks on the side, but to me they seem like little more then a gimmick. Almost nothing is in physical contact with them, and when they are only taking heat fom air, they seem to be virtually useless. I bet the diffrences if one had a "standard" side would be hardly measurable.The CM 830 surly is more ugly than the old model IMHO, It doesn't quit have that "large clean beast"-feeling anymore.
Cygni - Thursday, February 23, 2006 - link
It seems they were going for the look of the Zalman completly fanless case, but didnt bother to install the flush mount PSU or heatpipes that ran into the doors, haha. :p Oh well.Tamale - Thursday, February 23, 2006 - link
I'd call it a 'large techno beast' now ;)Howard - Thursday, February 23, 2006 - link
The 3/8" holes in the Tai Chi can easily be bored out with a twist drill bit (the regular ones) in a cordless drill. At least, they would be if the material is aluminum, and I think it is.JoshuaBuss - Thursday, February 23, 2006 - link
Yah, but it's still much easier when it can be taken apart and pieces can be worked on individually.Googer - Thursday, February 23, 2006 - link
Could you invert the motherboard on the CM Stacker by installing the tray on the left side in place of the usual right side? If you could possibly allow for better CPU cooling sine the processor would be sitting on the bottome getting plenty of cool air and allowing hot exhaust to escape upwards.