The GIGABYTE Z390 Aorus Master Motherboard Review: Solid, But Not Special
by Gavin Bonshor on March 21, 2019 12:30 PM EST- Posted in
- Motherboards
- Intel
- Gigabyte
- ATX
- LGA1151
- i7-8700K
- Z390
- Aorus Master
Overclocking
Experience with the GIGABYTE Z390 Aorus Master
GIGABYTE's UEFI firmware uses a basic, yet simple and intuitive layout. All of the relevant overclocking settings such as those for frequency, memory, and voltage all have their own individual sections. All of the power-related settings can be found under the advanced power settings subsection. This can make the adjustment of different settings a little bit challenging as once you’ve been through four or five different menus and changed settings, it could be quite easy to forget a couple of settings that’s been applied; for what it’s worth, I write mine down as I go.
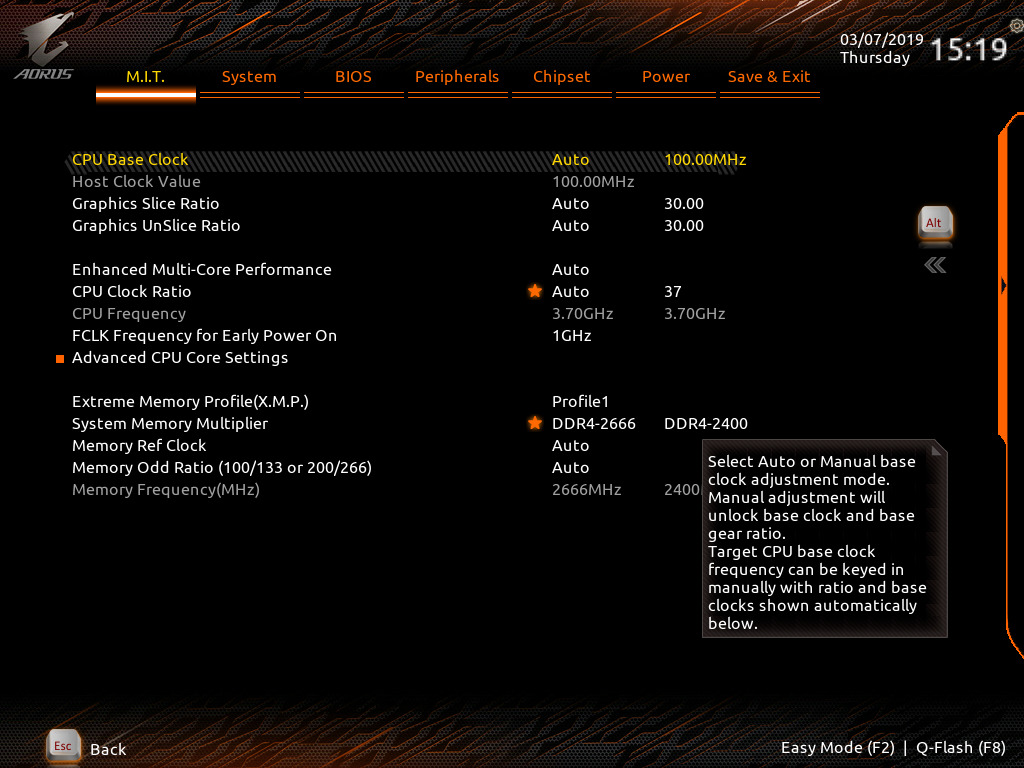
We know that the limitations when using ambient cooling with our testbed Intel Core i7-8700K. This is around 5.1 GHz at 1.45 V; thermal throttling kicks in around 1.4 V and does have a negative impact on performance. Changing the CPU Core Frequency can be done through the multiplier in increments of 100 MHz e.g. x45, x46. The GIGABYTE Z390 Aorus Master has a hardwired OC button in the top right corner of the PCB which allows users to instantly enable a pre-defined CPU overclocking profile with just one click. Users looking to overclock their memory can adjust their settings manually, or simply enable the X.M.P profile within the memory settings subsection of the firmware.
Before we dive into the overclock testing, we did experience the following issues when overclocking using this board:
- The CPU-Z monitoring utility and the GIGABYTE EasyTune software is reporting incorrect voltage values
- We experienced abnormal overclocking stability at usually reliable CPU Core Ratio and CPU VCore settings; the first board I have tested at AnandTech that has required extensive changes in the firmware in regards to power settings.
- Unreliable CPU VCore monitoring on the only accurate sensor without load-line calibration adjustment and VRM setting changes in the firmware.
How to Find the Correct CPU VCore Voltage on the GIGABYTE Z390 Aorus Master
To find the sensor with the most accurate CPU Vcore voltage readouts, first users will need to download HWINFO. The HWINFO utility provides very extensive information on various readouts including the temperature from various sensors including thermal monitoring points, chipsets and controllers, and voltages. To find the correct voltages for the GIGABYTE Z390 Aorus Master, the CPU VCore can be located under the VR VOUT value under the IR35201 section.

The IR35201 is the 8-channel PWM controller of choice on the power delivery of the Z390 Aorus Master and aside from being the most accurate for monitoring the CPU VCore voltage, is also the most obvious one as the IR35201 handles the current going directly from the power inputs into the CPU itself. Users can download HWINFO at this link.
Overclocking Methodology
Our standard overclocking methodology is as follows. We select the automatic overclock options and test for stability with POV-Ray and OCCT to simulate high-end workloads. These stability tests aim to catch any immediate causes for memory or CPU errors.
For manual overclocks, based on the information gathered from the previous testing, starts off at a nominal voltage and CPU multiplier, and the multiplier is increased until the stability tests are failed. The CPU voltage is increased gradually until the stability tests are passed, and the process repeated until the motherboard reduces the multiplier automatically (due to safety protocol) or the CPU temperature reaches a stupidly high level (90ºC+). Our test bed is not in a case, which should push overclocks higher with fresher (cooler) air.
Overclocking Results
For the purpose of overclocking our i7-8700K on the Z390 Aorus Master, we changed the following settings which generally on other boards we've tested, have been left completely untouched. It's not unusual to disable the C-states and alter power settings when overclocking.
- CPU VCore Loadline Calibration - High
- VAXG Loadline Calibration - High
- PWM Phase Control - Perf
- VAXG Phase Control - High Perf
- All C-States - Disabled
- EIST (Intel SpeedStep Technology) - Disabled
- Race to Halt - Disabled
- Voltage Optimization - Disabled
- Intel Speed Shift - Disabled
- Enhanced Multi-Core Performance - Disabled
The GIGABYTE Z390 Aorus Master has three different predefined overclocks and modes to choose from; Eco, OC mode and AutoTuning. The Eco mode ran our i7-8700K with 4.7 GHz on one core and achieved a max VCore of 1.115 V with an average of 1.137 V, with a slightly lower power draw overall than stock settings, and a with a little less performance in POV-Ray. The OC mode was slightly different with all cores set to 4.7 GHz which meant a higher overall power draw with a maximum figure of 218 W at the wall. This was due to the maximum CPU VCore at a load of 1.361 V, with an average of 1.351 V. With the AutoTuning mode, the firmware of the Z390 Aorus Master automatically determines which the best settings are suitable for the components and cooling selected. Once activated through the EasyTune software, it cycled through system resets and ran automatic stress tests are different frequencies to find the most stable. Our system managed to achieve 5.0 GHz with AutoTuning, but upon running POV-Ray, it crashed immediately. This means that the overclock the firmware spent 5-10 minutes preparing for us, wasn't actually stable and shows that the Z390 Aorus Master could do with a little work on that front.
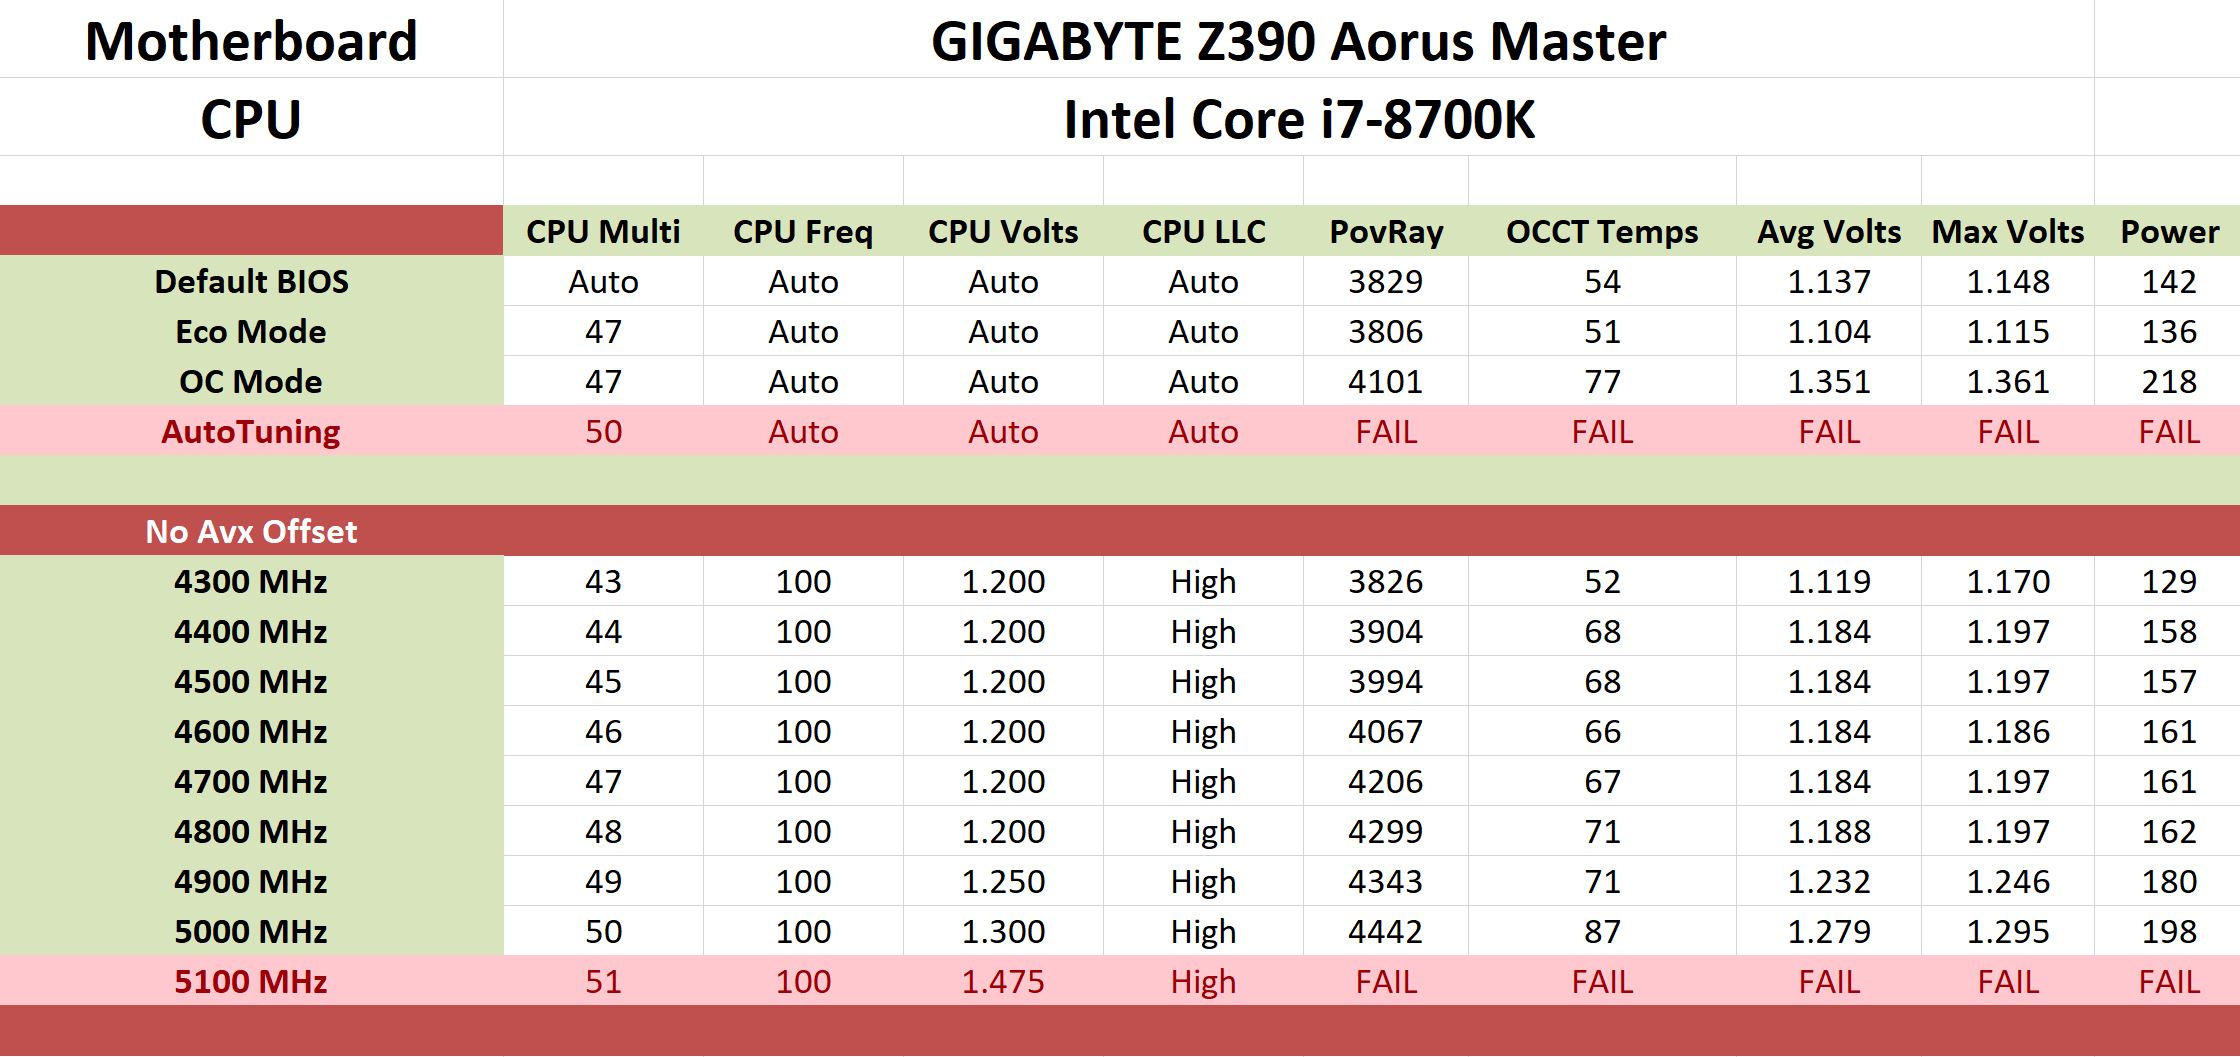
Performing manual overclocks on the GIGABYTE Z390 Aorus Master with our i7-8700K once we changed a plethora of settings was actually quite pleasing. We managed to achieve a maximum stable overclock of 5.0 GHz at 1.30 V on the VCore with the CPU LLC set to the high setting. Even with up to 1.475 V on the CPU VCore, 5.1 GHz was unstable, but one thing we did note was a consistent increase in POV-Ray performance from 4.3 GHz up to 5.0 GHz. Total power draw was consistent with what is expected compared to previous models tested and 1.30 V on the VCore for our test-bed i7-8700K is pretty impressive.
It's clear that the GIGABYTE Z390 Aorus Master has plenty of potential with the 6+2 power delivery and after the curfuffle and rigmarole with the default power settings, overclocking performance is good. As long as users remember that the VR VOUT sensor under the IR35201 section in the HWINFO monitoring utility is the most accurate sensor, overclocking can be made a lot easier and it would be nice to see GIGABYTE take note and rectify this for the future, especially on a model with a price tag of $290.


36 Comments
View All Comments
Timur Born - Thursday, March 21, 2019 - link
I have to keep ring ratio below x46 to stay stable overclocked.gavbon - Friday, March 22, 2019 - link
I tested DPC Latency on the latest 2 revisions (F7 and F8e). Retested the full suite on both revisions and didn't notice any significant differences. GIGABYTE has good hardware, just tetchy firmwareTimur Born - Thursday, March 21, 2019 - link
I am confused by the supposed usage of "DPC Latency Checker" on Windows 10?! Do you use LatencyMon or how do you make it work?gavbon - Friday, March 22, 2019 - link
We use LatencyMon :)Timur Born - Saturday, March 23, 2019 - link
I guessed so, which means this is just a typo in the text. Do you report maximum or average latencies and is this using the "Balanced" or "High Performance" Windows power profile?Gasaraki88 - Friday, March 22, 2019 - link
That gaming performance is pretty bad. A difference of 10+ frames between the best and worst board (this one) is a big different when you have the same cpu, gpu, and memory.IndianaKrom - Saturday, March 23, 2019 - link
I have this board and a 9900k, and the gaming performance is nothing like what they are getting in benchmarks (even my 7700k system was doing better than that). I wonder if it isn't because the BIOS defaults for this board actually respect the Intel turbo boost spec and will dial down the CPU clocks/energy back down to the rated TDP after a few seconds of load. I went in to BIOS and deliberately set P1/P2/P3 turbo power states to unlimited watts/duration so my CPU will turbo at its highest possible bins forever as long as the thermals are in check, but if you don't do that the board will clamp the CPU to 115w after 10 seconds and 95w after like 30 seconds IIRC.Arbie - Friday, March 22, 2019 - link
Even if the company's legal name is in all caps, that's just marketing hype and hard on the reader's eyes. I wouldn't indulge them by repeating it - which does them no favors anyway, as it looks gimmicky and cheap.WickedMONK3Y - Monday, March 25, 2019 - link
The performance of this board seems to vary greatly depending on the CPU used, and the BIOS revision that is on the board. F5 and F6 seem to be the best BIOS versions so far, I am running mine with F6 and a 9900K, and stuck in an 8700K to check these numbers and my performance was higher, but my girlfriends PC is running the same board on F8 with a 9700K and when I put in the 8700K the numbers are close to these. Scary how much a BIOS can affect performance on these boards.VoodooRufus - Wednesday, March 27, 2019 - link
Beefy power section, ESS Sabre DAC, gold plated audio connectors, dual 8-pin CPU power, and front USB-C. Very good aesthetics, integrated IO plate. VRM's run cool with minimal airflow. I love my Aorus Master. Stable and easy to tune. I mostly hate my Z68X-UD7-B3 in comparison.