Overclocking The AMD Ryzen APUs: Guide and Results
by Ian Cutress & Gavin Bonshor on April 16, 2018 2:30 PM ESTHow to Overclock With ASUS UEFI BIOS
Depending on which ASUS motherboard that is being used, whether that’s one such as the ASUS Prime X370-Pro (featured here) or a more gaming focused Republic of Gamers branded option, the only real differences come through the GUI and theme. The settings themselves remain the same and the ASUS BIOS offers both basic and advanced modes.
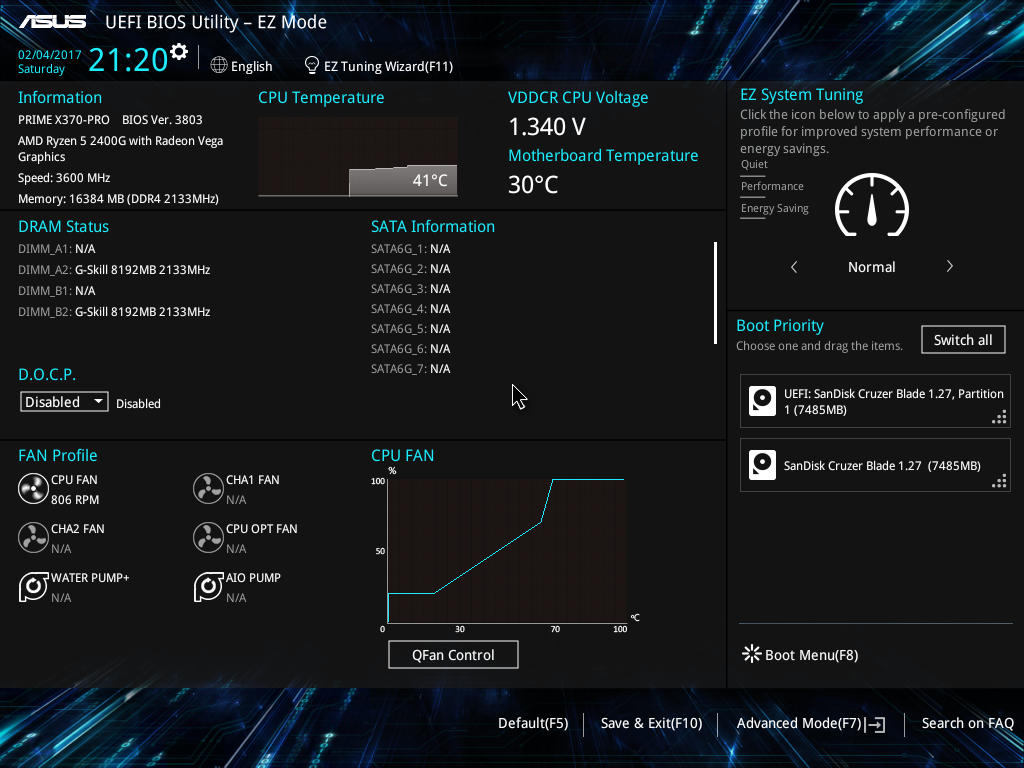
After entering the BIOS, the basic mode splash screen will appear. Here users can enable XMP (DOCP, Direct Overclock Profile), adjust fan profiles, and apply some 'EZ Tuning' for automatic overclocks that can be hit or miss. Pressing F7 enters the advanced mode.
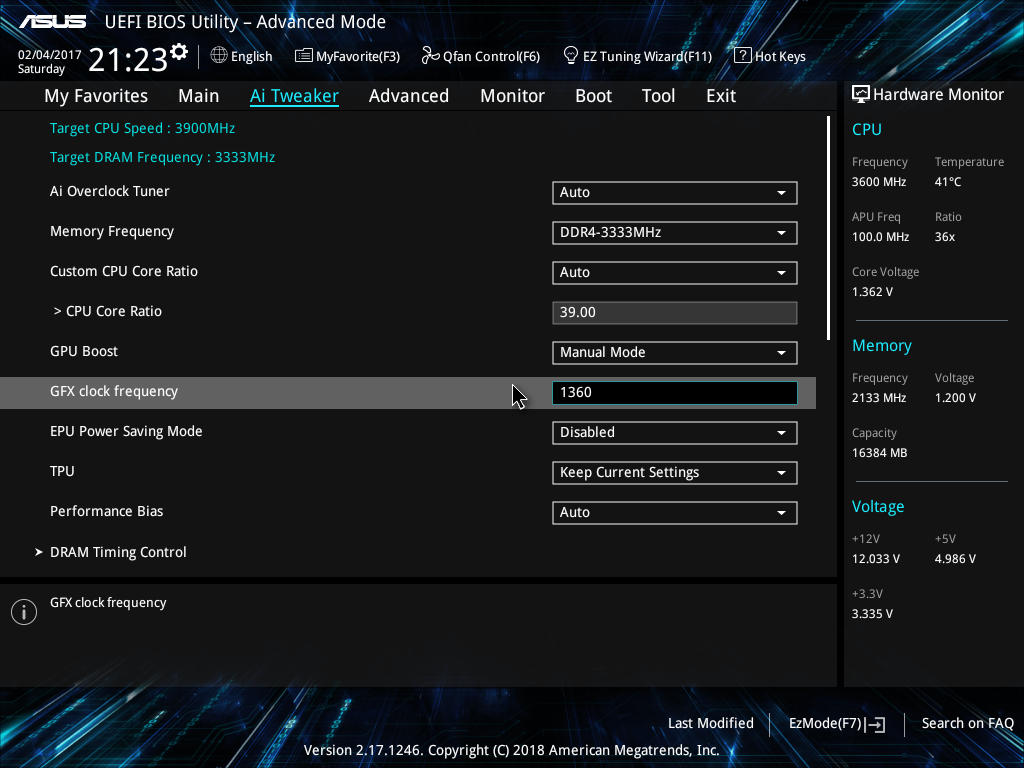
Once into the advanced section of the BIOS, all the overclocking related settings can be found in the AI Tweaker section. One interesting thing that was found within this particular BIOS was when XMP was enabled, it would remove access to the iGPU settings. Unfortunately we weren't able to determine if this was an isolated issue or whether it’s a more widespread across the entirety of the ASUS AM4 board range.
Changing the 'CPU Core ratio' to 39.00 will translate to 3.9 GHz. Due to the removal of the iGPU options when XMP enabled, the memory was changed manually within the BIOS; the easiest way to do this is to set the frequency and leave the sub-timings on auto, then manually adjusting the sub-timings to fit the module's rating.
To open up the integrated graphics options, setting the GPU Boost option to manual mode is required. This gives the GFX clock frequency option (note the lack of capital letters, perhaps this option was rushed in), while the voltage options are further down the list.

All the the voltage options further down. ASUS makes it a little confusing here, by not having the standard names for a few of these options - ASUS calls the CPU core voltage 'VDDCR CPU Voltage', for example. In each case for this sub-section, the manual mode option needs to be selected to offer the manual input for voltages. It is worth remembering to set the DRAM voltage if the timings were set manually.
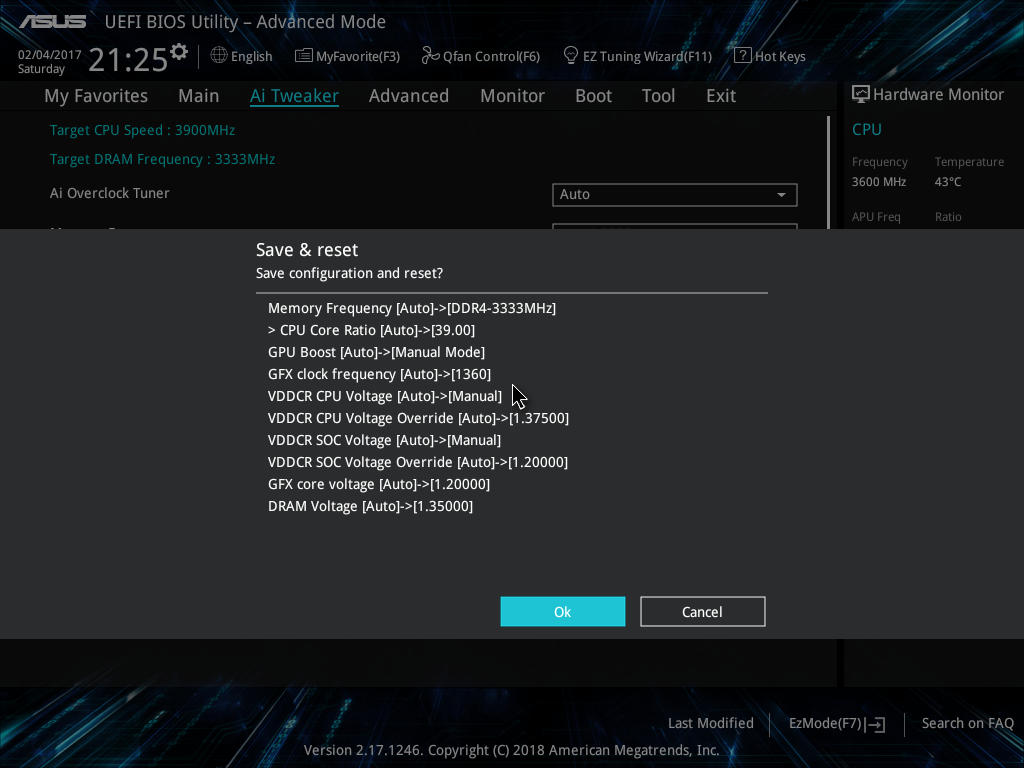
Once all the settings are entered, pressing F10 will bring up the save and reset box where the user can evaluate and comb over the changes made.
Many thanks to Lawrence Timme - due to not having an appropriate ASUS AM4 motherboard to hand (we somehow ended up with no ASUS boards with video outputs), he kindly provided the screenshots for this section.


63 Comments
View All Comments
0ldman79 - Wednesday, April 18, 2018 - link
Setting the multiplier manually automatically disables Cool'n'quiet, can it be reenabled afterwards while keeping the higher multiplier?I plan on overclocking mine the same as my FX 6300, keep Cool'n'quiet, keep turbo and just push it all higher. I like the idle dropping down to nothing and I prefer to keep my turbo so single threaded apps (still have a few) get everything they can possibly get.
gavbon - Wednesday, April 18, 2018 - link
You can re-enable it no problem, I only found it to automatically disable Cool'n'Quiet on MSI boards, there's absolutely nothing stopping you enabling it again :)YoloPascual - Wednesday, April 18, 2018 - link
Should have oced the gpu to 1600 instead of the cpu.krazyfrog - Wednesday, April 18, 2018 - link
Image compression is making my eyes bleed.PeachNCream - Wednesday, April 18, 2018 - link
The images in the article are fine and your eyes are working well enough for you to broadcast your whining to the rest of the world. Besides, the value in the article is in the written content, not the pretty pictures. If you want pictures as the primary content delivery mechanism, go buy a bunch of pre-literacy board books like The Very Hungry Caterpillar.dromoxen - Friday, April 20, 2018 - link
thess were my exact thoughts as many people here ... underclock the CPU and overclock the GPU for gaming (spend your heat budget on the GPU) and then on other tasks overclock the cpu and underclock the gpu) BUT I expect this cannot be done on one windows session . Actually using ryzen Master , it probably could . But youd need some scripts to o switch.If i ever take the plunge (waiting for 4000mhz dram) will examine this...
John_M - Friday, April 20, 2018 - link
A few things trouble me about this article.Firstly, the charts for 7-zip and 3DPM are incorrect. If lower really is better, then they show the stock 2200G outperforming the overclocked 2400G. If they are so blatantly wrong, then can the others be trusted?
Secondly, DDR4 defaults to 2133 MHz (2 x 1066) if you "forget" to enable XMP, not 2400. This is not a good representation of stock RAM frequency. I would have preferred to see you set 2933 MHz, as specified by AMD.
Thirdly, the Thermaltake Floe Riing 360 is an unrealistically expensive choice of cooler for either of those processors. Who spends more on the cooler than on the processor?
Fourthly, you can overclock the iGPU and adjust the SoC voltage in the ASRock UEFI BIOS, but it's rather hidden away!
cpupro - Saturday, April 21, 2018 - link
ASUS have the best looking UEFI.Galatian - Wednesday, April 25, 2018 - link
Thanks for the test, but I hope you will test all parts separately? I mean the FPS increase probably stems from the huge increase from the faster RAM, but you make it sound like the CPU and GPU overclock take equal parts.ballsystemlord - Wednesday, April 25, 2018 - link
Where did you get your data from when you wrote?"ed: I'm in the sliding scale camp, for what it is worth. I find it amusing to note that DRAM bit-errors, unaffected by overclocking, can happen on the scale of one per GB per four years (or less). That's about a worse case scenario, but it translates to about one bit-error per three months in a system with 16GB. that is something that can't be controlled by stability testing. Hopefully it occurs in DRAM that isn't being used."
Thanks!