It's An RGB Disco: The GIGABYTE X299 Gaming 7 Pro Motherboard, Reviewed
by Joe Shields on January 26, 2018 8:00 AM EST- Posted in
- Motherboards
- Gaming
- Intel
- Gigabyte
- AORUS
- RGB
- X299
- Basin Falls
- Skylake-X
- Gaming 7 Pro
BIOS
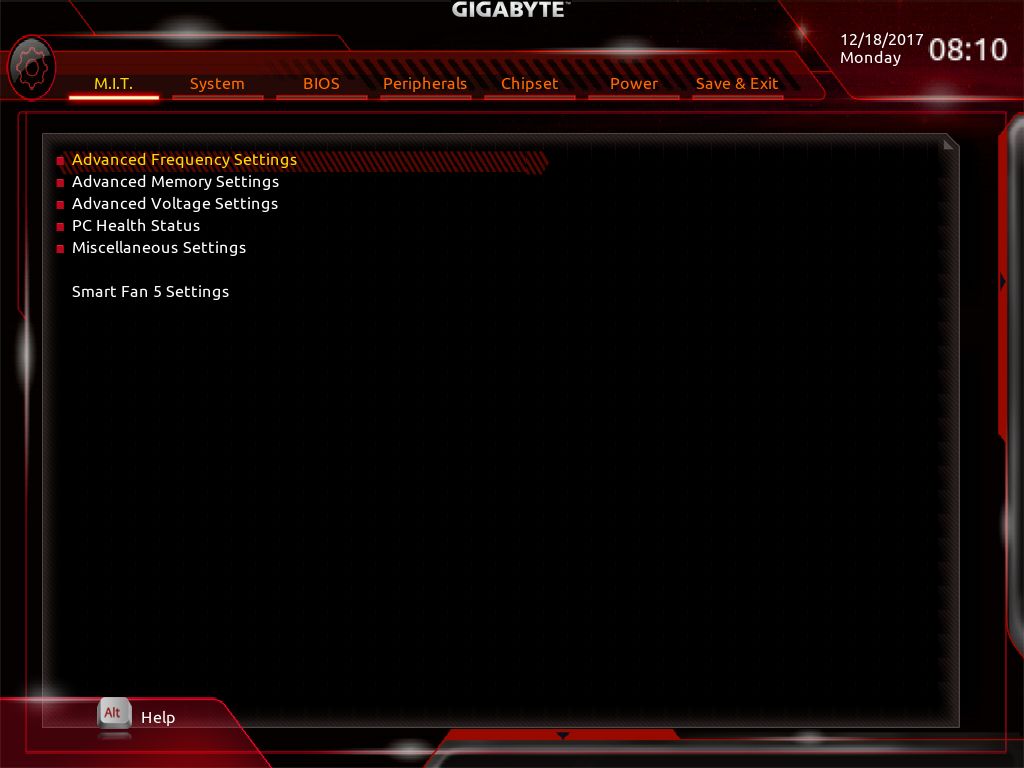
Our first glimpse of the Gigabyte BIOS brings us to the "Classic" style BIOS. Upon entry, useres are placed in the M.I.T (Motherboard Intelligent Tweaker) section. This fairly uninformative first screen is where users will dive into system changes from frequency, memory, and voltage settings, to PC Health Status and Smart Fan 5 settings. Other motherboard manufacturers boot into a status screen-like environment, with system information on it, or into an Easy Mode first, but this board does not and drops the user right in the middle of it.
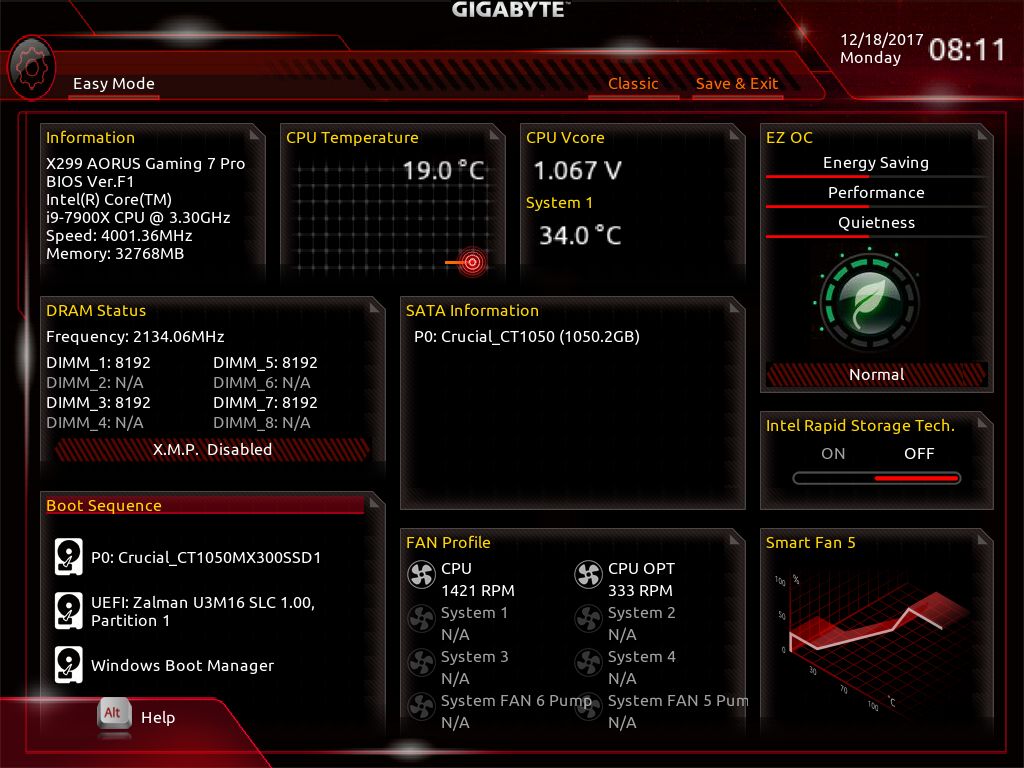
The BIOS still has an easy mode, via a mouse click on the bottom menu or by pressing F2. With this, we are now able to see system information from temperatures, voltage, DRAM Status, Boot order, fan profiles, and an area to adjust attached fans via Smart Fan 5 options.
Within Easy Mode is an EZ OC section with settings for Normal (default), Performance, and Saving. The performance mode raises the turbo boost clocks a couple of bins on each set of cores. So two threads will run at 4.7 GHz (from 4.5), While all core boost is raised to 4 GHz.
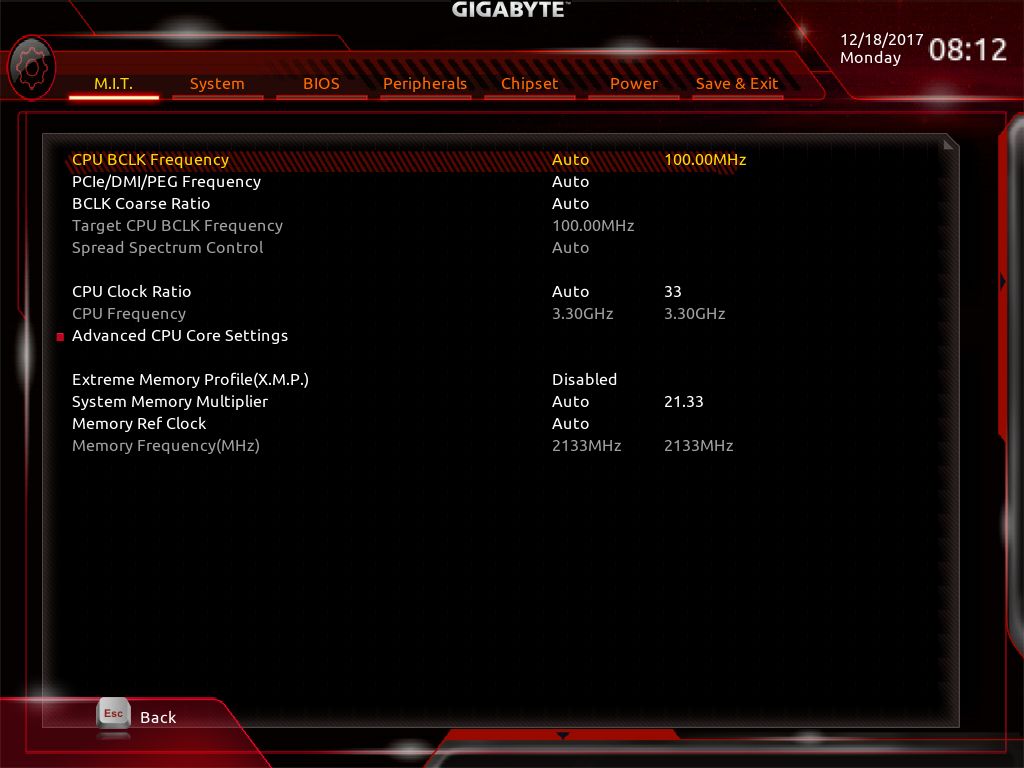
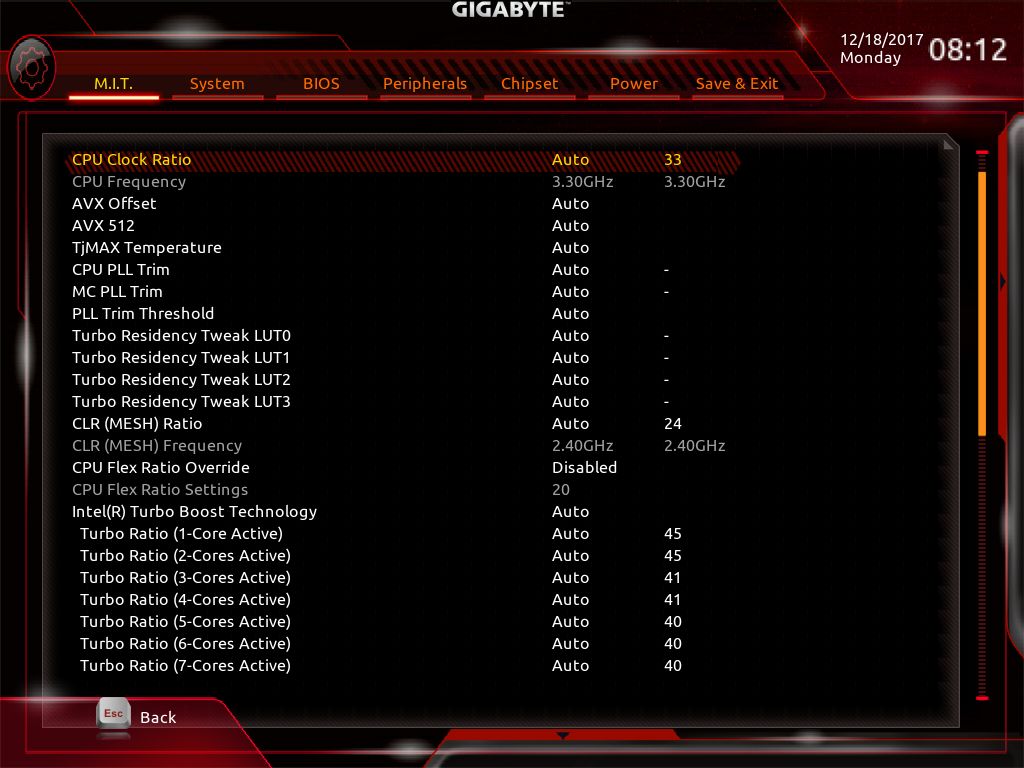
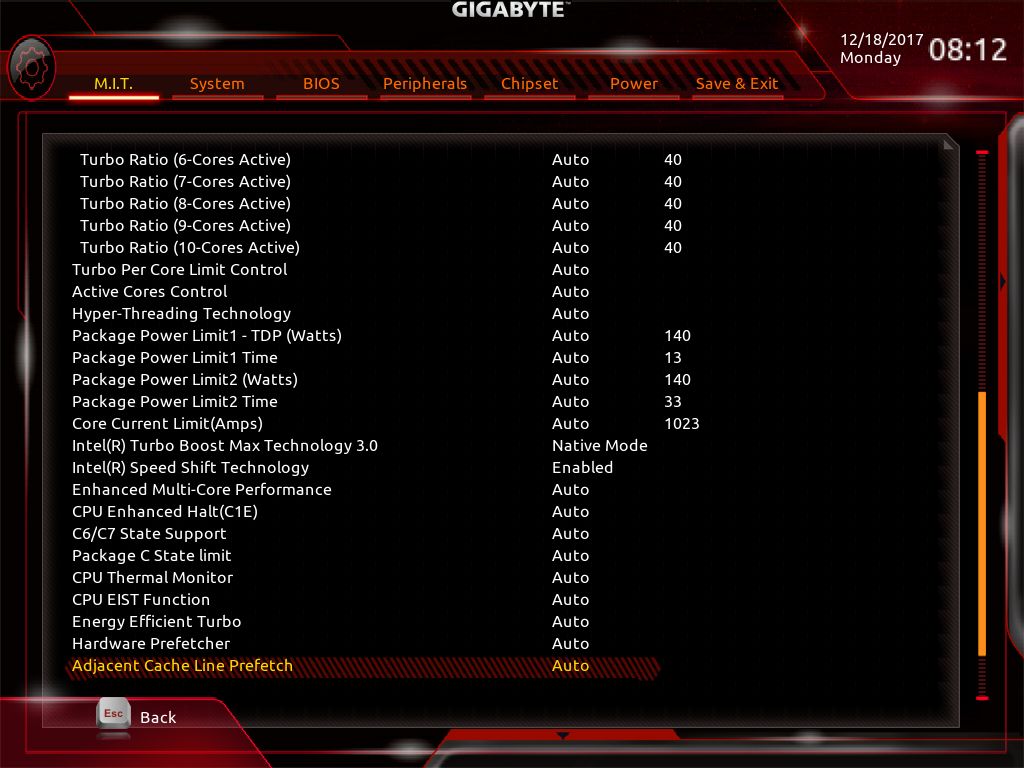
Back into the classic mode, and inside the Advanced Frequency section are options to edit BCLK, CPU and Memory Multiplier as well as XMP settings. Inside the Advanced CPU Core settings are more options such as per core overclocking, AVX offsets, as well as power limit, C-State, and other CPU adjustments. While most of what is needed here on this screen, I would have liked to see voltage adjustments here as well so it is a bit easier to adjust everything from one screen.
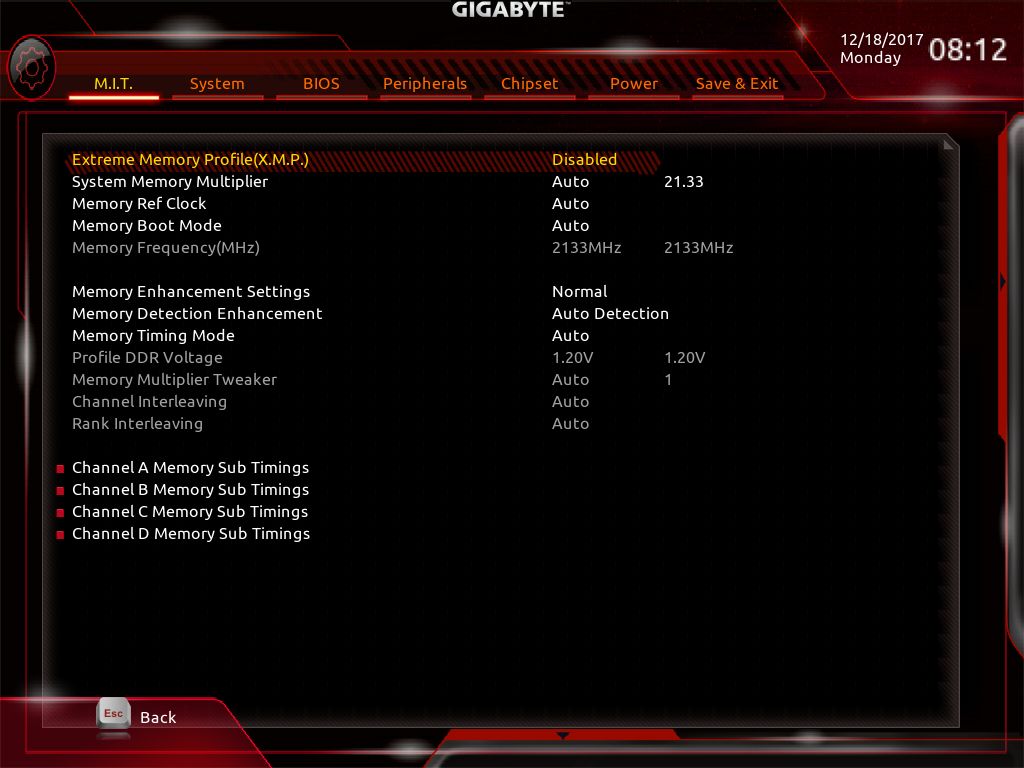
Within the Advanced Memory Section are all the options needed to adjust memory. We again see the XMP option and memory multiplier but now it is surrounded by other options for memory timings/sub timings adjustments and memory enhancement features.
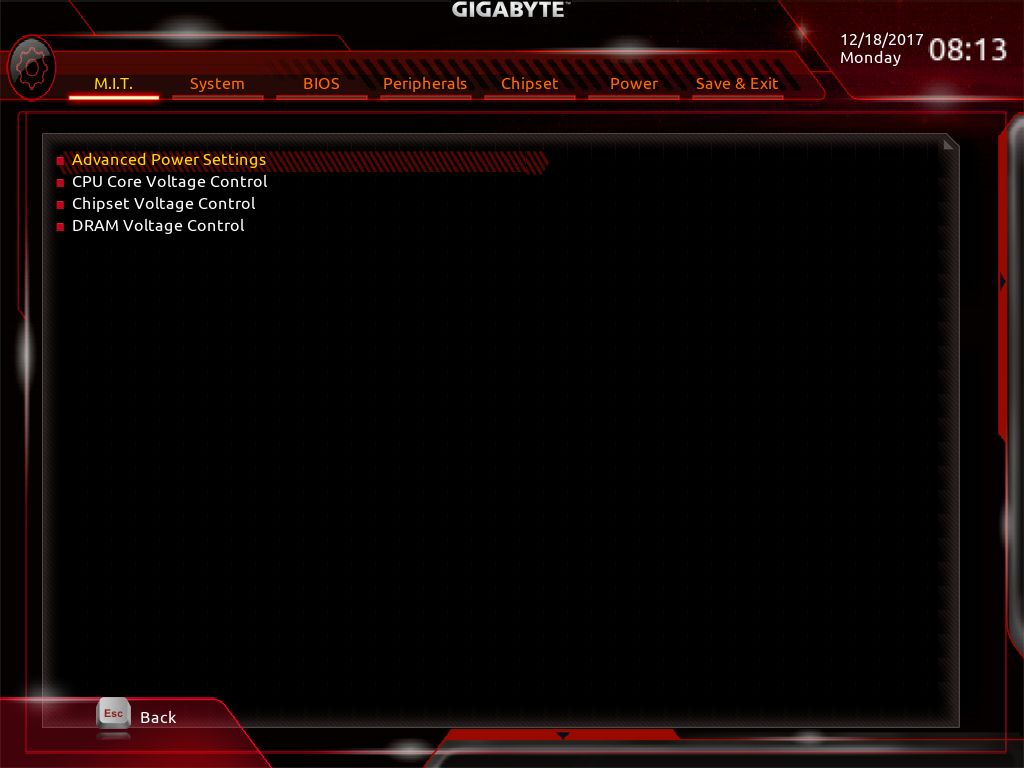
Once in Advanced Power settings, we are greeted by another set of sub-sections for CPU Core, Chipset, and DRAM Voltage control. The Advanced Power Settings sub-heading is where users will find LLC control if needed. Each section handles its own domain with the Core Voltage controlling VCore, Mesh, VRIN, VCCIO, and PLL voltages for the CPU. The Chipset heading has one option in it for the chipset voltage (PCH Core) while the DRAM Voltage section has options for each channel and its termination voltage. This is a section I would like to see condensed into one for ease of use. Users shouldn't have to have a section for each voltage/domain.
The System Section across the top holds information about the board and its BIOS version, System Date/Time, and default language.

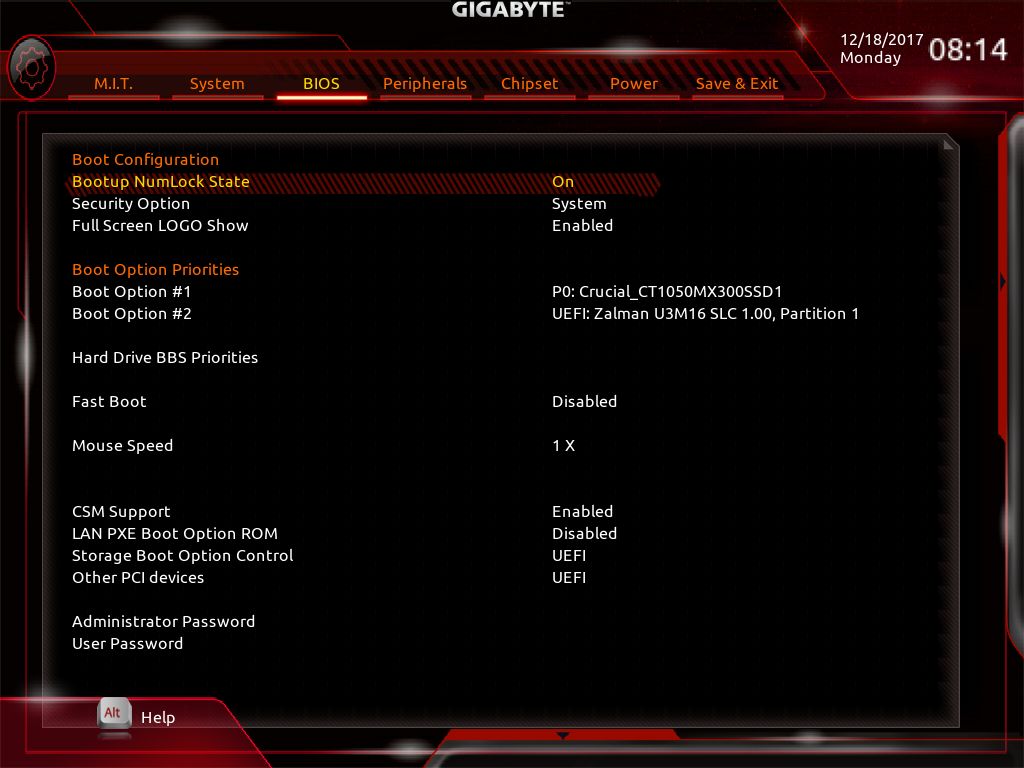
The BIOS heading supplies users with information on boot such as displaying the logo, boot options, fast boot, and other boot-related functions including Fast Boot and PXE boot among other boot-related options.
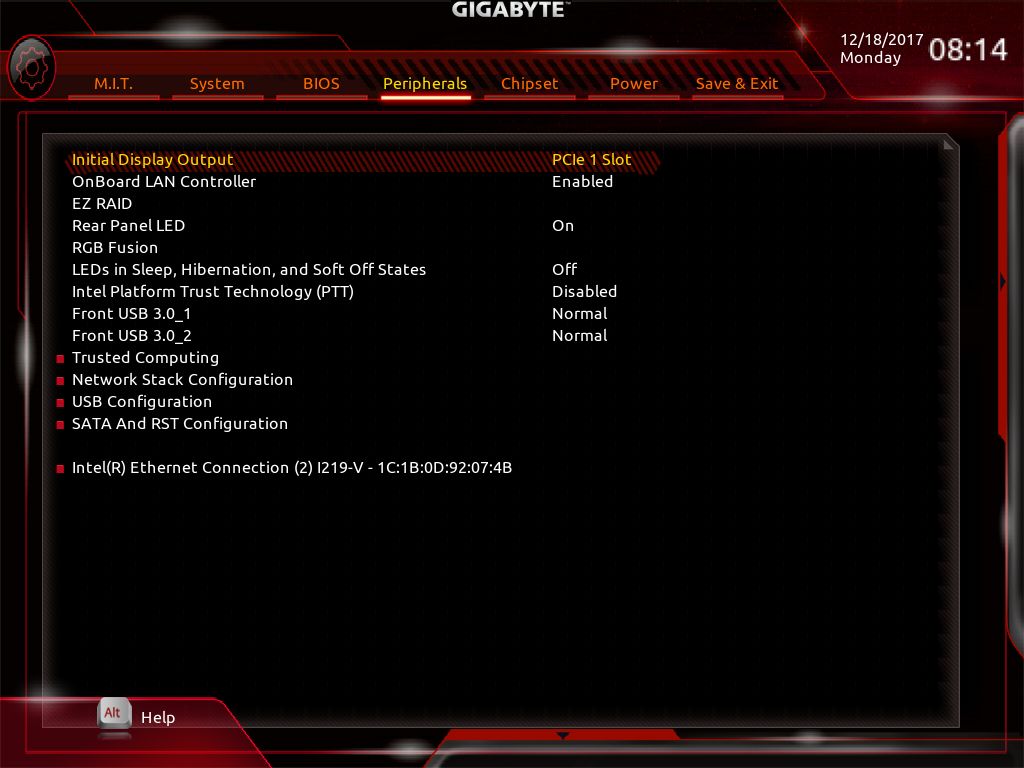
The Peripherals section is where adjustments to USB, SATA, the LAN Controller and Network Stack, and LEDs are found. These modes can be changed or enabled and disabled from within this section.
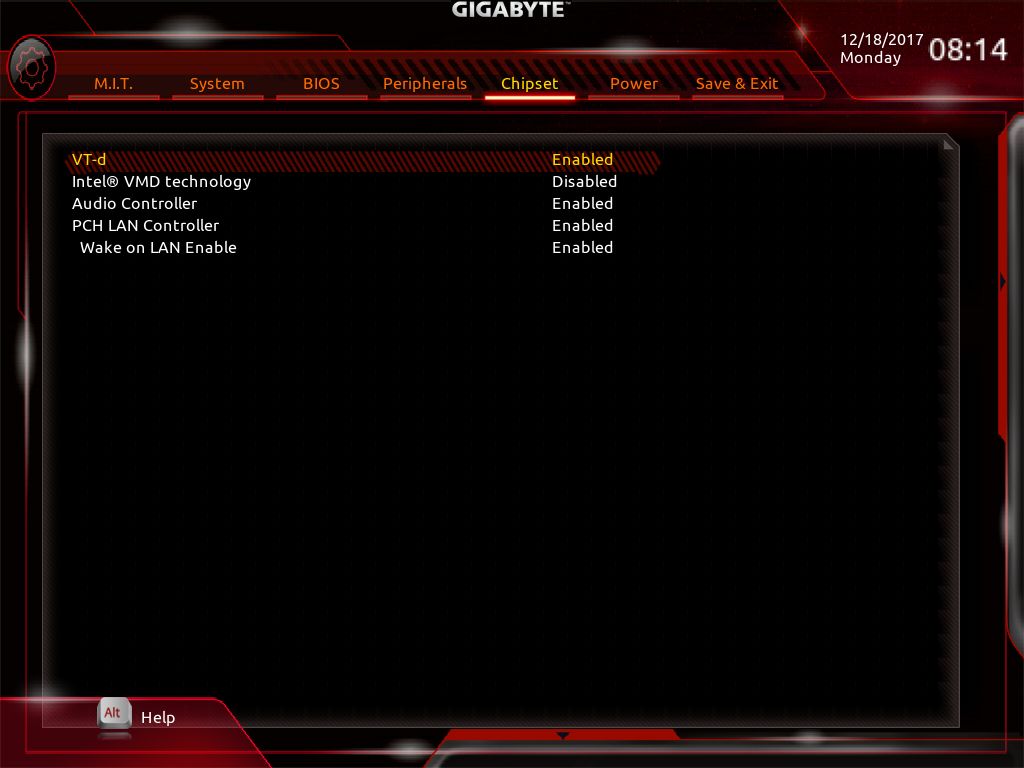
The Chipset section users will find controls for VT-d and VMD technology as well as the audio and PCH LAN controller in case those needed disabled.
The Power Section is where users have control over anything power on/off related including adjustments for how the power button behaves, and what the PC will do after power loss (AC BACK).

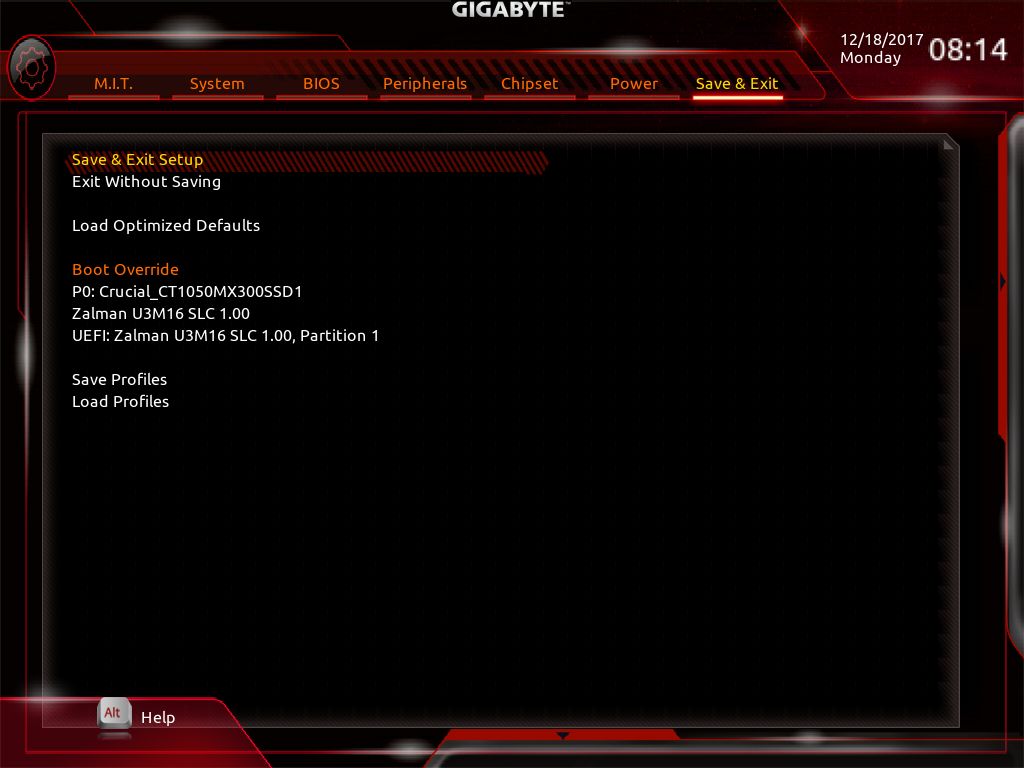
The Save and Exit Section is where users are able to load optimized defaults, override the set boot device (for one reboot), as well as an option to save and load BIOS profiles.
All BIOS screens are found in the gallery below.


Software
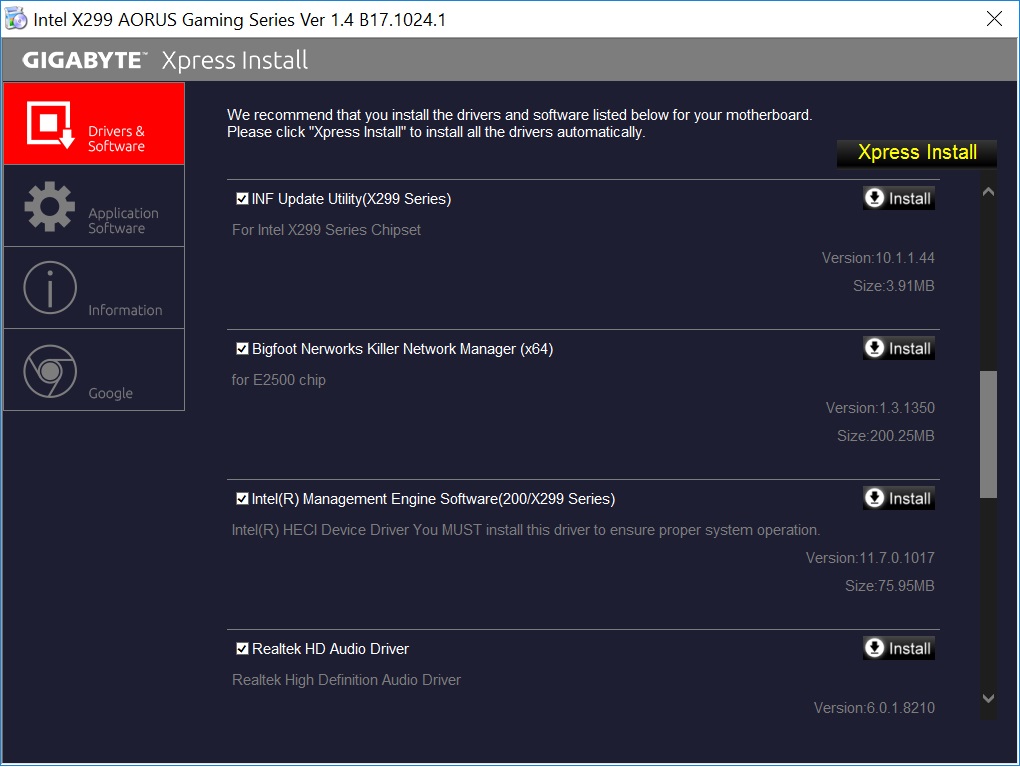
The driver disk includes all the drivers needed and software which GIGABYTE provides. Users are able to 'Xpress Install' all or select each item to be installed. All drivers were installed from the disk successfully. Also included on the disk are additional applications including the App Center, a central location for Gigabyte Software, and the dozen or so pieces of software it offers. We have installed the @BIOS software, Easy Tune, Gigabyte HW OC App (phone based monitoring and overclocking), the RGB Fusion application, as well as a Smart Backup program to backup the system in case of failure.
The GIGABYTE App Center is a piece of software designed to organize all the applications they have to offer. There are over a dozen different selections ranging from BIOS flashing, overclocking, RGB LED, and even backups. The App Center runs on startup and is accessible from the tray icons in the bottom right corner. The App Center is a useful place to consolidate the many different programs they offer for this motherboard.

Below is a screenshot of the @BIOS application which allows users to identify the BIOS details such as the version, flash type and size, as well as the vendor. The app allows users to flash their BIOS from a file or pull the latest from the website. I always like to flash the BIOS from the BIOS itself, but, these types of applications have made their way to the mainstream it seems. I was unable to test out the functionality as the board came equipped with the latest (and only) BIOS currently out for this motherboard.

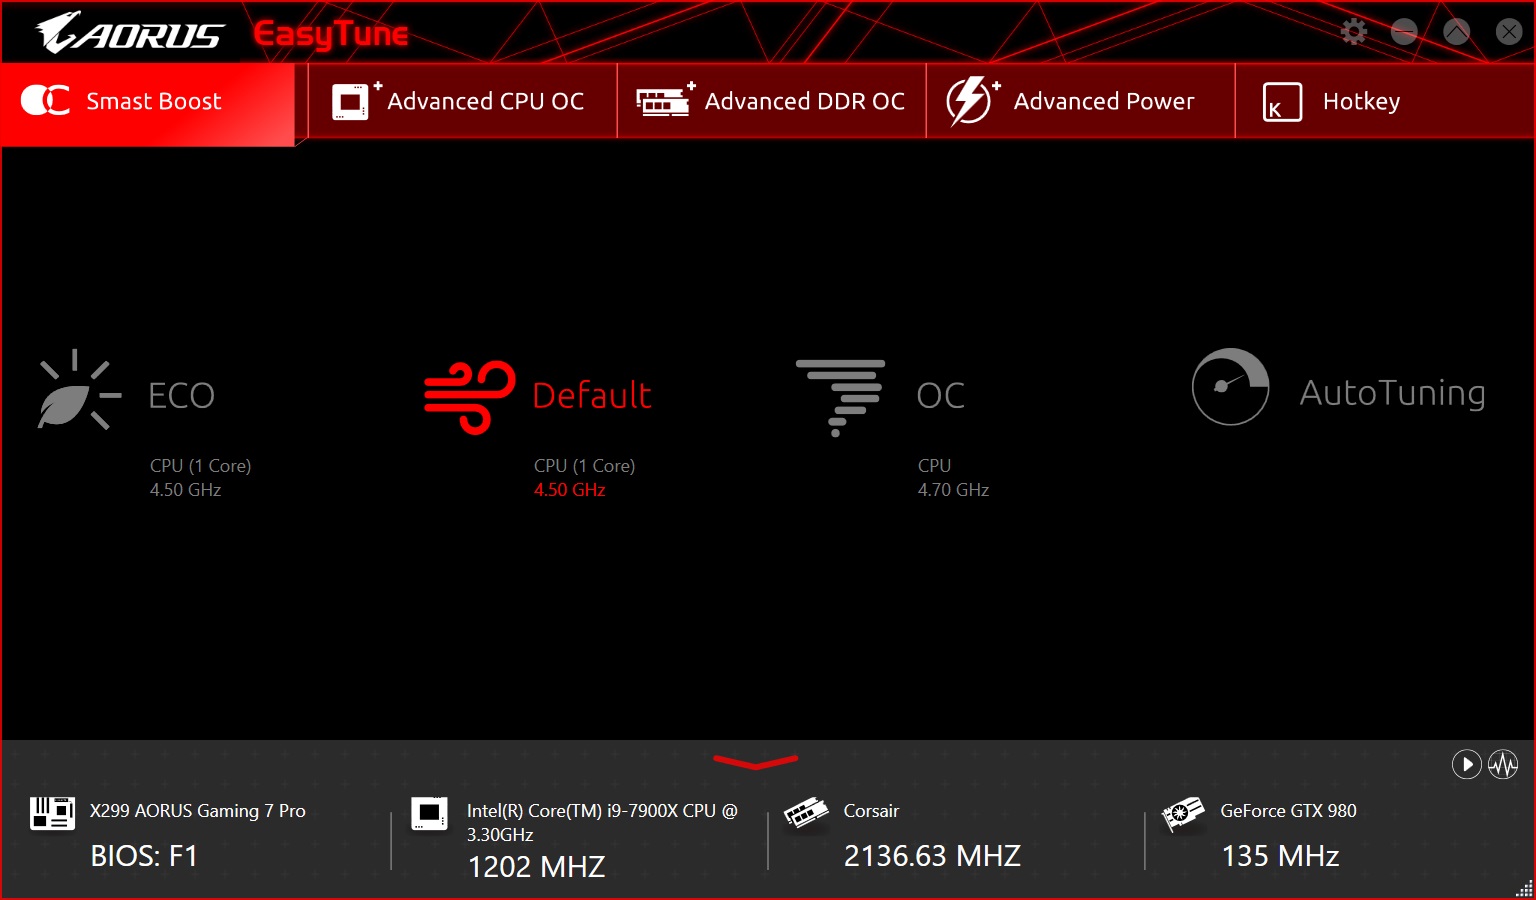
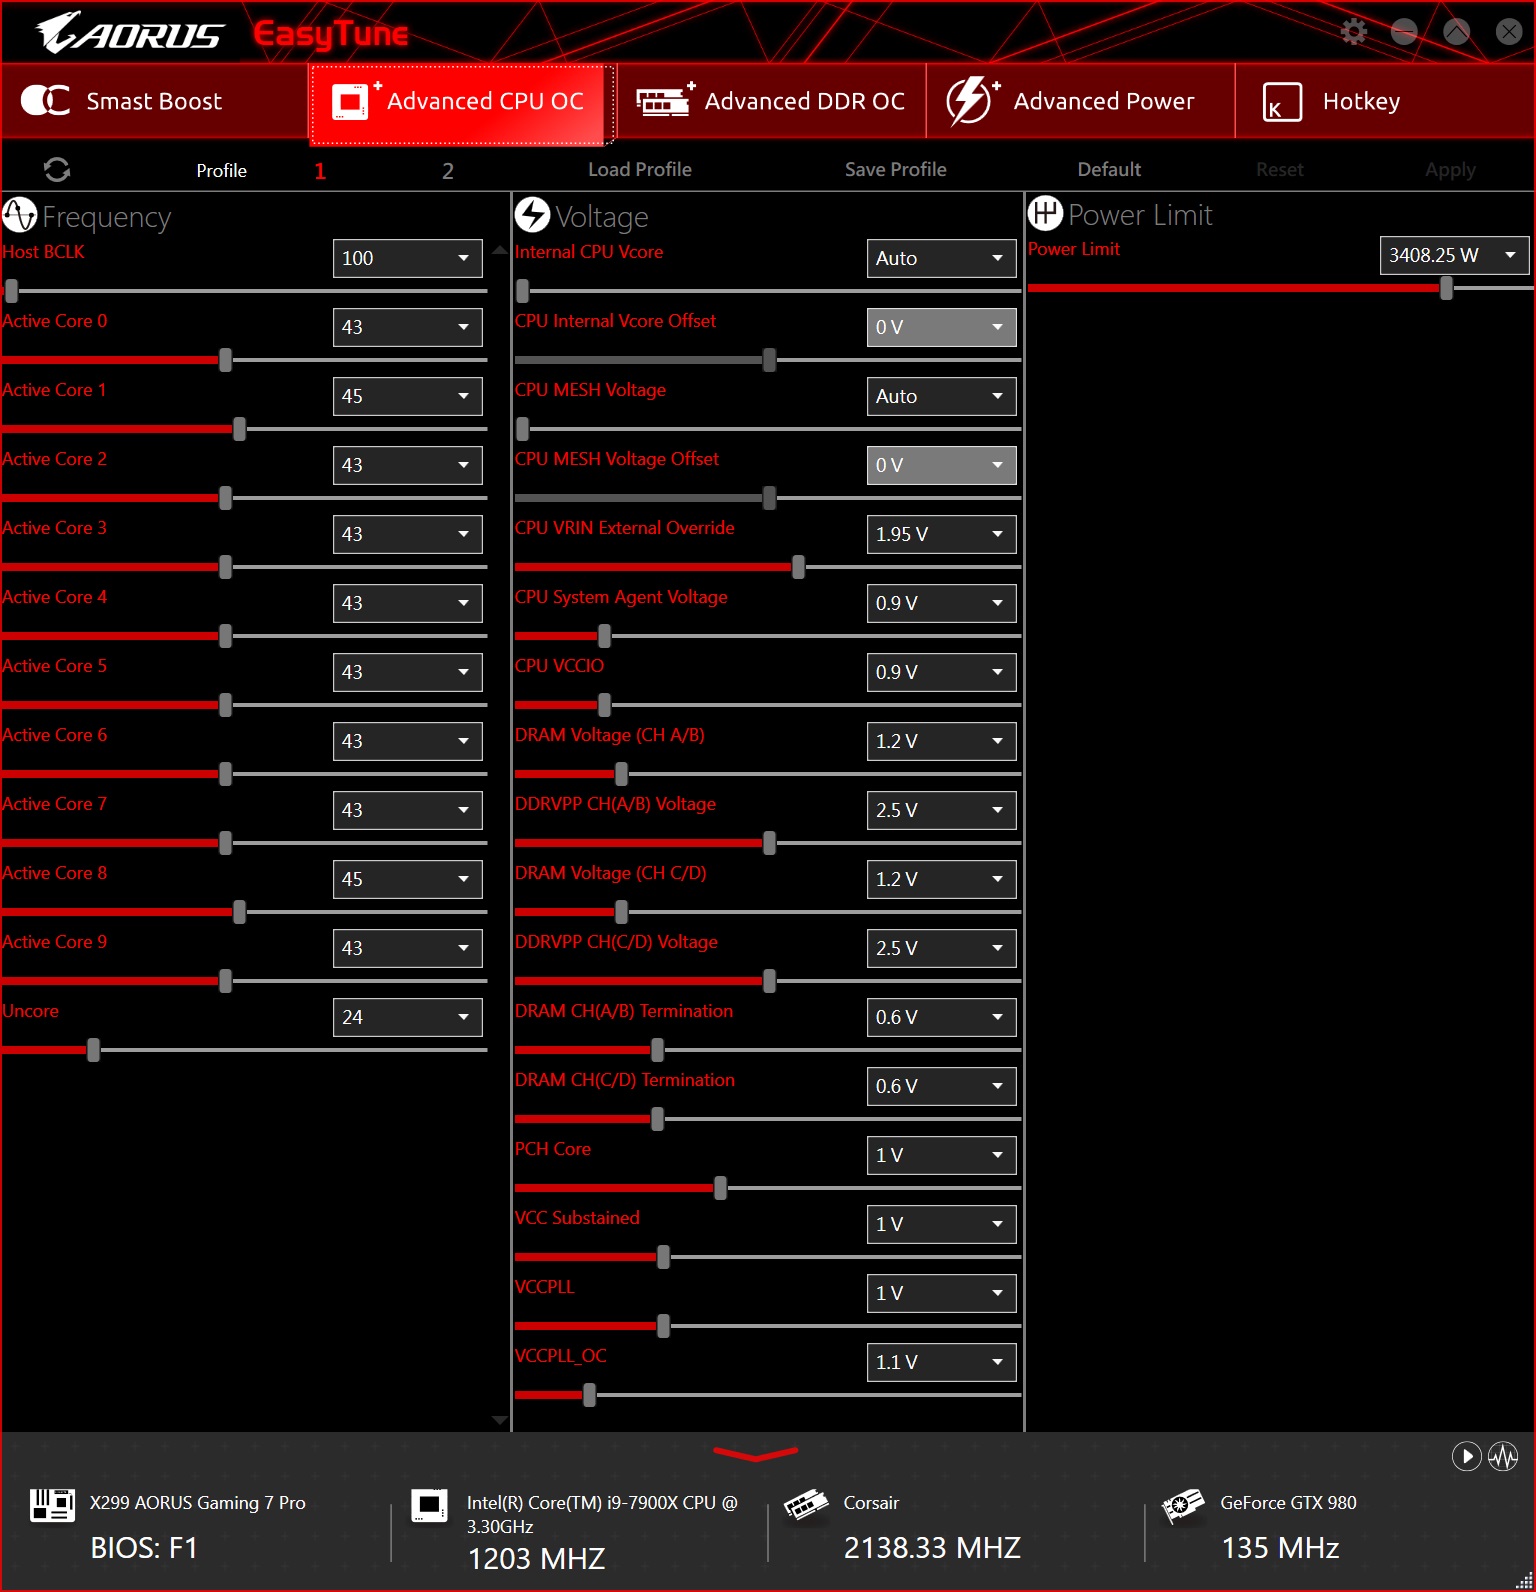
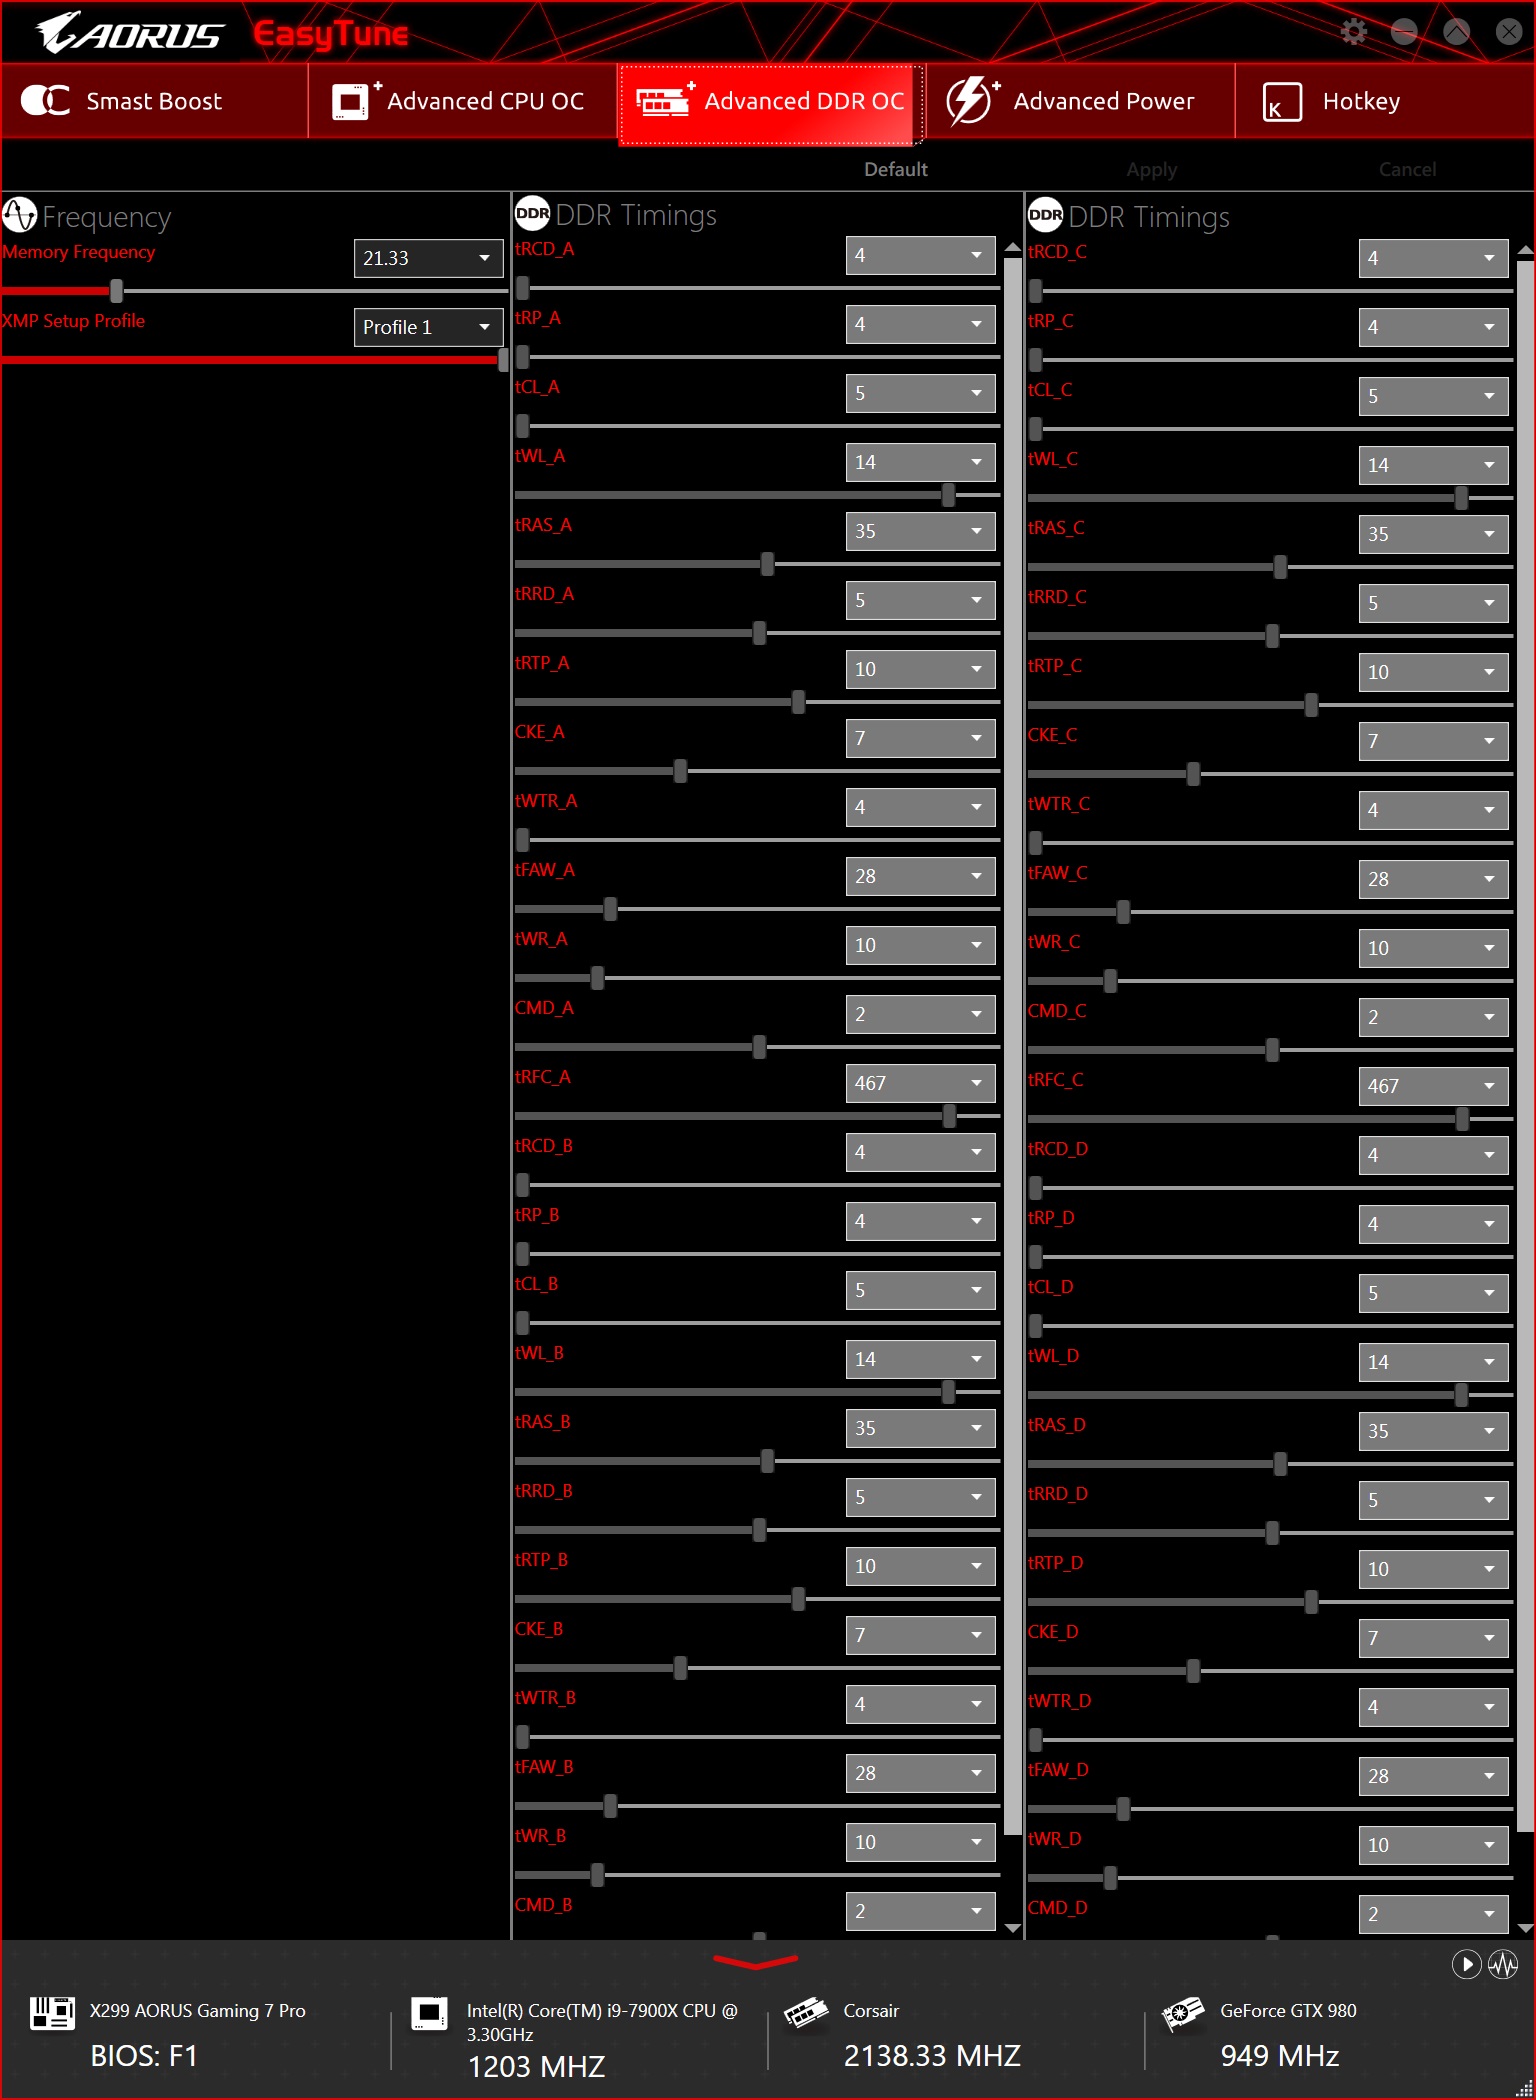
Next is the Easy Tune software, which is GIGABYTE's monitoring and overclocking application for Windows. This software monitors all the major voltages and settings across the bottom and depending on which tab is open, determines what is displayed. In the case of Smart Boost are overclocking it lists preset options for overclocking, as well as an auto-tuning function. The Advanced CPU and Advanced DDR tabs list options for overclocking the CPU and adjusting RAM timings. I did not touch the RAM selections (I prefer to do that from the BIOS) but played with the CPU multiplier and voltage without issue.
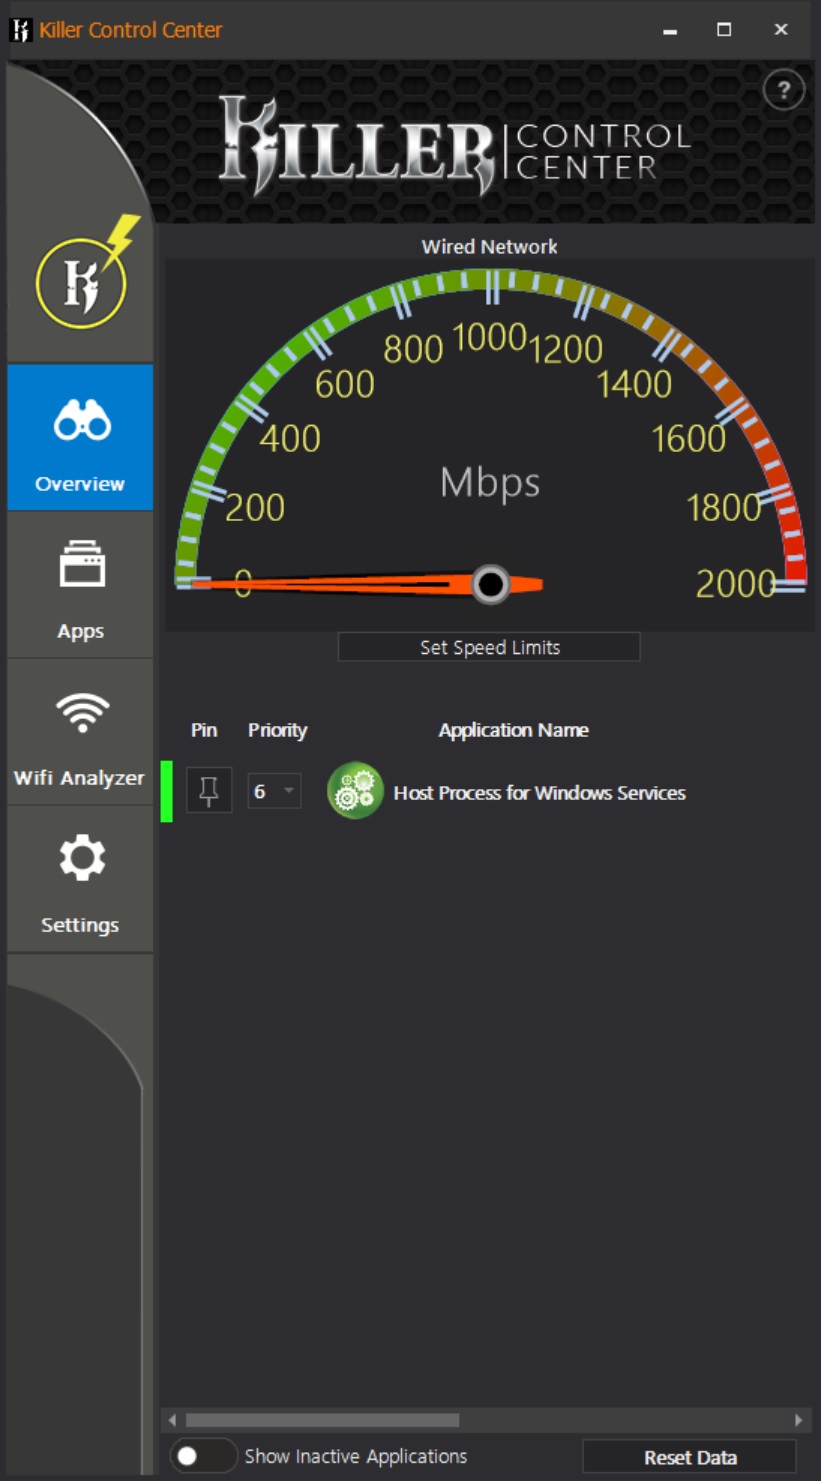
The Killer Control Center app is used to monitor and make changes to the Killer LAN port on the board. It allows to set limits on speed, prioritize traffic to improve latency, and a Wi-Fi Analyzer.
GIGABYTE's take on software control of their RGB LED ecosystem is named RGB Fusion. This application controls how the RGB LEDs act, or react, on the board. Pictured below is the basic tab where we see nine different preset patterns to choose from. The Advanced section gives even finer-grained control over each of the zones while in the Intelligent tab colors can be attached to a number of different events such as CPU temperature or use, CPU fan, via a schedule, and others. RGB Fusion has a lot of options for controlling system lighting and achieving the right lighting scheme for any user.

In addition to the Realtek software for control over the audio, Gigabyte has Sound Blaster Connect to control 3D effects as well as the sound itself through an equalizer. With the BlasterX Experience, users can setup specific sound environments for each activity or game.


29 Comments
View All Comments
dave_the_nerd - Friday, January 26, 2018 - link
What the actual hell?The worst thing about my hobbies are, apparently, the other people who enjoy them.
Lord of the Bored - Saturday, January 27, 2018 - link
Yup, that about sums it up.cbm80 - Friday, January 26, 2018 - link
Disco Stu will overclock you!FreckledTrout - Sunday, January 28, 2018 - link
Why don't we don't see RGB used for actual useful features like color coding with light the back ports like the audio ports etc?Beaver M. - Sunday, January 28, 2018 - link
Or LEDs at the back of the Monitor, changing colors according to the picture displayed.Oh wait, that already exists and is heavily copyrighted, so that only one manufacturer can use it and doesnt want it to take foot in gaming.
Gunbuster - Monday, January 29, 2018 - link
Or even bother to sell a TV in the united states. Thanks Philips...Gunbuster - Sunday, January 28, 2018 - link
Aorus bro eagle is still not animated in LED lifting a dumbell...BenJeremy - Monday, January 29, 2018 - link
Just say no to X299's VROC scam. Intel has made a mess of its support for M.2 NVMe RAID-0 arrays, and boards built on this chipset are a hot mess. Even with the "proper" VROC key (assuming you can get one), you'll find that Intel LIED about supporting non-Intel NVMe storage for bootable RAID arrays.It pains me to say that... I've been an Intel fan for many, many years and was looking forward to seeing their RAID solution optimized for NVMe, but motherboard manufaturers rushed out motherboards last year that linked M.2 slots to DMI PCI-e lanes (chipset, not direct to CPU), and hampered the whole implementation with crappy BIOS software. The Asus Hyper-X M.2 card, that works well with non-Asus AMD-based motherboards fails to work on these Gigabyte motherboards, too...
Maybe you all don't care about getting 20GB/sec throughput on your bootable storage, but if Intel is mucking up and outright lying about this, how confident can you be about the rest of their features?
wolfman3k5 - Thursday, April 26, 2018 - link
I don't know exactly how GIGABYTE releases motherboards, because it seems that they keep every model for a very short time in production. While I can't find the X299 Designare EX or the Aorus Gaming 7 Pro anywhere in stock, I have found the GIGABYTE X299 Aorus Gaming 9 for sale on eBay: https://www.ebay.com/itm/173287187006 - and the price seems to be pretty good.