ASRock X99 OC Formula Motherboard Review: What is the Overclocking Formula?
by Ian Cutress on December 30, 2014 10:00 AM EST- Posted in
- Motherboards
- Intel
- ASRock
- Overclocking
- X99
- LGA2011-3
Despite being an overclocking motherboard, the ASRock BIOS and software does not change much between models. As a result, little has changed since our review of the ASRock X99 WS. For completeness our analysis is added here, with the OC Formula specific information.
ASRock X99 OC Formula BIOS
The ASRock BIOS shifted slightly between Z87 and Z97, and it is the Z97 implementation we get on X99. This means the starry background is gone, replaced with a dark crystalline image that is blue on the mainstream boards, yellow with the OC Formula and red with the gaming. The icons are also reduced to mere text with a small image, and unlike the ASUS BIOS the menu sections are of equal size, which I prefer. There is also an adjustment to the OC Tweaker layout, which we will come to.
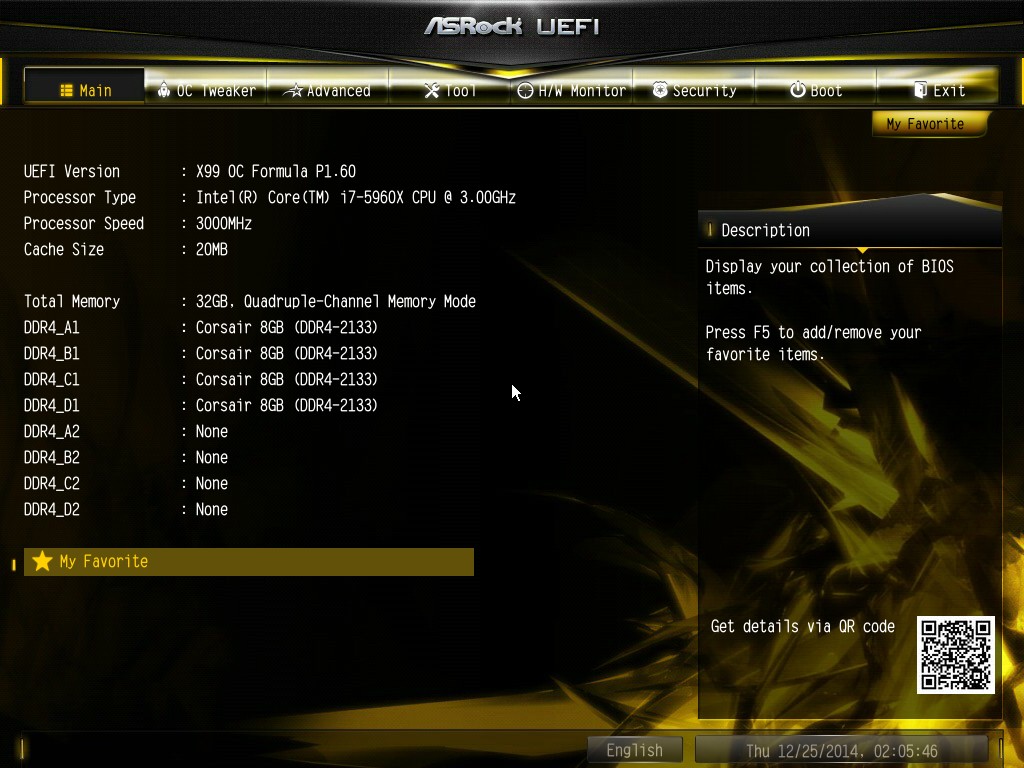
There is no ‘Easy Mode’ for the ASRock BIOS, with entry direct into this first Main screen. The right hand side of the BIOS is for description of the option selected, and the main segment shows information such as the BIOS version, CPU installed, CPU speed and memory installed. As mentioned in previous reviews, having some set of information relating to CPU voltages, temperatures and fan speeds might be useful here. If ASRock was to do an Easy Mode, it would make sense to have a one-button overclock option as well.
OC Tweaker takes heed of one of my previous complains about the ASRock overclock options. Previously there used to be a long list of options that continuously grew, depending on what options were left open to the user. For X99, ASRock has condensed these options into separate submenus similar in design to those we see on a GIGABYTE motherboard. Note that ASUS and MSI BIOSes currently go half-way between these extremes, offering some basic options with the more advanced ones in separate menus.
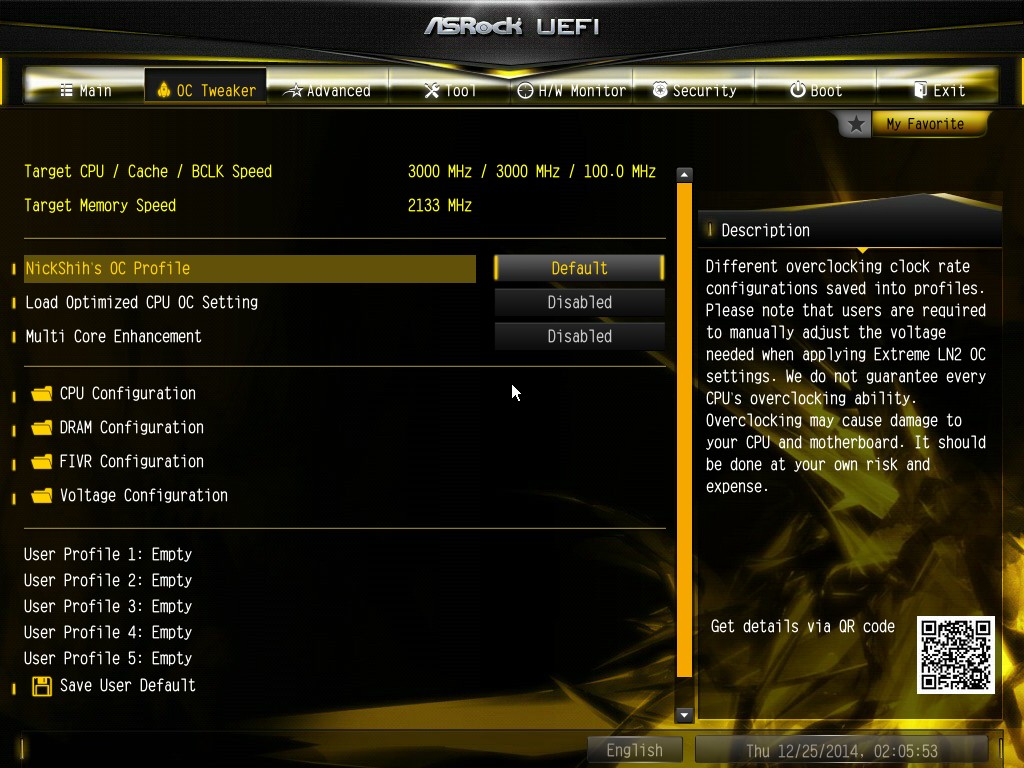
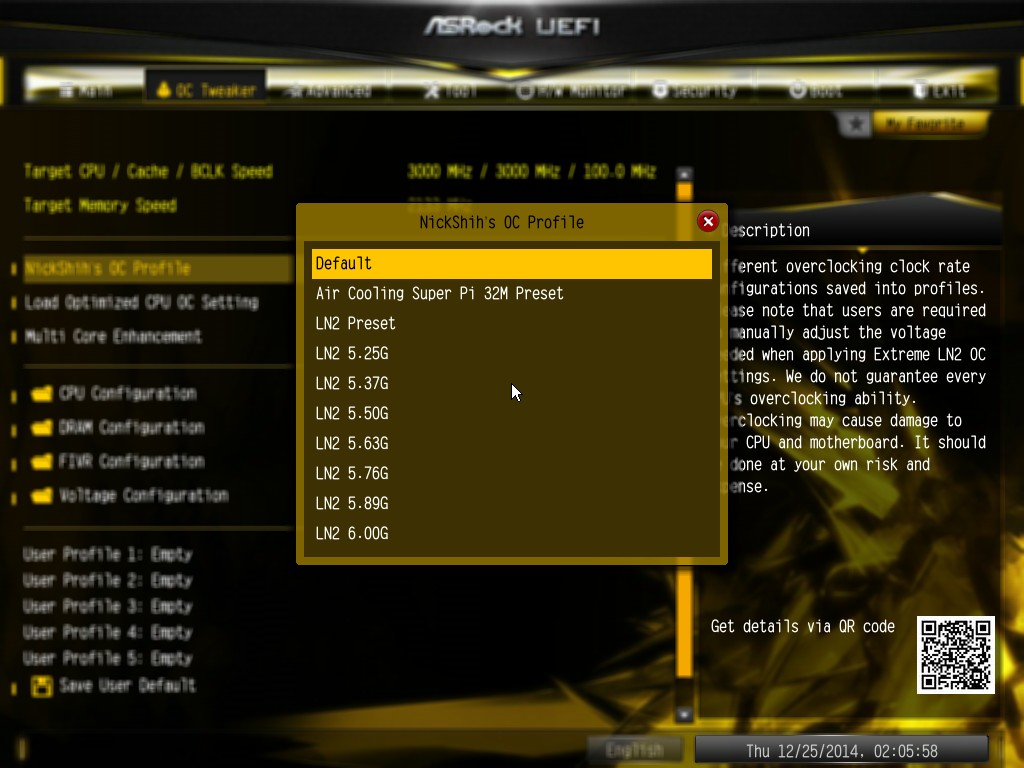
ASRock cuts straight to the chase – the first three options deal with overclocking. We have touched on features like Multi Core Enhancement many times previously, but it is interesting to have it so high up on the list of options. First up is NickShih’s OC Profiles, giving a set of options for people using liquid nitrogen:
The Optimized CPU OC Setting gives some easy selections for overclocks based on ASRock’s internal testing:
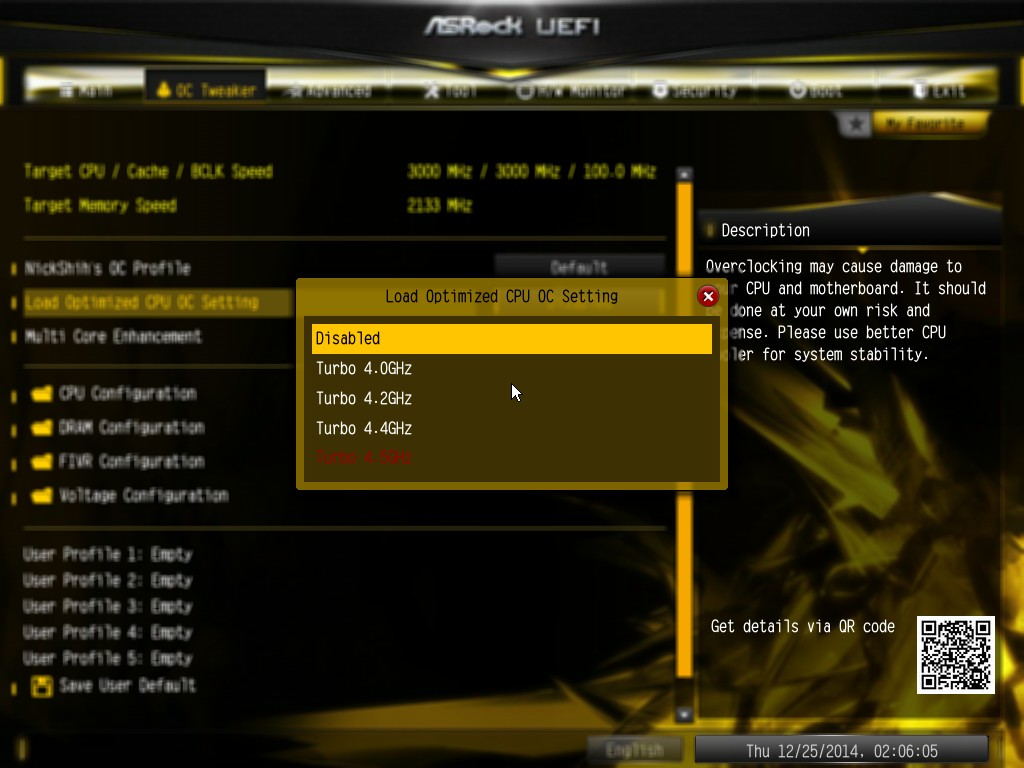
In line with our overclock testing, 4.0 GHz and 4.2 GHz should be achievable by all CPUs, with 4.4 GHz by most and 4.5 GHz by around half, given sufficient cooling methods.
The OC Tweaker menu is split into four sections. CPU Configuration gives options for CPU Ratio, multiplier, frequency, turbo boost and power limits:

DRAM Configuration allows for XMP application, DRAM strap adjustment, DRAM voltage and sub-timing adjustment, all the way through primary timings, secondary timings, tertiaries and others.

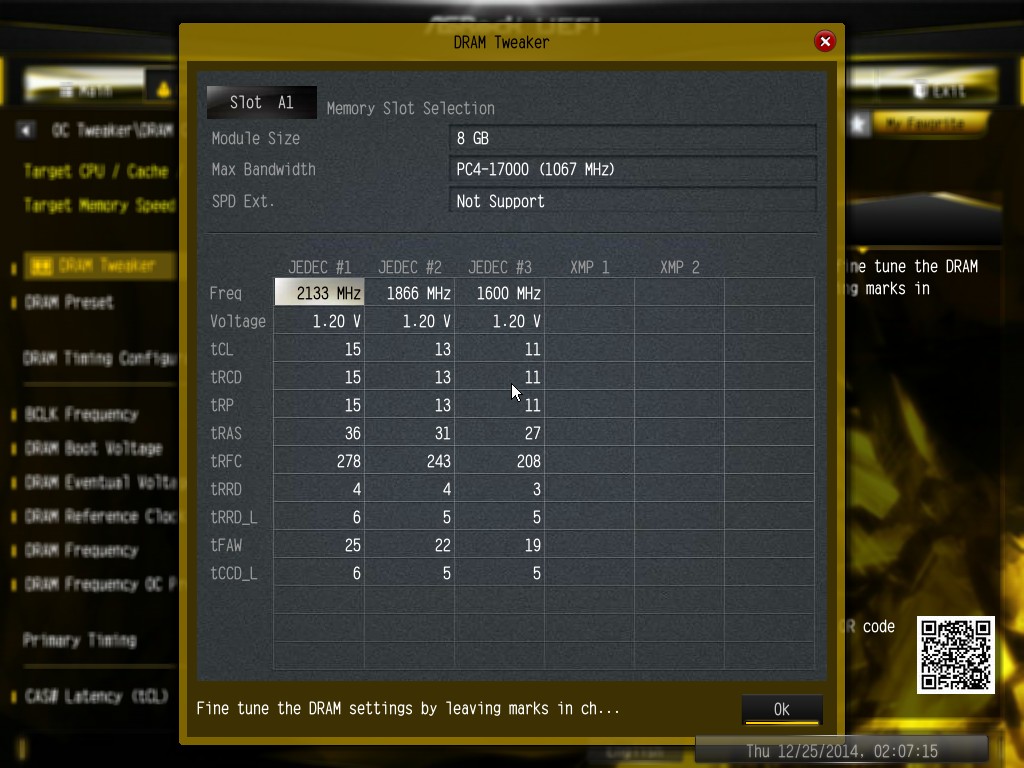
ASRock still uses the DRAM Tweaker function to fine tune the JEDEC and XMP responses to each memory kit.
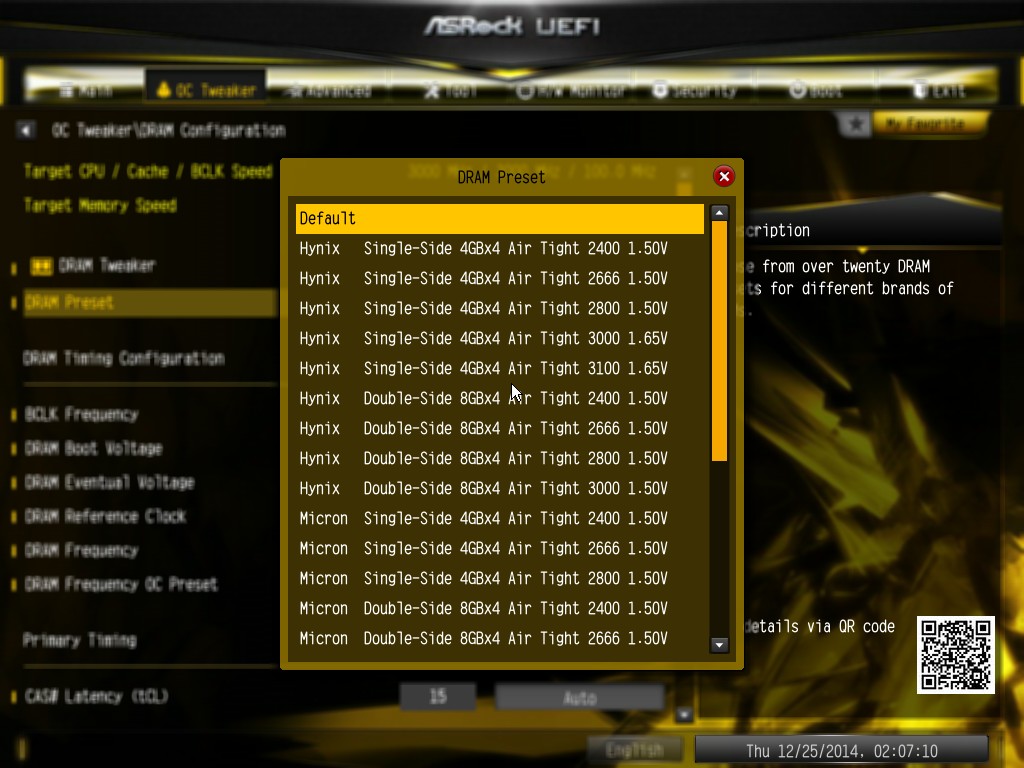
The ASRock BIOS also offers a DRAM Frequency overclocking preset list which will adjust the CPU strap and BCLK frequency needed to achieve various speeds. As there are a number of high speed memory kits on the market, the DRAM section of the BIOS also offers a series of presets for these as well:
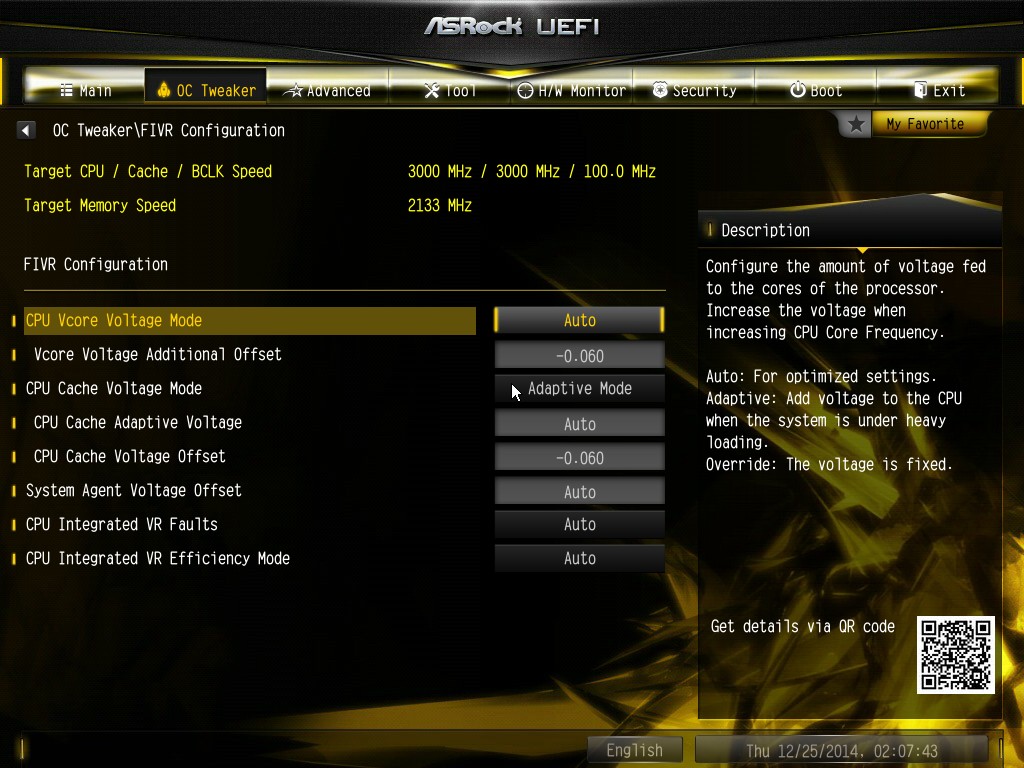
The FIVR Configuration menu from the OC Tweaker page deals with the CPU, CPU Cache and Uncore voltages.
The Voltage Configuration menu has the other voltages on the system, including VCIN to the FIVR and load line calibration. The Load Line Calibration option also comes with a handy graph showing what each setting means:
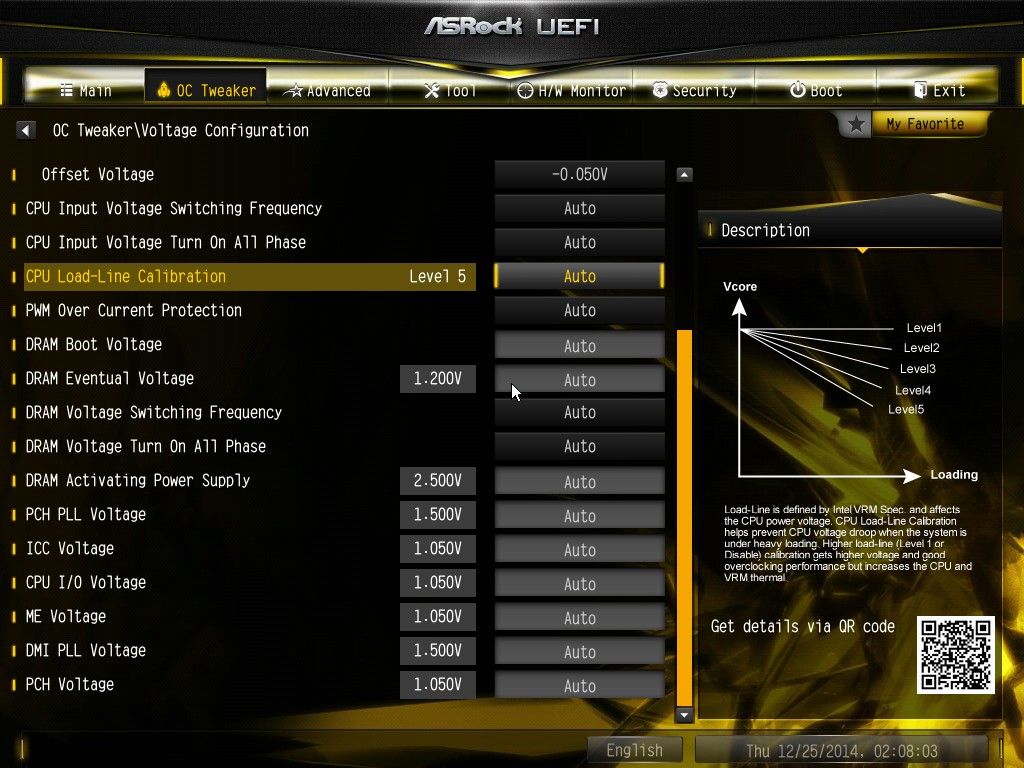
Unfortunately this arrangement of voltages is mildly confusing. Typically an overclocker will adjust the CPU voltage and the Load Line Calibration settings enough to get the right combination, and ASRock has placed these options in two different menus. If the CPU VCore option could be duplicated in the Voltage Configuration menu, this would be preferable.
The Advanced tab deals with other elements of the system configuration, such as the chipset, storage and super IO calibrations. This includes fixing power modes, PCIe linking speeds, disabling or enabling onboard controllers and adjusting RAID configurations.
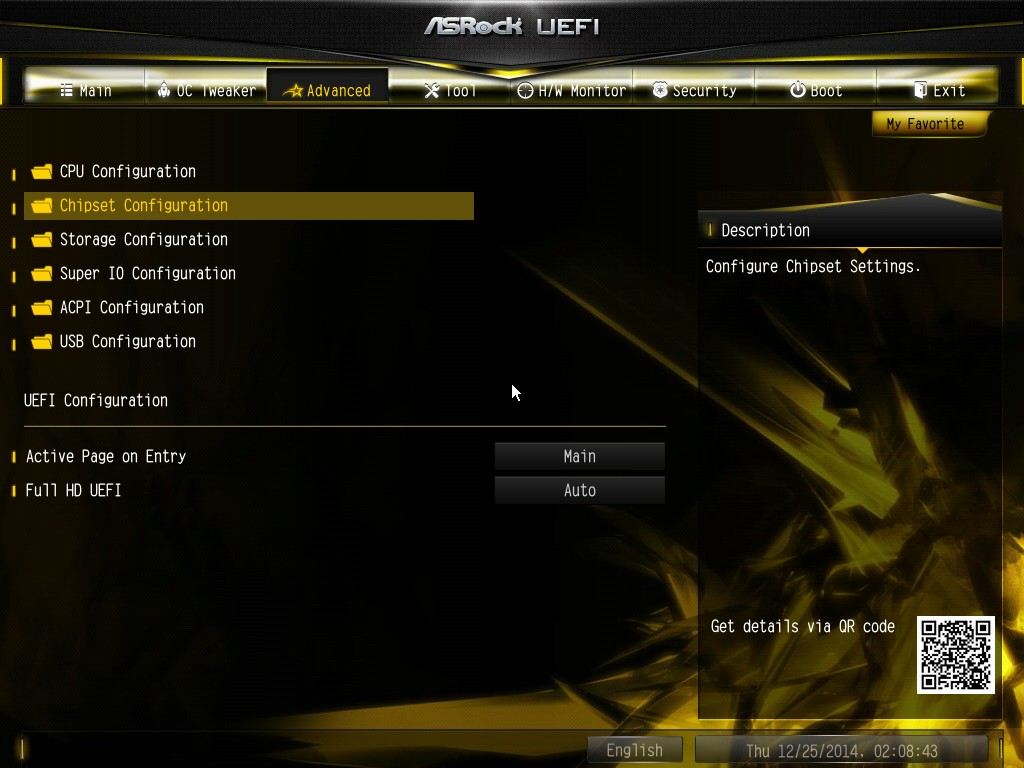
An adjustment in comparison to the X99 WS BIOS is that the Active Page on Entry setting has been moved here. Also of note is that on the OC Formula, if the user is going for pure frequency records, they can enable and disable specific cores within the CPU:
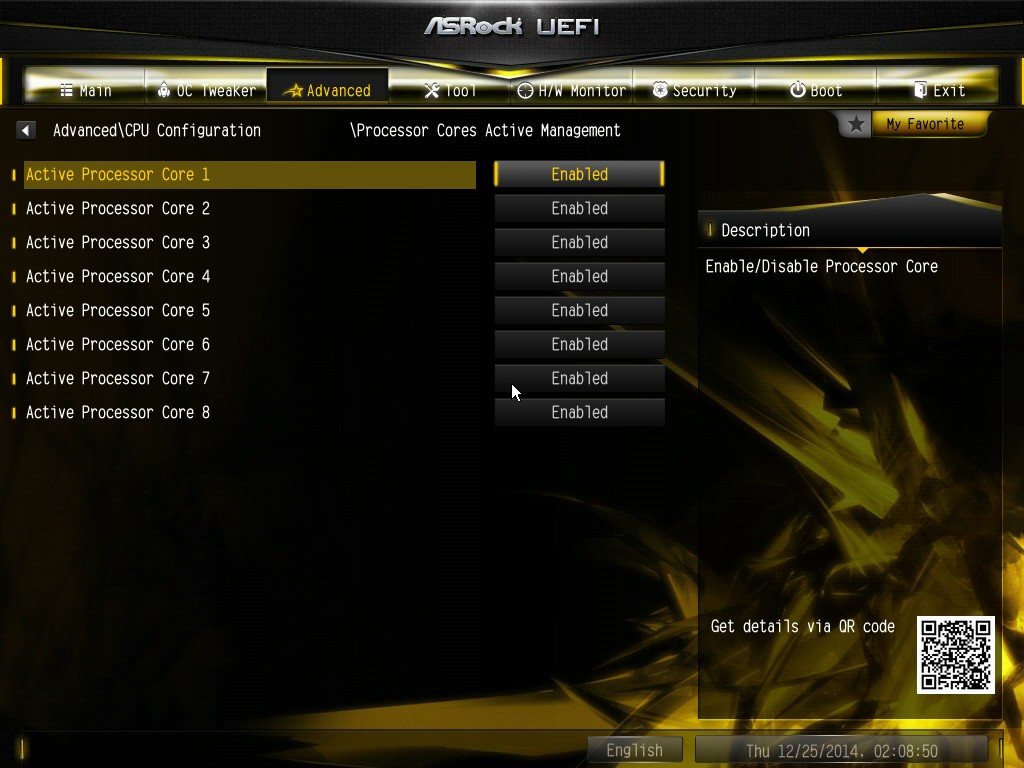
This can be accessed through the CPU Configuration menu.
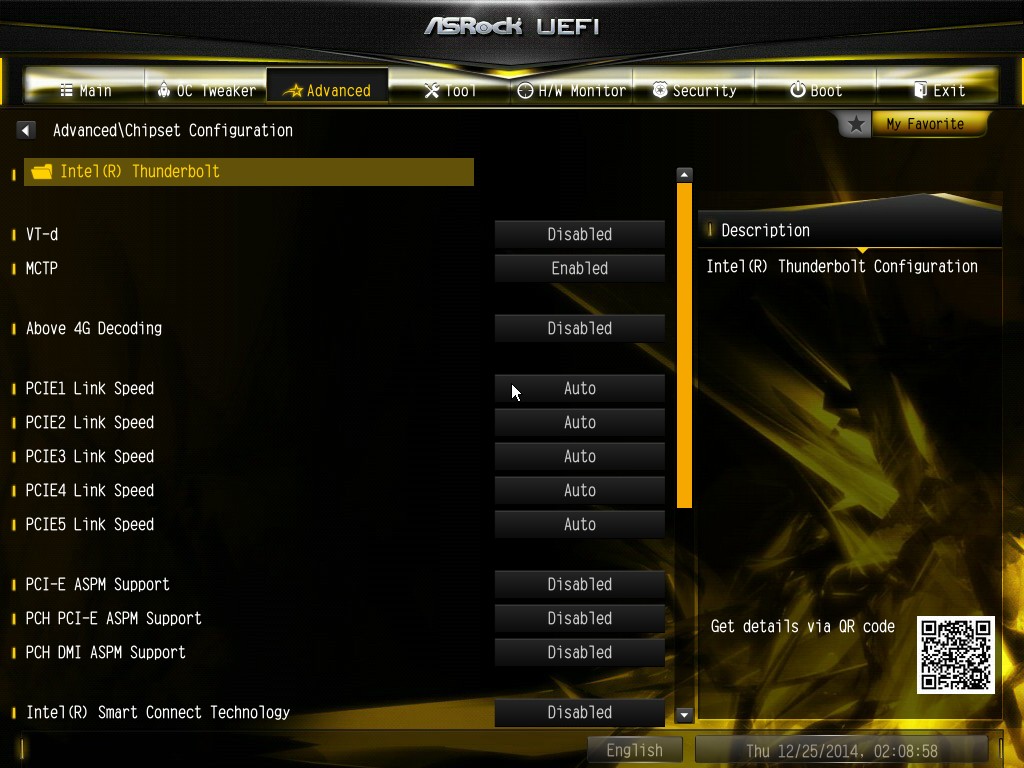

In the Chipset option list, by default the ‘Above 4G Decoding’ is disabled, and there is also a menu option to enable the Thunderbolt header as it is typically disabled by default.

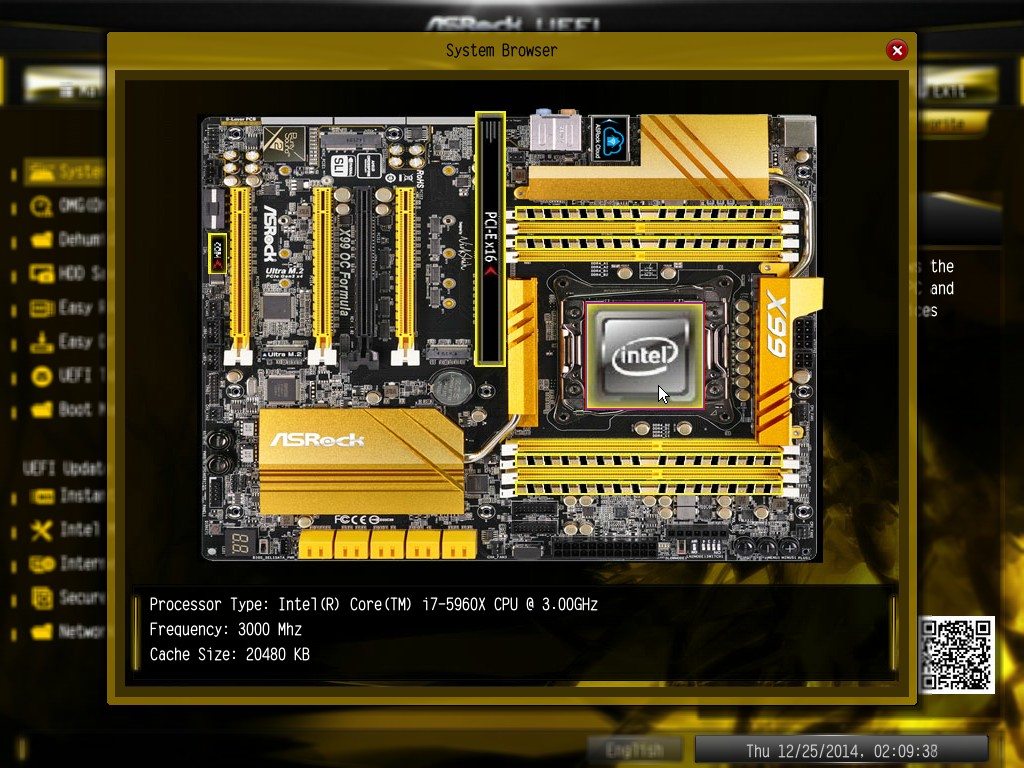
The Tools menu is typically where ASRock tries out its more unusual ideas, although we do not get anything new for X99 that we have not seen on Z97 already. The System Browser shows the different elements of the motherboard and what is detected:
The Online Management Guard (OMG) allows the user to enable or disable the network ports at various times of the day, as determined by the system time:
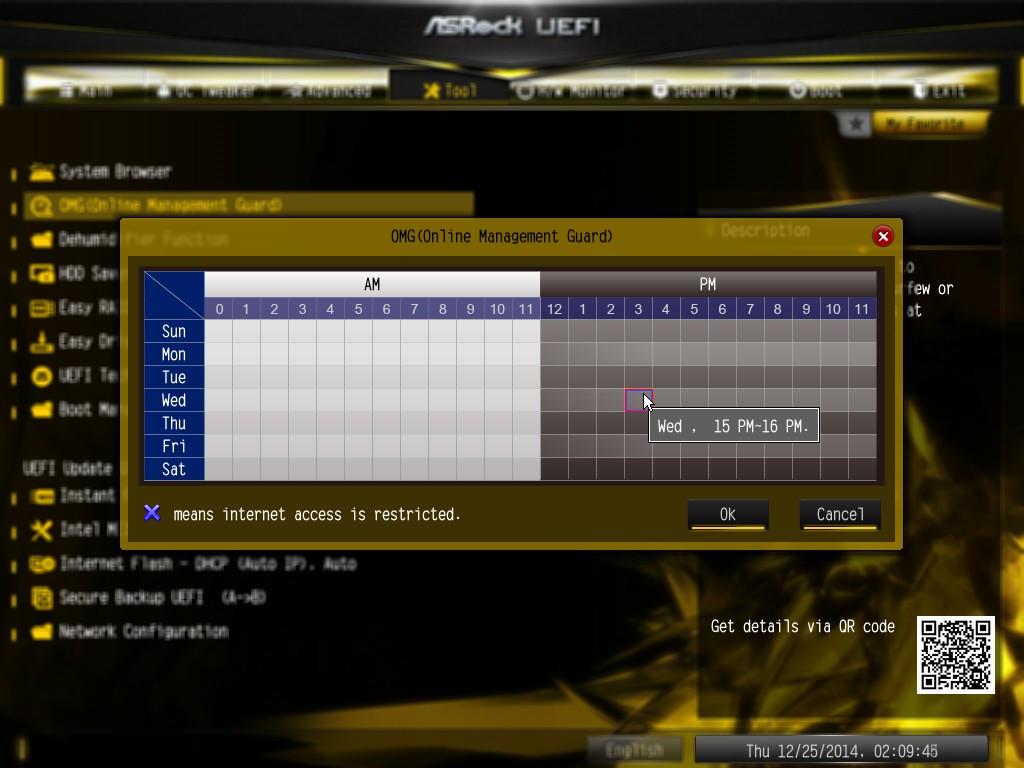
(It is amusing that this feature is aimed more at controlling when a child is allowed online, but X99 is not exactly a system configuration used as secondary machines.)
The Dehumidifier function now gets its own sub menu, allowing fans to spin for a fixed time after the machine is in S5:

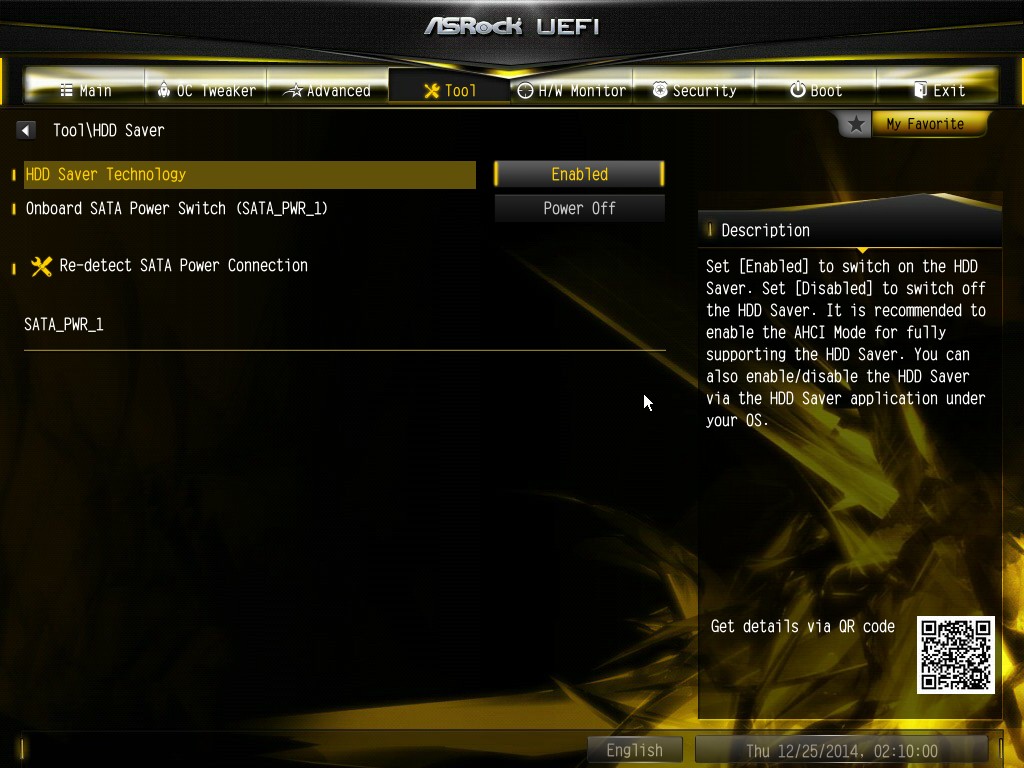
The HDD Saver can also be controlled from the Tools menu:
The H/W Monitor tab is where the temperatures, fan speeds and voltage monitoring tools are all kept, and we have seen an effort by the other manufacturers to improve the fan control situation. ASRock now joins them with the FAN-Tastic tuning option, moving into a more interactive type of scenario. This extends the multi-point gradient options into something more clickable, similar to the ASUS implementation. For example, a user can put a fan into one of five modes or customize the profile:
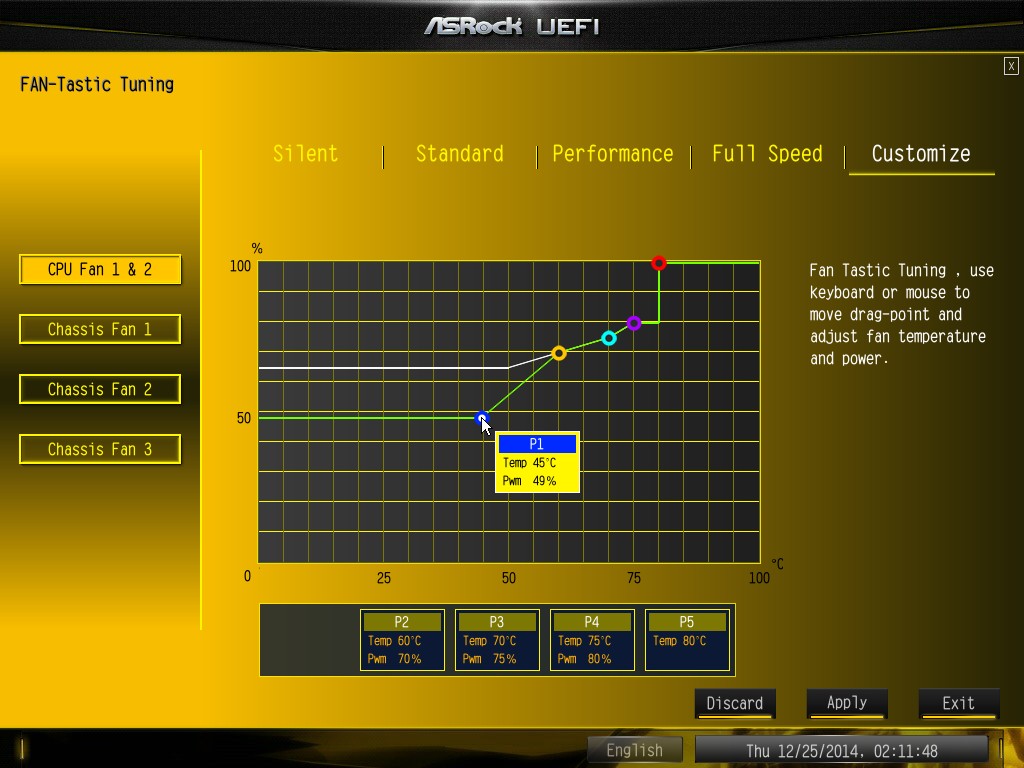
Rather than using the interface, users can do it the older way:

There is also an option to select which temperature sensor is being read from to make these adjustments.
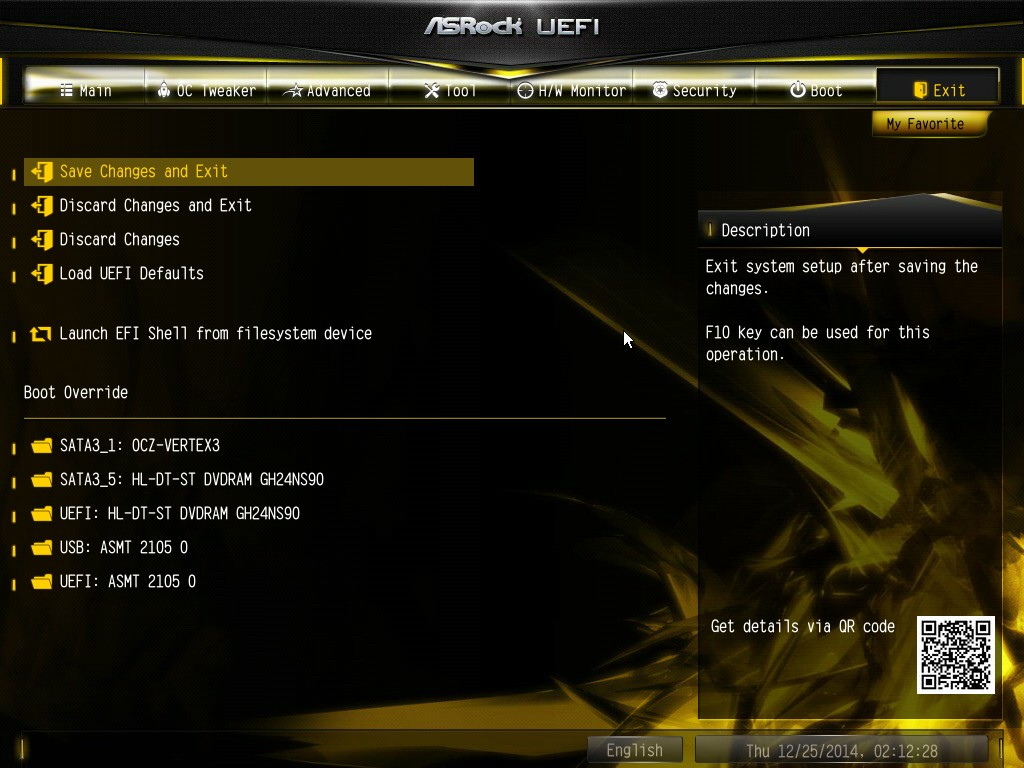
The rest of the BIOS deals with security, boot order and fast boot options. In the Save and Exit menu we do get options for Boot Override:


17 Comments
View All Comments
ssamhouu - Tuesday, December 30, 2014 - link
"When we compare the OC Formula to the other high end overclocking motherboards on the market such as the SOC Force, the Classified, the XPower and the Rampage V Extreme, it becomes clear that the OC Formula is the cheapest out of the set."...$300+ wowMorawka - Tuesday, December 30, 2014 - link
dude it's got tons of sata and m.2. wish it had dual intel nic tho. the other one is aethoros on this board.sjprg2 - Tuesday, December 30, 2014 - link
I have never understood why they put dual NICs and don't make them the same. I for one use the dual NICs for transfers to my NAS and the Intel's do it right.leedreamer189 - Tuesday, December 30, 2014 - link
And Conformal Coating is water resistant, how cool is that!Fallen Kell - Tuesday, December 30, 2014 - link
Completely agree. For almost any company that implements dual NICs which are not the same (aside from a Killer NIC+chipset NIC), it is simply a feature checkbox from the marketing department so they can say, "Yep, we have that too."Flunk - Tuesday, December 30, 2014 - link
I disagree with your assertition that "Killer NIC"s are the exception. Dual Intel or bust, Killer is just a way of branding cheap Qualcomm-Atheros parts as if they were quality.Lukart - Tuesday, December 30, 2014 - link
And It performs awesome as well! I made a build using this mobo for a friend, has lots of features, easy install, good software and lots of configuration options.chrnochime - Friday, January 2, 2015 - link
It pays to play at X99 level. If that's too expensive for you go play with Z97 instead.imaheadcase - Tuesday, December 30, 2014 - link
Is anyone else getting to wanting to use just mini-atx boards now-a-days? I just can't justify getting a atx or something like this for features that i would hardly use. The only reason i had a ATX board before is for SLI.But now you can get mini atx boards that do just as well as atx boards for less money. Used to be mini was only basic function, now they are full featured boards. My board for home server was Gigabyte WiFi, and i'm going to get another for this gaming system i use because i like it so much.
DavidBrees - Tuesday, December 30, 2014 - link
Maximus VII Impact is a great board for compact builds. I'm planning on putting it in a NCASE M1. With an M.2 slot and Wifi included in the board it makes it an easy choice.