The AnandTech Guide to Video Card Overclocking Software
by Michael Wilding on October 8, 2014 3:00 PM ESTASUS GPU Tweak
Next up is the ASUS GPU Tweak utility. Developed in-house by ASUS, the GPU Tweak Utility is designed to work with both NVIDIA and AMD based video cards. You don’t need to own an ASUS video card to take advantage of all the features in this utility as it’s designed to be vendor agnostic. With that said, GPU Tweak has some pretty heavy competition in this round up, so let’s take a look and dive right in.
Using their trademark red and black theme, ASUS designed GPU Tweak with style and function in mind. I think ASUS did a bang up job designing the user interface of GPU Tweak. It uses a sleek and intuitive interface that is geared towards overclockers of all experience levels, and I think it's arguably one of the best looking utilities in our round up.
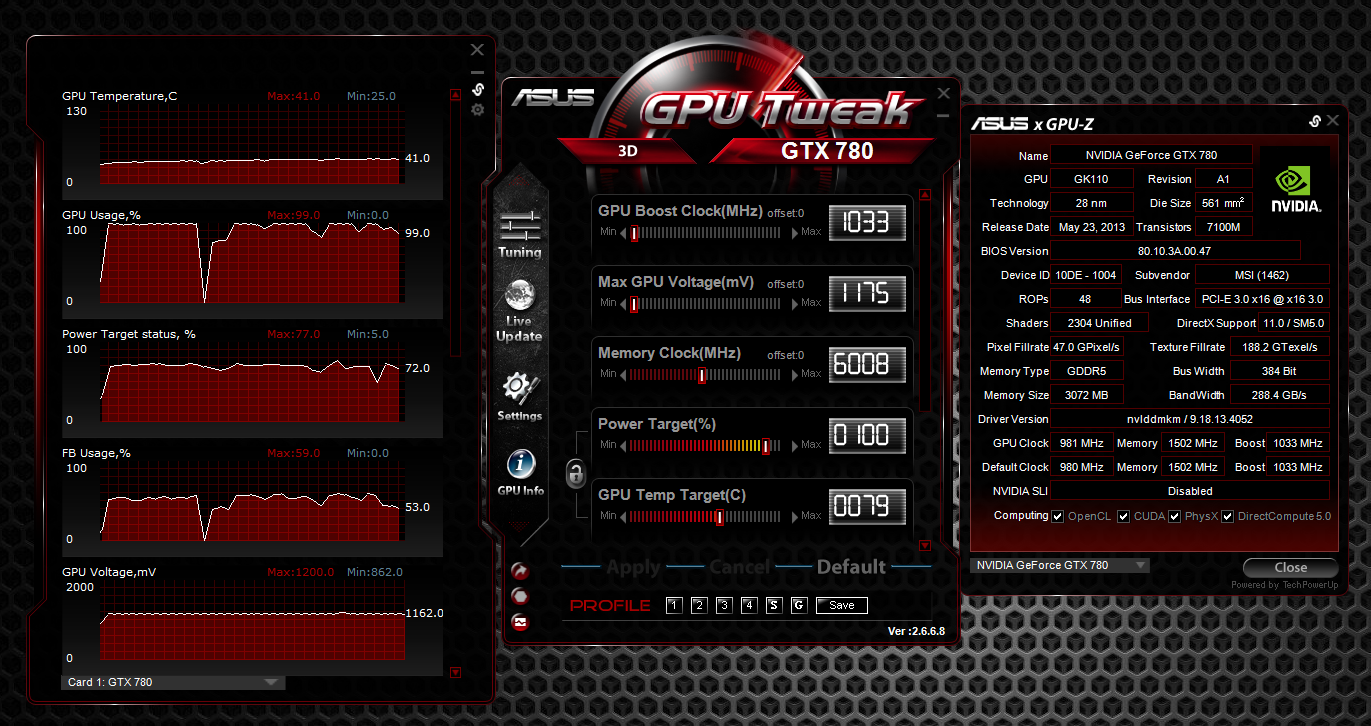
To start things off let's look at the main panel of the utility. This panel has the standard assortment of settings that are seen in most overclocking utilities in this round-up. Here we’re able to increase the card's core and memory clock speeds, adjust fan settings, create custom fan profiles, increase the power target, and on some cards you can adjust GPU core voltage. You can adjust these settings using the mouse to adjust the sliders or by manually keying them in.
The settings can vary largely depending on the model and manufacturer of the video card. Adjustment of the GPU core voltage turned out to be the most inconsistent option for us. For example, we fired up our MSI GTX 780 Lightning and were given the option to adjust GPU core voltage in GPU Tweak, but when installing our AMD reference 7970 GHz Edition and our Sapphire HD 7790 we had no such option. After doing some digging into the matter, it looks like this is hit or miss and depends on the type of voltage controller that comes equipped with the video card.
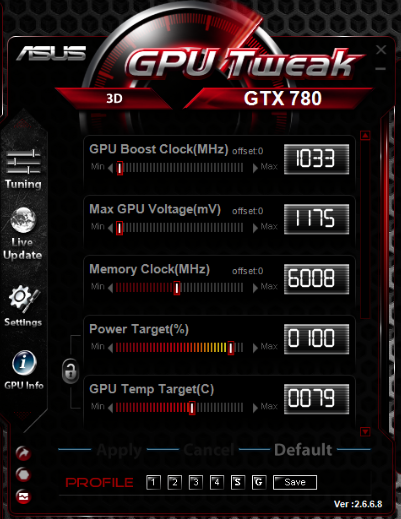
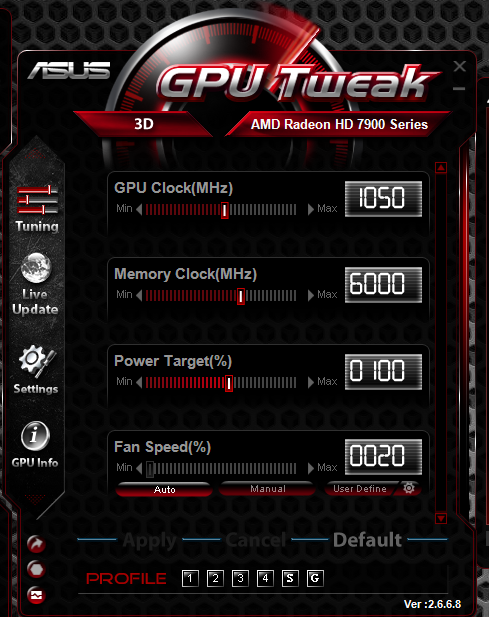
Comparison of center panels with different GPUs
Note that selecting the advanced mode may require you to scroll down in the main panel to access all of the available sliders. Since the scroll bar is red and doesn't stick out, it could be easily missed by new users. I will say after awhile it did become a bit of a nuisance; I would've liked to have an option to expand the height of the utility, or even add tabs to avoid the need to scroll. At least ASUS has an option in the tune panel to change the order of the sliders; this helps keep the most important sliders up top where you can see them.
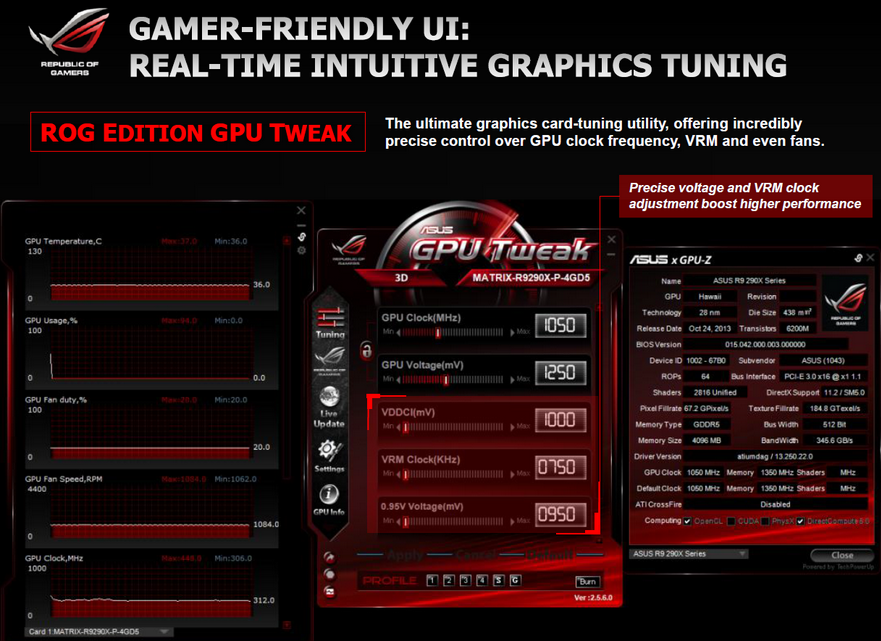
Additionally, ASUS ROG based video cards can utilize the ROG Edition of GPU Tweak. This version offers precise control over options like VDDC, VRM clock, memory voltages, and more. Advanced users looking to squeeze every bit of performance out of their ROG video cards will welcome this version of GPU Tweak.

Meanwhile the main panel of GPU Tweak has a multitude of neat features, so let's take a look at some of them that really stand out. Starting off, there is a Live Update button; using this button allows you to stay up to date with the latest version of the GPU Tweak utility. We can also set the utility to do an auto update at certain intervals, such as every day, week, or month. If you happen to own an ASUS video card you can also check the current version of your video card’s BIOS. If you're on an older BIOS version, you can perform a BIOS update using GPU Tweak. This will keep your video card on the latest and greatest BIOS from ASUS.
Having user profiles is a must in any of today’s overclocking utilities, and like TriXX ASUS has four profile slots you can use. You can apply these profiles while in a full screen application and adjust core clocks via the Hotkey feature as well, which is a nice addition. These features are found in the settings panel under the Hotkey tab.
Another feature worthy of mention is the benchmark button. To configure this feature you use the tune settings tab within the tuning panel. Here we can configure any stress testing or benchmark program to open with the click of a button. I personally like to use Unigine’s Heaven 4.0 as the program of choice for this button, as it adds a nice touch of convenience when I’m testing an overclock.
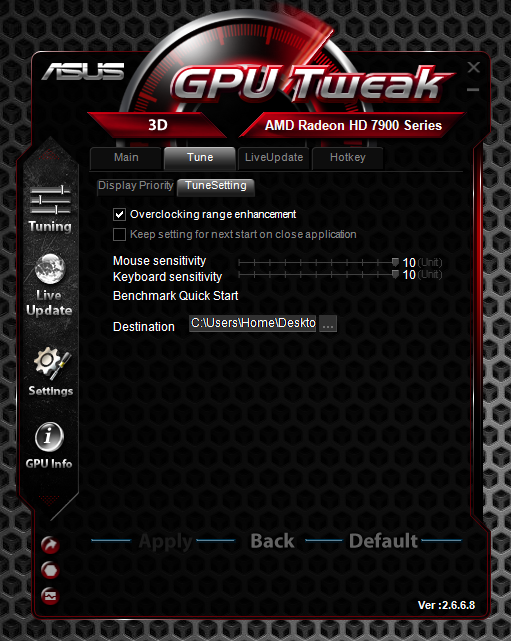
Within this same panel, ASUS gives the option to increase your overclocking range. This option unlocks the utility and allows for higher core and memory frequencies that can otherwise be limited by your video card’s BIOS (and sometimes video card drivers).
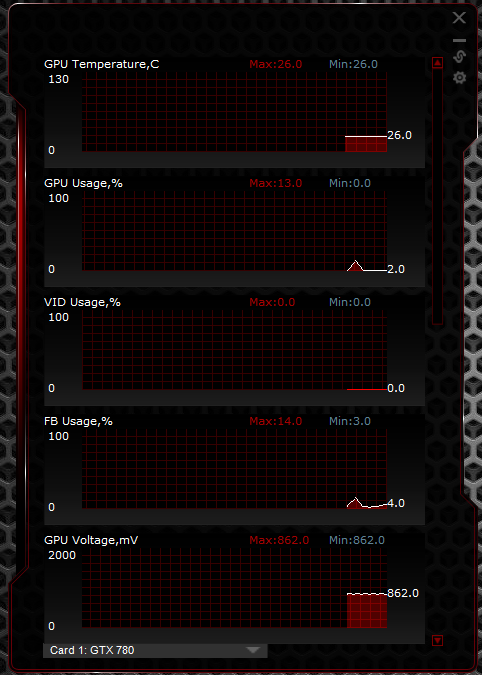
The graph icon in bottom left corner of the main panel offers real-time logging and monitoring of your graphics card. Here you can view GPU temperature, GPU usage, GPU voltage, and more. Since this panel will only show so much at one time, you have to scroll down to see additional information. You can however keep your important graphs at the top of the monitoring panel; do this by selecting the item then drag and drop the item into the order you like.
Since GPU Tweak offers such a robust logging and monitoring system, I would’ve liked an OSD or on screen display option available. The use of an OSD allows users to monitor their video card while in a game. While this is not directly related to overclocking, I still think ASUS should try to implement such a feature.
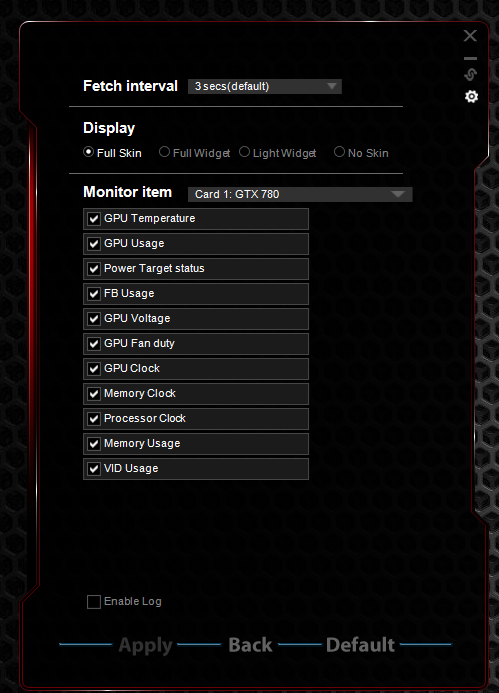
Arrange monitoring priorities using a drag and drop interface
Moving on, inside the main panel we notice that selecting the GPU Info icon reveals a familiar face. I think it’s safe to say out of all of the programs used by oveclockers and enthusiast alike, GPU-Z is definitely among the most popular. Having GPU-Z integration allows you to see your graphics card’s specifications and allows you to monitor changes in real-time. While I like the GPU-Z implementation, I also would like to see the sensors tab from the stand alone version of GPU-Z.
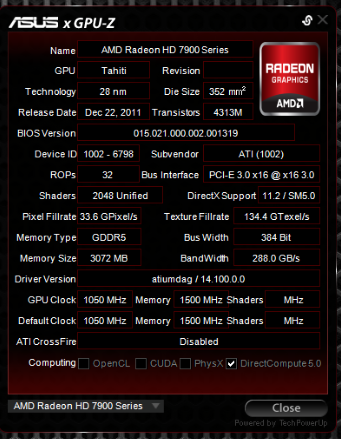
GPU-Z integration
Finishing things up, I can easily say I enjoyed my time with GPU Tweak. It's a beautiful utility that offers a ton of great features such as GPU-Z integration, real-time logging and monitoring, custom fan profiles, and more. GPU Tweak works with AMD and NVIDIA based graphics cards as well, which really gives it an edge over most of the other utilities in our round-up.
However, while there are a lot of good things to say, it's not “all good". The hit or miss GPU voltage adjustment option is a big problem. This issue could deter a lot of overclockers from using the utility alltogether. I also mentioned when selecting advanced mode, having to constantly scroll to adjust sliders and settings when testing our overclock did get a bit tiresome. GPU Tweak isn't alone in having these issues, but it would be nice to clean them up.


59 Comments
View All Comments
Death666Angel - Saturday, October 11, 2014 - link
"This seems eerily similar to my own article" | "I wasn't saying anything negative about you writing this"The first quote does seem like you insinuate that this article is plagiarising your work. That's just my reading of it, though.
LedHed - Thursday, October 16, 2014 - link
Lol, do you really think I believe AnAndTech read my article a year ago and then sat on the idea until now? Give me a break, I was joking...ChristTheGreat - Friday, October 10, 2014 - link
Tested Afterburner on my R9 290 WF OC, doesn' work well.. I can't get 2D and 3D clock. if I put 2D with riva tuner stats (automatic changing 2D to 3D), it always crash, black screen.Tried GPU tweak, Set my 3D clock, and it works fine changing from 2D to 3D. Only thing is ram going from 150 to 1500 when I am on the internet, instead, no issue at all.
But missing CCC Core clock without % (and bios flashing for voltage :( )
Rock1m1 - Sunday, October 12, 2014 - link
I love the MSI Afterburner, rock solid, feature complete. For my Sapphire Trix R9 290 OC, I clocked it to 1130Mhz core, and 1500Mhz memory. Great performance, meeting 780Ti stock in a lot of benchmarks.frwiz - Monday, October 20, 2014 - link
boost settings are not saved after I click on apply tab. When I re-open precision-x app, boost clocks are back to default settings. I tried the oc scanner and it shows the default speed with no over clocks.is there a bug somewhereSeanJ76 - Thursday, October 30, 2014 - link
EVGA precisonX 5.2.3 or w/e newest version is out is FLAT OUT TERRIBLE!!! Sli tunning does not work, K-boost does not work, over-volting does not work, core and memory offsets do not stick. The only good tuner is the Evga PrecisonX Legacy 4.2.1. I will not use AB because their overvoltage does not actually change the voltage on the actual cards, its fake, made to look like it works, but Unwinder himself as confirmed over-volting in AB does not work at all.IHxInfi - Monday, November 3, 2014 - link
I wish they wouldn't "pimp my ride" all of these over clocking utilities... a functional professional looking application would be much preferable.reddwar4ever - Saturday, December 12, 2015 - link
Really interesting review. One thing Imneed is a ' dummies' guide to overclocking using this utility, it can't be as simple as increasing the GPU clock until a temperature limit is reched and checking for stability with OC scanner, what about the memclock setting ! and there are lots of warnings about not increasing the voltage as this could shorten the life of the GPU....but as far as I understand, increasing this slightly allows a higher GPU clock speed....this is why a guide to overclocking with this utility step by step would be so handy red.dwarf4ever@yahoo.com thanksChewyXX - Tuesday, November 15, 2016 - link
[Ed: does anyone really think in Fahrenheit when it comes to computer temperatures?]-----------------------------------------------------------------------------------------------------------------
I did not get offended about your comment, but yes I prefer Fahrenheit. This is not to say I do not use the metric of some measurements though.