ASRock M8 Barebones Review: My Steam Box
by Ian Cutress on January 2, 2014 10:00 AM EST- Posted in
- Barebones
- Intel
- ASRock
- Motherboards
- Cases/Cooling/PSUs
- Z87
Because the motherboard comes part of the set for the barebones, there is scope for analysis of the BIOS and included software in the build. It is perhaps unsurprising that ASRock does not venture far from the normal Z87 package here, although there was scope for custom designs in the software and BIOS to make the experience of the M8 that more unique. On the one hand there would be consistency for users of other ASRock Z87 products, and on the other the BMW linkup could have been pushed a bit more.
ASRock Z87-M8 BIOS
Typically a motherboard from ASRock comes with BIOS 1.20, or a 1.13B beta version, and when I go to update it for a review, 1.30 or 1.40 might be available. I would normally suggest that users update their BIOSes on a fresh build when starting (as long as you are comfortable with the procedure), due to bug fixes or compatibility improvements.
Aesthetically speaking, ASRock have one of the better BIOSes on the market. A fair number of users (and reviewers) berated the starry background that in some versions twinkle and others actually causes a noise, but the BIOS uses a nice font and a deep contrast between background and text that makes it easy to navigate. The icons are suitably high definition as well; there are still a number of BIOSes on the market that feel and look blocky.
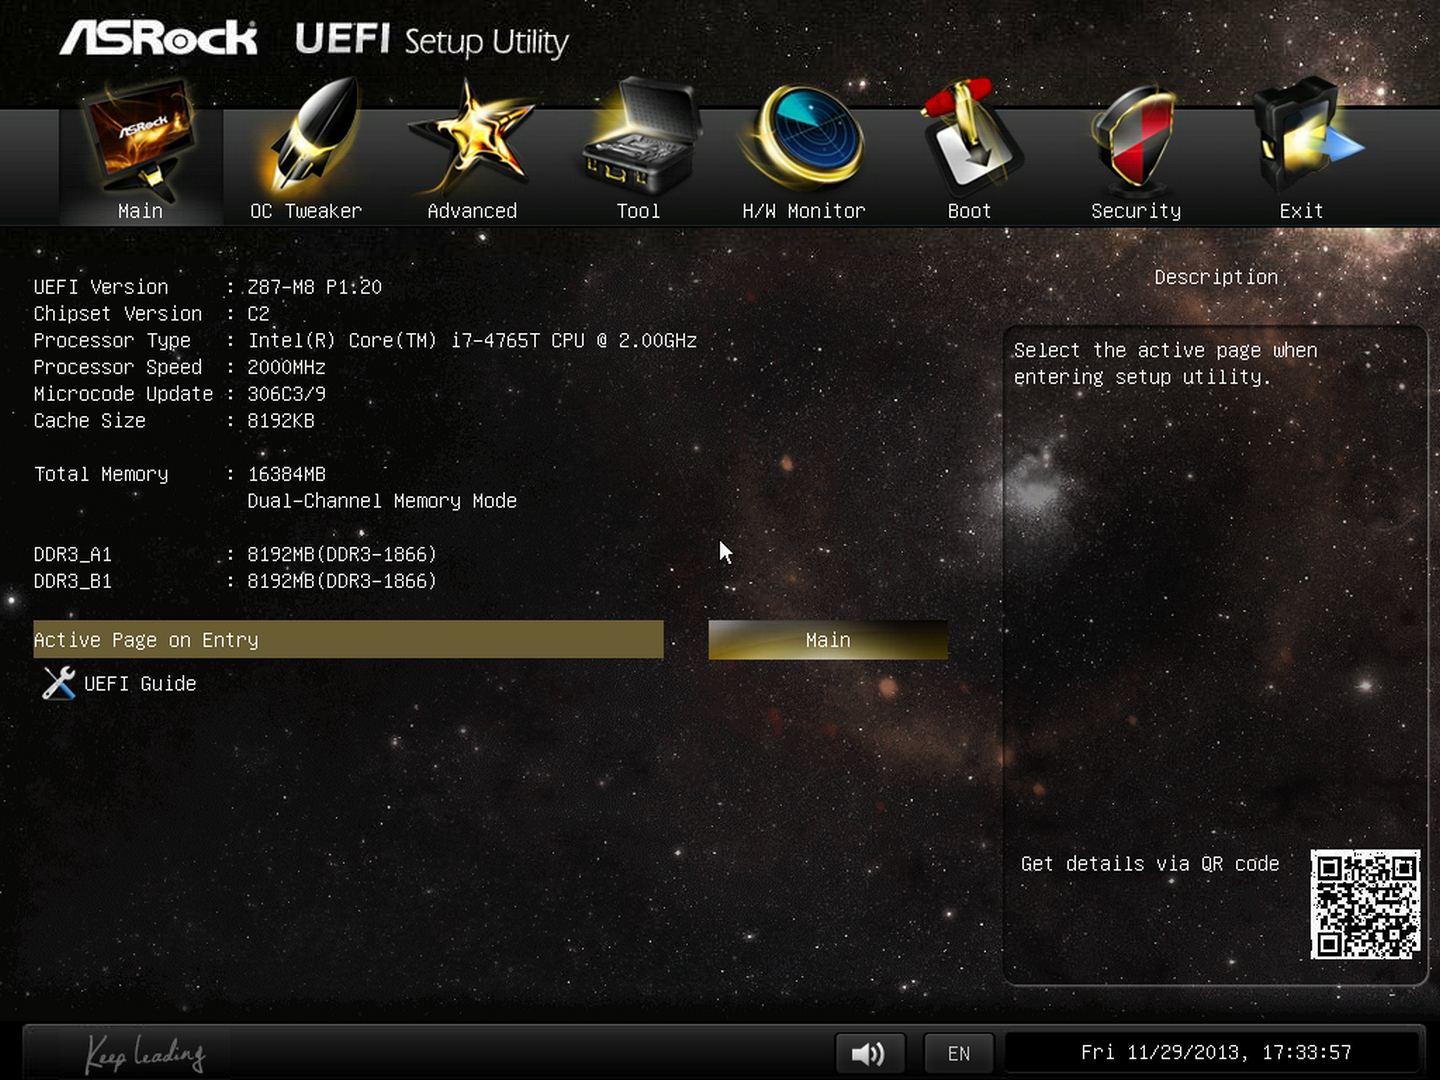
The first page of the BIOS lists several important numbers of the motherboard – the name, the BIOS revision, the CPU installed, the memory installed, and all associated speeds. This should be the staple entry screen in any BIOS, but ASRock are missing CPU temperatures, voltages and fan speeds. Ideally I would like the motherboard name, CPU name and CPU temperature persistent across each BIOS menu, perhaps on the bottom bar where there is space in the ASRock BIOS.
ASRock offers an option on this page to select the default page of entry, which for overclockers or users adjusting fan controls may help. There is also a UEFI Guide which runs a slow slideshow of all the BIOS features.
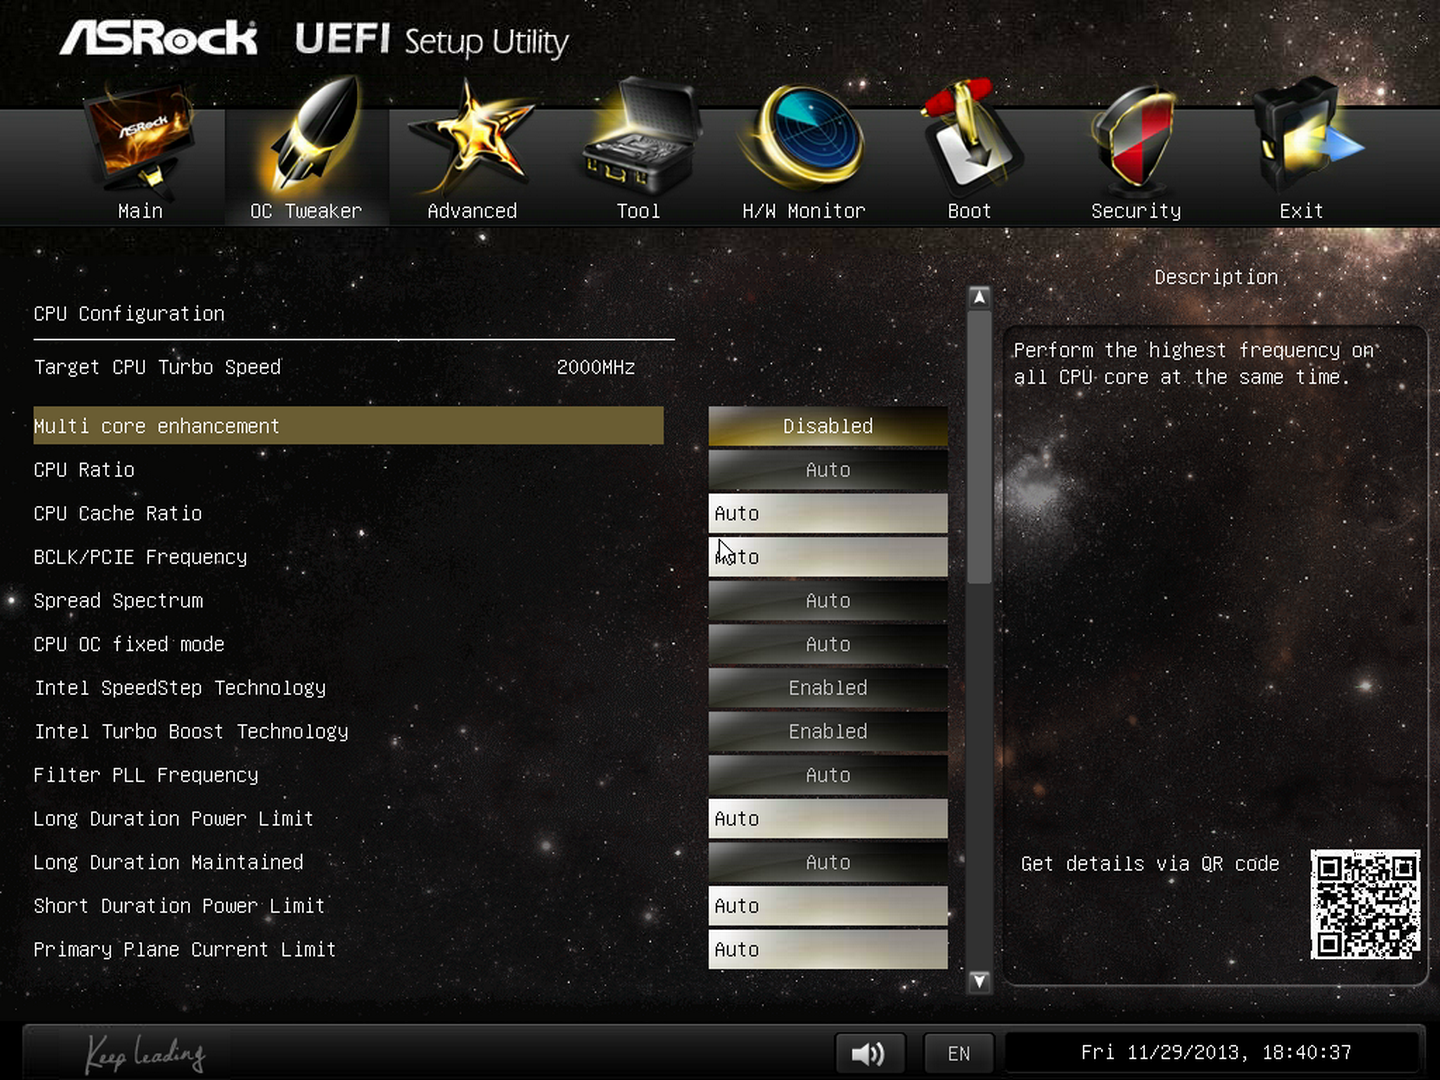
The OC Tweaker tab provides users with overclock options, with enough to keep most enthusiasts happy. The M8 has the MultiCore Enhancement option set to disabled by default, so any user who wants extra multi-threaded performance without overclocking in any serious fashion can enable this.
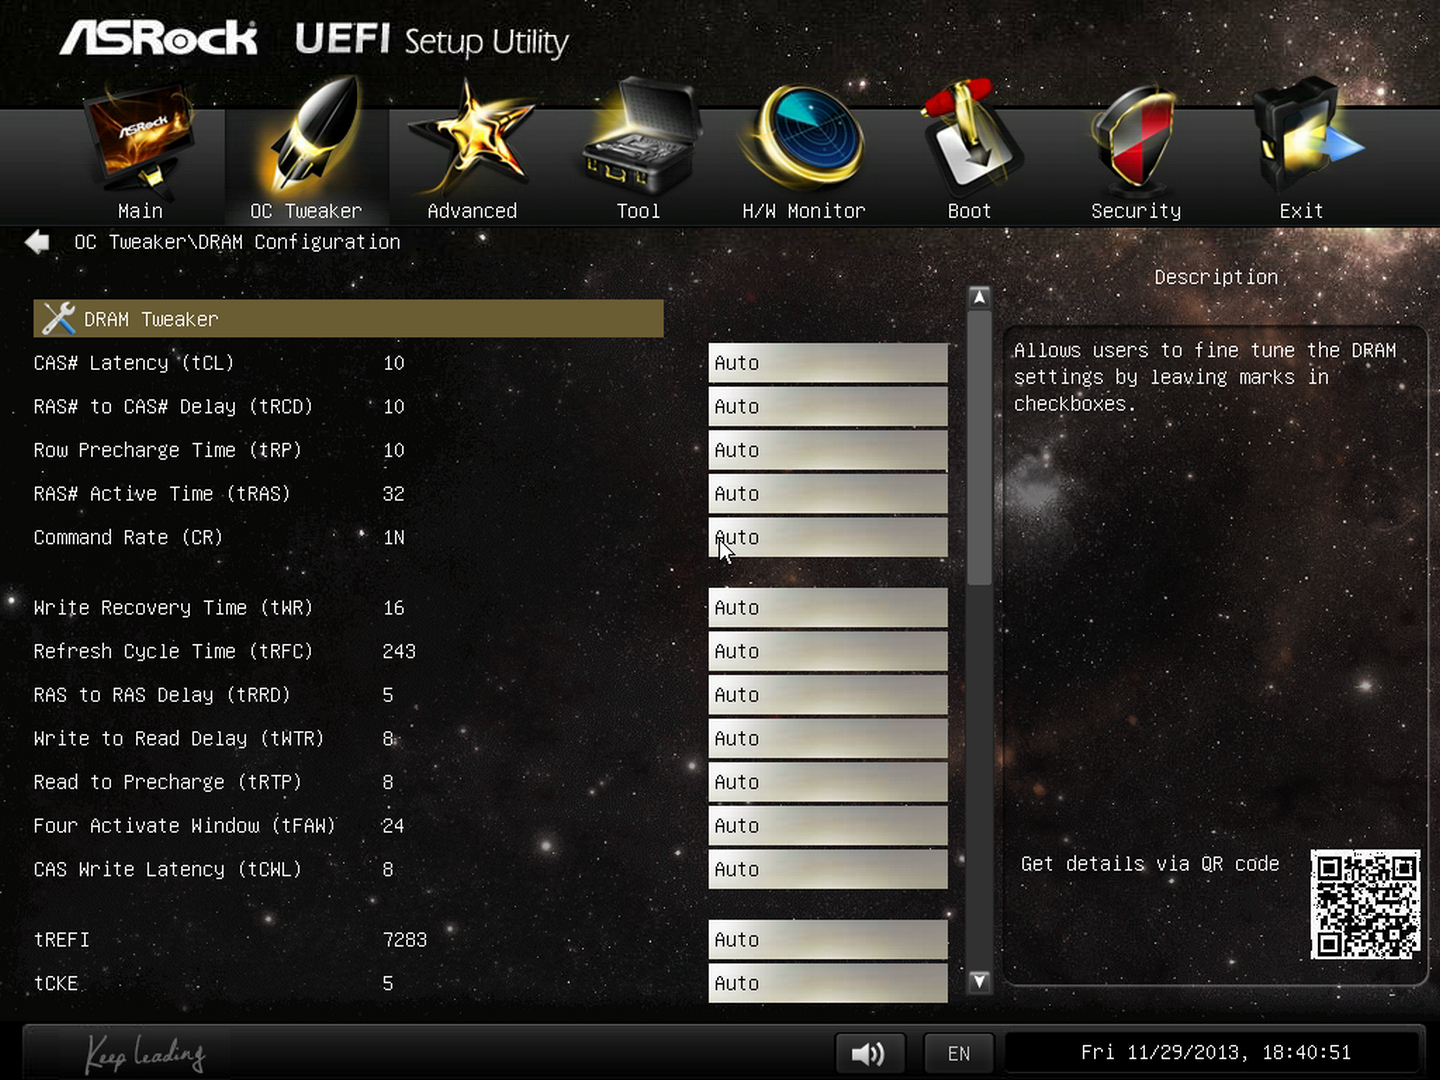
The OC Tweaker gives control of the CPU voltages, load lines, cache voltages, multipliers, and control of the FIVR (Fully Integrated Voltage Regulator). In the DRAM settings users can control all the major options as well as fine tuning options in the DRAM tweaker:
Aside from the usual CPU and controller configuration pages in the ‘Advanced’ tab, ASRock likes to put a lot of their extra features into the ‘Tool’ tab:
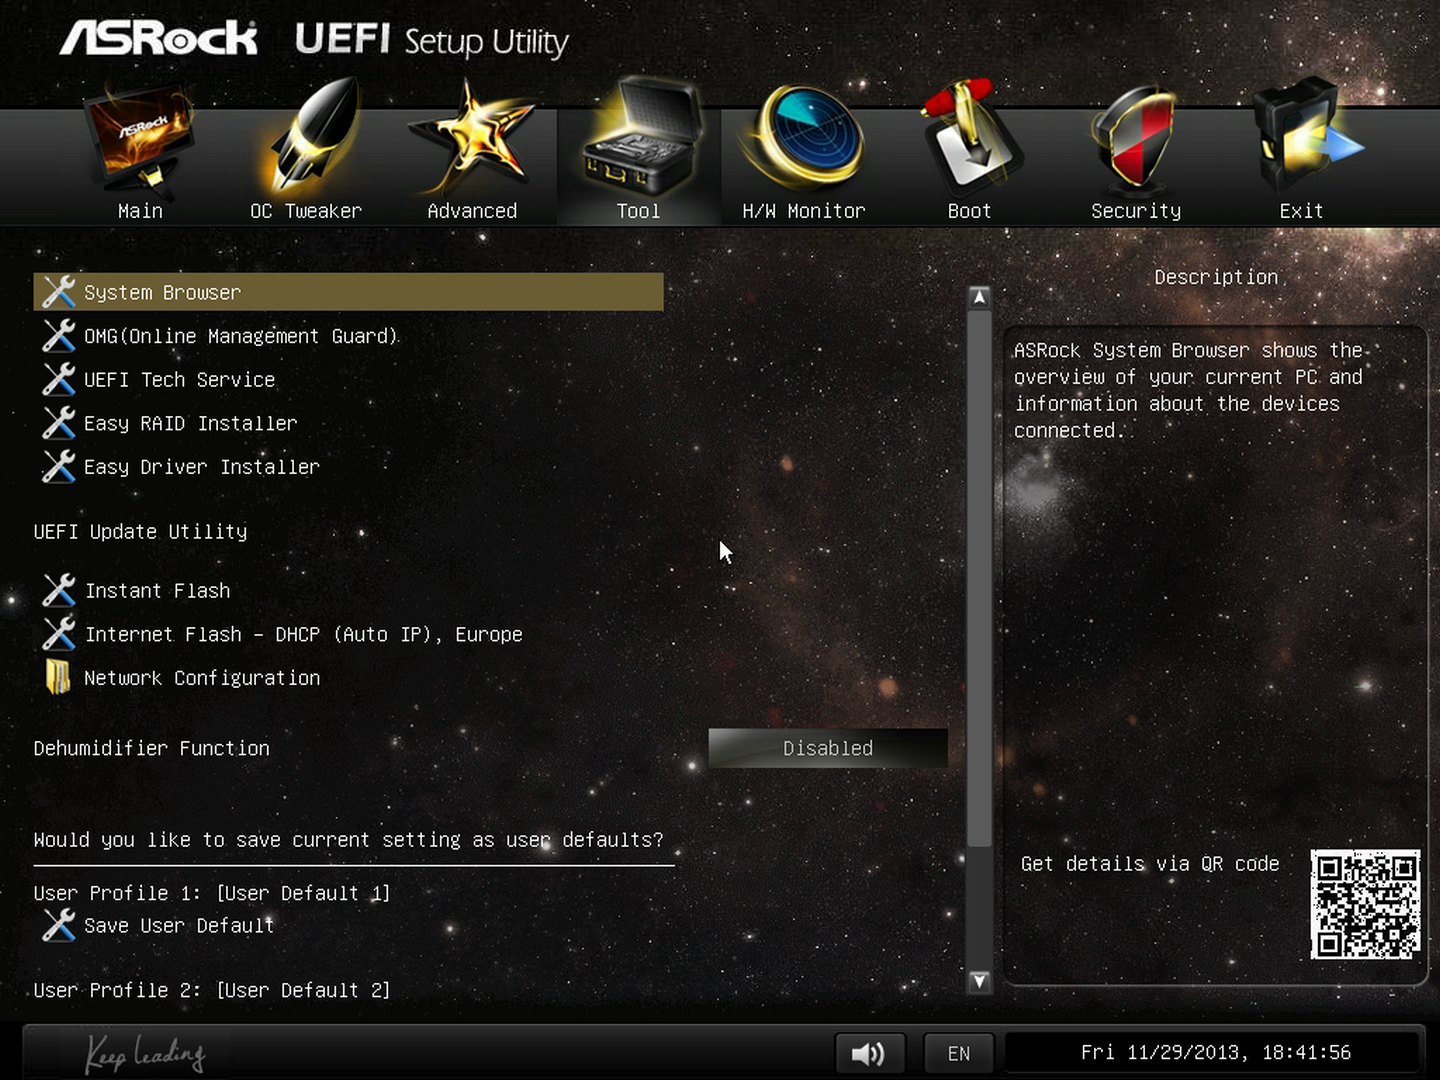
One feature I like especially is the System Browser that shows an image of the motherboard as well as all the detected components. This is useful for when one stick of memory is not being detected or issues with USB/SATA devices:

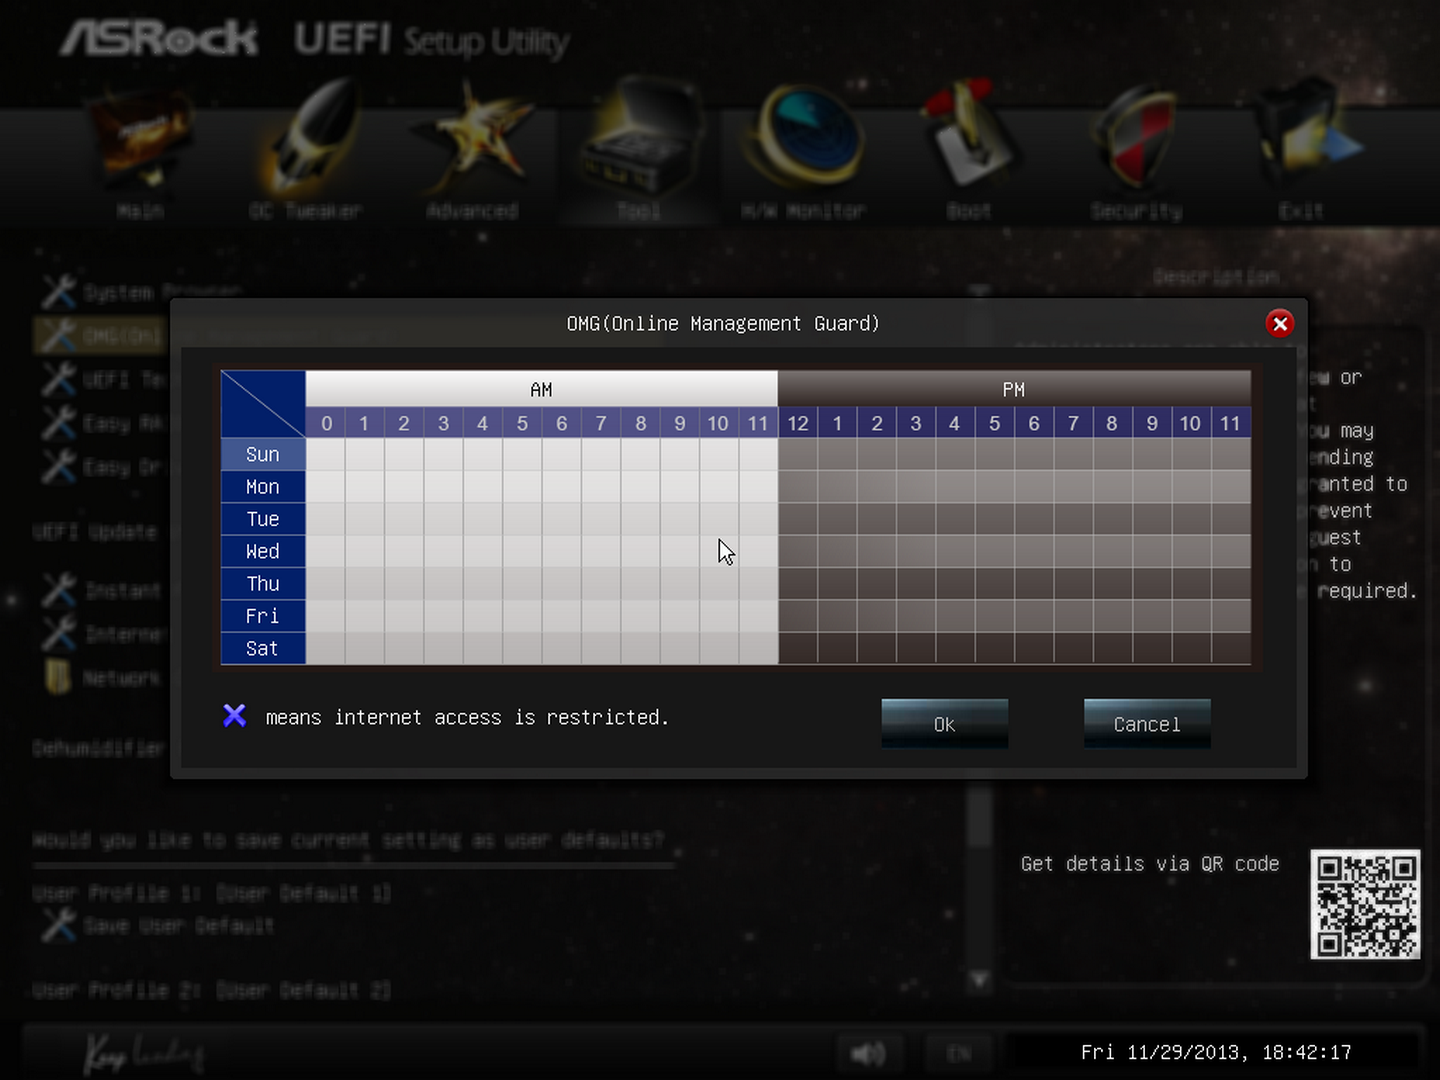
Perhaps a small oddity in ASRock BIOSes is the OMG option, standing for ‘Online Management Guard’. This is an hour-by-hour selection of when to disable the network ports, designed for users with small children. However the options can be bypassed by loading up the BIOS and adjusting, or forcing a Clear_CMOS.
Something new for Z87 was the UEFI Tech Service option in the BIOS. Users with an Ethernet network connection can send error reports direct to ASRock from within the BIOS (or using the included software). I would assume that this also takes a snapshot of BIOS information such that ASRock can find certain issues that may not be obvious to the user.

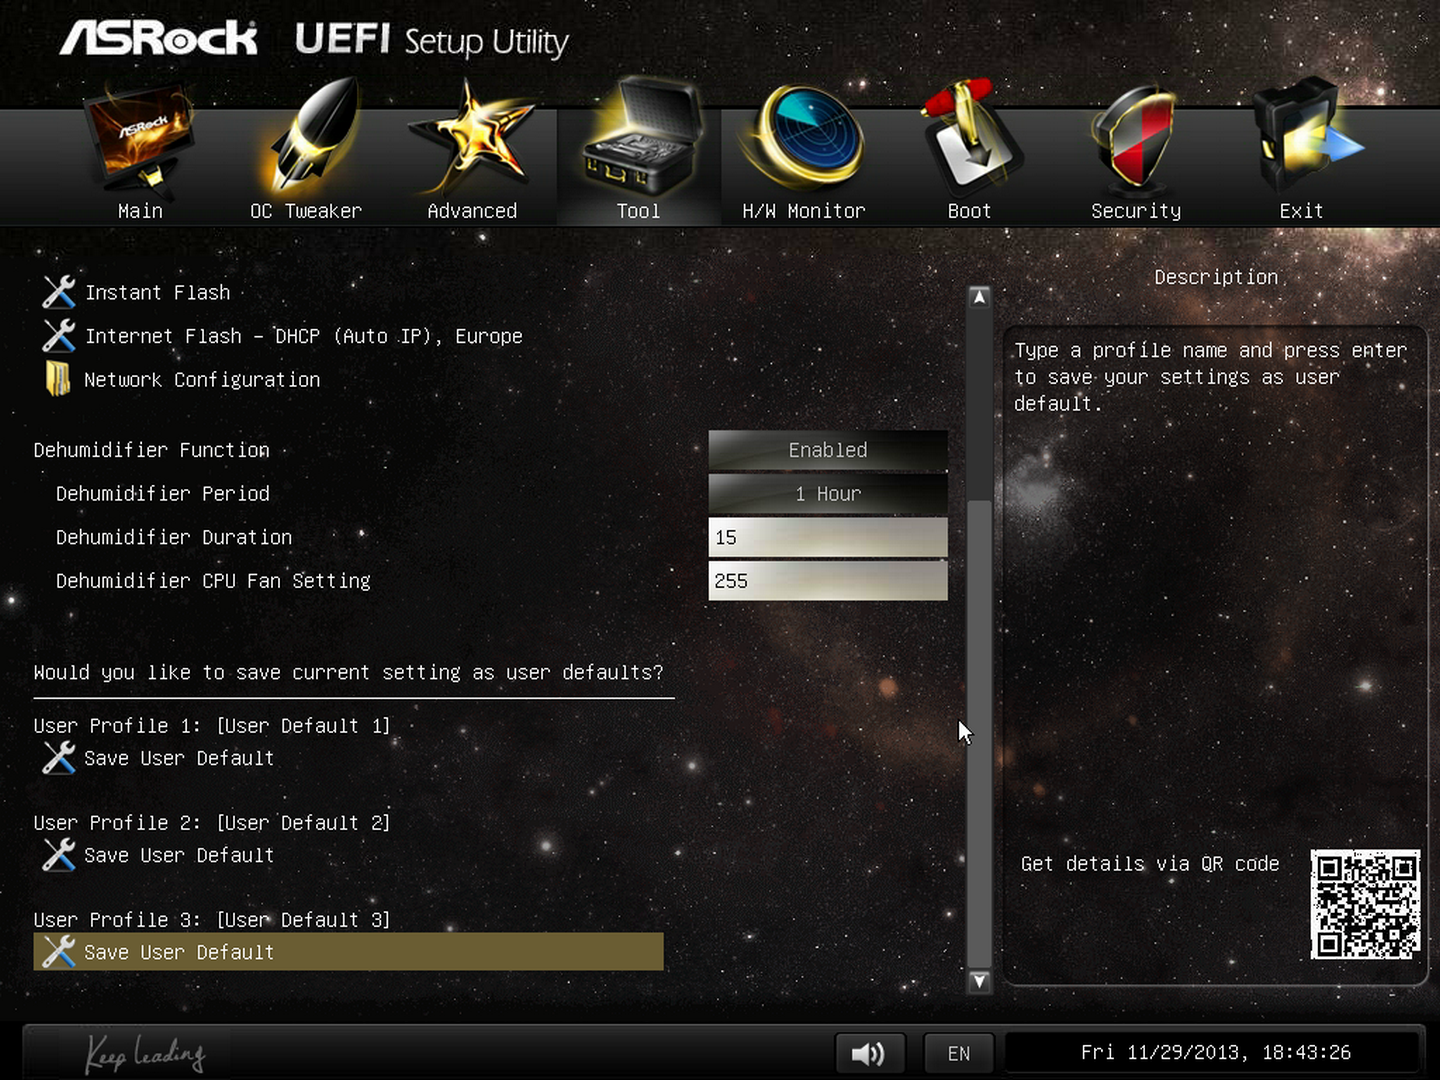
The ‘Tool’ menu allows users to update the BIOS via the internet from within the BIOS itself, which is a feature we have seen from ASRock on previous platforms. The final option to note in this menu is the return of the Dehumidifier function, which keeps the fans spinning after the motherboard is turned off in an effort to equalize the temperature within the case and the ambient temperature. In climates with high humidity, this may help with condensation forming when the temperature outside the case drops, causing a rapid cooling inside the case and condensation to form (think condensation on the inside of a house when it is cold outside).
Despite there being only three fan headers on the motherboard, the hardware monitor tab gives users options to provide multi-point fan profiles for each header:
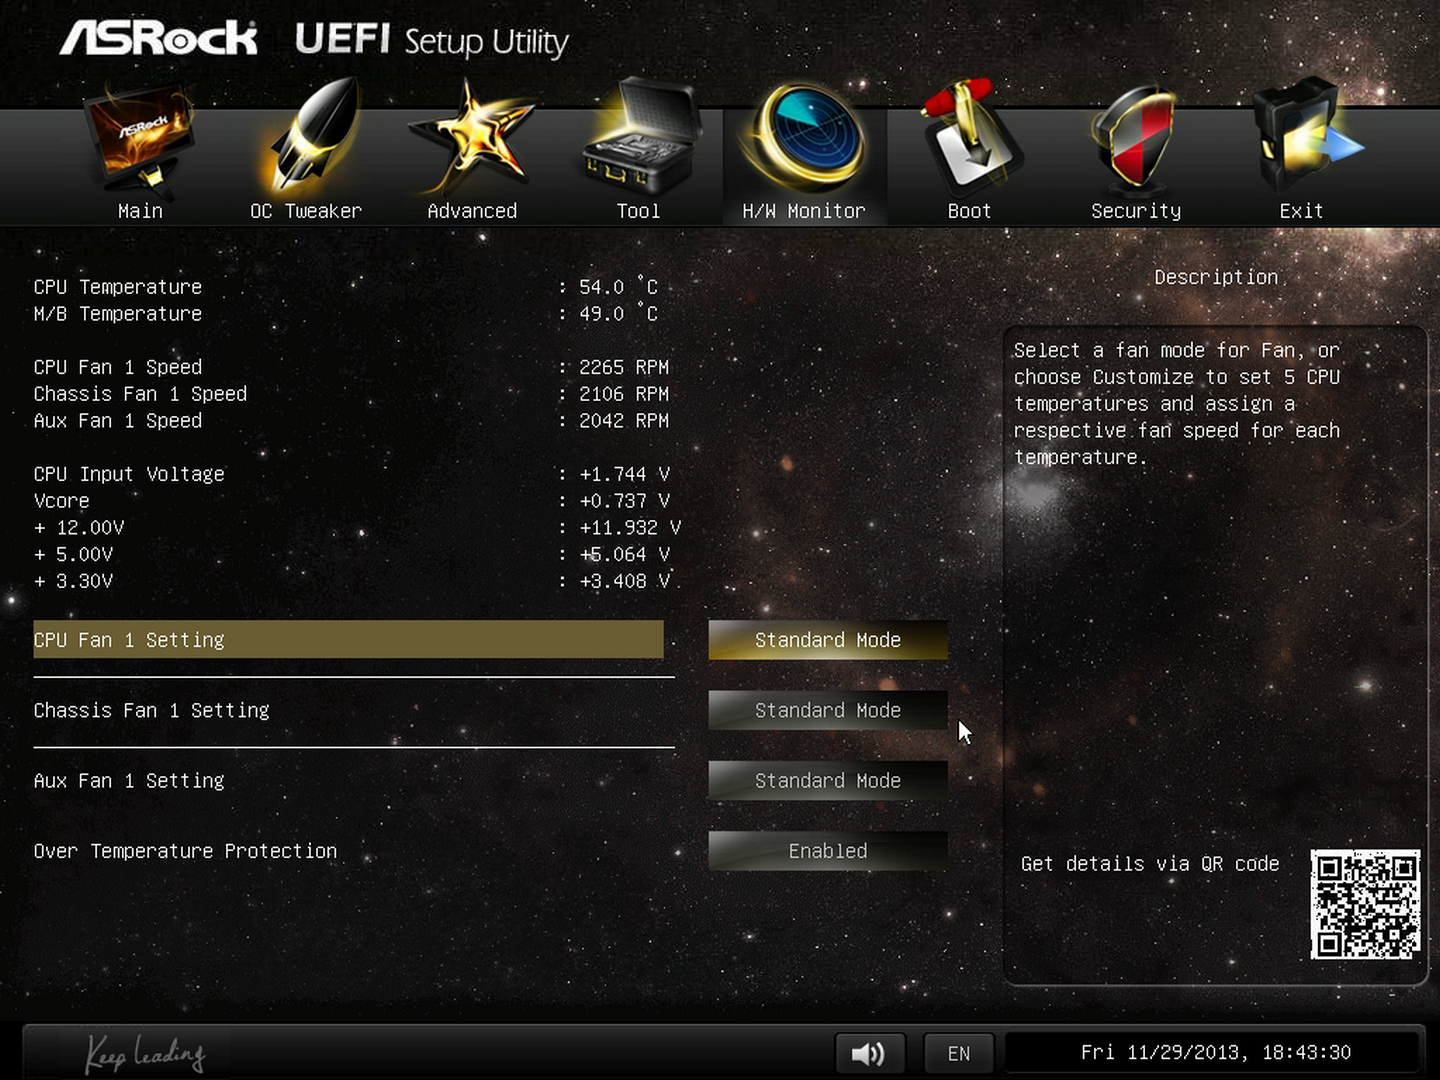
At this point in time I think MSI have the best graphical representation of fan controls in the BIOS, but ASRock have a good multi-point fan option. Despite this, fan controls in the OS are where most manufacturers focus their efforts because that is what more people end up using.


ASRock Z87-M8 Software
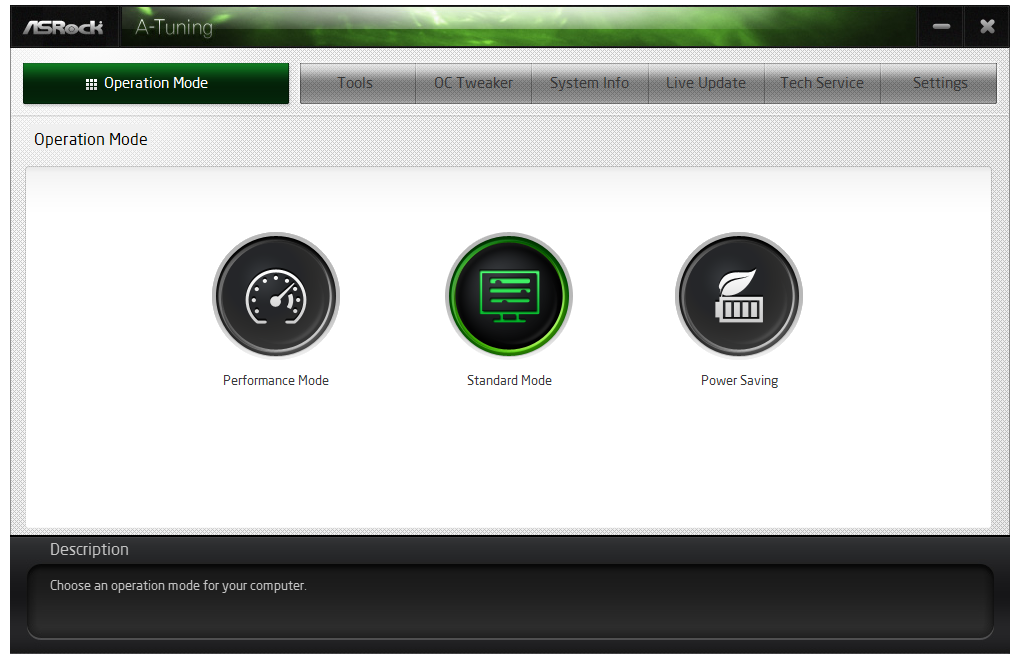
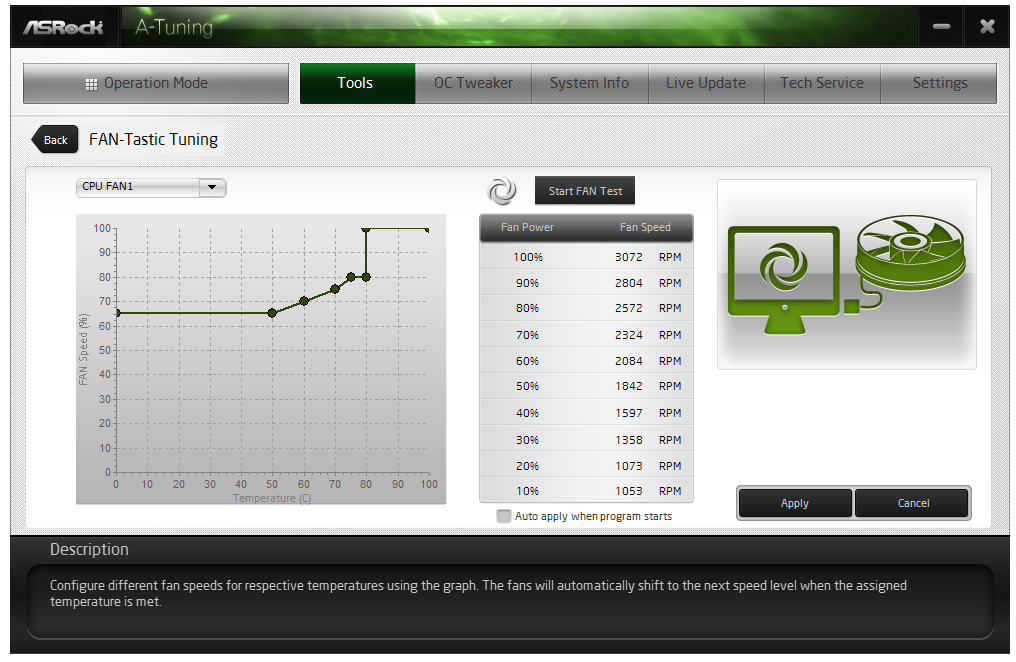
The principles of ASRock software took a small shift with Z87: ASRock placed most of their tools into one interface called A-Tuning. This includes the overclocking options for the OS, fan controls (with fan tester), XFast RAM, System Browser and their Dehumidifier function. The interface is clean and polished for the most part, as we examined in the Z87 Extreme6 review. The automatic overclocking options are still ‘Power Saving’ mode (slow ramp over 8 seconds of sustained load to the multi-threaded turbo multiplier), ‘Standard’, ‘Performance Mode’ (highest turbo bin at any load) and automatic overclocking.

Other software such as XFast RAM and XFast LAN still have their own software utilities as they are licensed versions of retail software.
One update that ASRock are now putting into their software package is a three-month license to XSplit, software to help stream games online in conjunction with twitch or other services. This has a $24.95 value when purchased separately, and is now bundled with all ASRock gaming motherboards. No doubt ASRock got an awesome deal on buying 10000+ (or more) licenses, and it will be hard to determine exactly what extra cost this would mean to the end user. For XSplit it is almost a win-win: sell some licenses, and if the user likes it, they will continue to pay for it.


78 Comments
View All Comments
mwildtech - Thursday, January 2, 2014 - link
50' HDMI cable, Wireless Xbox 360 controller and Steam Big Picture = My Steam BoxBPB - Thursday, January 2, 2014 - link
That would be me too. The 360 wireless setup is great!56tb - Thursday, January 2, 2014 - link
Tek Syndicate did a video of this, you can find it on youtube. They went into a lot of detail on thermals and suchlike, so worth checking out. They even used a Velociraptor to add some extra heat to the mix.pirspilane - Thursday, January 2, 2014 - link
I bought an ASRock barebones system and would recommend steering clear of this. Their techs are either grossly incompetent, dishonest, or both. If you get one with a defect, they will claim your memory, processor, assembly (take your pick) is the problem and give you the runaround. You will waste endless hours of your precious time dealing with their ineptitude, not to mention the cost and time of trips to UPS.Sivar - Thursday, January 2, 2014 - link
Please change the photographs in the article to JPG format.PNG is the best format by far for line art, technical drawings, charts, screen captures from Excel, -- anything without a lot of random color variability -- but is an absolutely terrible format for website photographs.
The images load slowly and many mobile users have to pay for bandwidth past a certain point.
IanCutress - Thursday, January 2, 2014 - link
Noted for the future.nerd1 - Thursday, January 2, 2014 - link
At such a price, it actually seems more logical to get a powerful gaming laptop. You can spend $2K to get a 17" gaming laptop with QC cpu, 780M, SSD and that is actually mobile.nunomoreira10 - Thursday, January 2, 2014 - link
So true, win everywhere.Death666Angel - Monday, January 6, 2014 - link
That 780M is about as fast as a GTX 660TI, which is a bit more than half as powerful as some GTX 780 / R9 290X cards, which you can fit in here (450W is fine for the current crop of high end cards as long as your CPU isn't OC'ed to the max).So I don't see how there is even the slightest comparison. And once you get into 780M SLI territory, you are way up there in price.
cgalyon - Thursday, January 2, 2014 - link
I've read elsewhere that the default fan configuration is not ideal (because they are oriented one up, one down in the top and bottom of the case). Has AsRock changed this? I would like a more detailed look at us thermal characteristics of the case of possible, as it was one of the main things holding me back (the other being weight).Also, I would like to see a review comparing this case to another barebones case, the Shuttle SZ86R6. Don't know how feasible that would be...