Intel Z87 Motherboard Review with Haswell: Gigabyte, MSI, ASRock and ASUS
by Ian Cutress on June 27, 2013 8:00 AM EST- Posted in
- Motherboards
- Intel
- MSI
- Gigabyte
- ASRock
- Asus
- Haswell
- Z87
- Shark Bay
- Lynx Point
MSI Z87-GD65 Gaming BIOS
I am very glad to say that the MSI Z87 BIOS gets a couple of very important updates for the Z87 generation. On Z77 it was a dichotomous situation whereby MSI were very focused on giving users the motherboard information and plenty of options to play with – the downside was that almost no options were ever explained. This is one of the big changes with the MSI Z87 BIOS – the other comes in the form of their fan control tool. While the tool does not necessarily offer the depth of control we would like, it is perhaps one of the better ways of actually displaying the information, and I would like to offer kudos to MSI for the aesthetics.
The BIOS for the Z87-GD65 Gaming gets a gaming touch in order to separate it from the rest of the MSI range: we are talking red and we are talking dragons.
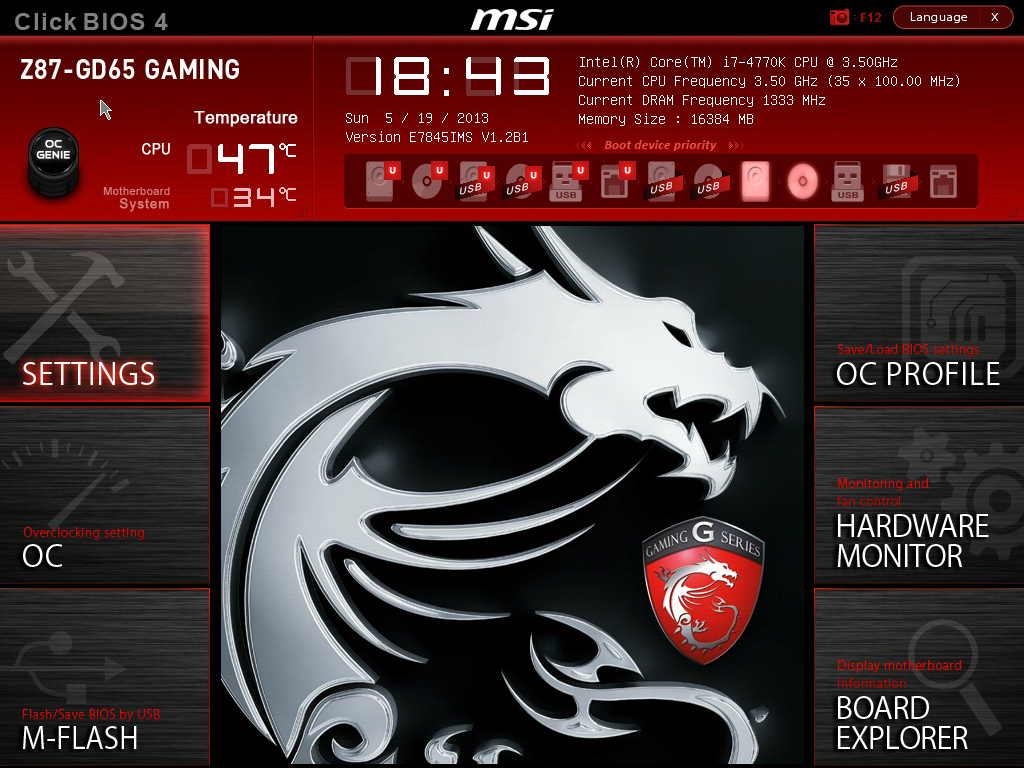
Like the Z77 BIOSes from MSI, the main selling point is the ribbon of information along the top – we get details of the motherboard being used, BIOS version, CPU installed, current speed, memory size and also memory speed. Ultimately all we are lacking is CPU voltages and fan speeds, but there is also perhaps another issue – this ribbon is quite big. Keeping it this size and keeping it a consistent part of the display means that everything else is squashed and it becomes an effort to fit everything in. A few manufacturers that are going down this route are keeping the ribbon small enough to make sure that the actual ‘options’ area of the BIOS have plenty of space.
Aside from the ribbon we have a standard MSI layout of six buttons around the edge and the main options in the middle. For Z87 the options have changed slightly, with the main two additions being Hardware Monitor and Board Explorer. Hardware Monitor is actually an awesome way to organize your fan controls from the BIOS:
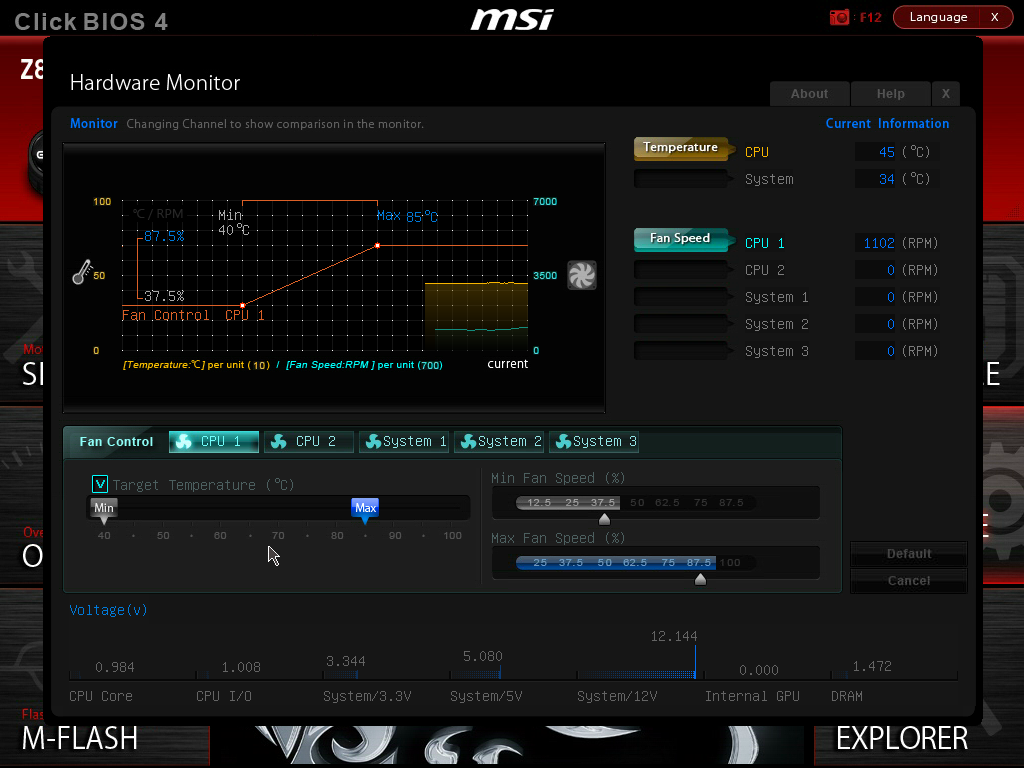
While the level of control is quite small (a two point gradient, no hysteresis, BIOS engineers horrendously confusing power applied to the fans as directly proportional with the actual RPM), the execution of visually showing the fan controls is one of the best we have seen. By moving the sliders in the ‘fan control’ section around the graph changes to show what is actually happening. Aside from the power-to-RPM issue (which should be inexcusable in 2013), what we need here is more control – more points in the gradient to deal with, as well as hysteresis and manual control over the points on the graph. Then perhaps MSI would be onto on overall fan control success.
The second new feature of the BIOS is Board Explorer, which mimics features we originally came across in ASRock BIOSes:
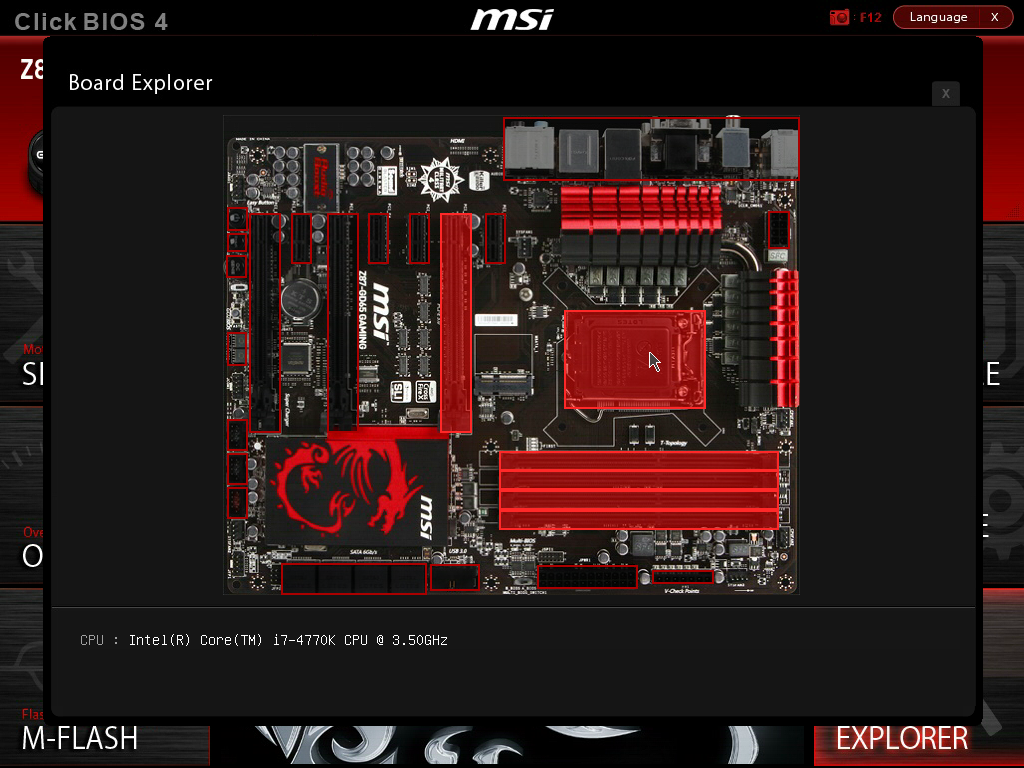
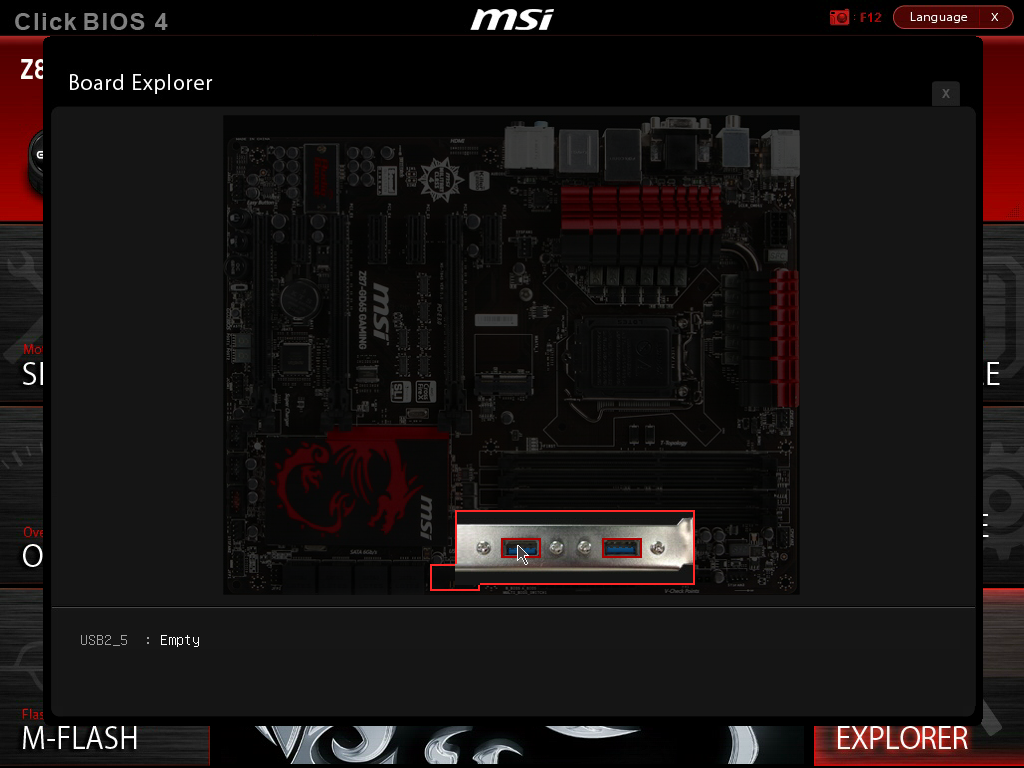
Here is a visual representation of the motherboard, and everything on board which has something plugged in comes up red. My moving the mouse over an area we get an explanation of the hardware plugged in with the hardware string assigned by the manufacturer. Moving to the SATA ports or IO panel and clicking brings up an additional visual showing which ports are in use:
I am glad this is a feature becoming standard. It ultimately helped when I received the ES version of this motherboard into the office and one of the PCIe did not work – I was able to diagnose this issue through Board Explorer. If hardware is not seen here, then it was not recognized by the motherboard at POST time.
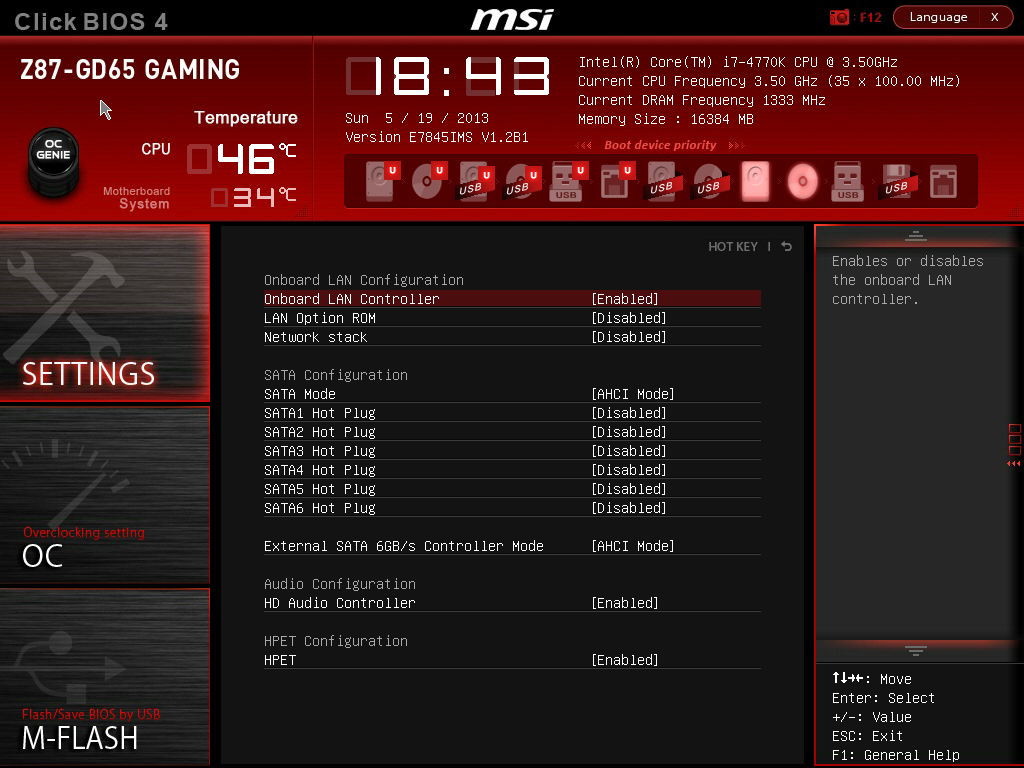
For the rest of the BIOS, we have typical MSI faire. Most of the regular options available to the user are in Settings, including SATA configuration and turning on/off controllers:
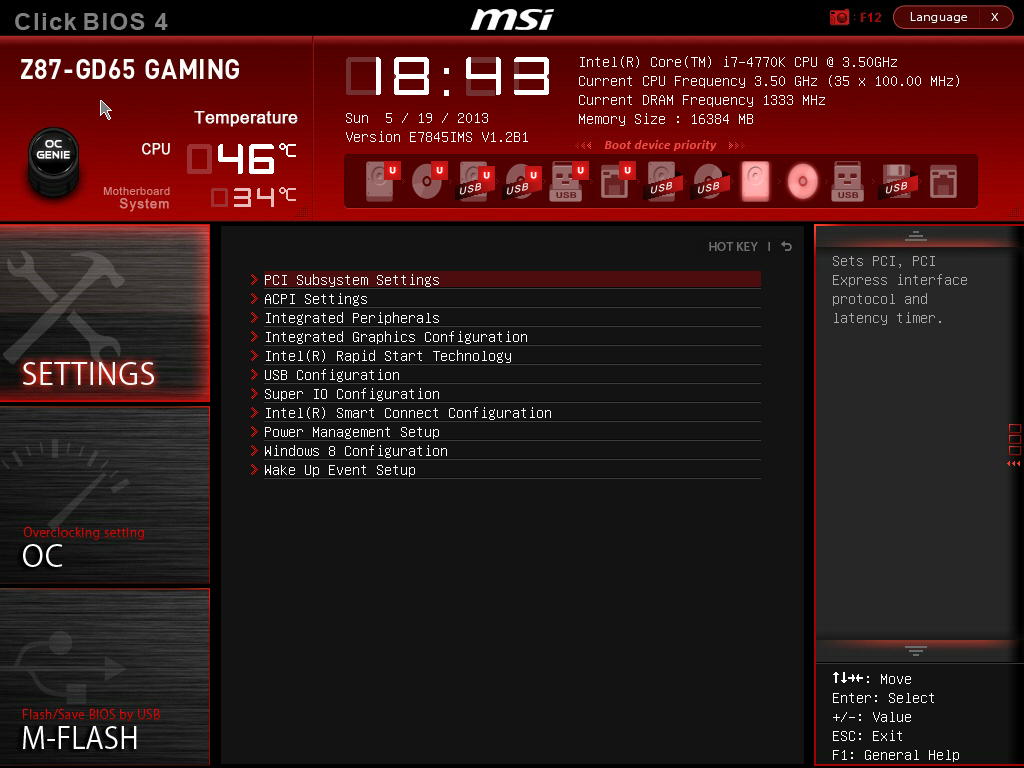
A nice positive is the Boot Override, also slowly becoming standard across all manufacturers allowing a one type boot from a secondary device.
As on the previous MSI Z77, our OC options are almost a complete jumble:
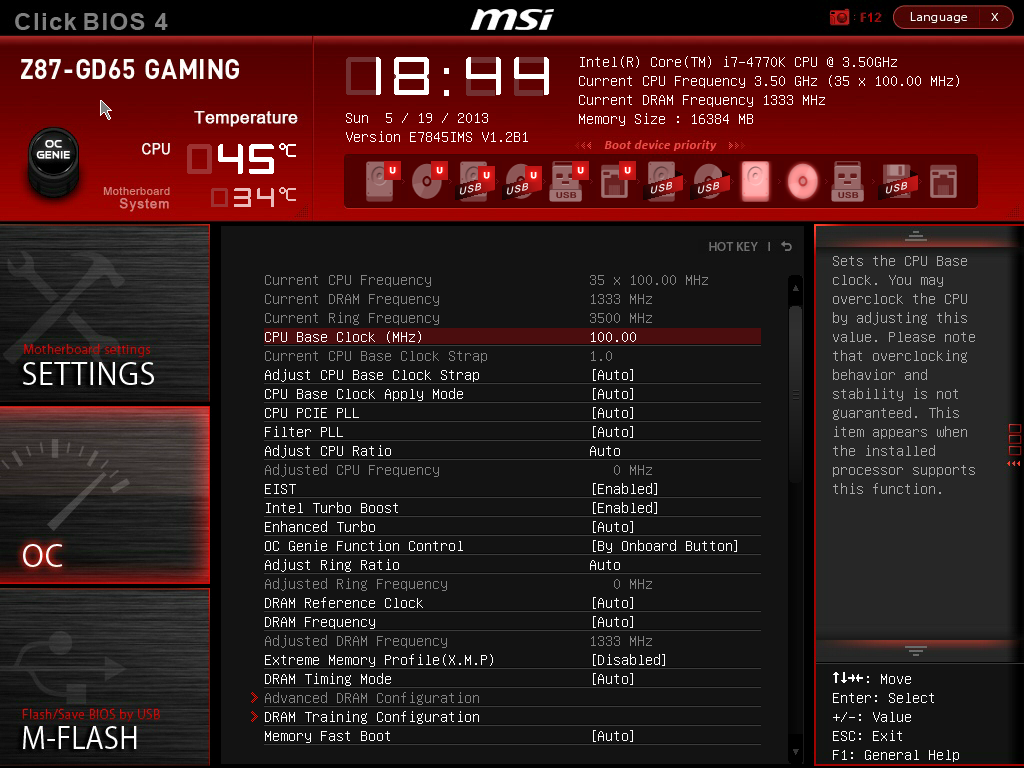
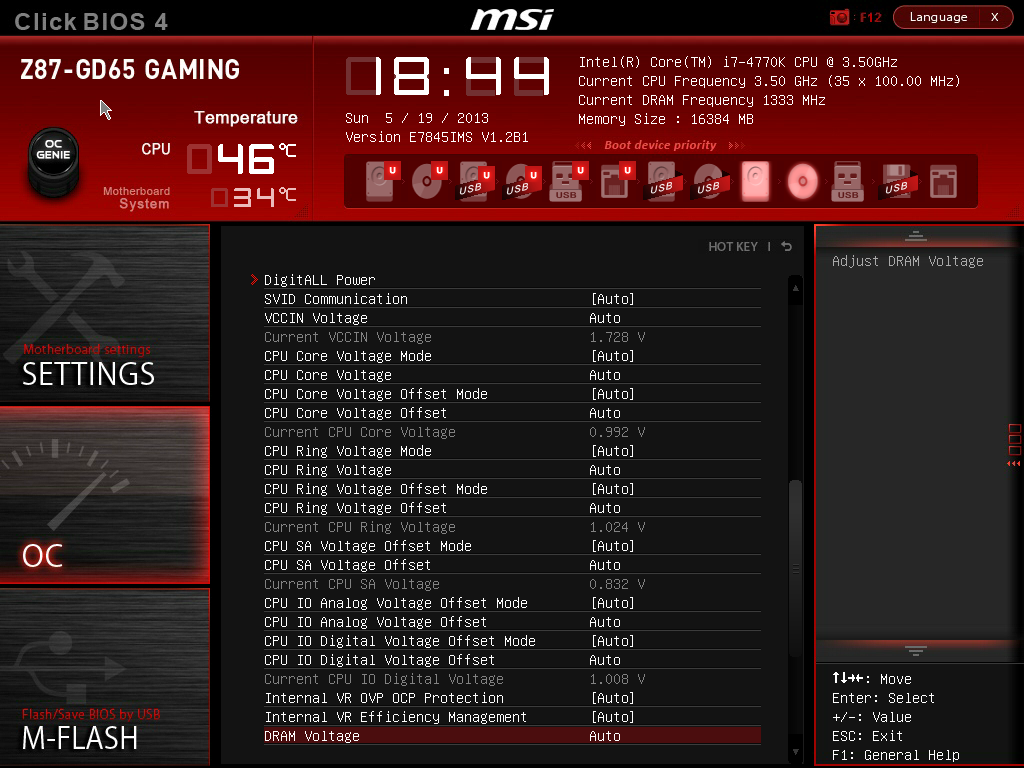
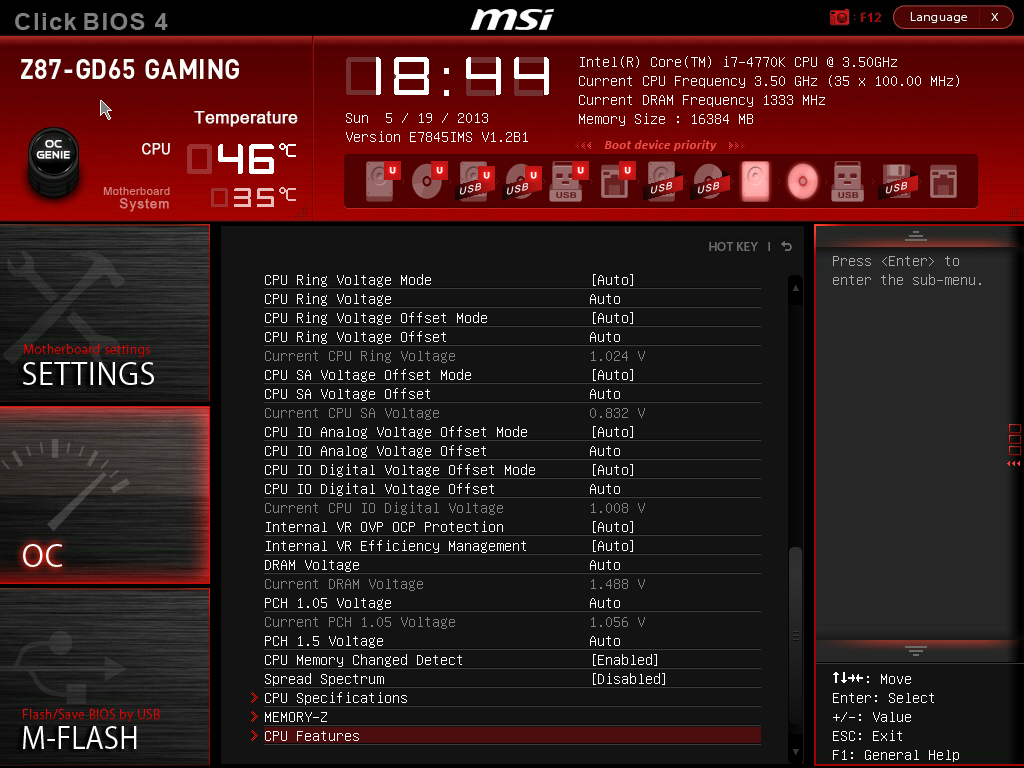
There is some sort of order, but it would be ideal to actually have headings like the Integrated Peripherals menu in standard Settings, such that CPU overclocking features are separate from the DRAM options and then voltage options inserted into the appropriate places. As it stands the MSI BIOS looks like a higgledy-piggledy jumble to a new overclocker. One of the positives on the Z87 generation at least is the addition of the information panel on the right hand side, allowing users to see a small amount of information on each option. Ideally this side panel should also show the min, max, interval and ‘suggested value’ for each option to assist overclockers, but that may appear in another update. It should also be pointed out that for some of the options, there is almost no guidance – it merely repeats the option listed or says ‘Adjust X’, which is not particularly helpful to anyone but the BIOS engineer.
One additional option that MSI should consider is a greater range of automatic overclocking options so users can select between 4.0 and 4.5 GHz in 100 MHz jumps with just an option selection in the BIOS. This would aid users in finding out how to overclock the CPU a bit more, and can work side by side with OC Genie.


58 Comments
View All Comments
clyman - Tuesday, November 26, 2013 - link
In my personal experience and from ASUS tech support, the safest way to update bios is by first downloading it. This mobo has an excellent update program in bios that only looks at local drives, not online. I found it quite simple at each bios update.silenceisgolden - Thursday, June 27, 2013 - link
Great job Ian, really looking forward to the super high end motherboard review as well! I'm curious though, did you use the VGA port at all in any of these reviews, and also when was the last time you used a VGA port?IanCutress - Thursday, June 27, 2013 - link
My Korean 1440p panels are all via DVI-D. But the VGA comes in use when you have to use a DVI-I to VGA converter for DVI-I cables. Otherwise you need a DVI-D cable.JeBarr - Thursday, June 27, 2013 - link
Great review Ian. I very much appreciate your taking the time to explain the PCIe slot assignment and repeating the less-than-x8-no-good-for-SLI truth that needs to spread far and wide.What I took away from this review when analysing my own usage patterns and component choices is that each of the boards in this review would be better suited to the mATX form factor. There is no point in purchasing these mid-high end boards for multi-GPU, multi-display configs. There are only a handful of full size z87 boards that in my opinion earn their full-size status.
Shadowmaster625 - Thursday, June 27, 2013 - link
If it has fully integrated voltage regulators then why in blazes does it still need $20 worth of components buried beneath $3 heatsinks surrounding the cpu socket? Yeah, that's what I thought....DanNeely - Thursday, June 27, 2013 - link
What FIVR means to Intel isn't quite what you think it means. What's on package is the collection of VRs needed to provide power to all the separate sections of the CPU and to vary them as the chip clocks itself up and down. The motherboard itself still needs to do the heavy lifting to convert the 12V from the PSU to the voltage used by the DRAM and to a single input voltage the that CPU converts to the other levels it uses internally (IIRC this is the full load core voltage).I believe the reason why those regulators can be squeezed into the package while the ones still on the mobo are much larger is that the uncore/cache have relatively low power levels and the lower core voltages are only used at low CPU loads and thus don't need to push nearly as high of a peak current level.
WeaselITB - Thursday, June 27, 2013 - link
Wonderful review, Ian. Any chance of a Z87 vs Z77 vs ... comparison chart? It seems like functionalities of the processor are highly publicized, and the individual motherboard reviews chart the differences between chipset models within that family, but I don't recall seeing a comparison between chipset families. I know the chipset seems to be taking a smaller and smaller role these days, but it would still be helpful to exactly see the differences between generations.Thanks!
Kougar - Thursday, June 27, 2013 - link
It doesn't work with my 30" U3011 monitor either, yet another forum user with the same monitor didn't have any problem. Only difference was he used a Radeon and I use a GTX 480.
Creig - Thursday, June 27, 2013 - link
I only had time so far to skim this article, so I apologize if this question was already answered in the body. Is there any way to find out when each board starts shipping with the C2 stepping of the Z87 chipset? As some people are already aware, the C1 stepping has been shown to have issues with certain USB 3.0 controllers disconnecting when the computer awakes from sleep mode. The C2 stepping is apparently already shipping to manufacturers, but it would be handy to know a way to ensure that a person who orders a board in the near future receives the updated chipset.blackie333 - Friday, June 28, 2013 - link
I'm not sure that C2 stepping shipping already started, according to public available plan from May only samples have been sent to manufacturers. Mass production of C2 should start on 1st of July and manufacturers should start receiving them from the 30th of July. Boards based on C2 stepping should be available for end users from middle August.But you maybe have some more actual/insider information.