Cooler Master Cosmos II: Large and in Charge
by Dustin Sklavos on January 23, 2012 3:20 PM EST- Posted in
- Cases/Cooling/PSUs
- Cooler Master
- Full-Tower
Assembling the Cooler Master Cosmos II
Part of the problem with assembling the Cooler Master Cosmos II is that it looks exponentially more complicated than it actually is, and the instruction manual on their website isn't as useful as I would like it to be. Assembly is really fairly simple; the Cosmos II is an oversized ATX case, but in terms of layout Cooler Master hasn't done anything radical here.
Owing to the copious internal real estate, getting the motherboard in is a breeze, but when you're paying $349 for an enclosure at least having the mounting studs preinstalled would've been appreciated. Some of Corsair's enclosures actually have the center stud already installed to use as a guide for getting the rest of the screws in place; why not have something like that here to make life a little easier? Installing the video card is painless as well; Cooler Master uses thumbscrews for the expansion slots but they're in pretty tight and you'll want to use a screwdriver regardless.
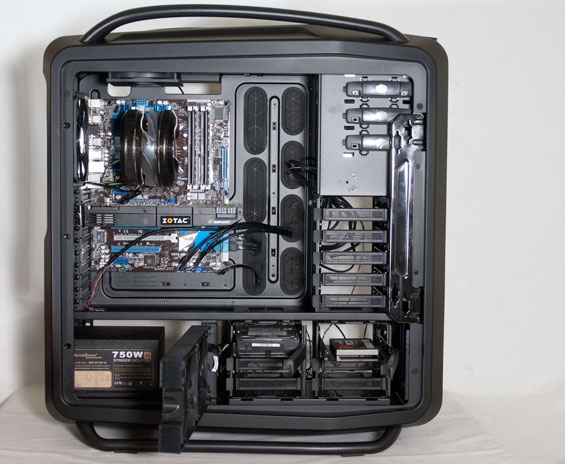
Installing the 3.5" and 2.5" drives is just as easy; Cooler Master uses the same trays for the top and bottom drive cages, and for 3.5" drives you just slide out the tray, snap it around the sides of the drive, and slide the tray back in. 2.5" drives need to be mounted with four screws to the bottom of the tray, but this is par for the course. Where things get dicey is the 5.25" drive bay. The bay shield pops out easily enough thanks to the lever on the left side (though it feels a bit fragile), but the "push-button" locking mechanism for the optical drive is dire and I wouldn't trust it. It's better to screw in the other side of the optical drive and call it a day, but this is not one of the better toolless systems I've seen for mounting 5.25" drives.
Finally, getting the power supply in and the cables all routed proved simple enough; there's just enough space between the PSU and the bottom drive cage to plug in modular cables without too much discomfort, but the mounting bracket for the PSU affords you a little more real estate if you need it. Cooler Master also smartly includes an extension cable for the AUX 12V line; our power supply didn't need it, but the cable was stretched about as far as it could go (and this is true for most of the power leads, actually). Finally, there's a healthy amount of headroom at the top for plugging in the AUX 12V, owing to the space needed to mount a full 360mm radiator.


I'm not ashamed to admit the most confusing part of the assembly was actually figuring out what the heck all the two-pin leads coming off of the top control panel were. There's a massive braid of them in the case, and these turned out to be the LED controls. You'll want to tuck these leads behind the motherboard tray (along with the extra fan headers) as only the front intake fan actually uses the LED lead. I did like that there's no dedicated power indicator lead for the motherboard front panel headers; given that the power button is powered by the same molex connection that powers the fan controller, what purpose is there for one? Yet you'd be surprised how many enclosures include one anyhow.
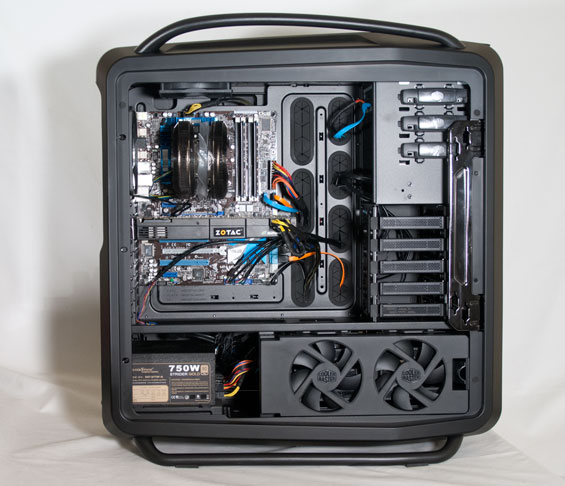
Ultimately, assembly and cable routing was really very easy, which is the major perk of a case of this magnitude. The worst part was trying to get the case to lay flat on the table, and then having to manipulate it to route cables, install parts, and so on. The case is very large and that makes it a bit awkward to manipulate, but in the end it's not hard to produce a nice, clean assembly in the Cosmos II.


53 Comments
View All Comments
GoGamerPro - Tuesday, February 7, 2012 - link
I have games and computers for sale at http://gogamerpro.comarijit.ray81 - Sunday, July 28, 2013 - link
The X-Dock DOES NOT take up 2 (TWO) 5.25" bays. It takes up about 1.5 (One & Half) of them. I know we can swap them out. However, I'm looking for suitable front panel replacement to put in there. I cant find anything that will fit in that slot. Any suggestions?arijit.ray81 - Friday, October 3, 2014 - link
How much spacing is there between the motherboard & top? Can we mount a H110?