ZFS - Building, Testing, and Benchmarking
by Matt Breitbach on October 5, 2010 4:33 PM EST- Posted in
- IT Computing
- Linux
- NAS
- Nexenta
- ZFS
SuperMicro SC846E1-R900B
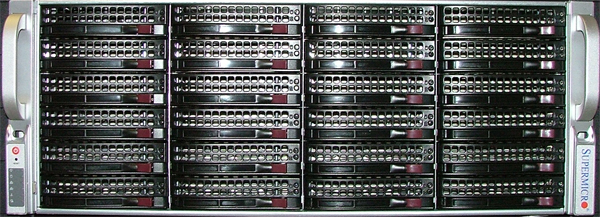
Click to enlarge
Our search for our ZFS SAN build starts with the Chassis. We looked at several systems from Supermicro, Norco, and Habey. Those systems can be found here :
SuperMicro : SuperMicro SC846E1-R900B
Norco : NORCO RPC-4020
Norco : NORCO RPC-4220
Habey : Habey ESC-4201C
The Norco and Habey systems were all relatively inexpensive, but none came with power supplies, nor did they support daisy chaining to additional enclosures without using any additional SAS HBA cards. You also needed to use multiple connections to the backplane to access all of the drive bays.
The SuperMicro system was by far the most expensive of the lot, but it came with redundant hot-swap power supplies, the ability to daisy chain to additional enclosures, 4 extra hot-swap drive bays, and the connection to the backplane was a single
Click to enlarge
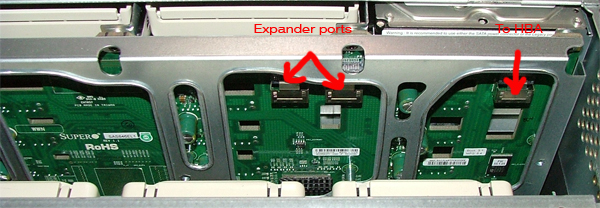
The SuperMicro backplane also gives us the ability without any additional controllers to daisy chain to additional external chassis using the built in expander. This simplifies expansion significantly, allowing us to simply add a cable to the back of the chassis for additional enclosure expansion without having to add an extra HBA.
Given the cost to benefits analysis, we decided to go with the SuperMicro chassis. While it was $800 more than other systems, having a single connector to the backplane allowed us to save money on the SAS HBA card (more on this later). To support all of the other systems, you either needed to have a 24 port RAID card or a SAS controller card that supported 5
We also found that the power supplies we would want for this build would have significantly increased the cost. By having the redundant hot-swap power supplies included in the chassis, we saved additional costs. The only power supply that we found that would come close to fulfilling our needs for the Norco and Habey units was an Athena Power Hot Swap Redundant power supply that was $370 Athena Power Supply. Factoring that in to our purchasing decisions makes the SuperMicro chassis a no-brainer.

Click to enlarge
We moved the SuperMicro chassis into one of the racks in the datacenter for testing as testing it in the office was akin to sitting next to a jet waiting for takeoff. After a few days of it sitting in the office we were all threatening OSHA complaints due to the noise! It is not well suited for home or office use unless you can isolate it.
Click to enlarge
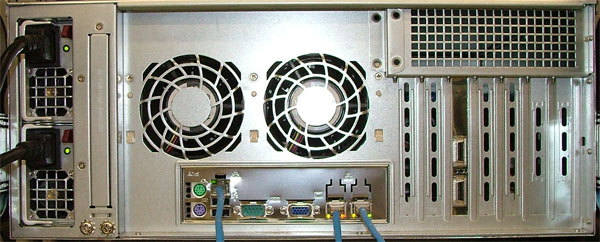
Rear of the SuperMicro chassis. You can also see three network cables running to the system. The one on the left is the connection to the IPMI management interface for remote management. The two on the right are the gigabit ports. Those ports can be used for internal
Click to enlarge
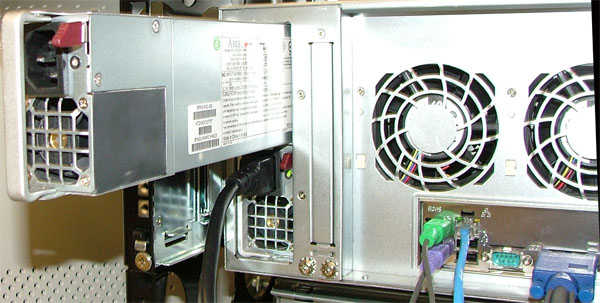
Removing the Power supply is as simple as pulling the plug, flipping a lever, and pulling out the PSU. The system stays online as long as one power supply is in the chassis and active.
Click to enlarge
This is the Power Distribution Backplane. This allows both PSU’s to be active and hot swapable. If this should ever go out, it is field replaceable, but the system does have to go offline.
A final thought on the Chassis selection – SuperMicro also offers chassis with 1200W power supplies. We considered this, but when we looked at the decisions that we were making on hard drive selections, we decided 900W would be plenty. Since we are selecting a hybrid storage solution using 7200
Another consideration would be if you decided to create a highly available system. If that is your goal you would want to use the E2 version of the chassis that we selected, as it supports dual SAS controllers. Since we are using SATA drives and SATA drives only support a single controller we decided to go with the single controller backplane.
Additional Photos :
Click to enlarge
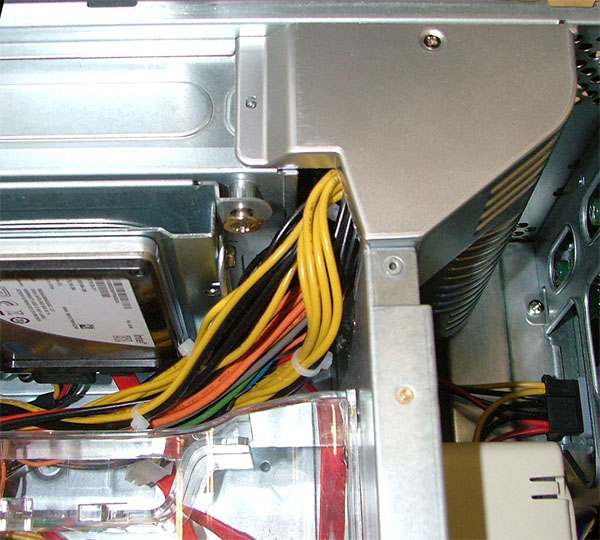
This is the interior of the chassis, looking from the back of the chassis to the front of the chassis. We had already installed the SuperMicro X8ST3-F Motherboard, Intel Xeon E5504 Processor, Intel Heatsink, Intel X25-V SSD drives (for the mirrored boot volume), and cabling when this photo was taken.
Click to enlarge
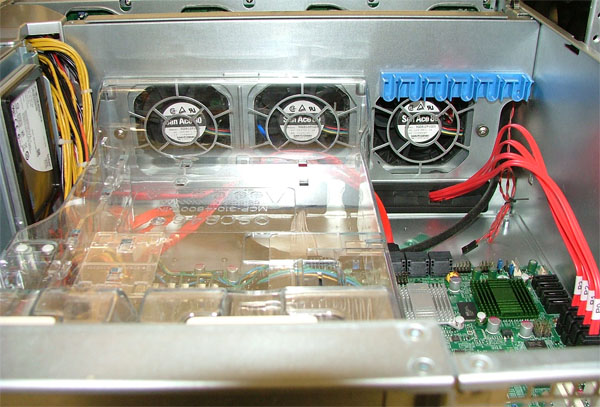
This is the interior of the chassis, showing the memory, air shroud, and internal disk drives. The disks are currently mounted so that the data and power connectors are on the bottom.
Click to enlarge
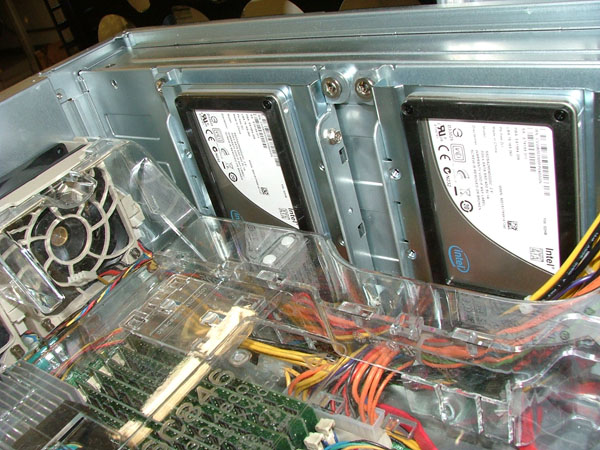
Another photo of the interior of the chassis looking at the hard drives. 2.5″ hard drives make this installation simple. Some of our initial testing with 3.5″ hard drives left us a little more cramped for space.
Click to enlarge
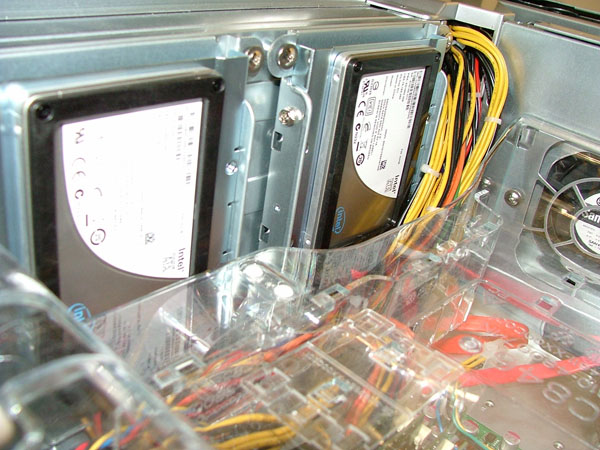
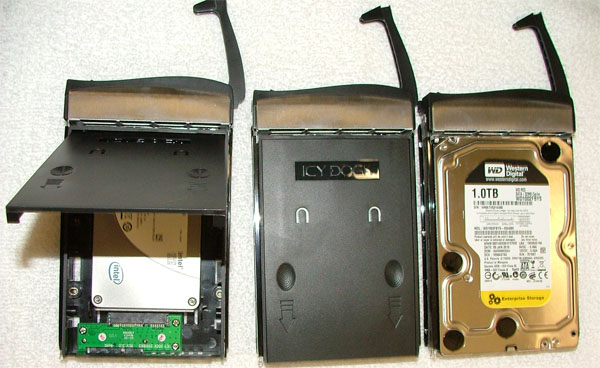
The hot swap drive caddies are somewhat light-weight, but that is likely due to the high density of the drive system. Once you mount a hard drive in them though they are sufficiently rigid for any needs. Do not plan on dropping one on the floor though and having it save your drive. You can also see how simple it is to change out an SSD. We used the IcyDock’s for our SSD location because they are tool-less. If an SSD were to go bad, we simply pull the drive out, flip the lid open quick, and drop in a new drive. The whole process would take 30 seconds, which is very handy if the need ever arises.
Click to enlarge
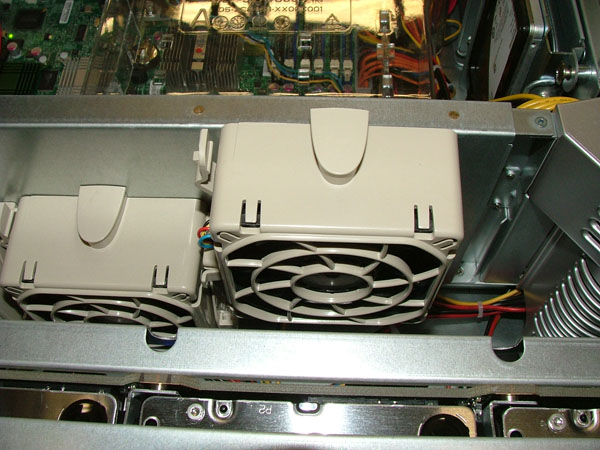
The hot-swap fans are another nice feature. The fan on the right is partially removed, showing how simple it is to remove and install fans. Being able to simply slide the chassis out, open the cover, and drop in new fans without powering the system down is a must-have feature for a storage system such as this. We will be using this in a production environment where taking a system offline just to change a fan is not acceptable.
Click to enlarge
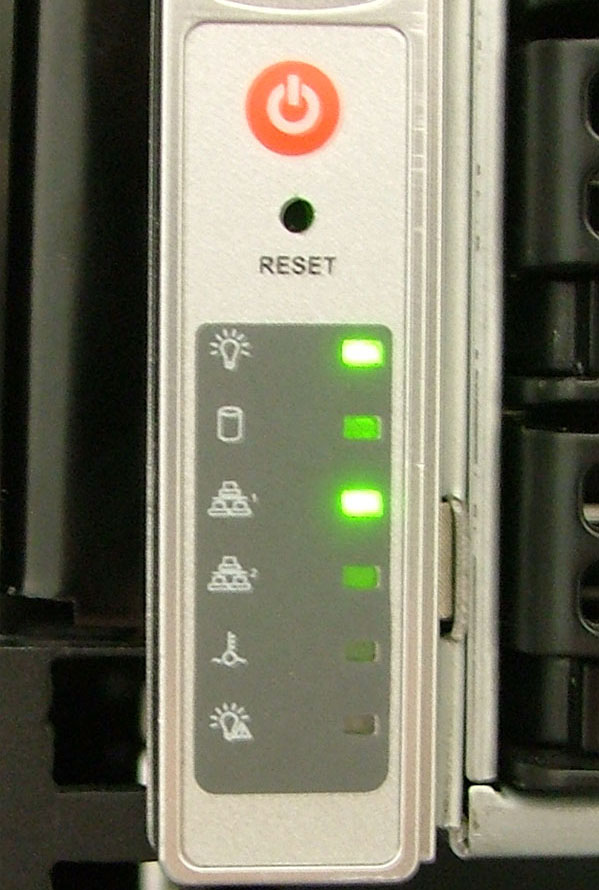
The front panel is not complicated, but it does provide us with what we need. Power on/off, reset, and indicator lights for Power, Hard Drive Activity, LAN1 and LAN2, Overheat, and Power fail (for failed Power Supply).
Motherboard Selection – SuperMicro X8ST3-F
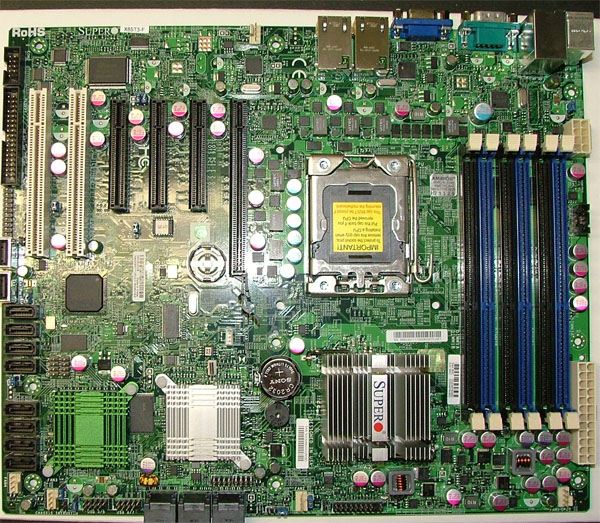
Click to enlarge
Motherboard Top Photo
We are planning on deploying this server with OpenSolaris. As such we had to be very careful about our component selection. OpenSolaris does not support every piece of hardware sitting on your shelf. We had several servers that we tested with that would not boot into OpenSolaris at all. Granted, some of these were older systems with somewhat odd configurations. In any event, component selection needed to be made very carefully to make sure that OpenSolaris would install and work properly.
In the spirit of staying with one vendor, we decided to start looking with SuperMicro. Having one point of contact for all of the major components in a system sounded like a great idea.
Our requirements started with requiring that it support the Intel Xeon Nehalem architecture. The Intel Xeon architecture is very efficient and boasts great performance even at modest speeds. We did not anticipate unusually high loads with this system though, as we will not be doing any type of RAID that would require parity. Our RAID volumes will be mirrored VDEV’s (RAID10). As we did not anticipate large amounts of CPU time, we decided that the system should be single processor based.

Click to enlarge
Single CPU Socket for LGA 1366 Processor
Next on the list is RAM sizing. Taking in to consideration the functionality of the ARC cache in ZFS we wanted our system board to support a reasonable amount of RAM. The single processor systems that we looked at all support a minimum of 24GB of RAM. This is far ahead of most entry level RAID subsystems, most of which ship with 512MB-2GB of RAM (our 16 drive Promise RAID boxes have 512MB, upgradeable to a maximum of 2GB).
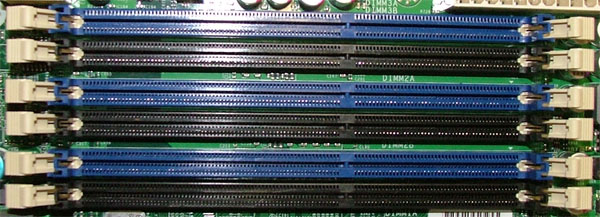
Click to enlarge
6 RAM slots supporting a max of 24GB of DDR3 RAM.
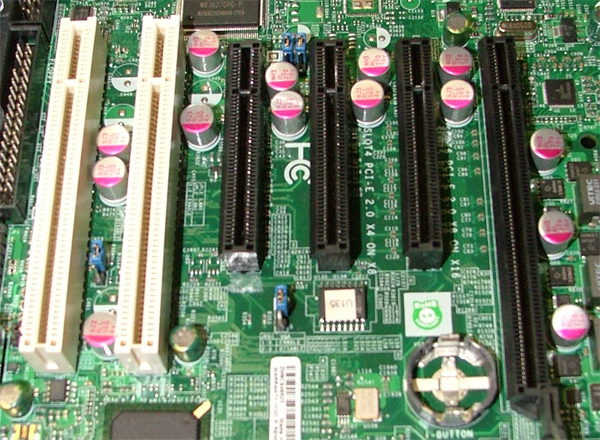
For expansion we required a minimum of 2 PCI-E x8 slots for Infiniband support and for additional SAS HBA cards should we need to expand to more disk drives than the system board supports. We found a lot of system boards that had one slot, or had a few slots, but none that had just the right number while supporting all of our other features, then we came across the X8ST3-F. The X8ST3-F has 3 X8 PCI-E slots (one is a physical X16 slot), 1 X4 PCI-E slot (in a physical X8 slot) and 2 32bit PCI slots. We believe that this should more than adequately handle anything that we need to put into this system.
Click to enlarge
PCI Express and PCI slots for Expansion
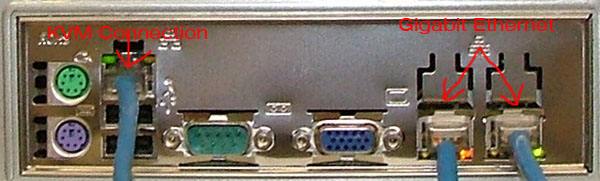
We also need Dual Gigabit Ethernet. This allows us to maintain one connection to the outside world, plus one connection into our current iSCSI infrastructure. We have a significant iSCSI setup deployed and we will need to migrate that data from the old iSCSI
Click to enlarge
Lastly, we required remote KVM capabilities, which is one of the most important factors in our system. Supermicro provides excellent remote KVM capabilities via their IPMI interface. We are able to monitor system temps, power cycle the system, re-direct CD/
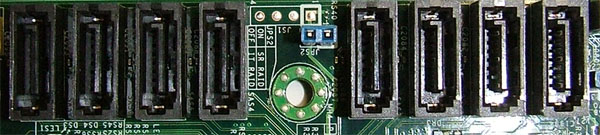
Our search (and phone calls to SuperMicro) lead us to the SuperMicro X8ST3-F. It supported all of our requirements, plus it had an integrated SAS controller. The integrated SAS controller was is an
Click to enlarge
Jumper to switch from RAID to I/T mode and 8 SAS ports.
After speaking with SuperMicro, and searching different forums, we found that several people had successfully used the X8ST3-F with OpenSolaris. With that out of the way we ordered the Motherboard.
Processor Selection – Intel Xeon 5504
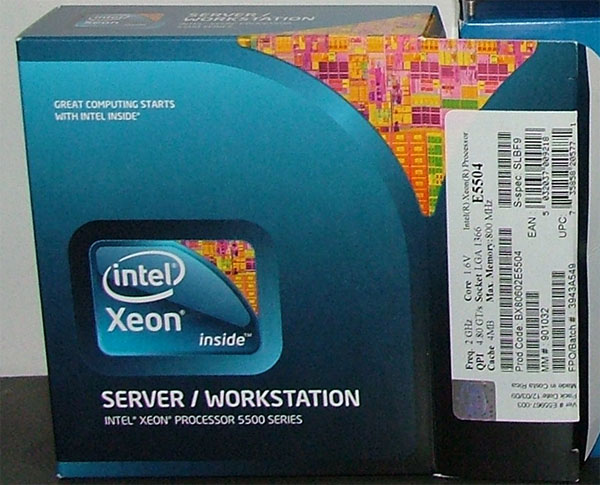
Click to enlarge
With the motherboard selection made, we could now decide what processor we wanted to put in this system. We initially looked at the Xeon 5520 series processors, as that is what we use in our BladeCenter blades. The 5520 is a great processor for our Virtualization environment due to the extra cache and hyperthreading, allowing it to work on 8 threads at once. Since our initial design plans dictated that we would be using Mirrored Striped VDEV’s with no parity, we decided that we would not need that much processing power. In keeping with that idea, we selected a Xeon 5504. This is a 2.0ghz processor with 4 cores. Our thoughts are that it should be able to easily handle the load that will be presented to it. If it does not, the system can be upgraded to a Xeon E5520 or even a W5580 processor, with a 3.2ghz operating speed if the system warrants it. Testing will be done to make sure that the system can handle the IO load that we will need to handle.
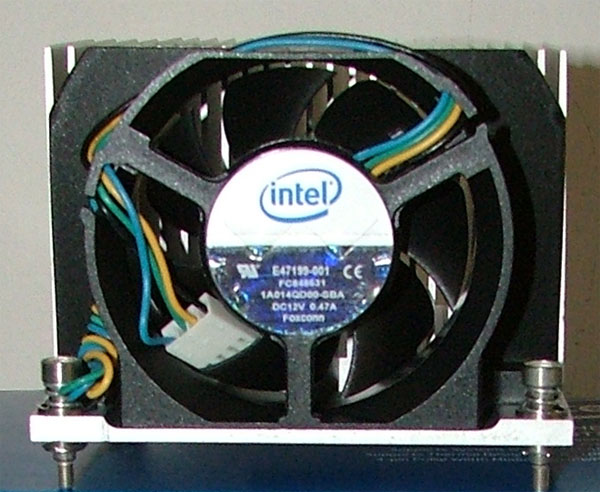
Cooling Selection – Intel BXSTS100A Active Heatsink with fan
Click to enlarge
We selected an Intel stock heatsink for this build. It has a TDP of 80Watts, which is exactly what our processor is rated at.
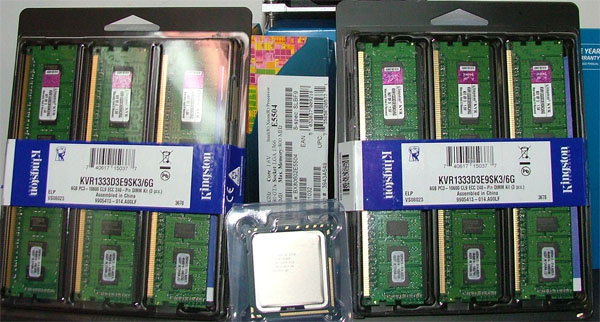
Memory Selection – Kingston Value Ram 1333mhz ECC Unbuffered DDR3
Click to enlarge
We decided to initially populate the ZFS server with 12GB of
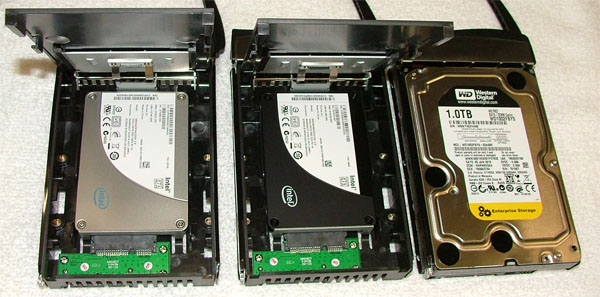
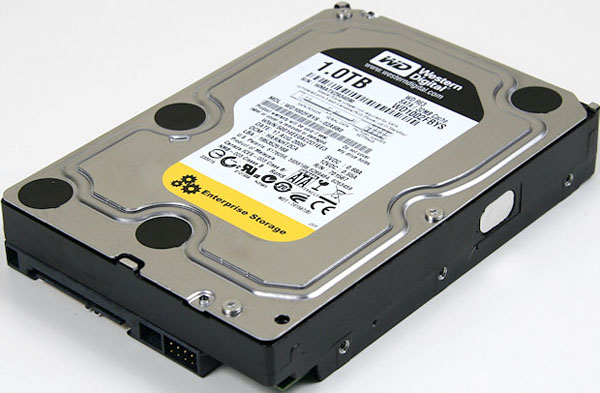
To get the affordable part of the storage under hand, we had to investigate all of our options when it came to hard drives and available SATA technology. We finally settled on a combination of Western Digital RE3 1TB drives, Intel X25-M G2 SSD’s, Intel X25-E SSD’s, and Intel X25-V SSD’s.
Click to enlarge
The whole point of our storage build was to give us a reasonably large amount of storage that still performed well. For the bulk of our storage we planned on using enterprise grade SATA
Click to enlarge
To accelerate the performance of our ZFS system, we employed the L2ARC caching feature of ZFS. The L2ARC stores recently accessed data, and allows it to be read from a faster medium than traditional rotating
Click to enlarge
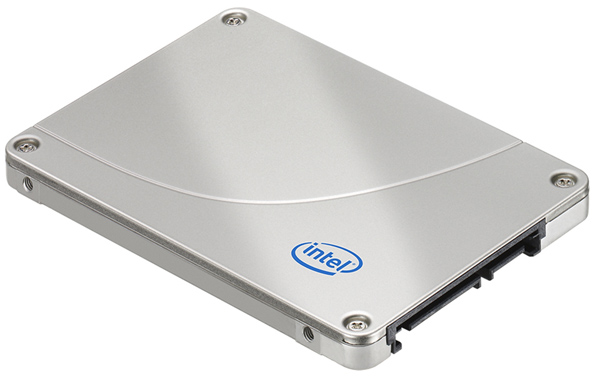
To accelerate write performance we selected 32GB Intel X25-E drives. These will be the ZIL (log) drives for the ZFS system. Since ZFS is a copy-on-write file system, every transaction is tracked in a log. By moving the log to SSD storage, you can greatly improve write performance on a ZFS system. Since this log is accessed on every write operation, we wanted to use an SSD drive that had a significantly longer life span. The Intel X25-E drives are an SLC style flash drive, which means they can be written to many more times than an MLC drive and not fail. Since most of the operations on our system are write operations, we had to have something that had a lot of longevity. We also decided to mirror the drives, so that if one of them failed, the log did not revert to a hard-drive based log system which would severely impact performance. Intel quotes these drives as 3300 IOPS write and 35,000 IOPS read. You may notice that this is lower than the X25-M G2 drives. We are so concerned about the longevity of the drives that we decided a tradeoff on IOPS was worth the additional longevity.
Click to enlarge
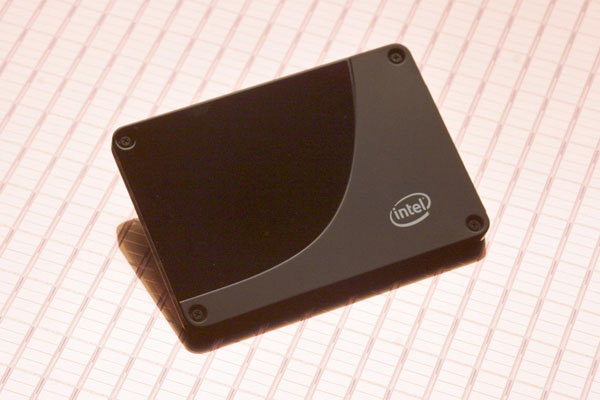
For our boot drives, we selected 40GB Intel X-25V SSD drives. We could have went with traditional rotating media for the boot drives, but with the cost of these drives going down every day we decided to splurge and use SSD’s for the boot volume. We don’t need the ultimate performance that is available with the higher end SSD’s for the boot volume, but we still realize that having your boot volumes on SSD’s will help reduce boot times in case of a reboot and they have the added bonus of being a low power draw device.
Click to enlarge
Important things to remember!
While building up our ZFS SAN server, we encountered a few issues in not having the correct parts on hand. Once we identified these parts, we ordered them as needed. The following is a breakdown of what not to forget.
Heatsink Retention bracket
We got all of our parts in, and we couldn’t even turn the system on. We neglected to take in to account that the heatsink that we ordered gets screwed down. The bracket needed for this is not included with the heatsink, the processor, the motherboard, or the case. It was a special order item from SuperMicro that we had to source before we could even turn the system on.
The Supermicro part number for the heatsink retention bracket is BKT-0023L – a Google search will lead you to a bunch of places that sell it.
SuperMicro Heatsink Retention Bracket
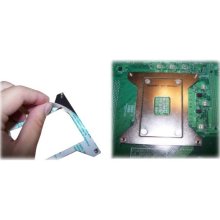
Reverse Breakout Cable
The motherboard that we chose actually has a built in
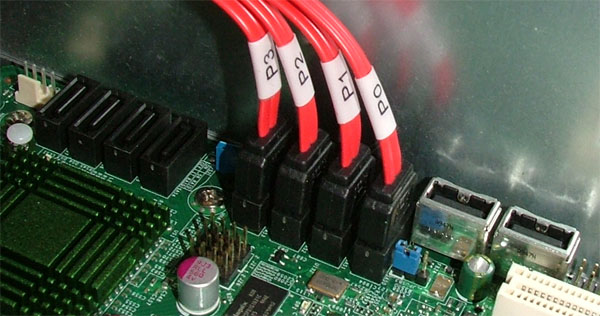
Click to enlarge
Reverse Breakout Cable – Discreet Connections.
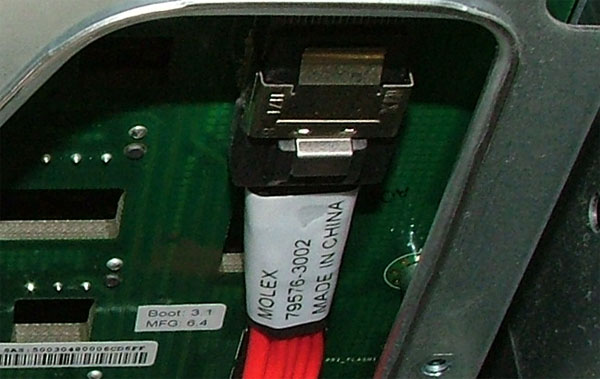
Click to enlarge
Reverse Breakout Cable – SFF8087 End
Fixed
Dual 2.5″ HDD Tray part number – MCP-220-84603-0N
Single 3.5″ HDD Tray part number – MCP-220-84601-0N
LA or RA power and data cables – We also neglected to notice that when using the 3.5″ HDD trays that there isn’t really any room for cable clearance. Depending on how you mount your 3.5″ HDD’s, you will need Left Angle or Right Angle power and data connections. If you mount the power and data connectors at the top of the case, you’ll need Left Angle cabling. If you can mount the drives so the power and data are at the bottom of the case, you could use Right Angle cabling.
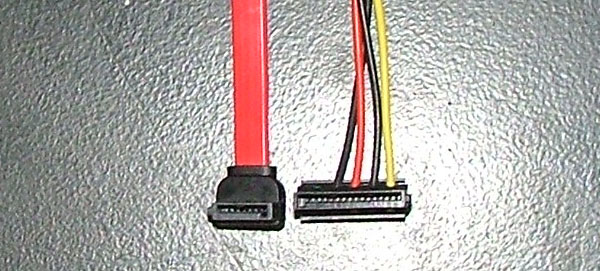
Click to enlarge
Left Angle Connectors
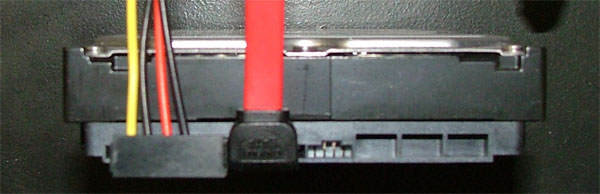
Click to enlarge
Left Angle Connectors connected to a HDD
Power extension cables – We did not run in to this, but we were advised by SuperMicro that it’s something they see often. Someone will build a system that requires 2x 8 pin power connectors, and the secondary 8 pin connector is too short. If you decide to build this project up using a board that requires dual 8 pin power connectors, be sure to order an extension cable, or you may be out of luck.
Fan power splitter – When we ordered our motherboard, we didn’t even think twice about the number of fan headers on the board. We’ve actually got more than enough on the board, but the location of those gave us another item to add to our list. The rear fans in the case do not have leads long enough to reach multiple fan headers. On the system board that we selected there was only one fan header near the dual fans at the rear of the chassis. We ordered up a 3 pin fan power splitter, and it works great.


102 Comments
View All Comments
sfw - Wednesday, October 13, 2010 - link
I'm just wondering about SAS bandwidth. If you connect the backplane via 4 SAS lanes you have a theoretical peak throughput of around 1,200MB/s. The RE3 has an average read/write spead of around 90MB/s so you could already saturate the backplane connection with about thirteen RE3s at average speed. Given the fact you also connect the SSDs this seems to a bottleneck you may wish to consider on your "areas where we could have improved the original build" list.By the way: really great article! Thanks for it...
Mattbreitbach - Wednesday, October 13, 2010 - link
While in pure sequential reads (from all drives at the same time) would yield a bottleneck, I don't know of any instances where you would actually encounter that in our environment. Throw in one random read, or one random write, and suddenly the heads in the drives are seeking and delivering substantially lower performance than in a purely sequential read situation.If this was purely a staging system for disk to tape backups, and the reads were 100% sequential, I would consider more options for additional backplane bandwidth. Since this isn't a concern at this time and this system will be used primarily for VM storage, and our workloads show a pretty substantial random write access pattern (67 write/ 33 read is pretty much the norm, fully random) the probability of saturating the SAS bus is greatly reduced.
sfw - Thursday, October 14, 2010 - link
Concerning random IO you are surely right and the impressing numbers of your box prove this. But even if you don't have sequential workload there is still "zpool scrub" or the possible need to resilver one or more drives which will fill your bandwidth.I've checked the options at Supermicro and beside the SC846E1 they are offering E16, E2 and E26 versions with improved backplane bandwidth. The difference in price tag isn't that huge and should not have much impact if your are thinking of 15k SAS or SSD drives.
Mattbreitbach - Thursday, October 14, 2010 - link
The E2 and E26 are both dual-controller designs, which are meant for dual SAS controllers so that you can have failover capabilities.The E16 is the same system, but with SAS 2.0 support, which doubles the available bandwidth. I can definately see the E16 or the E26 as being a very viable option for anyone needing more bandwidth.
solori - Thursday, October 21, 2010 - link
Actually (perhaps you meant to say this), the E1 and E16 are single SAS expander models, with the E16 supporting SAS2/6G. The E2 and E26 as dual SAS expander models, with the E26 supporting SAS2/6G.The dual expander design allows for MPxIO to SAS disks via the second SAS port on those disks. The single expander version is typical of SATA-only deployments. Each expander has auto-sensing SAS ports (typically SFF8088) that can connect to HBA or additional SAS expanders (cascade.)
With SAS disks, MPxIO is a real option: allowing for reads and writes to take different SAS paths. Not so for SATA - I know of no consumer SATA disk with a second SATA port.
As for the 90MB/s average bandwidth of a desktop drive: you're not going to see that in a ZFS application. When ZIL writes happen without an SLOG device, they are written to the pool immediately looking much like small block, random writes. Later, when the transaction group commits, the same ZIL data is written again with the transaction group (but never re-read from the original ZIL pool write since it's still in ARC). For most SATA mechanisms I've tested, there is a disproportionate hit on read performance in the presence of these random writes (i.e. 10% random writes may result in 50%+ drop in sequential read performance).
Likewise, (and this may be something to stress in a follow-up), the behavior of the ZFS transaction group promises to create a periodic burst of sequential write behavior when committing transactions groups. This has the effect of creating periods of very little activity - where only ZIL writes to the pool take place - followed by a large burst of writes (about every 20-30 seconds). This is where workload determines the amount of RAM/ARC space your ZFS device needs.
In essence, you need 20-30 seconds of RAM. Writing target 90MB/s (sequential)? You need 2GB additional RAM to do that. Want to write 1200MB/s (assume SAS2 mirror limit)? You'll need 24GB of additional RAM to do that (not including OS footprint and other ARC space for DDT, MRU and MFU data). Also, the ARC is being used for read caching as well, so you'll want enough memory for the read demand as well.
There are a lot of other reasons why your "mythical" desktop sequential limits will rarely be seen: variable block size, raid level (raidz/z2/z3/mirror) and metadata transactions. SLOG, L2ARC and lots of RAM can reduce the "pressure" on the disks, but there always seem to be enough pesky, random reads and writes to confound most SATA firmware from delivering its "average" rated performance. On average, I expect to see about 30-40% of "vendor specified average bandwidth" in real world applications without considerable tuning; and then, perhaps 75-80%.
dignus - Sunday, October 17, 2010 - link
It's still early sunday morning over here, but I'm missing something. You have 26 disks in your setup, yet your mainboard has only 14 sata connectors. How are your other disks connected to the mainboard?Mattbreitbach - Sunday, October 17, 2010 - link
The 24 drives in the front of the enclosure are connected via a SAS expander. That allows you to add additional ports without having to have a separate cable for each individual drive.sor - Sunday, February 20, 2011 - link
I know this is old, but it wasn't mentioned that you can choose between gzip and lz type compression. The lz was particularly interesting to us because we hardly noticed the cpu increase, while performance improved slightly and we got almost as good compression as the fastest gzip option.jwinsor566 - Wednesday, February 23, 2011 - link
Thanks guy's for an excellent post on your ZFS SAN/NAS testing. I am in the process of building my own as well. I was wondering if there has been any further testing or if you have invested in new hardware and ran the benchmarks again?Also Do you think this would be a good solution for Disk Backup? Would backup software make use of the ZIL you think when writing to the NAS/SAN?
Thanks
shriganesh - Thursday, February 24, 2011 - link
I have read many great articles at Anandtech. But this is the best so far! I loved the way you have presented it. It's very natural and you have mentioned most of the pit falls. It's a splendid article and keep more like these coming!PS: I wanted to congratulate the author for this great work. Just for thanking you, I joined Anandtech ;) Though I wanted to share a thought or two previously, I was just compelled enough to go through the boring process of signing up :D