The Pain of Assembly
Building a small form factor system is an exercise in flowcharts. If you’re using a highly compact case, like the Silverstone SG04B, the order of assembly is critical. The power supply, for example, goes in last.
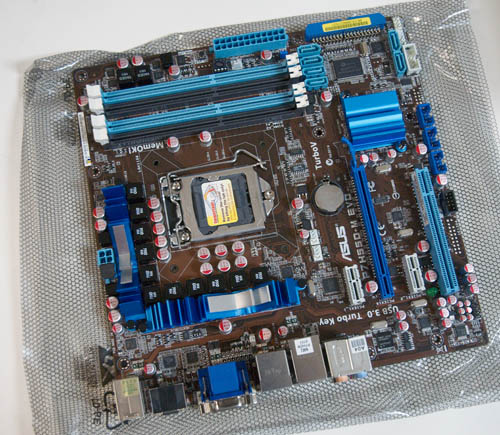
The Asus motherboard offers a fairly clean layout, so there’s ample room for a large CPU cooler. However, I discovered late in the game that the SATA ports are poorly located, which means a long graphics card butts up to some of the SATA connectors. The board has plenty of ports, however, and does support USB 3.0, with an onboard NEC USB 3.0 controller.
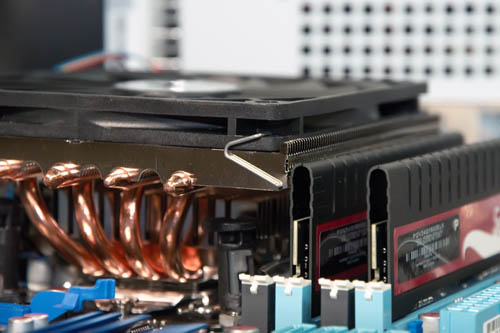
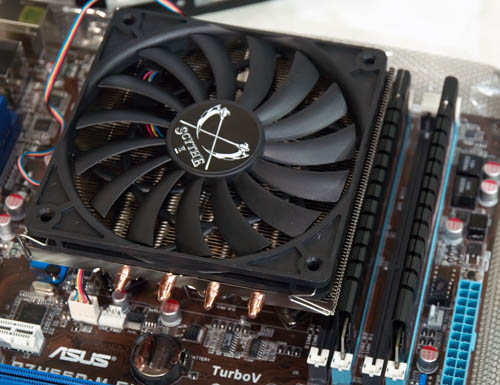
Attaching the CPU cooler was challenging, too. I’ve generally liked Scythe coolers, but the designers often don’t think about how you actually mount the HSF. The Shiruken is a very low profile cooler, just 58mm high, including the skinny, 120mm fan. However, it’s fairly large, at 4.7 inches square. Plus, the Intel mounting tabs are under the radiator.
All this meant two things: I needed to install the HSF before installing the motherboard in the case.
Installing the cooler was an exercise in patience. I needed a large, flat bladed screwdriver, because there was no way I was going to get my fingers in between the HSF radiator and the top of the mounting pushpin, and still exert enough force to press the connector down until it snapped into place. Even then, I wasn’t 100% sure that all four pushpins had locked down.
And the Patriot memory modules, with their slightly taller silhouette, meant that two of the memory sockets weren’t usable. Lower profile memory modules would have allowed me to install four modules instead of two, if I wanted to go beyond 4GB.
Once the heat sink, CPU and memory were in place, the motherboard slid into the case nicely. It’s definitely a snug fit, since the case is just the right size for a micro ATX motherboard.
The biggest pain, though, was installing the Radeon HD 5850 graphics card. The XFX card is based on the reference design, and is 9.5 inches long. However, the power connectors are on the rear of the card. This had two consequences: you needed to attach the PCIe power plugs before installing the card in the case. Secondly, getting the card into the case meant slipping the card in at an angle, holding cables out of the way, and making sure you didn’t bump SATA or front panel connectors.
Due to the location of the SATA ports, I had to route the SATA cables over the top of the graphics card. Otherwise, I’d need to run them under the card, and that space is already pretty crowded.
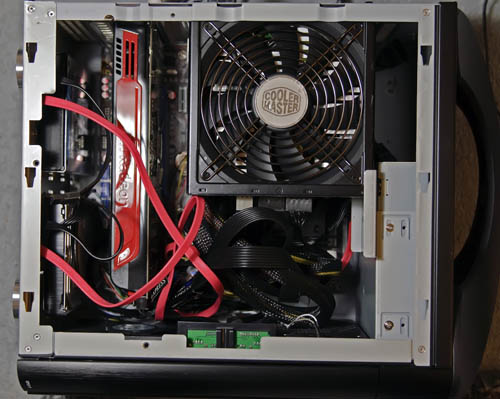
The Silverstone case mounts hard drives in the base of the case, which is removable. However, as with the motherboard tray, space is tight, so you need to attach SATA and drive power after you close up the case bottom. I needed to be very careful, as the power adapter and SATA plug have barely enough room. It would be very easy to damage a SATA drive connector.
Once I figured out cable routing and got the graphics card running – which took several cycles of installing and removing the card, then re-routing cables – I booted the system. Everything was good. Installing Windows went smoothly.
The OCZ drive is fast, too. It’s in a 3.5-inch shell, rather than the more common 2.5 inch mechanism, and is really two 128GB modules pre-configured inside the shell for RAID 0. (Users never see the RAID configuration.)


81 Comments
View All Comments
jada59 - Wednesday, January 12, 2011 - link
How can this disk withstand shock up to 1500G? Purchased a 1CLS120G disk 3 months ago. When pulling out the SATA cable, the plastic covering the connector pins broke. Tried to get a new disk on the warranty but did not succeed. Has lost a lot of money on this SSD.