Apple's Mac Pro - Upgrading CPUs, Memory & Running XP
by Anand Lal Shimpi on September 12, 2006 1:51 AM EST- Posted in
- Mac
Next we had to remove the fan assembly, which we did by first removing two of the hard drive sleds so we could gain access to the lone screw that holds the fan assembly in place. Then, with a flexible putty knife we pulled the edge of the assembly away from the case and attempted to pull it out. The fan assembly will pull straight out, although we've found that it's a very tight fit and wiggling sometimes helps as you pull it out.
The fan assembly is made out of plastic so be careful as you're doing this; you'll want to put pressure on the less flimsy parts of the assembly to avoid snapping/cracking anything. Also be careful not to put pressure on the heatsinks as the aluminum is very thin and will bend very easily.
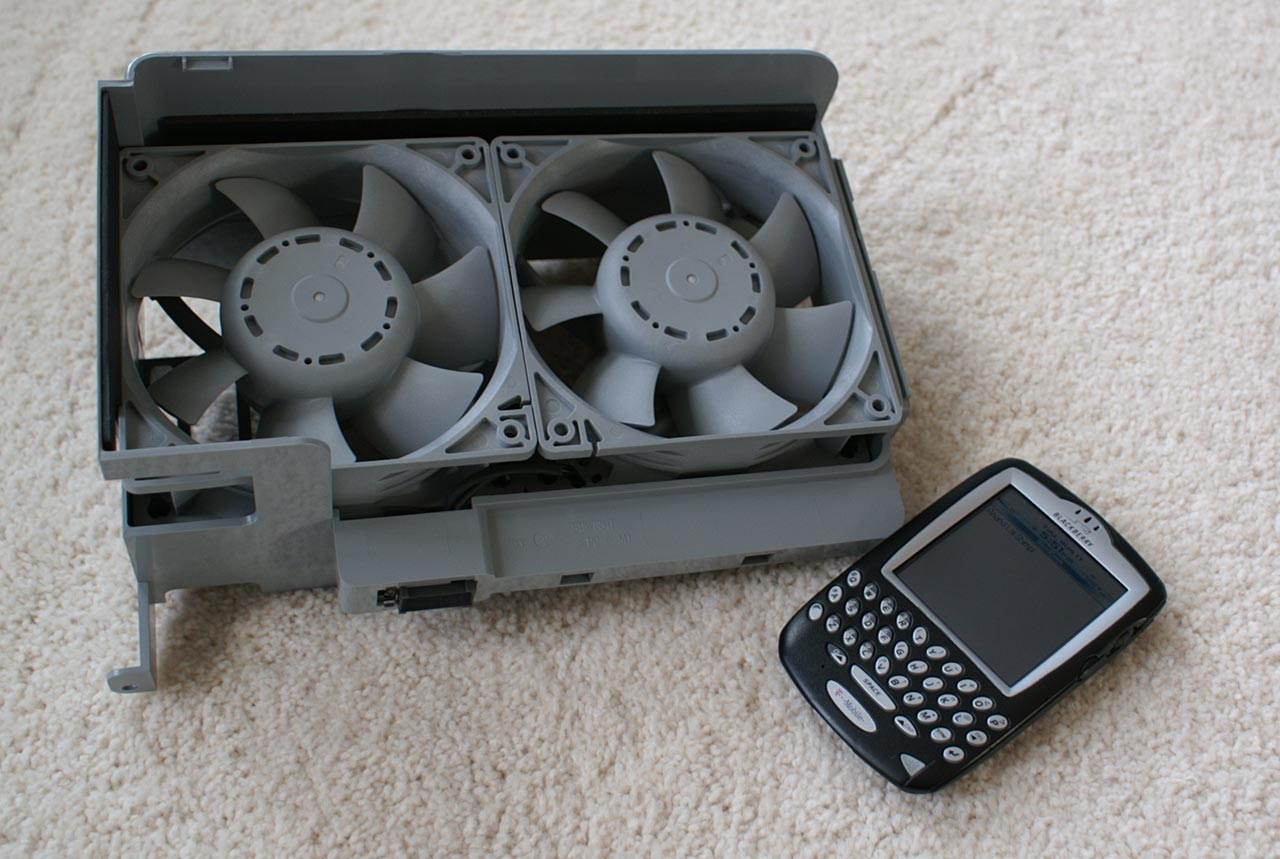
With the fan assembly out take a moment to marvel at how large and heavy it is, and then put it aside as we need to get one more thing out of the way before we can unscrew the heatsinks. If you can get the memory cage out then this next step isn't necessary, but if you're like us and can't get the thing out then this next step will make removing the heatsinks a lot easier.
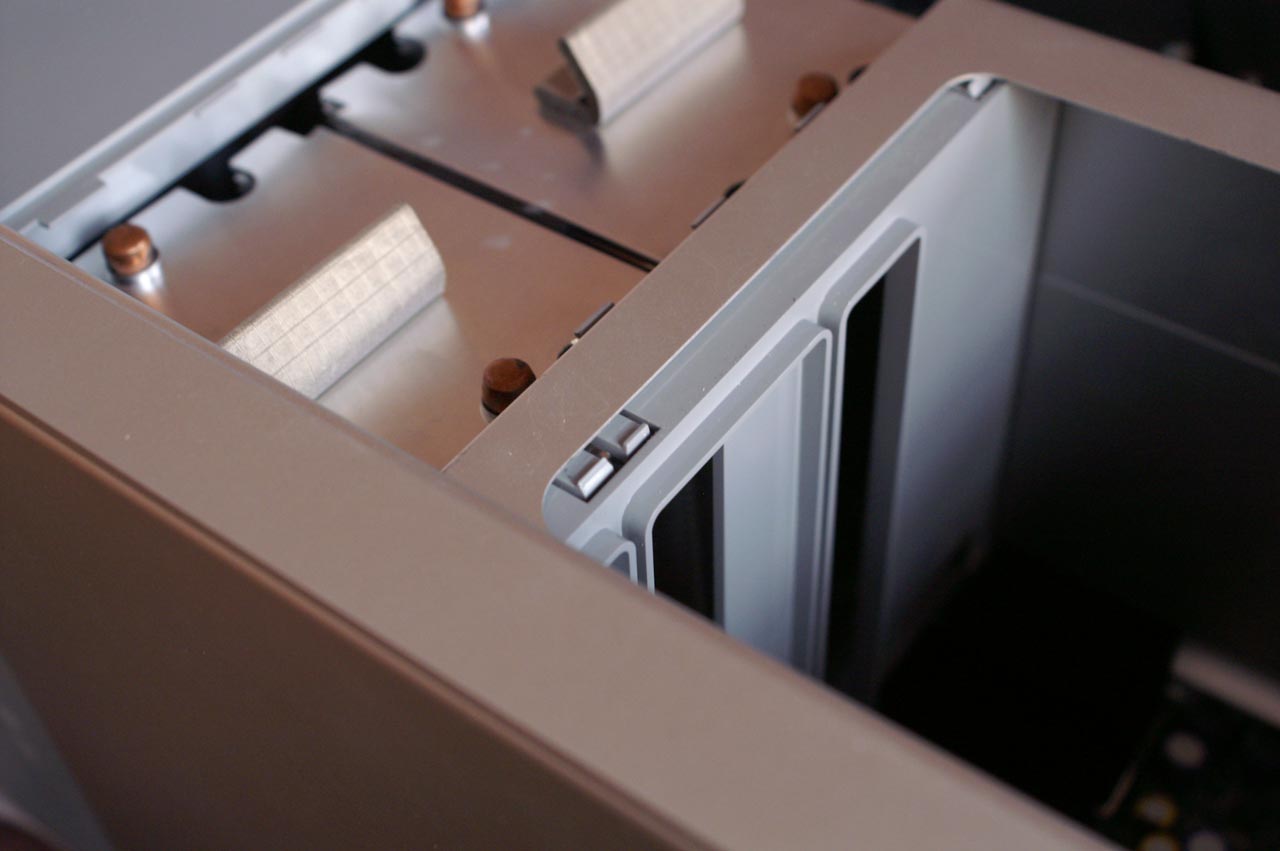
The plastic guard, pulled out slightly to expose the latches - Click to Enlarge
There's a plastic piece that sits in the left side of the memory cage; it's what the CPU heatsink cover latches on to on this side and it's also what helps the memory risers guide into place. This plastic piece can be removed fairly easily as it just latches into the memory cage itself, so break out the putty knife and let's get to it.
All you need to do is unlatch the plastic guard from the memory cage by sliding your putty knife between the cage and the guard. As you unlatch the plastic guard start pulling it away from the CPUs and eventually you'll get it off completely. Patience pays off here as you don't want to break any of the latches.
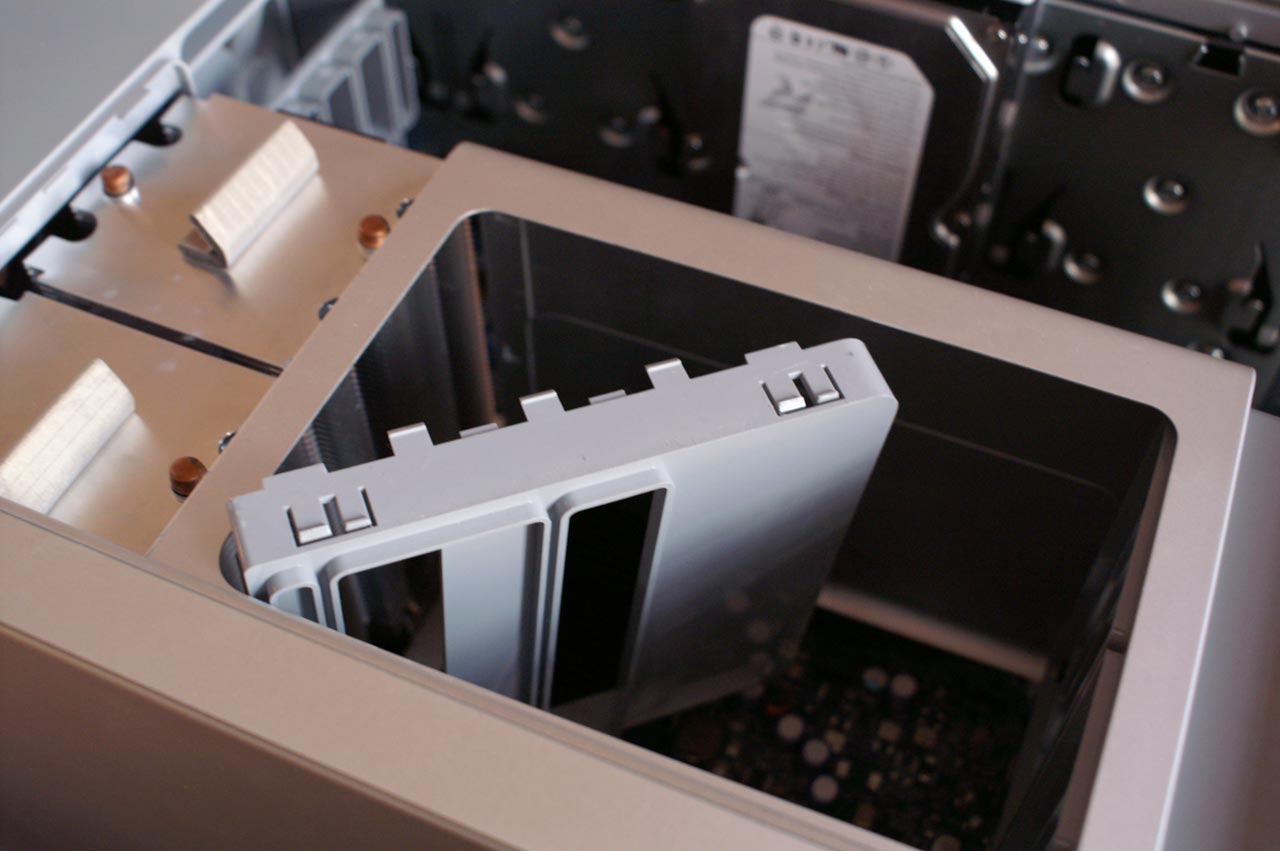
With the plastic guard off, it's now infinitely easier to gain access to the screws that hold the heatsinks in place. Each heatsink is attached to the motherboard by four allen screws; simply remove them (in an opposite side/opposite corner pattern) using a very long screwdriver (or a small allen wrench). We didn't have an allen wrench that worked so we attached two extenders to our screwdriver to get down to the screws.
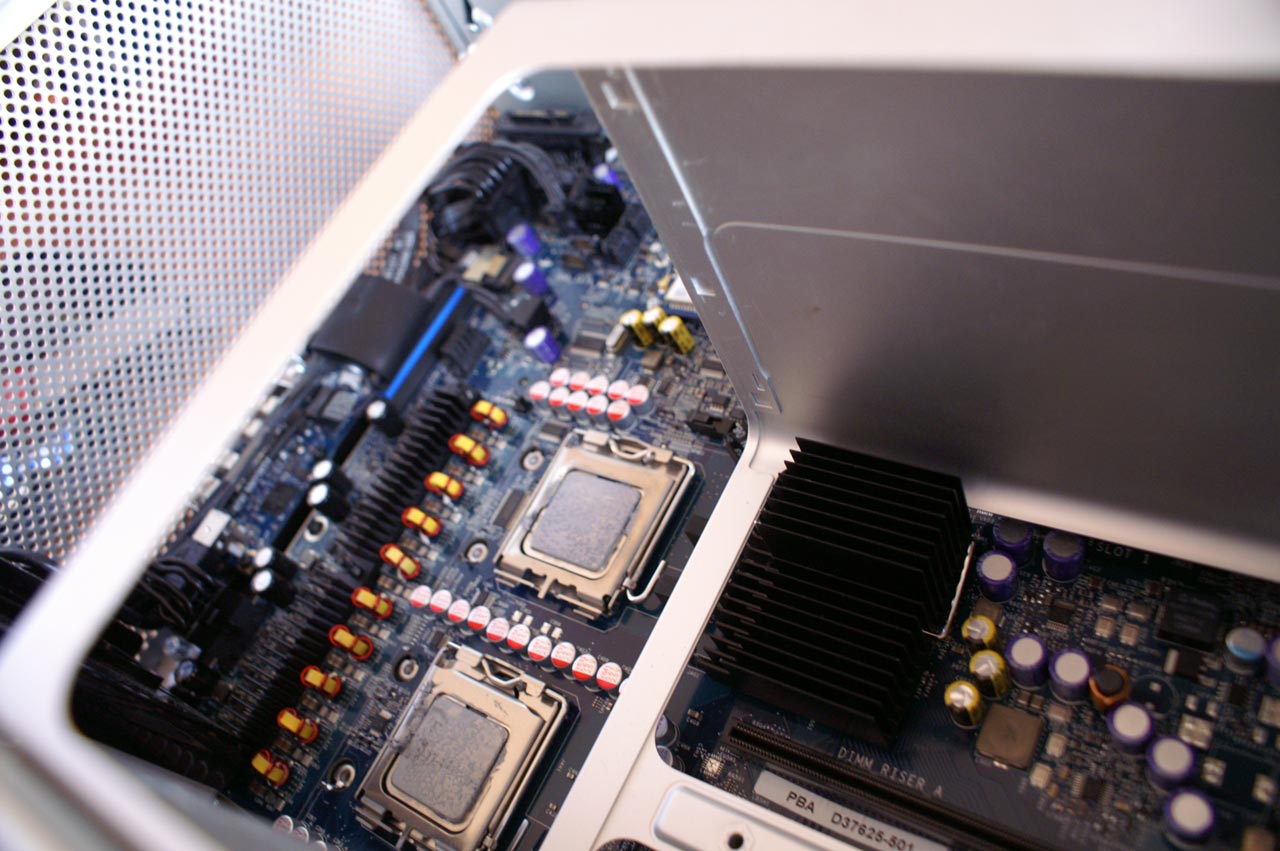
With all of the screws undone for the first heatsink (the allen screws don't come off completely, they remain attached to the heatsink) you have to disconnect the thermistor cable that runs from the heatsink to the motherboard. Be sure to do this before you remove the heatsink as you don't want to cause any accidental damage to the cable.
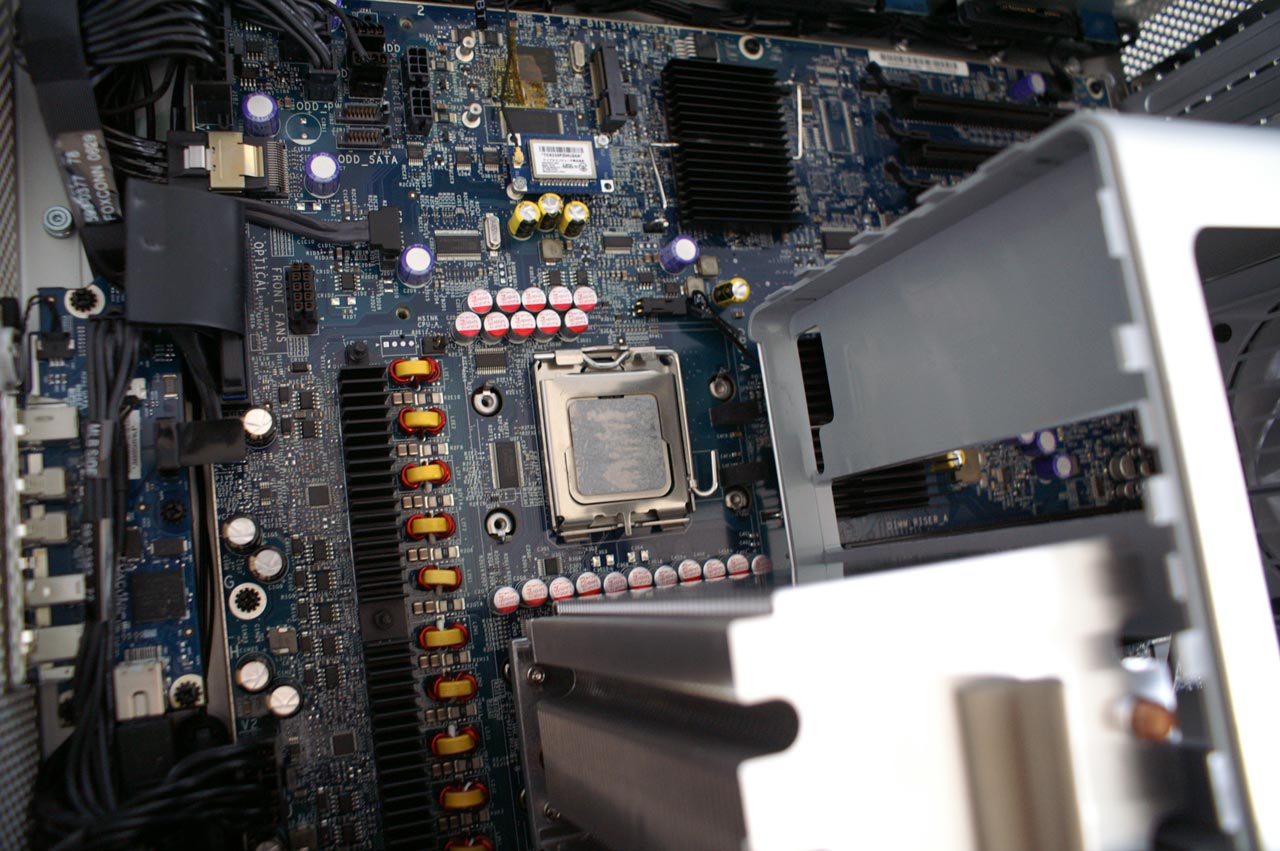
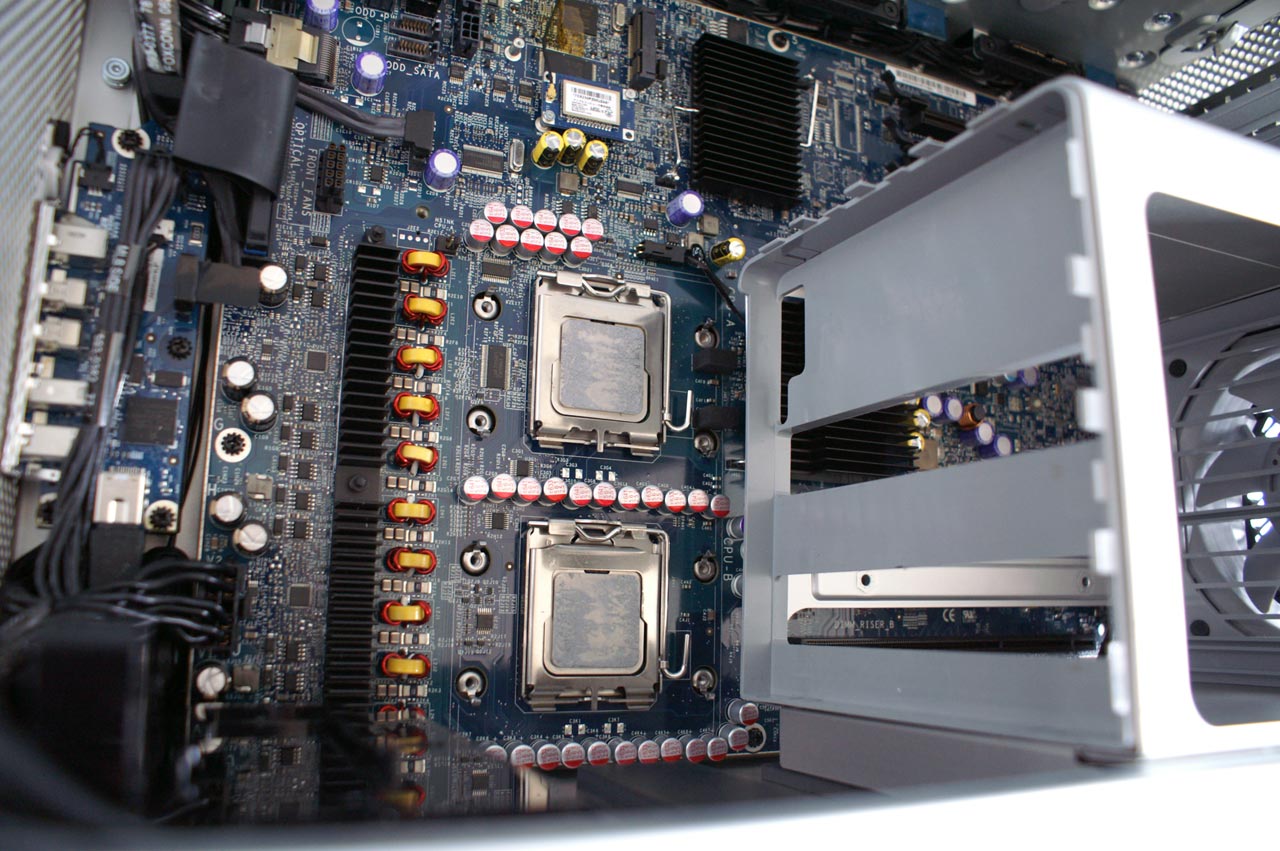
Finally you lift off the heatsink and set it aside, exposing the LGA-771 Xeon socket below. You can repeat the process for the second heatsink, also not forgetting to remove its thermistor cable (this one is actually beneath the memory cage) before pulling off the heatsink. With both heatsinks removed, it was time to swap processors.


72 Comments
View All Comments
Corlissmedia - Thursday, December 9, 2010 - link
I've been reading through a lot of these sites that discuss upgrading a 2006 Mac Pro with dual dual-core 2.66's to dual quad-core x5355's. I'm thinking of doing this upgrade also, but in researching the cpus, I've found that none of them support ECC memory, and all Mac Pros, as far as I know, have ECC memory. So how does that work?????Spawn4ever - Tuesday, August 4, 2015 - link
I realize this is a very old post but i'm hopping someone, somewhere will still be willing to help me out. I own a great MacPro 2.1 2007 with the following specsModel Name: Mac Pro
Model Identifier: MacPro2,1
Processor Name: Quad-Core Intel Xeon
Processor Speed: 3 GHz
Number of Processors: 2
Total Number of Cores: 8
Memory: 32 GB RAM
ATI Radeon HD 5780
I need to change the motherboard in order to install OS X 10.10 or change the system all together. The processors in this system are still quite fast to just get rid of them. Two questions:
1) Can i find motherboards today that will take these CPUs and work as a Hackintosh
2) Would you say that an Intel i7 series be faster than these almost 8 year old Xeons?
I primarily use this system for video editing and i'm starting to edit 4K footage which cannot be played back in real-time on this configuration.
Hope this post doesn't get lost in digital land and i hear back from someone at Anandtech or the internet world.
Thank you