AnandTech Guide to Better Photos: Post-Processing
by Stephen Caston on March 18, 2005 3:45 PM EST- Posted in
- Digital Camera
Getting Ready
Before we jump right into editing, there are a couple of things that are very important to do. First, we highly recommend making a backup of your original image. Whether it’s to a CD, DVD, external hard drive, etc., just make sure that you have the original in a safe place and only work on a copy. By doing this, you are giving yourself the option to start over with the original. The second thing to do is to set the RGB color space in Photoshop. By default, Adobe Photoshop will use the sRGB color space. If your original images are in the sRGB color space, you can simply leave it as is (most consumer cameras shoot in sRGB). The sRGB color space is best suited for viewing images on a monitor (such as on a web page). Higher-end cameras often have the option to shoot in either sRGB or Adobe RGB. If your images are in the Adobe RGB color space, you should configure your Photoshop working space as Adobe RGB (1998). The reason for this is that the Adobe RGB color space has a much wider gamut than sRGB – meaning that you can work with a larger range of colors.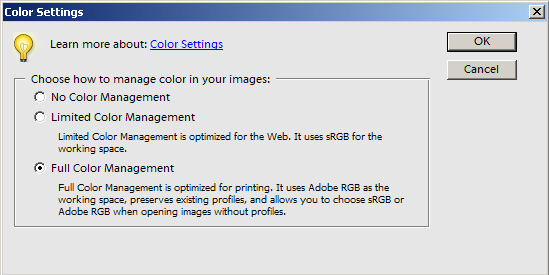
Photoshop Elements 3.0
Click to enlarge.
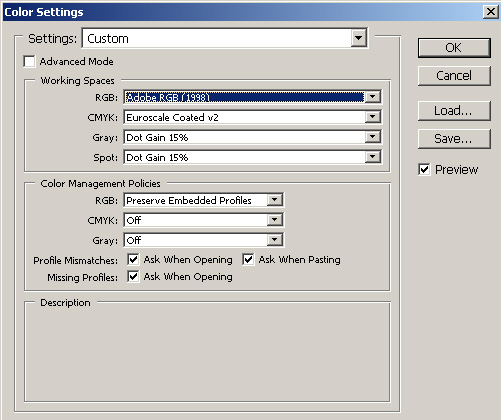
Photoshop CS
Click to enlarge.


20 Comments
View All Comments
vladik007 - Saturday, March 19, 2005 - link
if you're such a hot shot photographer , read dpreview's articles and subscribe to magazine that are FOR pros. This is a sire for hardware geeks , so this little tid bit is great and refreshing.Power to anand and his editors , great job.
vladik007 - Saturday, March 19, 2005 - link
hoppa - Saturday, March 19, 2005 - link
In Soviet Russia, layers adjust YOU.JarredWalton - Friday, March 18, 2005 - link
Great stuff, Stephen. Now all I need is a way to make the crappy, grainy images from my digital camera not look crappy and grainy. (Note to others: The Fuji S5000 shoots *only* in ISO200 or ISO400 modes. So, my options are "grainy" and "really grainy". I'm going to see if I can pick up some halogen lights tonight and maybe they'll help.)CrystalBay - Friday, March 18, 2005 - link
thanks for the toot..blackbrrd - Friday, March 18, 2005 - link
Nice article!More articles like this is good :)
(Don't go the tomshardware way.. 80% of the articles there are useless)
segagenesis - Friday, March 18, 2005 - link
#2 - Wah wah... this is a good article, would you rather have your pictures look like mud?Rocket321 - Friday, March 18, 2005 - link
I found this information very useful and hope to see more photo guides in the future. As an amature this type of infomation is invaluble.Questar - Friday, March 18, 2005 - link
Typical amatuer stuff, adding way too much contrast and color saturation to punch up images.InuYasha - Friday, March 18, 2005 - link
power of phtoshop!