ASUS ROG Maximus XII Hero Wi-Fi Review: The Tale of Two Motherboards
by Dr. Ian Cutress & Gavin Bonshor on June 11, 2020 11:45 AM EST- Posted in
- Motherboards
- Intel
- Asus
- ROG
- 5GBase-T
- Z490
- 10th Gen Core
- Comet Lake
Visual Inspection
The visual slant of the Maximus XII Hero is a 45-degree downward angle going from left to right, as seen on the rear panel cover, power delivery heatsink, and the chipset heatsink. These sort of angular consistent aesthetic is now becoming consistent on a lot of motherboards, and in the case of the Maximus XII Hero we get a mostly black and neutral design aside from the lit up Hero section on that rear panel, and the ROG logo on the chipset heatsink.
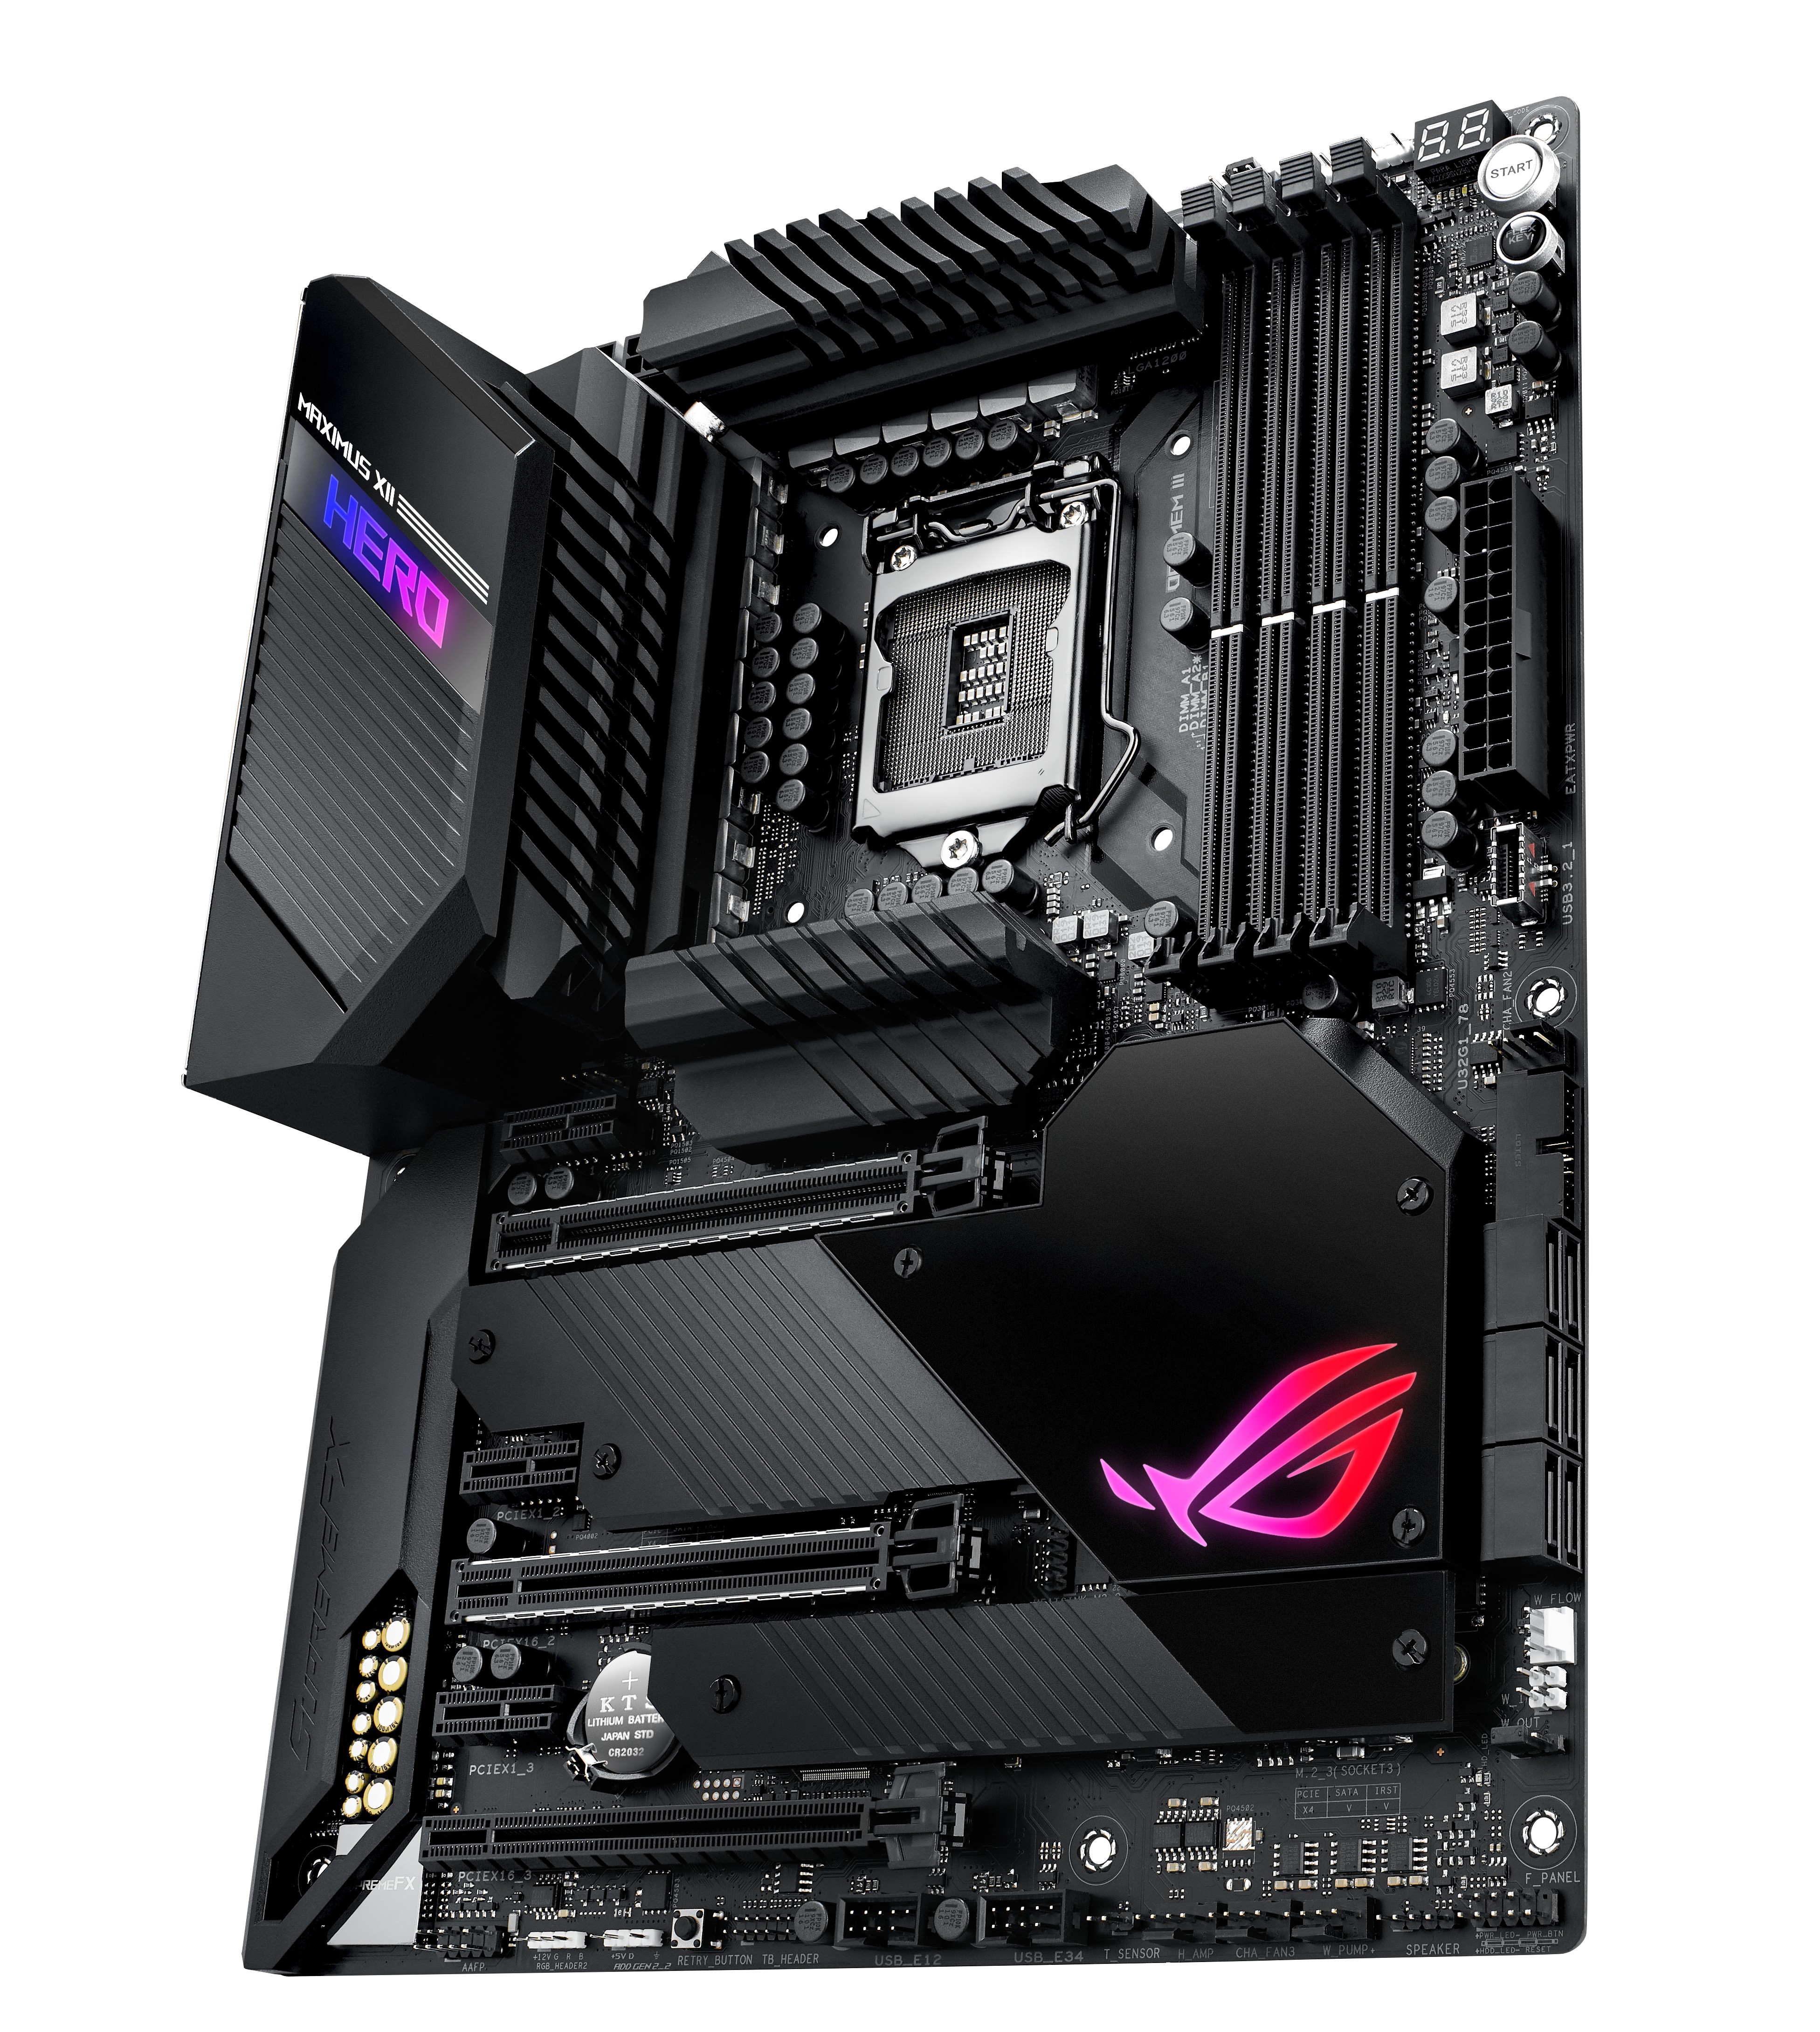
The socket area is relatively clear, with the chipset heatsink covering three sides of the socket and hiding the 14+2 phase power delivery. To the top right of the socket is the 12 V CPU connectors, one 8-pin and one 4-pin, while as we move right across the board there are three 4-pin fan headers, two RGB headers, a two-digit debut, and power/reset buttons.
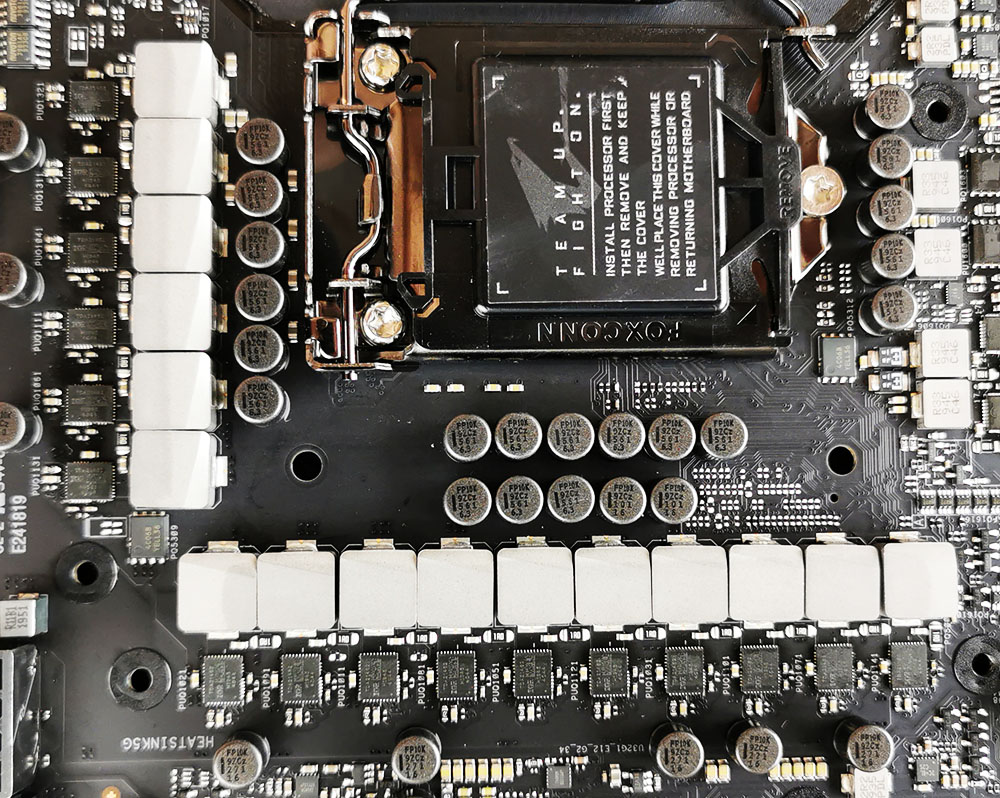
The ASUS ROG Maximus XII Hero WiFi is using a 16-phase design which is controlled by an ASP1405I PWM controller operating in 6+1 mode. This is a custom part designed for ASUS and is similar to the International Rectifier IR35201 controller which can operate a maximum of eight phases. The CPU section is using fourteen Infineon TDA21490 90 A power stages operating in teamed mode, while the SoC section is using two TDA21490 90 A power stages also in teamed phase mode. This type of power delivery is designed to reduce the processing delay for a more consistent and optimized power throughput, as well as reducing the transient response under high-loads.
The power delivery is cooled by three large and weighty heatsinks which are interconnected via a large nickel-plated copper heat pipe. Along the top of each heatsink is a deep channels to direct passive airflow through for more optimal cooling, with aluminium fins and an all-black design.
To the right of the socket we have the four DDR4 memory slots, which ASUS states can support up to DDR4-4800, and benefits from ASUS’ Optimem v3 layout optimization to help memory sub-timings when overclocking. Each of the memory slots has additional security bars to help keep the slots in place during transport, and the slots themselves have a single-sided latch, so users should be wary and make sure both sides are pressed down.
On the right hand side of the motherboard, below the 24-pin ATX power connector, there is a USB 3.1 front panel connector, another 4-pin fan header, a USB 3.0 header, and six SATA ports connected through the chipset. Below this are water flow headers: one 3-pin for a pump, and two 2-pin headers for monitoring.

In the PCIe area, there are two main full-length PCIe slots for add-in cards with additional bracing, supplied with x16/x0 or x8/x8 bandwidth from the processor. The final full-length PCIe slot on the board is an x4 from the chipset, and we also have three more open-ended x1 slots from the chipset.
Between the PCIe slots are three PCIe 3.0 x4 slots, all from the chipset, that allow for M.2 NVMe drives. These are underneath the extended chipset heatsink, in order to help with additional cooling.

Below the PCIe slots on the bottom of the motherboard are the majority of the headers. We get the audio header on the bottom left, another RGB header, a HDD Gen 2 header for those that need 5V access, a retry button, a Thunderbolt header for users that have add-in cards, two USB 2.0 headers, a 2-pin thermal sensor, three more 4-pin fan headers, the speaker header, and the front panel header.
So far we’ve seen three 4-pin fan headers at the top of the board, one 4-pin by the 24-pin ATX connector, one 3-pin water pump header by the SATA ports, and now three more 4-pin at the bottom of the board. If that wasn’t enough, there’s another 4-pin above the top PCIe x1 slot, making eight total.
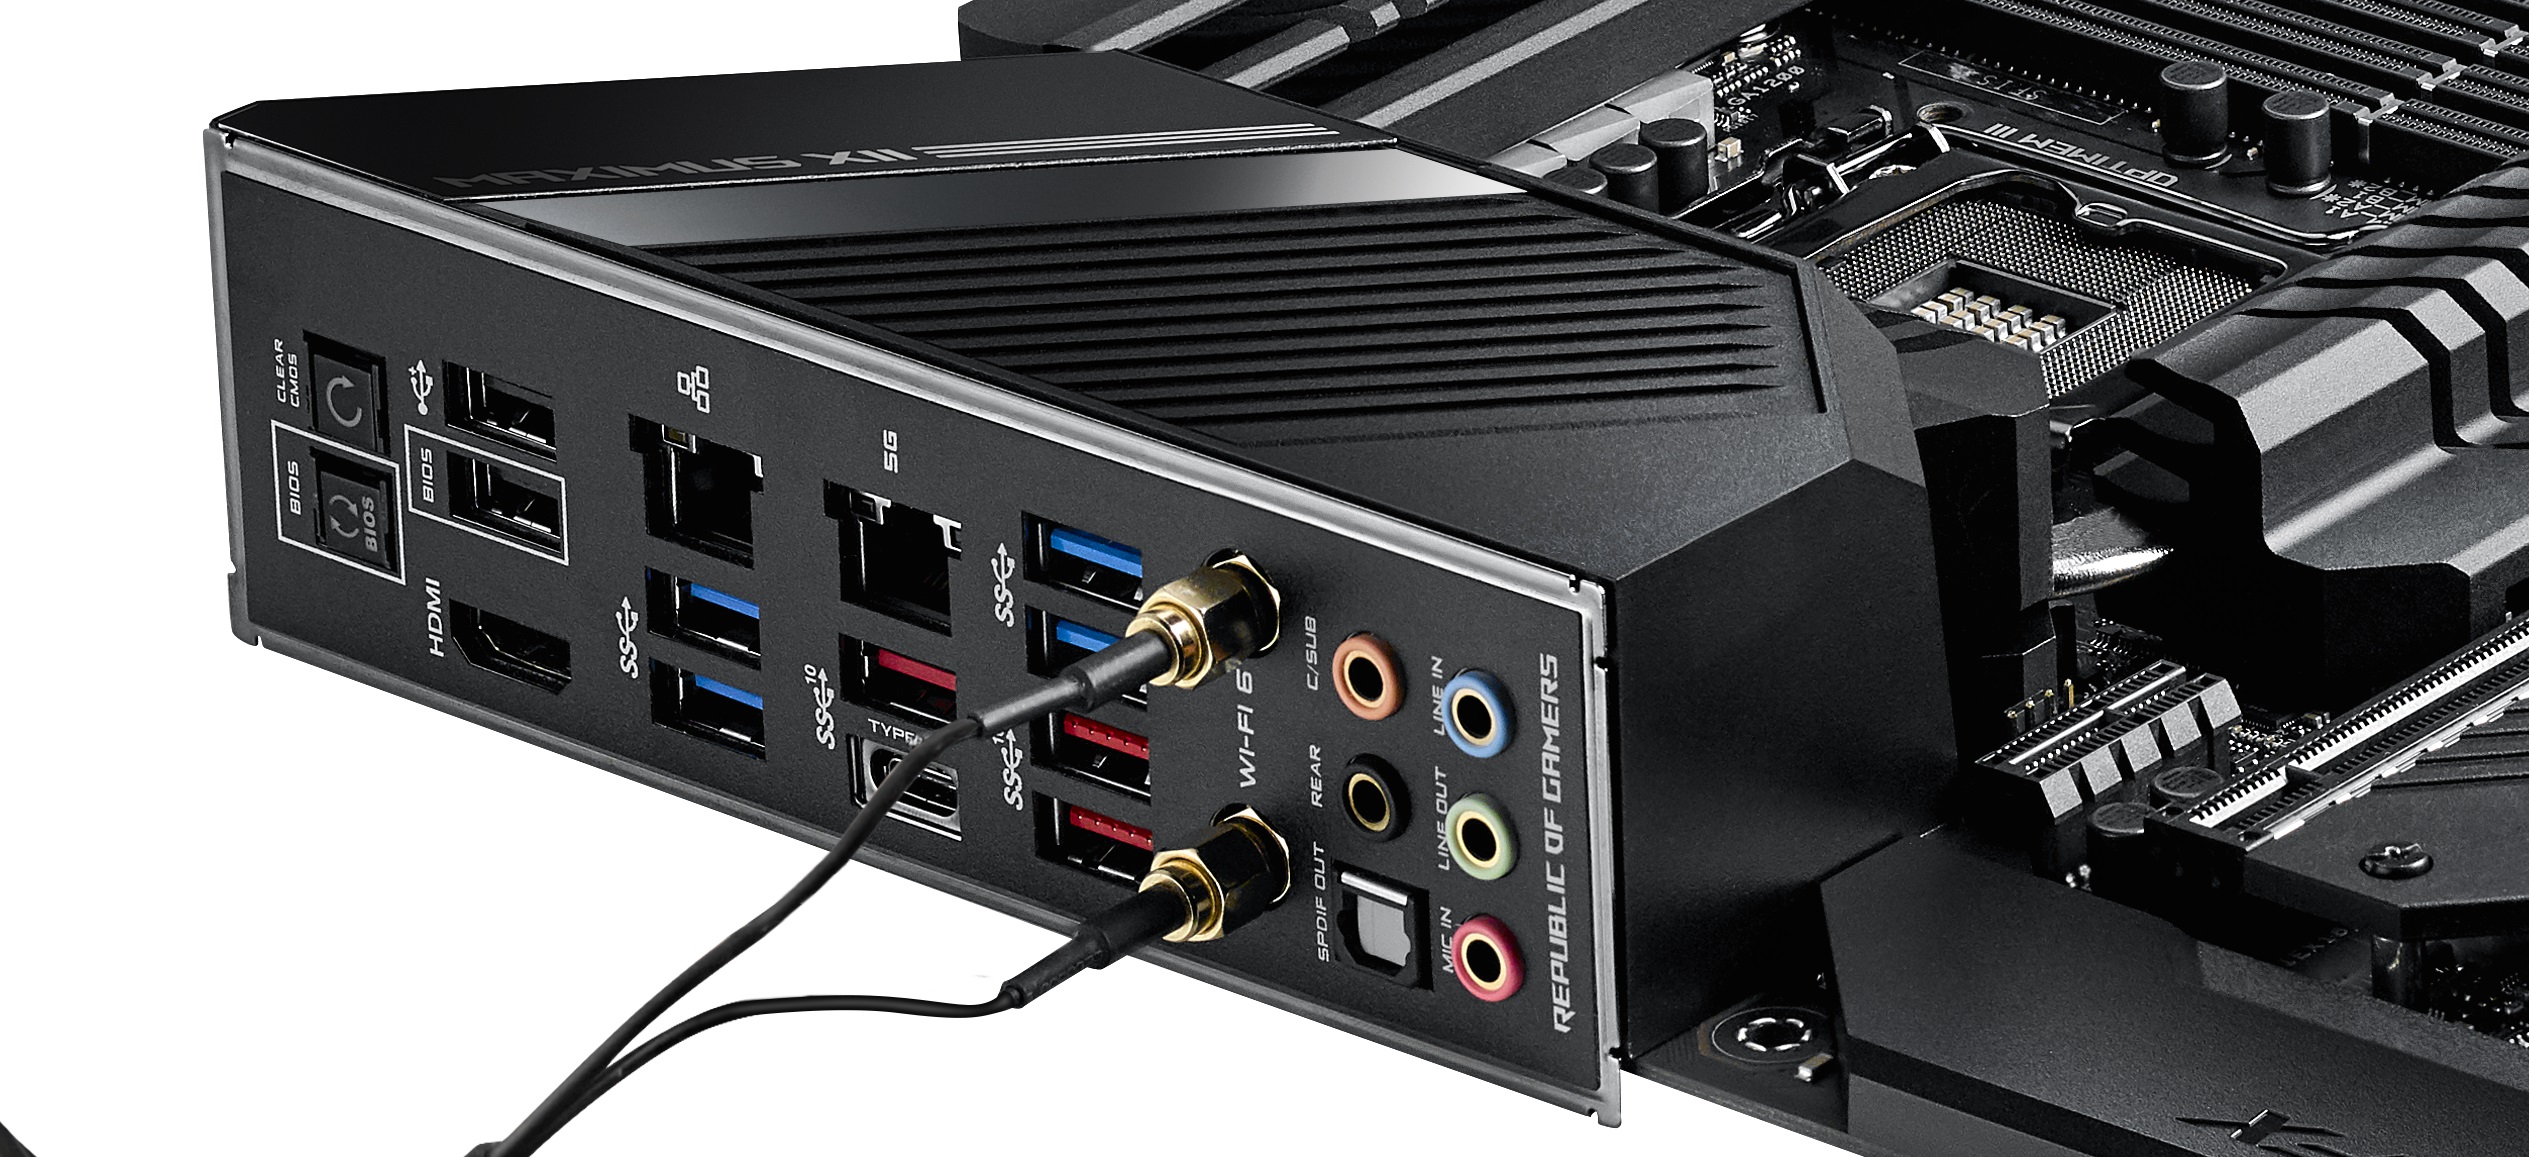
On the rear panel, from left to right, we get a Clear CMOS button, a BIOS Flashback button, two USB 2.0 ports, a HDMI 1.4b video output, the Intel I219 gigabit Ethernet port, two USB 3.2 Gen 1 ports in blue, the Aquantia 5G Ethernet port, three USB 3.2 Gen 2 Type-A ports in red, a USB 3.2 Gen 2.2 Type-C port, two more USB 3.1 Gen1 Type-A ports in blue, two Wi-Fi 6 antenna connectors, and the audio connectors.
What's in The Box
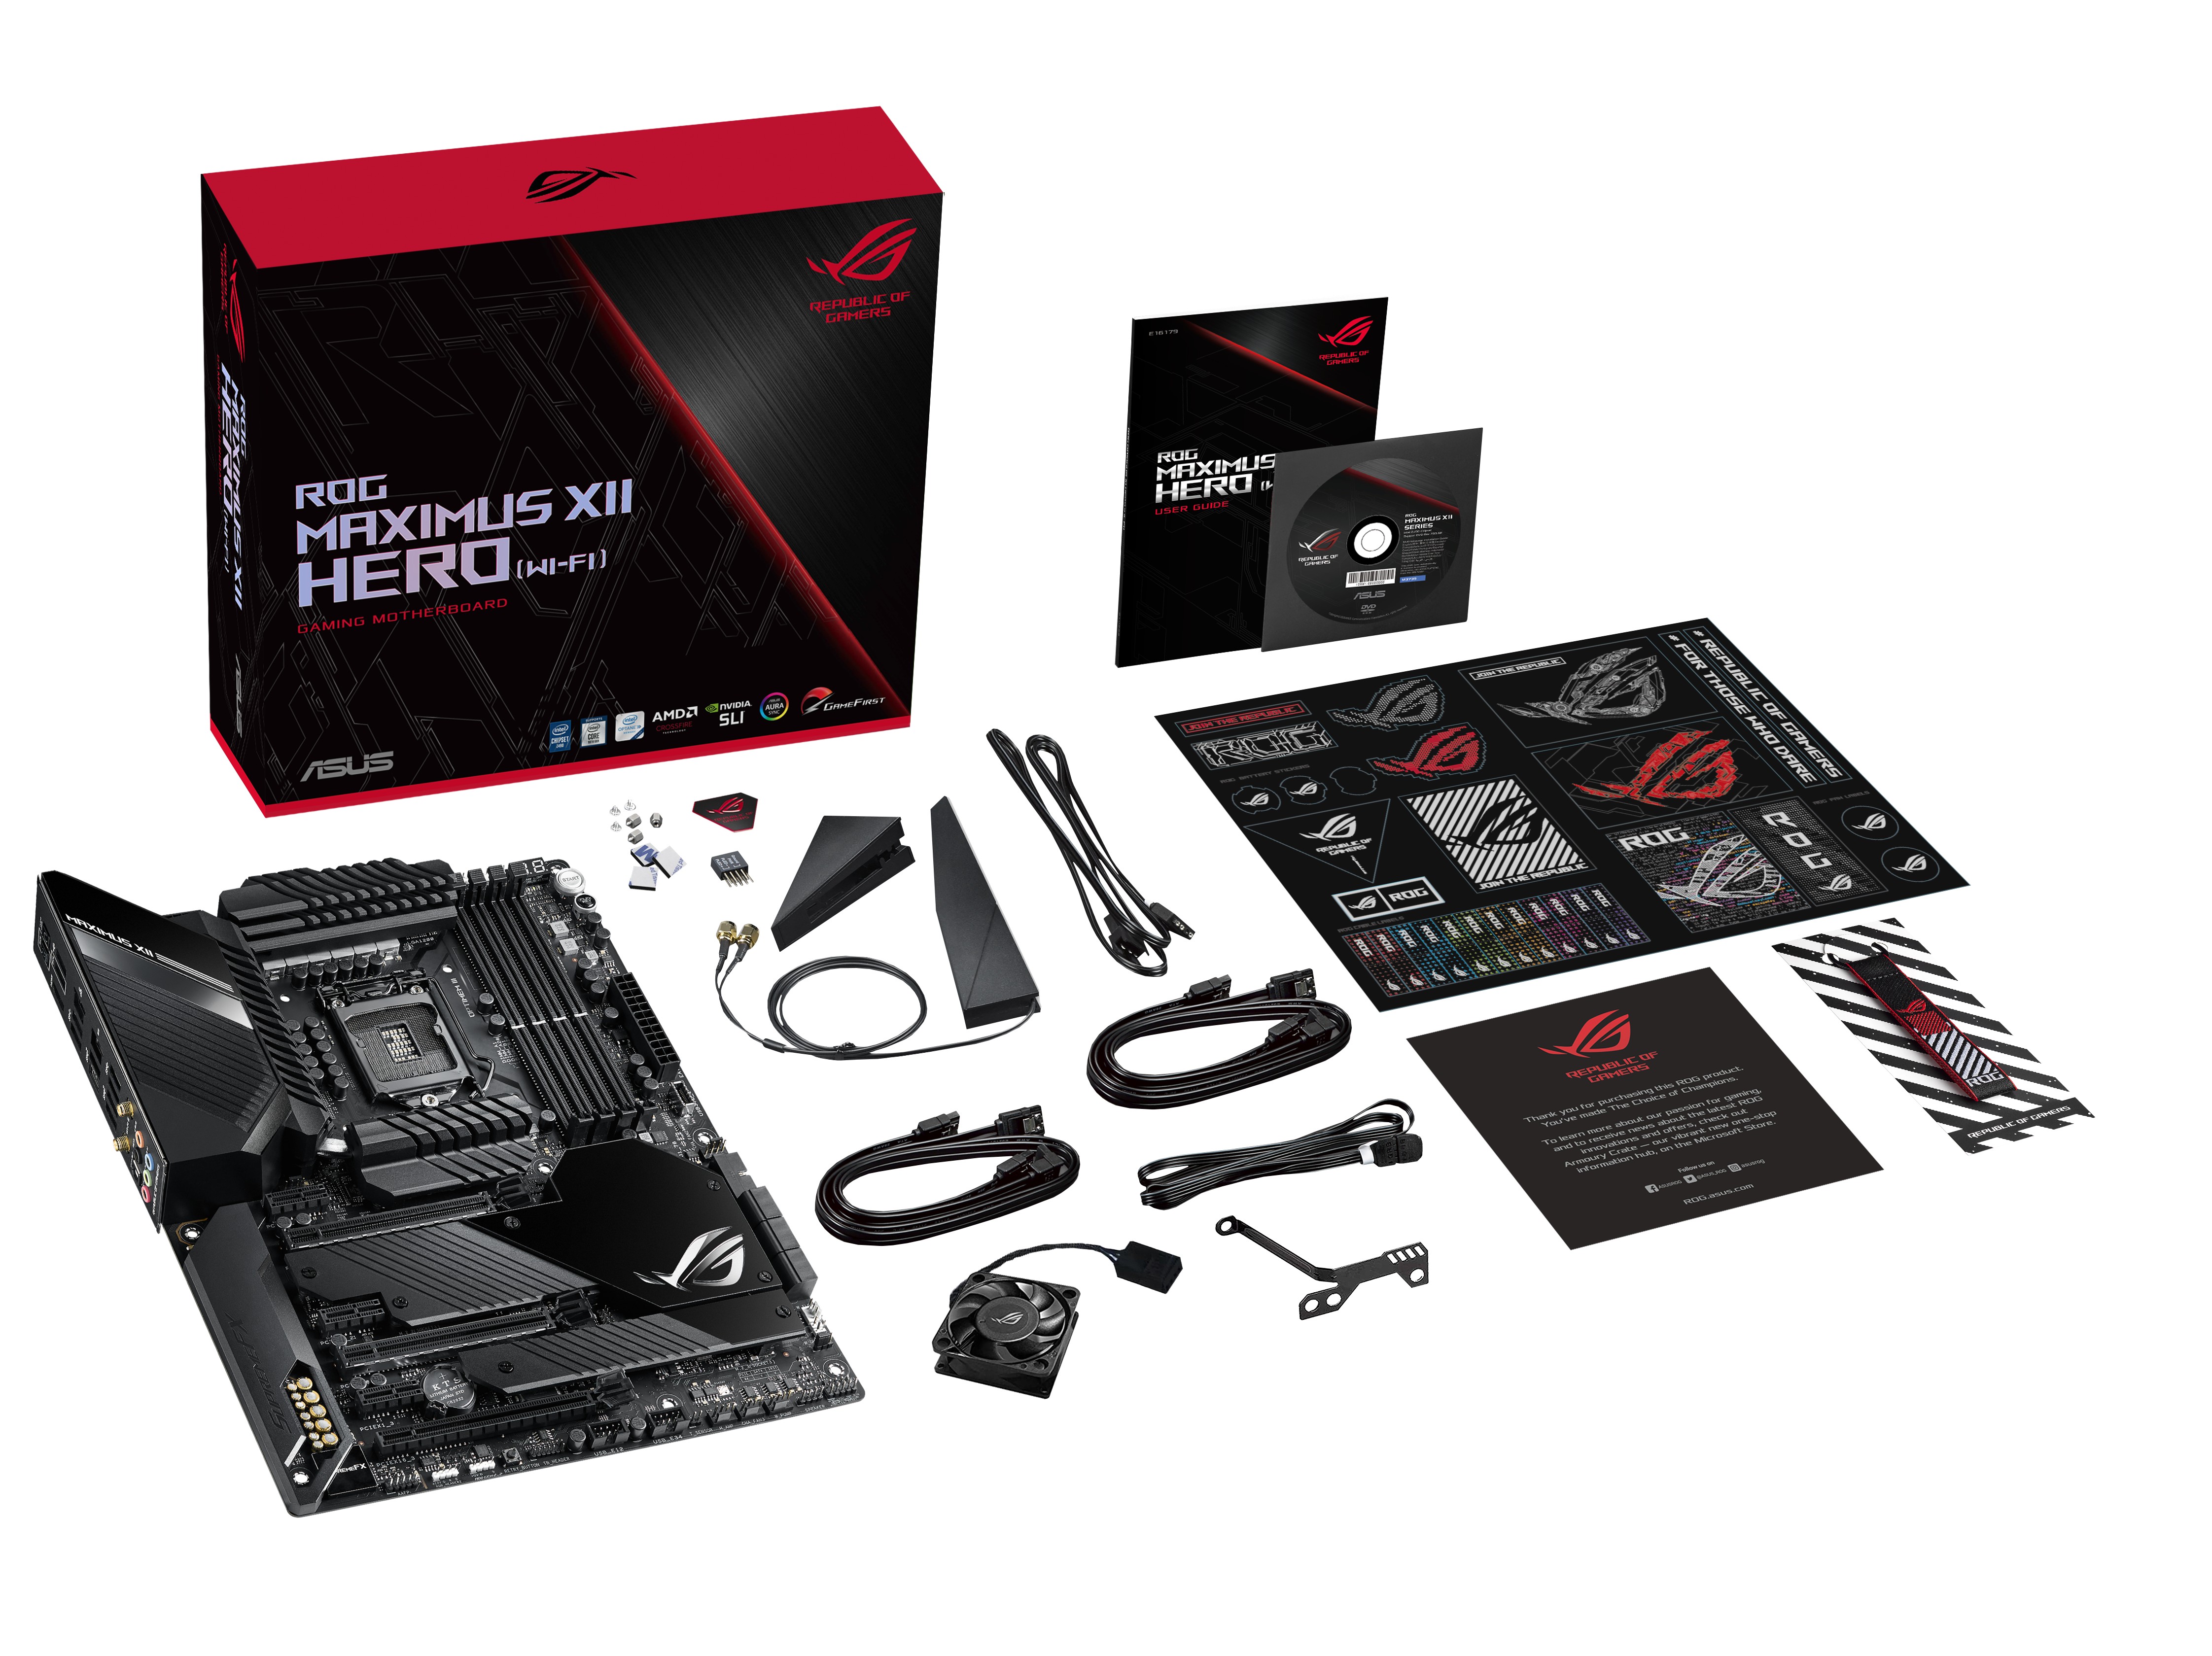
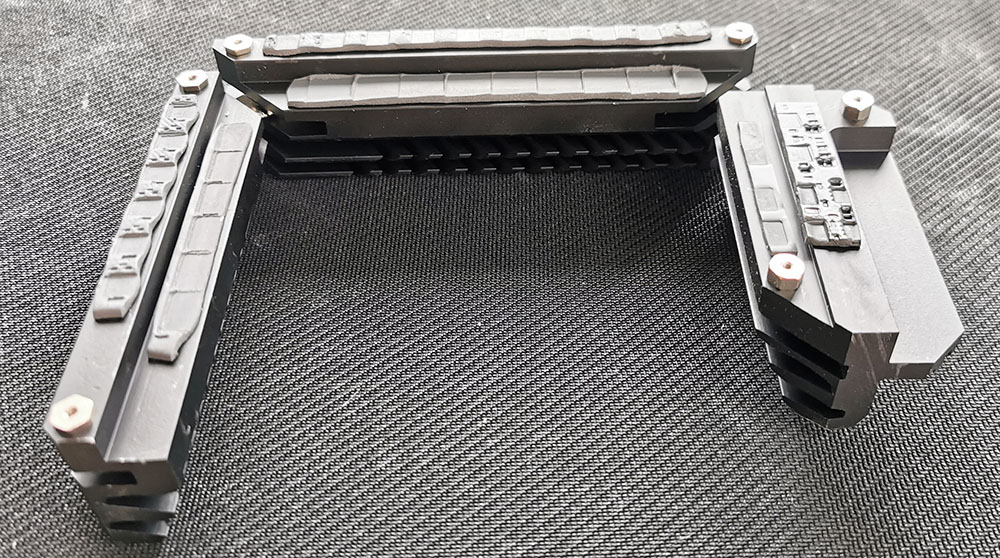
Included in the packaging of the ASUS ROG Maximus XII Hero WiFi is a varied selection of accessories. The most notable includes four SATA cables, two M.2 installation kits, a driver and software installation disc, and the Intel AX201 Wi-Fi 6 wireless antenna. ASUS includes a ROG themed thank you card, a Q-connector and a large ROG sticker sheet. An interesting addition to the bundle is a MOS cooling kit which allows users to turn the passively cooled power delivery into an active one. This includes a fan bracket and a 40 x 40 mm cooling fan.
- MOSFET cooling kit (bracket and 40 mm fan)
- Intel AX201 Wi-Fi 6 antenna
- 4 x SATA cables
- Q-Connector
- 2 x M.2 installation kits
- ROG Big Sticker sheet
- Driver and software installation disc
- ROG logo adhesive plate
- ROG Thank you card
- ROG key chain
- 80 cm RGB extension cable


29 Comments
View All Comments