The GIGABYTE Z390 Aorus Master Motherboard Review: Solid, But Not Special
by Gavin Bonshor on March 21, 2019 12:30 PM EST- Posted in
- Motherboards
- Intel
- Gigabyte
- ATX
- LGA1151
- i7-8700K
- Z390
- Aorus Master
BIOS
The latest GIGABYTE UEFI firmware (F4) on the Z390 Aorus Master appears quite rustic, but has been improved since our last GIGABYTE review.
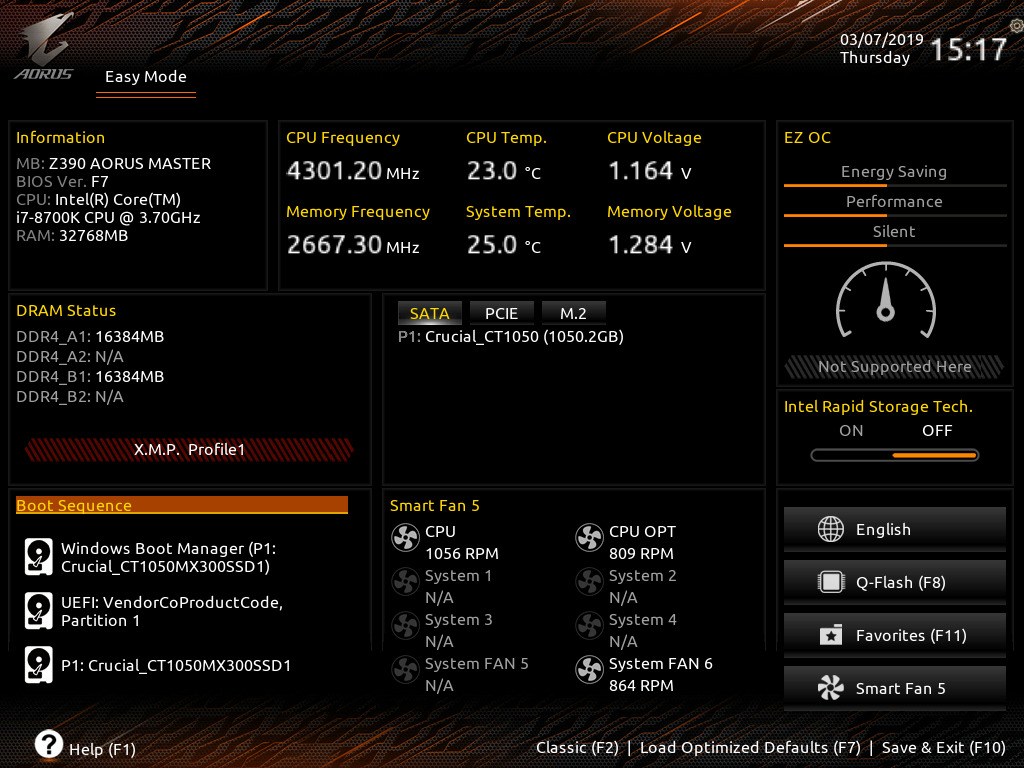
The firmware on the GIGABYTE Z390 Aorus Master has two primary modes for users to work with. These include the Easy Mode which is the initial splash screen and the classic mode which can be entered by pressing F2. With the Easy Mode, everything is displayed in a block system with eight different four-sided panels. These panels include basic information about different aspects of the mainboard and its installed components such as RAM, storage booting sequence, frequency and voltage monitoring, EZ OC and fan speed information. Users can quickly access functions such as Q-Flash by pressing F8, a handy favorites menu by pressing F11 or access the Smart Fan 5 utility by highlighting the options and physically selecting it with a mouse click or the enter key when highlighted.

Upon pressing the F2 key, users can switch between the Easy and Classic modes. Within the Classic mode is a much more extensive list of options with a list of main menus displayed horizontally across the top. These include M.I.T, System, BIOS, Peripherals, Chipset, Power and Save & Exit. Within each menu is a sub-menu listed vertically and in the case of the M.I.T, this section contains all the tools needed to do overclocking and change frequency and voltage variables. Each of the primary sections such as frequency, memory and voltage setting are all located within their own sub-section, but users can add relevant and commonly changed settings to their favorite menu for easy access.
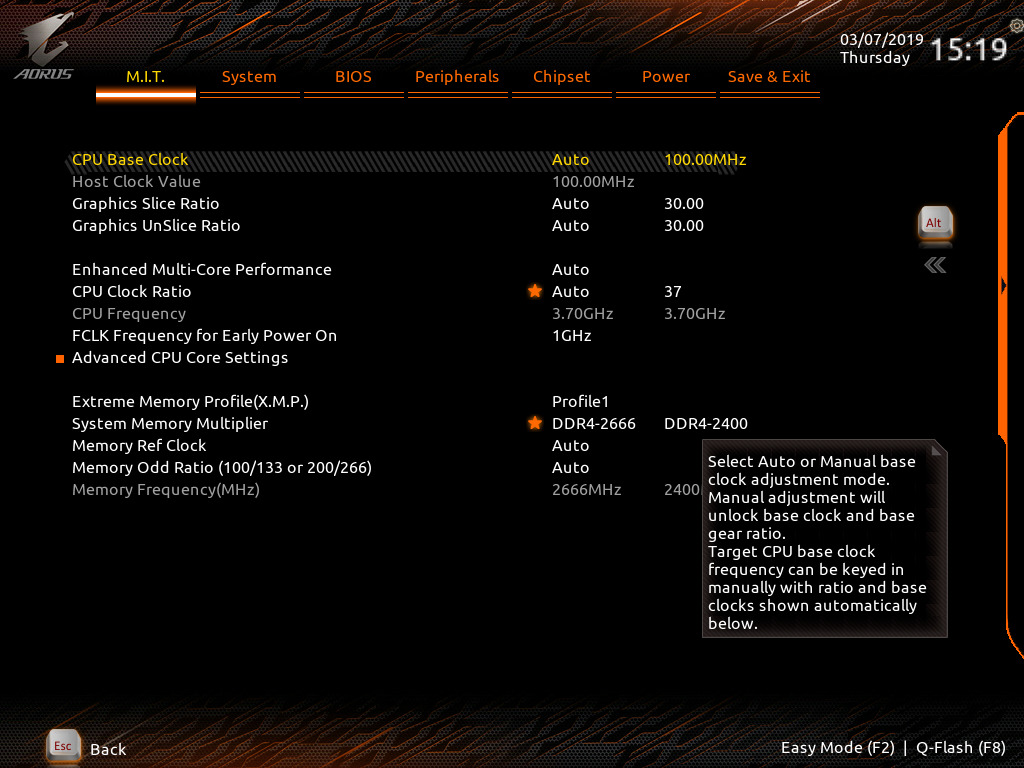
Despite being a noticeable improvement in terms of GUI from the F4 launch firmware to F7, the layout is still a little basic and doesn’t feature much pizazz from a visual point of view. This isn’t necessarily a negative as each setting and option is clear with white text on a black background; as contrasting as it gets. Present are settings for changing the CPU base clock, integrated graphics ratios CPU clock ratio and a one-click setting to enable X.M.P 2.0 profiles on compatible and supported DDR4 memory.
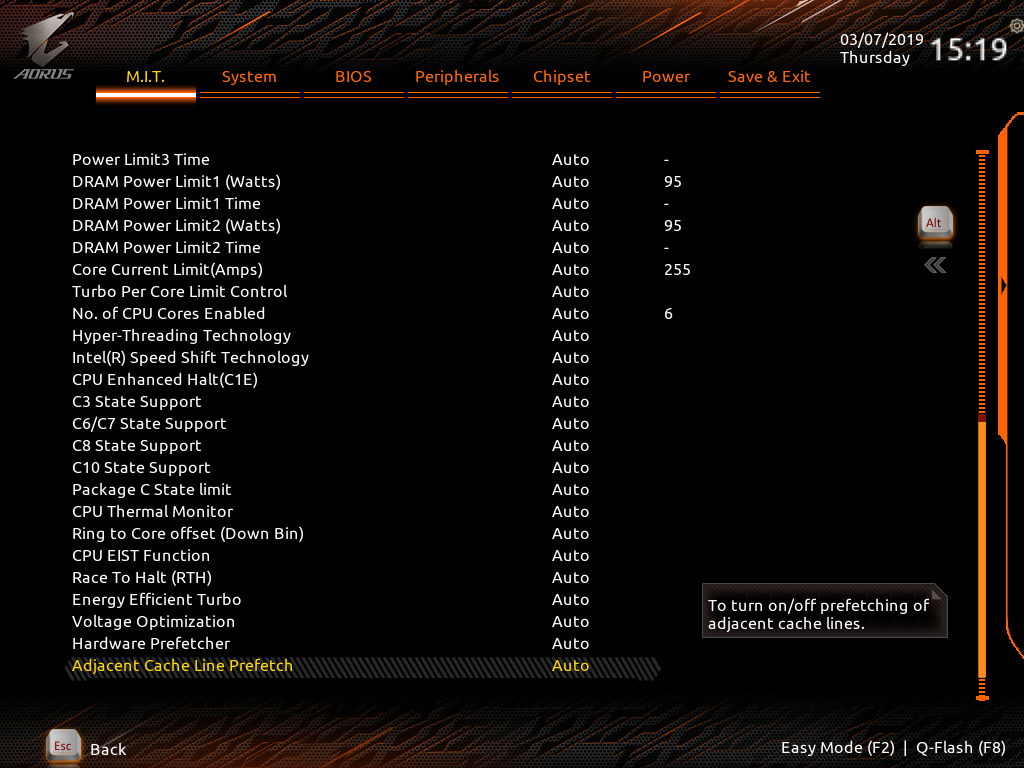
All the relative power settings such as Turbo Boost Technology ratios, package power limits and C States can be altered within the Advanced CPU Core Settings sub-menu within the Advanced Frequency Settings menu. Users can even enable or disable Intel EIST, Intel Speed Shift and enable or disable CPU cores; users however can only select the number of enabled cores and not select between individual ones.
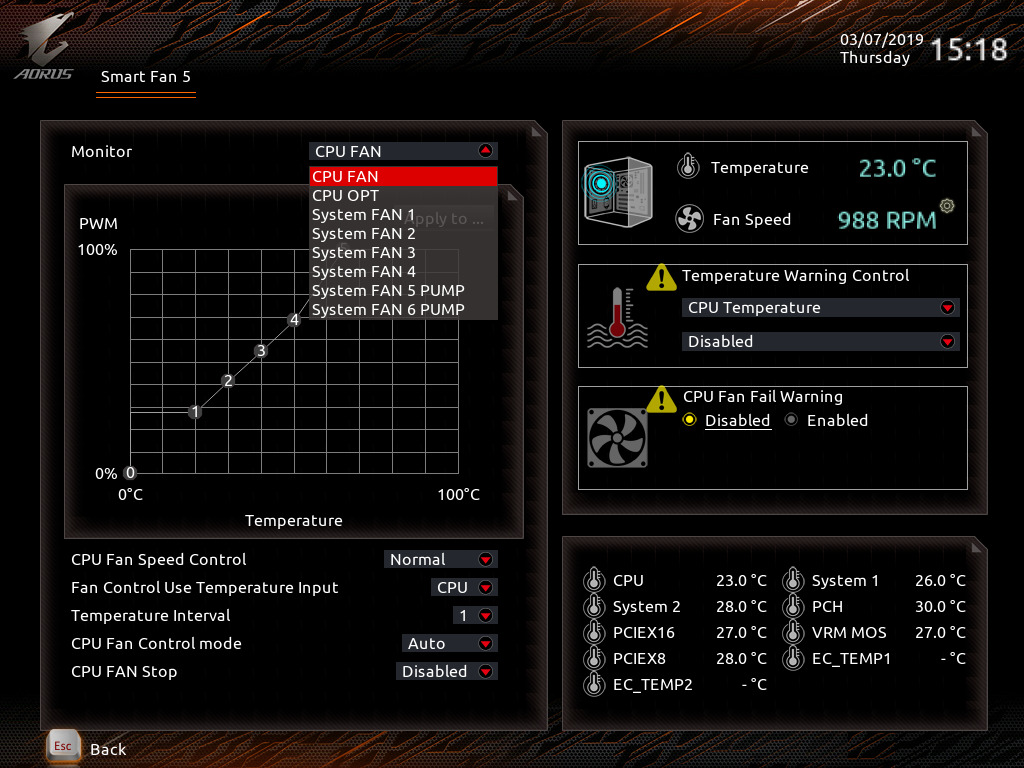
The GIGABYTE Z390 Aorus Master comes equipped with an integrated fan control utility called Smart Fan 5. With a theme that looks more with the times than some other vendors output, Smart Fan 5 allows users to control each of the seven 4-pin headers individually. There are options to enable an alarm with certain variables including temperature on each of the different sensors and below this is a set of Realtime temperature values on all the different onboard thermal sensors. Users can make their own profiles through a five-point fan curve, or select a predefined one such as normal, quiet, performance and full-speed.
_thumb.jpg)
_thumb.jpg)
_thumb.jpg)
_thumb.jpg)
_thumb.jpg)
_thumb.jpg)
Solid and reliable firmware can make or break the user experience on a motherboard and GIGABYTE’s UEFI firmware does work very well. Much like ASRock does on its premium models, GIGABYTE has separated key overclocking controls into their own subsections which makes it easy to find settings, although there are too many clicks for my liking to get through to the LLC options (four in total). Users can alleviate this by putting their most frequently used options in the favorites panel for quick and easy access. The firmware is very responsive, there are extensive options for power settings and even though in our overclocking section I’ve highlighted some noteworthy points, the GIGABYTE firmware when updated past F5 on the Z390 Aorus Master is good.
Software
Accompanying the GIGABYTE Z390 Aorus Master is an enthusiastic software bundle that caters towards gamers, enthusiasts and audiophiles. All the software surrounds the Aorus App Center which acts as the hub with the most notable software coming via the EasyTune which is an overclocking and tweaking utility, the RGB Fusion 2.0 software for customizing the boards RGB LEDs and USB DAC-UP 2 utilities which allows users to alter the power of two USB 3.1 G1 Type-A ports on the rear panel.
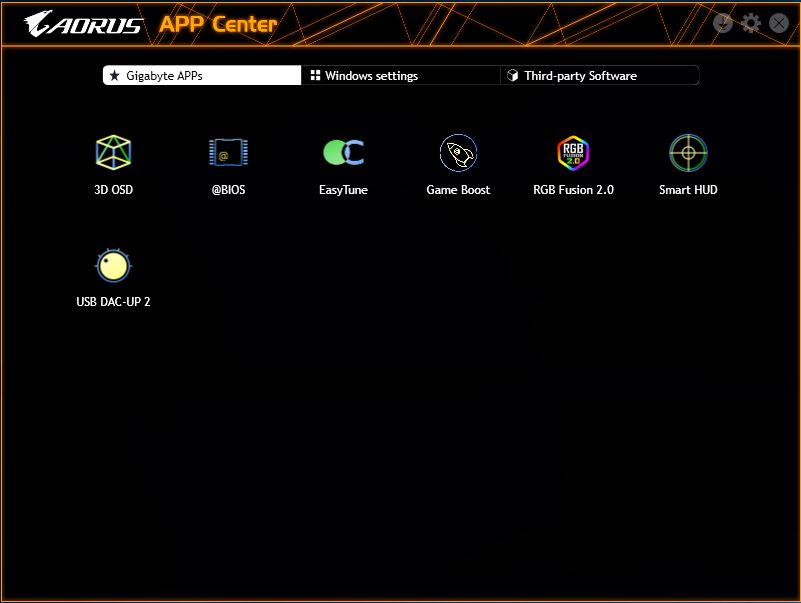
The GIGABYTE Aorus App Center acts as its software’s plexus and all other applications cannot be installed without first installing the App Center. This is a positive for users looking to keep software in one easy to use panel, which also offers users access to primary Windows settings from the Control Panel and from third-party applications too. The negative is that users must do something that they may not wish to do; no-one likes applications and software to be forced upon them, even if it’s intuitive and purposeful.
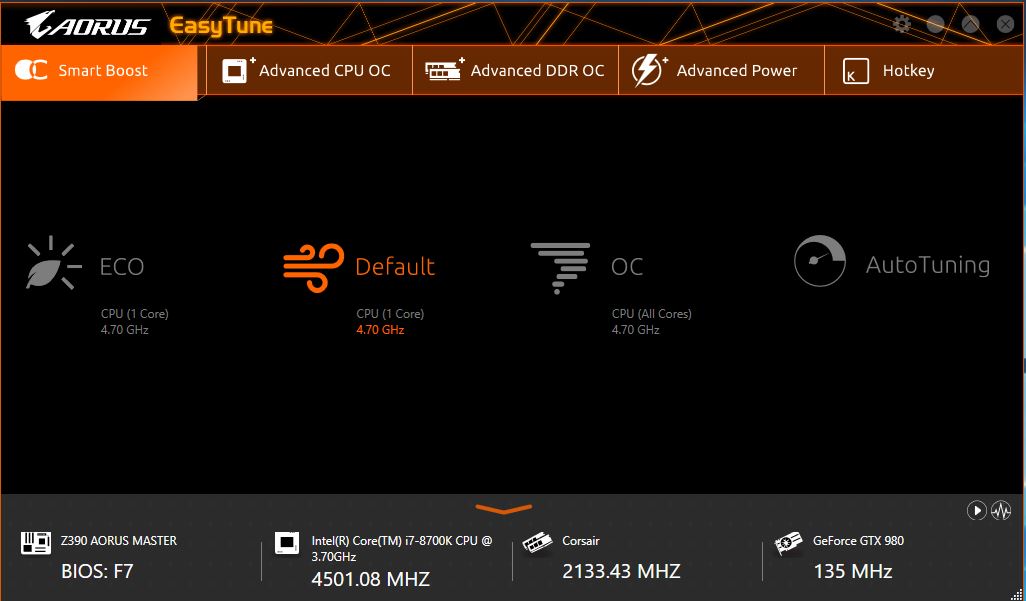
With the Aorus EasyTune software, it allows users to select between four different overclocking modes; ECO, Default, OC and AutoTuning. Eco applies an overclock of 4.7 GHz on a single core, while Default looks to do the same, but with a little more headroom in power draw. The OC mode applies an overclock of 4.7 GHz across all the cores, whereas the AutoTuning profile goes through a 10-15-minute process of rebooting, automatic overclock tweaking and outputs a profile based on what it thinks the overall system can handle.

Users looking to do overclocking outside of the firmware can do so with the EasyTune utility. Within the software is an extensive list of overclocking settings for the CPU, memory and boards power delivery. Options for changing the frequency of external base clock generator, the CPU core ratio per core or all core, primary voltage settings and even memory frequency are assessable via EasyTune. Unlike some overclocking utilities from other vendors, the Aorus EasyTune offers real-time changing without the need to constantly reboot.
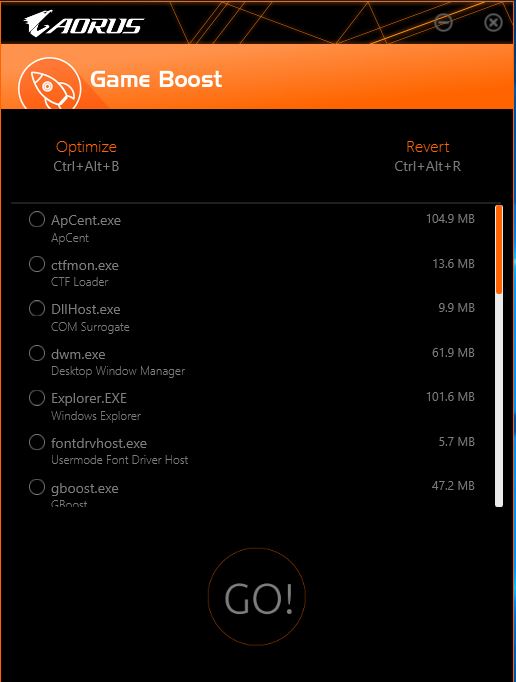
The GIGABYTE Aorus Game Boost software allows users to essentially free up system resources such as applications that hog RAM and CPU power. Users can press Ctrl + Alt + B to allow the software to ‘optimize’ the system processes or users can select through the hungriest of programs and close them down manually. The benefit is more likely to be noticed on a lower end system or if users are running highly intensive applications such as Adobe Photoshop in the background without realizing; I certainly notice if Photoshop is open and the software doesn’t offer much more than common sense would dictate.
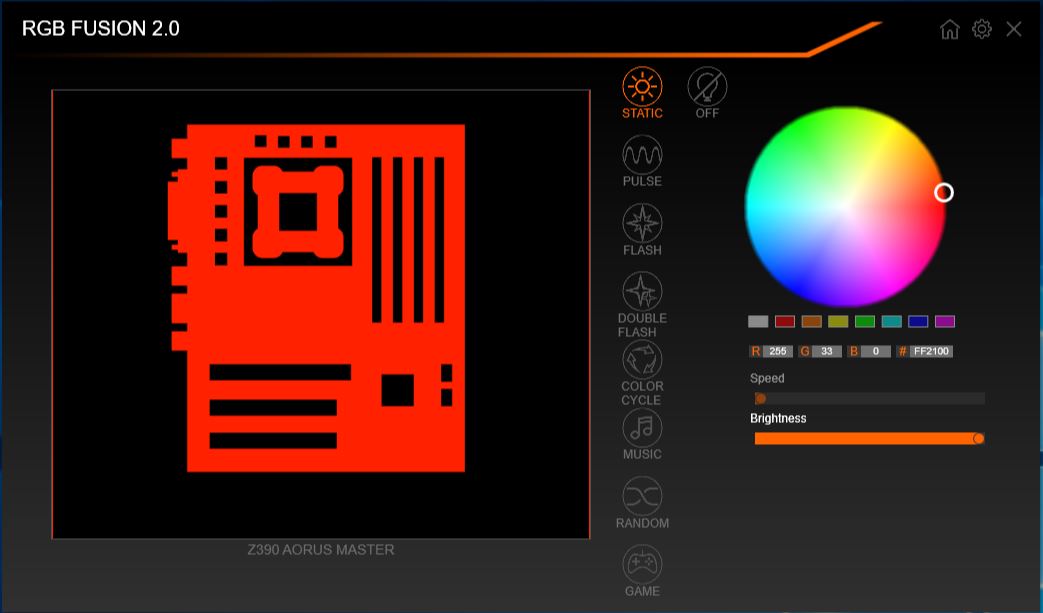
When it comes to customizing the integrated RGB LEDs on the Z390 Aorus Master, GIGABYTE has equipped the software bundle with the RGB Fusion 2.0 software. Users can select between eight different lighting effects or turn the LEDs off completely. Each of the individual lighting zones and headers can be customized to have their own separate effect/color combination or sync across the board.
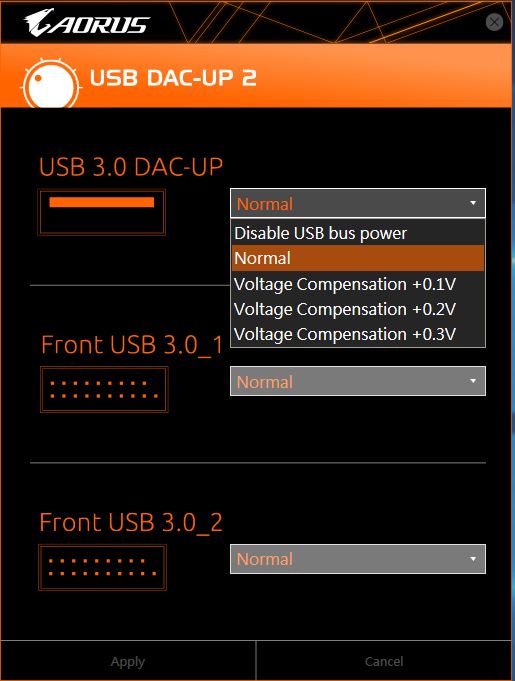
For the audiophiles using good quality USB headsets, GIGABYTE has doubled up the two USB 3.1 G1 Type-A ports with the USB DAC-UP 2 technology. What this does is allow users to apply voltage compensation to the ports with up to 0.3 V more through the ports. The voltage compensation defaults at normal variables with the software allowing users to disabled USB bus power completely from both ports. Users can also control and apply voltage compensation through the front panel USB 3.0 header; the software displays two headers, but the board only has a single USB 3.1 G1 header.


While the core software bundle accompanying the Z390 Aorus Master is useful, I don't feel GIGABYTE hasn't utilized all of that focus on onboard audio as they should. Usually with models that incorporate good quality audio options including DACs and amplifiers come with a software package that makes users feel like they are getting a premium product, as well as offering functionality for users to customize sound profiles. Even though the Realtek Audio Console does do this to a degree, a third party software suite downloadable from the official product page and the installation CD would make the bundle more complete.


36 Comments
View All Comments
Timur Born - Thursday, March 21, 2019 - link
I have to keep ring ratio below x46 to stay stable overclocked.gavbon - Friday, March 22, 2019 - link
I tested DPC Latency on the latest 2 revisions (F7 and F8e). Retested the full suite on both revisions and didn't notice any significant differences. GIGABYTE has good hardware, just tetchy firmwareTimur Born - Thursday, March 21, 2019 - link
I am confused by the supposed usage of "DPC Latency Checker" on Windows 10?! Do you use LatencyMon or how do you make it work?gavbon - Friday, March 22, 2019 - link
We use LatencyMon :)Timur Born - Saturday, March 23, 2019 - link
I guessed so, which means this is just a typo in the text. Do you report maximum or average latencies and is this using the "Balanced" or "High Performance" Windows power profile?Gasaraki88 - Friday, March 22, 2019 - link
That gaming performance is pretty bad. A difference of 10+ frames between the best and worst board (this one) is a big different when you have the same cpu, gpu, and memory.IndianaKrom - Saturday, March 23, 2019 - link
I have this board and a 9900k, and the gaming performance is nothing like what they are getting in benchmarks (even my 7700k system was doing better than that). I wonder if it isn't because the BIOS defaults for this board actually respect the Intel turbo boost spec and will dial down the CPU clocks/energy back down to the rated TDP after a few seconds of load. I went in to BIOS and deliberately set P1/P2/P3 turbo power states to unlimited watts/duration so my CPU will turbo at its highest possible bins forever as long as the thermals are in check, but if you don't do that the board will clamp the CPU to 115w after 10 seconds and 95w after like 30 seconds IIRC.Arbie - Friday, March 22, 2019 - link
Even if the company's legal name is in all caps, that's just marketing hype and hard on the reader's eyes. I wouldn't indulge them by repeating it - which does them no favors anyway, as it looks gimmicky and cheap.WickedMONK3Y - Monday, March 25, 2019 - link
The performance of this board seems to vary greatly depending on the CPU used, and the BIOS revision that is on the board. F5 and F6 seem to be the best BIOS versions so far, I am running mine with F6 and a 9900K, and stuck in an 8700K to check these numbers and my performance was higher, but my girlfriends PC is running the same board on F8 with a 9700K and when I put in the 8700K the numbers are close to these. Scary how much a BIOS can affect performance on these boards.VoodooRufus - Wednesday, March 27, 2019 - link
Beefy power section, ESS Sabre DAC, gold plated audio connectors, dual 8-pin CPU power, and front USB-C. Very good aesthetics, integrated IO plate. VRM's run cool with minimal airflow. I love my Aorus Master. Stable and easy to tune. I mostly hate my Z68X-UD7-B3 in comparison.