Overclocking The AMD Ryzen APUs: Guide and Results
by Ian Cutress & Gavin Bonshor on April 16, 2018 2:30 PM ESTHow to Overclock With ASUS UEFI BIOS
Depending on which ASUS motherboard that is being used, whether that’s one such as the ASUS Prime X370-Pro (featured here) or a more gaming focused Republic of Gamers branded option, the only real differences come through the GUI and theme. The settings themselves remain the same and the ASUS BIOS offers both basic and advanced modes.
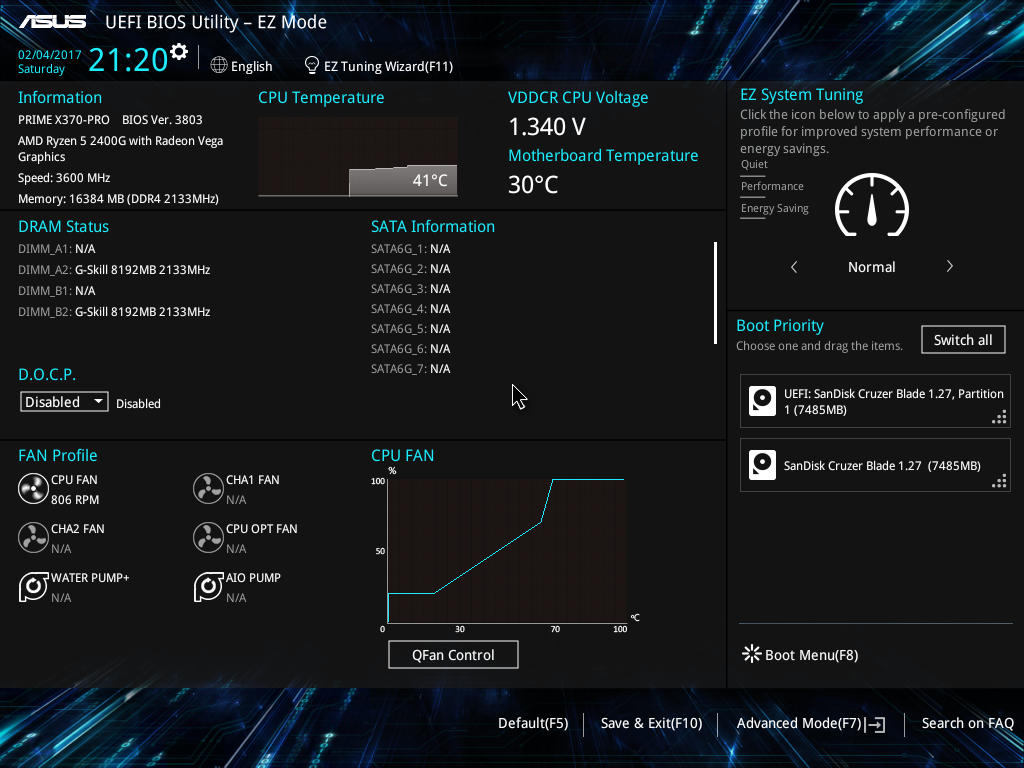
After entering the BIOS, the basic mode splash screen will appear. Here users can enable XMP (DOCP, Direct Overclock Profile), adjust fan profiles, and apply some 'EZ Tuning' for automatic overclocks that can be hit or miss. Pressing F7 enters the advanced mode.
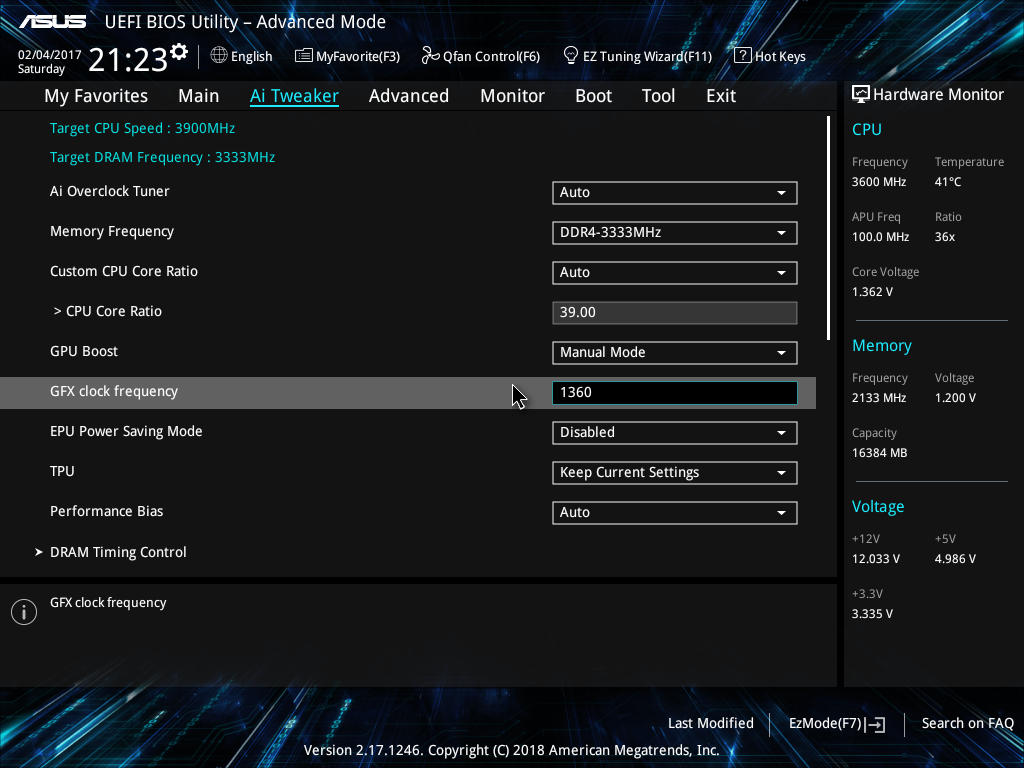
Once into the advanced section of the BIOS, all the overclocking related settings can be found in the AI Tweaker section. One interesting thing that was found within this particular BIOS was when XMP was enabled, it would remove access to the iGPU settings. Unfortunately we weren't able to determine if this was an isolated issue or whether it’s a more widespread across the entirety of the ASUS AM4 board range.
Changing the 'CPU Core ratio' to 39.00 will translate to 3.9 GHz. Due to the removal of the iGPU options when XMP enabled, the memory was changed manually within the BIOS; the easiest way to do this is to set the frequency and leave the sub-timings on auto, then manually adjusting the sub-timings to fit the module's rating.
To open up the integrated graphics options, setting the GPU Boost option to manual mode is required. This gives the GFX clock frequency option (note the lack of capital letters, perhaps this option was rushed in), while the voltage options are further down the list.

All the the voltage options further down. ASUS makes it a little confusing here, by not having the standard names for a few of these options - ASUS calls the CPU core voltage 'VDDCR CPU Voltage', for example. In each case for this sub-section, the manual mode option needs to be selected to offer the manual input for voltages. It is worth remembering to set the DRAM voltage if the timings were set manually.
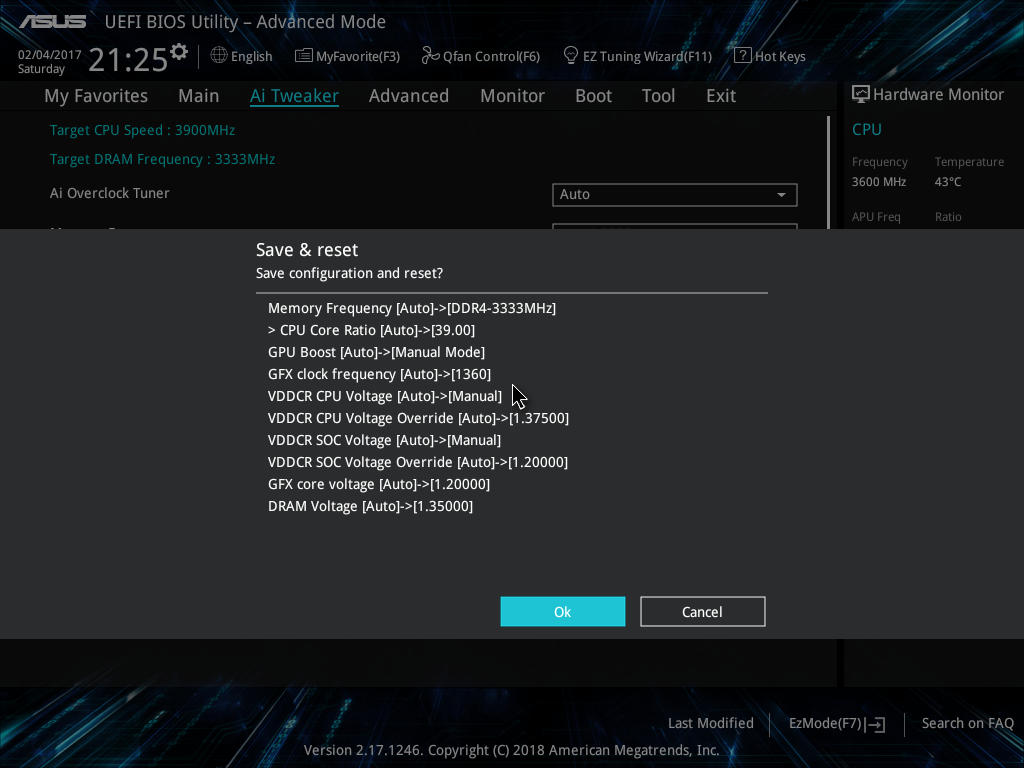
Once all the settings are entered, pressing F10 will bring up the save and reset box where the user can evaluate and comb over the changes made.
Many thanks to Lawrence Timme - due to not having an appropriate ASUS AM4 motherboard to hand (we somehow ended up with no ASUS boards with video outputs), he kindly provided the screenshots for this section.


63 Comments
View All Comments
chitraqueen - Saturday, November 30, 2019 - link
https://www.hyderabadiqueens.com/banjara-hills-esc... Banjara Hills escort present best of there just click on the link and enjoy the sexiest pic of Banjara Hills escorts working for your pleasure and satisfaction try one.aradii - Tuesday, January 7, 2020 - link
The GIGABYTE team looks happy with their worksLaser hair removal https://www.tehranlaserclinic.com/
sonianextlevel - Saturday, February 1, 2020 - link
They understand professional to keep the outlooks to look stylish with the gaze of clients.https://www.hyderabadiqueens.com/