The ASRock Z270 Supercarrier Motherboard Review: 4-way SLI and 5 Gigabit Ethernet on Kaby Lake
by E. Fylladitakis on September 29, 2017 9:00 AM EST- Posted in
- Motherboards
- ASRock
- SLI
- Aquantia
- Z270
ASRock Z270 Supercarrier BIOS
The BIOS of the ASRock Z270 Supercarrier is graphical, and features control via the mouse, and direct internet access for updates or contacting ASRock’s support department. It defaults to the “EZ Mode", a simplistic single page that hosts only basic configuration settings and informative dials. From this page, the user can switch the boot device priority, engage DRAM XMP profiles, change the fan speed setting and engage pre-programmed CPU overclocking profiles. There is also a simplistic automatic overclock option, allowing the user to switch between “Off” and “Tubo”. No, we are not the ones who spelled this wrong.
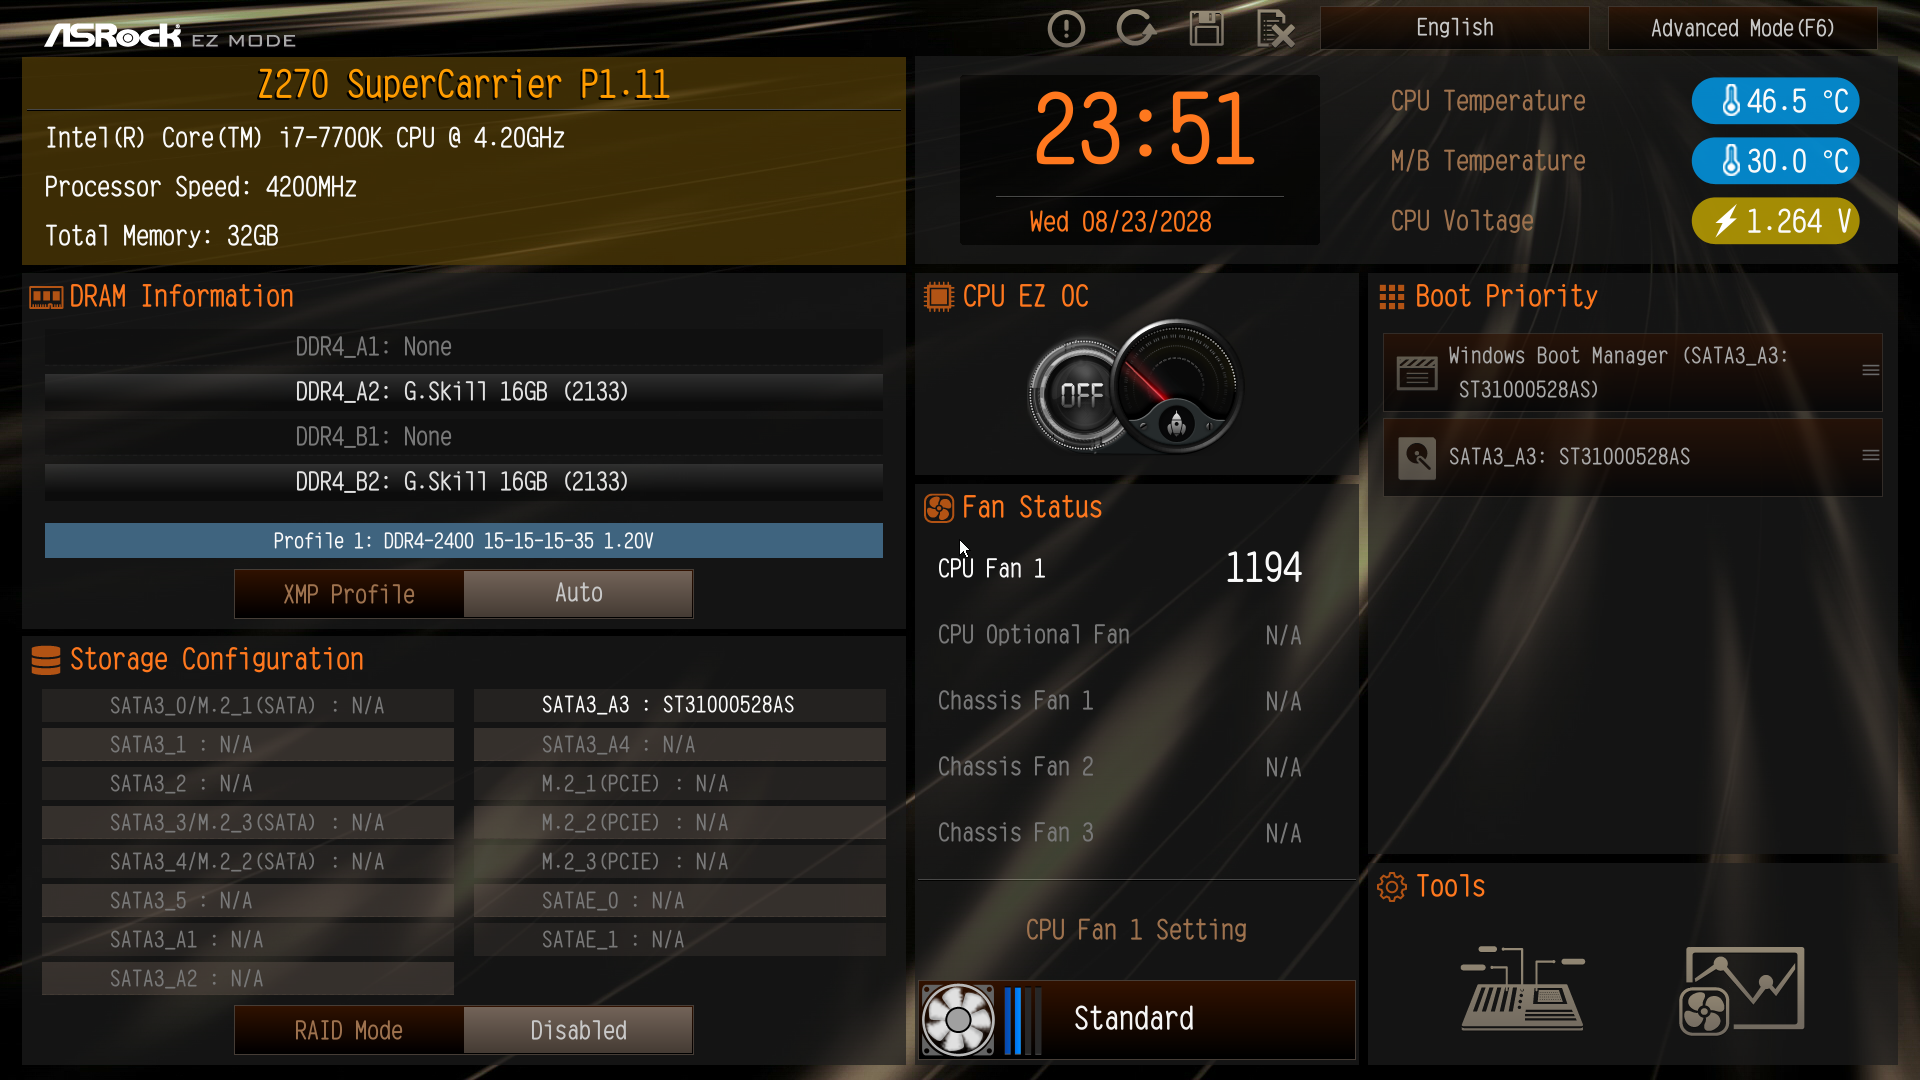
Upgrading the BIOS, device identification, and fan speed tuning tools are also accessible through the icons found at the bottom right corner of EZ Mode. The “Instant Flash” tool can be used to flash a BIOS that is already stored into a local disk drive and the “Internet Flash” will access and check ASRock’s servers for a newer BIOS version. The “System Browser” tool brings up an image of the motherboard and its rear I/O panel, where the user can “explore” the board using the mouse pointer. The tool will display information on the device that is attached/connected on the port or slot that the pointer is placed on. Finally, the “FAN-Tastic” tuning tool brings up a red screen where the thermal profile of the cooling fans connected to the motherboard’s headers can be either selected from four pre-programmed presets or be manually programmed.
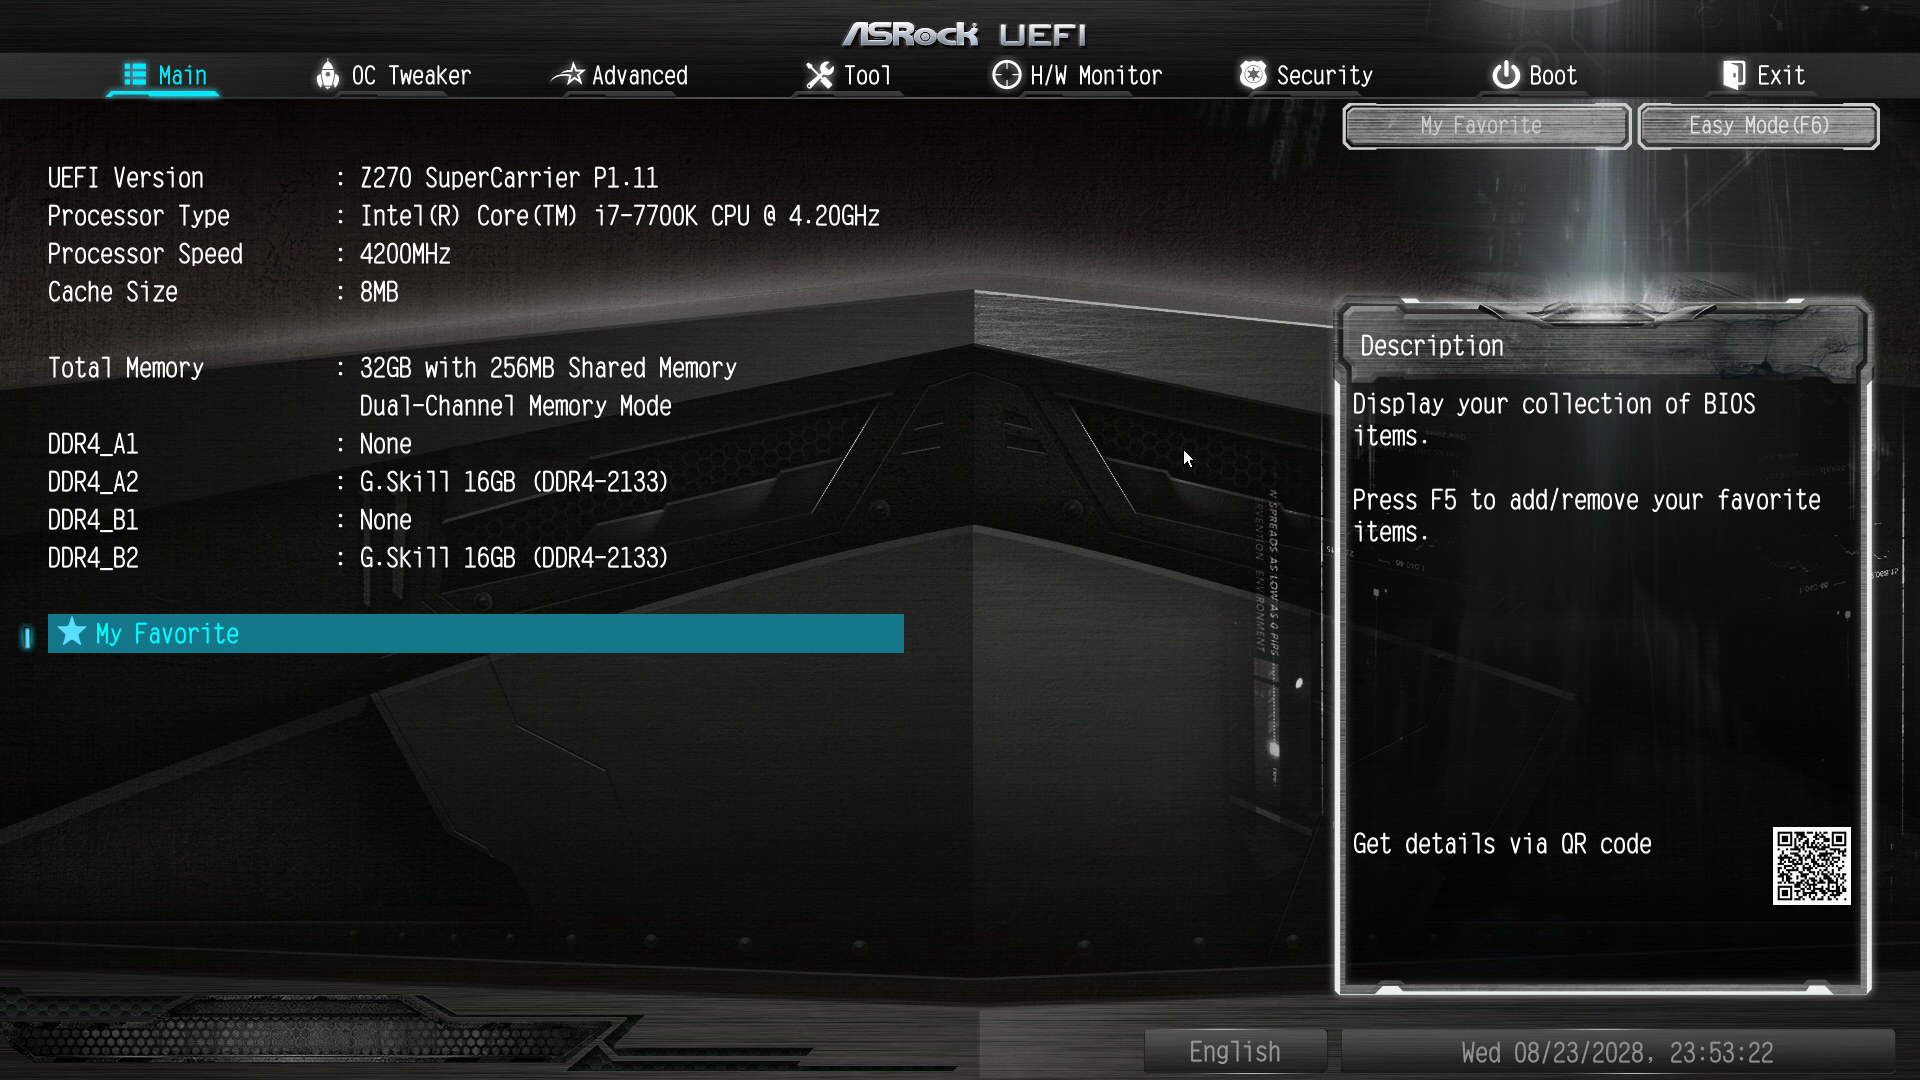
Users can enter the “advanced” mode that allows access to all of the BIOS options and features by pressing the F6 key. The full BIOS has all of its settings arranged under eight major tabs, with the bulk of the tweakable settings and options under the “OC Tweaker” and “Advanced” tabs.
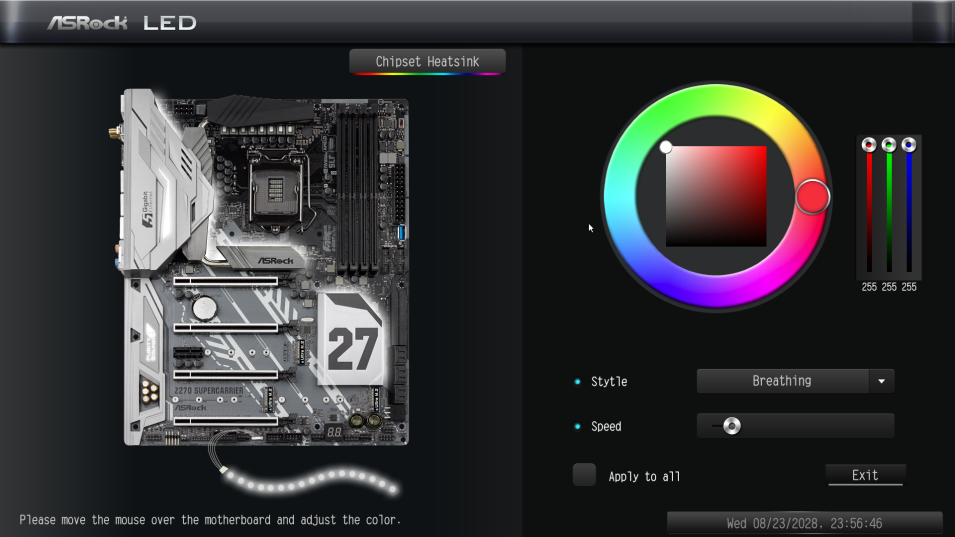
The first tab is the “Main” Tab and only includes system information and a list of settings that have been flagged by the user as “Favorite”. Skipping down to the fourth tab, the “Tools” tab that is, we find the same tools that are accessible via the “EZ mode” screen, plus a few more: the “UEFI Tech Service”, which is practically sends a direct message to ASRock’s customer support from inside the BIOS, the “AURA RGB LED” that allows for the programming of both the onboard LEDs and the optional strip connected to the motherboard’s header, and the “Network Configuration” submenu that allows the user to manually set up the system’s IP rather than having DHCP do it automatically. There is also an option to backup the BIOS from the main to the auxiliary memory chip, which can be useful for the users who want to keep both of the BIOS chips up to date.
The fifth tab, dubbed “H/W Monitor”, initially appears to be a purely informative screen. However, scrolling down the page reveals the fan settings, allowing the user to choose pre-programmed or program new thermal profiles for the cooling fans connected on the motherboard’s headers. The “FAN-Tastic” tuning tool is also accessible via this screen. In the three last tabs, we find typical BIOS options that have to do with the system’s security and boot options, options that we do typically see programmed into any motherboard BIOS. That leaves us with just two tabs, the “OC Tweaker” and the “Advanced” tabs, each of which holds many submenus and numerous sub settings.


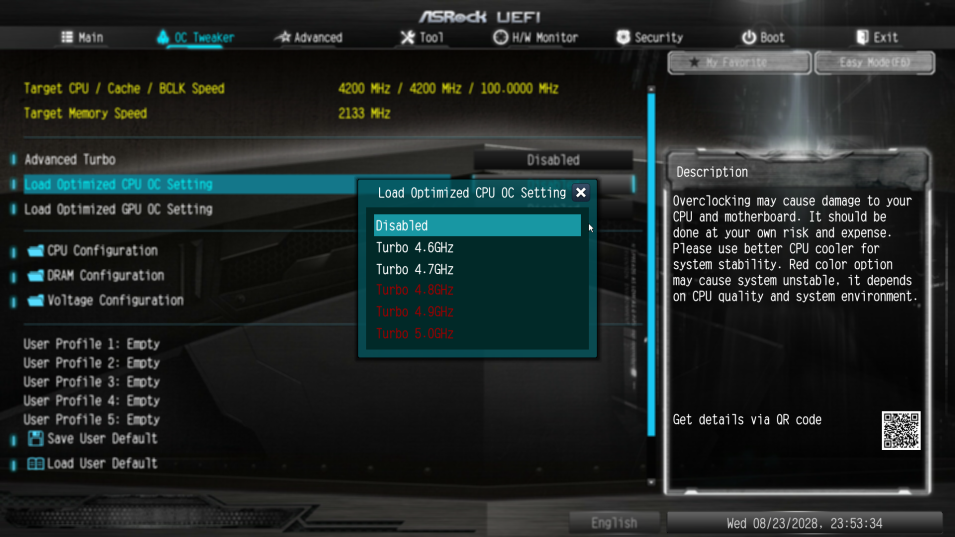
The “OC Tweaker” tab initially offers only three tweakable options. The first is the “Advanced Turbo” mode that concurrently overclocks the CPU and GPU via presets. The other two are the “CPU OC setting” and “GPU OC setting”, which offer the same presets as the “Advanced Turbo” option does but only affect the CPU or GPU respectively. Up to five manual configuration profiles can also be saved/loaded through this screen.
A host of frequency, timing and voltage settings can be found under the three submenus here. The first submenu hosts all of the CPU settings, the second the DRAM settings, and the third all voltage configuration settings.
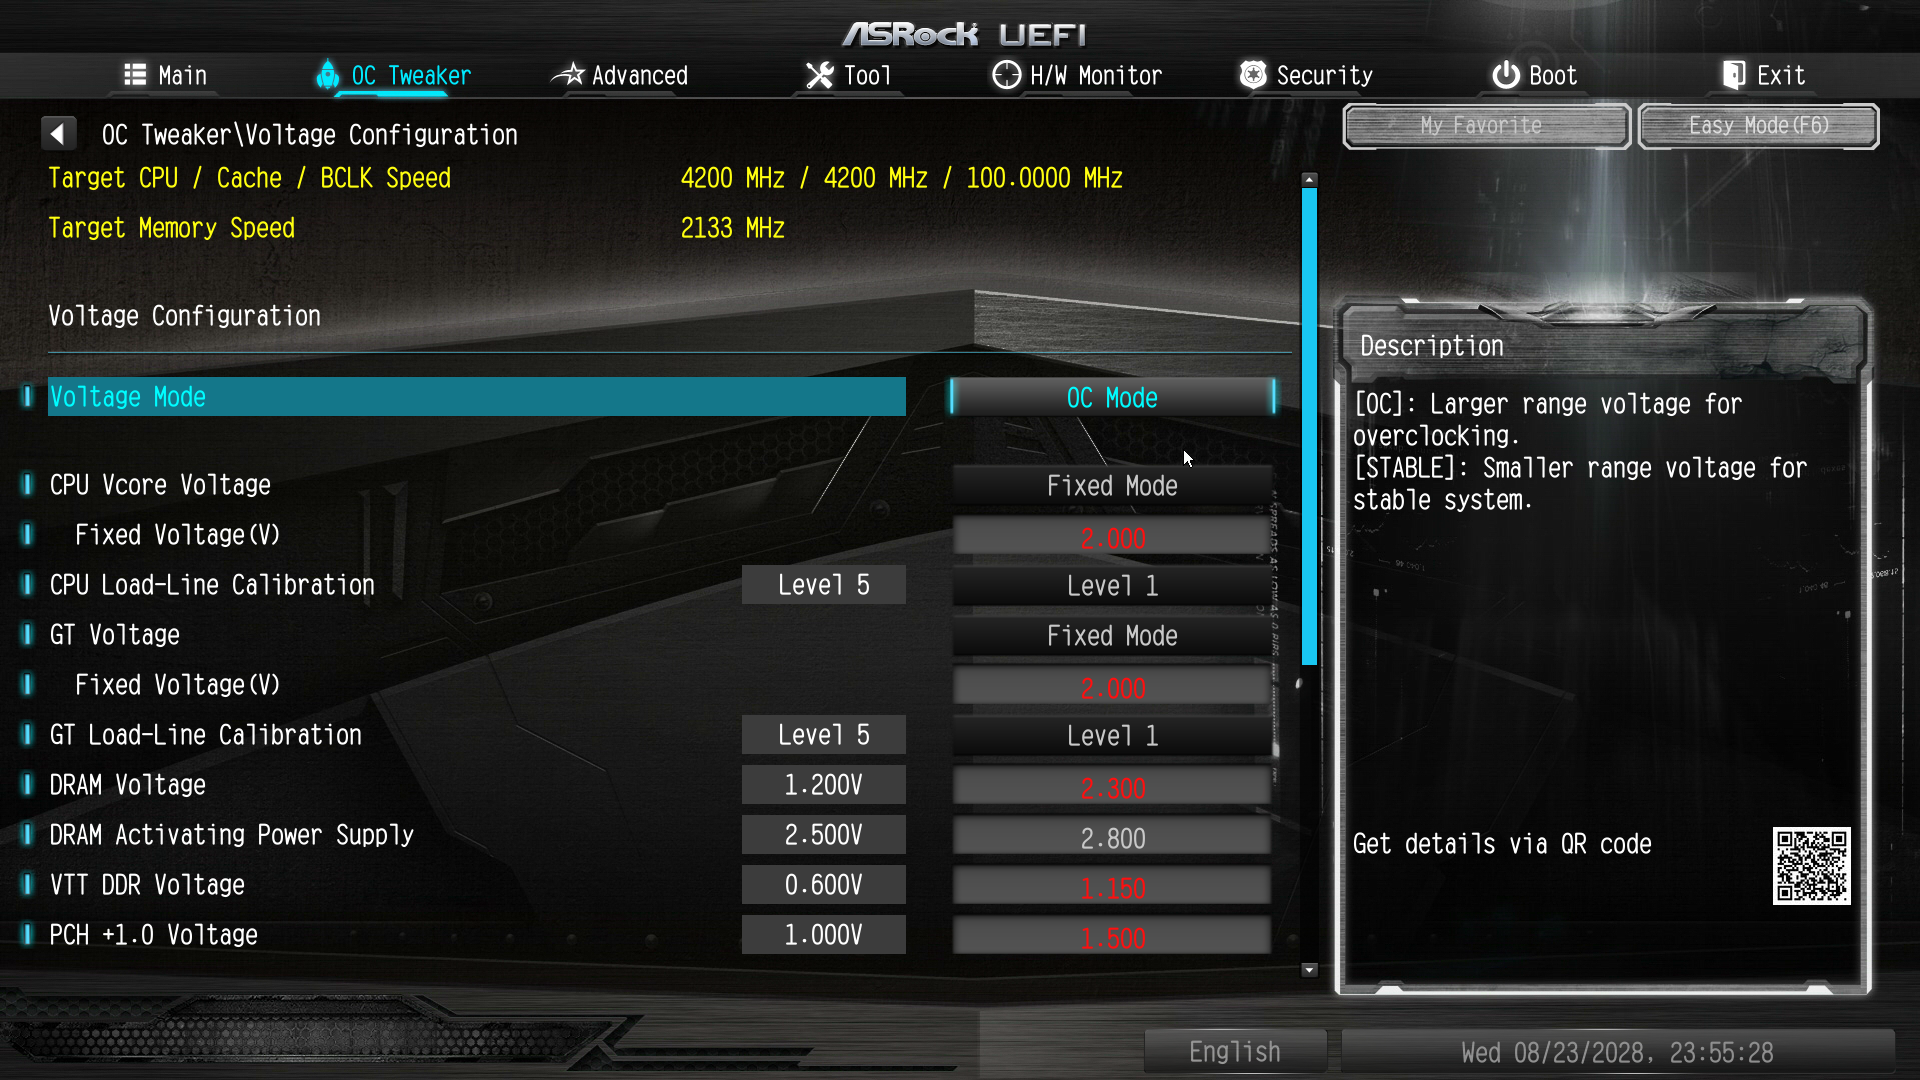
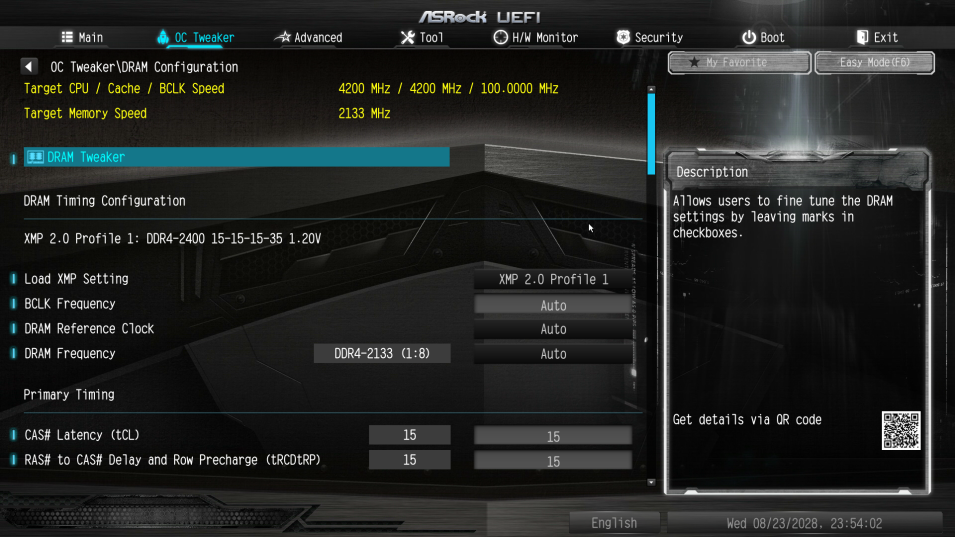
The “CPU Configuration” submenu includes all of the CPU-related options, such as the multiplier, BCLK frequency, Intel-specific features and power limits. The “DRAM Tweaker” begins with the XMP settings and basic RAM timings, but the BCLK frequency appears in this submenu as well. As the user begins scrolling down, the menu expands to “primary”, “secondary”, “third”, “fourth” and “advanced” timings, offering a ridiculous number of possible timing adjustments that even seasoned overclockers will not be fiddling with. Finally, the “Voltage Configuration” submenu allows for the manipulation of the CPU, DRAM, PCH and other voltage lines. The voltage adjustment steps are very fine, at 5 mV for most of the options here, and the range is exceptional as well. Actually, the range of most voltage options is so great that we do not recommend manual adjustments by users without at least some overclocking experience, as some of these settings could kill components outright.
The “Advanced” tab includes all of the configuration options for the motherboard’s features and onboard devices. Once again there is a “CPU Configuration” submenu, with the options that ASRock probably assumed that they are not relevant for overclockers. Most of these options control features of the CPU, such as hyper threading and virtualization, as well as power saving states. Among these options lies the disabling of thermal throttling, which may be used by experienced overclockers but can be very dangerous.
The “Chipset Configuration” submenu includes advanced options for the chipset’s link speeds and iGPU, and allows the disabling of the onboard audio and LAN devices. The rest of the submenus are straightforward, with the “Storage Configuration” including the SATA control options, the “Super I/O” the settings for the PS/2 and serial ports, etc. There is nothing out of the ordinary in any of these submenus.


50 Comments
View All Comments
edzieba - Saturday, September 30, 2017 - link
A 'headphone amplifier' is just an op-amp used correctly in its linear region. Marketing departments may wish to tell you otherwise, but there is nothing magical about them.extide - Friday, September 29, 2017 - link
WHY are we still seeing boards with SATA Express... That just needs to die!Regular Reader - Sunday, October 1, 2017 - link
Same reason this motherboard still has PS/2 on it.Samus - Saturday, September 30, 2017 - link
Is triple\quad SLI still a think? I mean, at what point are 2x 1080Ti's or 2x Vega64's not good enough for any game at any reasonable resolution even across multiple monitors?Regular Reader - Sunday, October 1, 2017 - link
Apparently there are enough buyers still out there (for multiple motherboard vendors no less) that want the braggingest brag of a gaming rig out there, regardless of the paltry 5% performance increase 3 and 4 cards affords.Notmyusualid - Sunday, October 8, 2017 - link
Its not all about gaming....CrazyHawk - Friday, October 6, 2017 - link
There are other uses for 4-way GPUs other than gaming. An inexpensive deep-learning rig is one of them. 16 PCI 3 lanes still provide 15.8 GB/second total bandwidth. With the PEX 8747 chip (in a 2-GPU system), if a single card is exchanging data with the CPU, it gets the entire 15.8 GB/second bandwidth, and GPU to GPU transfers are at 15.8 GB/second without involving the CPU.On GoogLeNet, with a GTX 1070, time spent transferring data at x16 is about 3% of runtime. With AlexNet (same hardware), it is about 5.5% of runtime. That means that for 95% of the job, there is no data going over the PCI x16 links. The PEX 8747 can give full access to the 16 PCI lanes to each GPU during that 95% of the time. With 4 GPUs, each gets x8 lanes, so the transfer time doubles, but it is still just around 10% of runtime, and only 40% of the total bandwidth is used (this analysis ignores optimizations possible through pipelining the data transfer with the compute).
The GTX 1080Ti is about twice the speed as the GTX 1070, so with 4 1080Ti cards, you are using near 80% of the bandwidth, which starts to become a stretch. But if you can afford 4 1080Ti cards, you can probably afford an HEDT machine. For getting started with deep learning, this motherboard, an 8700K processor, and 4 used GTX 1070 or GTX 1060 GPUs (after the mining craze goes bust) would be a very inexpensive way to build a real AI supercomputer.
Does anyone have any rumors/ideas on when the z370 version of this board will come out? (or the ASUS z370-WS version of their board?)
Notmyusualid - Sunday, October 8, 2017 - link
@ CrazyHawkPeople have been telling me since 2007, that mining is going to go bust:
1 Bitcoin equals 4469.43 US Dollar
Mining has changed, but alive & kicking!
oranos - Monday, October 2, 2017 - link
nobody knows how to push the irrelevant innovation of hardware quite like the ethernet industrywagletops - Tuesday, October 3, 2017 - link
save all these reviews for when the 370 comes out :)http://www.appcheatsonline.com/roblox-robux/