Kaby Lake Motherboards at $140: MSI Z270 SLI Plus vs. ASRock Z270 Killer SLI
by E. Fylladitakis on May 1, 2017 10:30 AM EST- Posted in
- Motherboards
- Intel
- MSI
- ASRock
- SLI
- Kaby Lake
- Z270
- Z270 SLI PLUS
- Z270 Killer SLI
BIOS
The ASRock Z270 Killer SLI features a graphical UEFI BIOS, much like every modern motherboard these days. The BIOS defaults to a simple, single page mode, called the “EZ Mode”. From this mode only basic features and functions are accessible, with most tabs being purely informative in function. The “Tools” Tab does bring up some interesting functions though. There is the “Instant Flash” option that allows the user to flash a BIOS available into a USB drive, but there is also an “Internet Flash” option that has the ASRock Z270 Killer SLI automatically connecting to the company’s servers, checking, downloading and flashing the latest stable BIOS instantly, without having to download it from inside an OS.
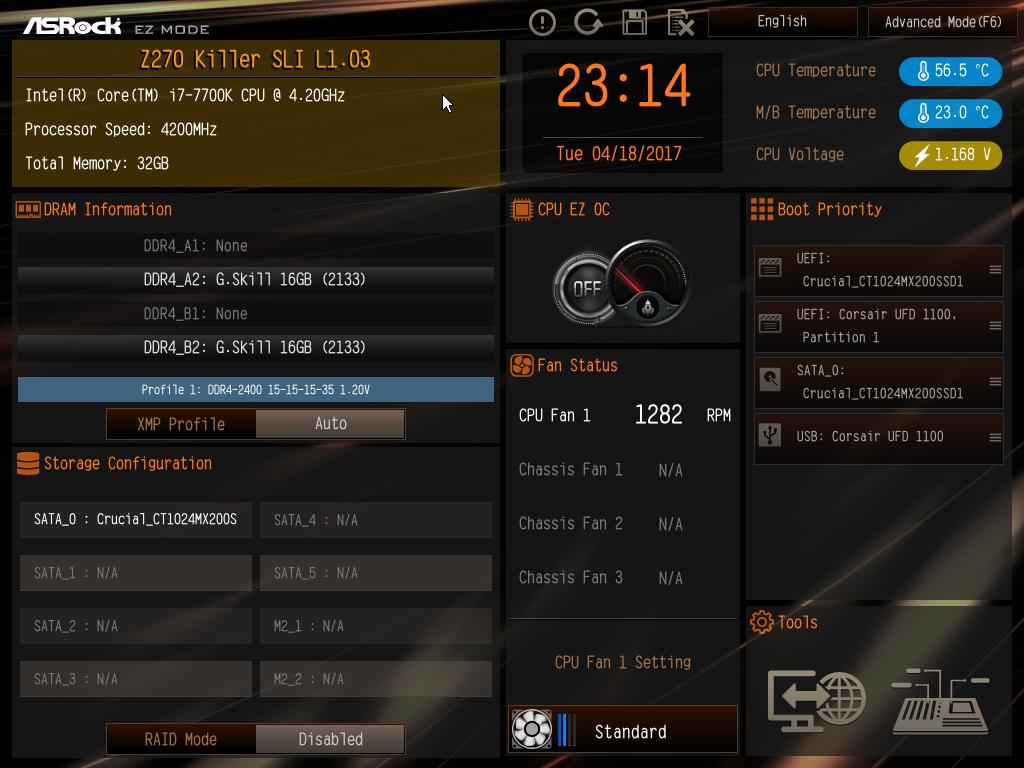
The “System Browser” tool is identical to MSI’s “Board Explorer”; it brings up an image of the motherboard and its rear I/O panel, where the user can “explore” the board with the mouse’s pointer. The tool will display information on the device that is attached/connected on the port or slot that the pointer is placed on. Finally, the “FAN-Tastic” tuning tool brings up a bright red screen that will try and burn the user’s retinas. Assuming that the user escaped blindness, the thermal profile of the cooling fans connected to the motherboard’s headers can be either selected from four pre-programmed presets or manually programmed.
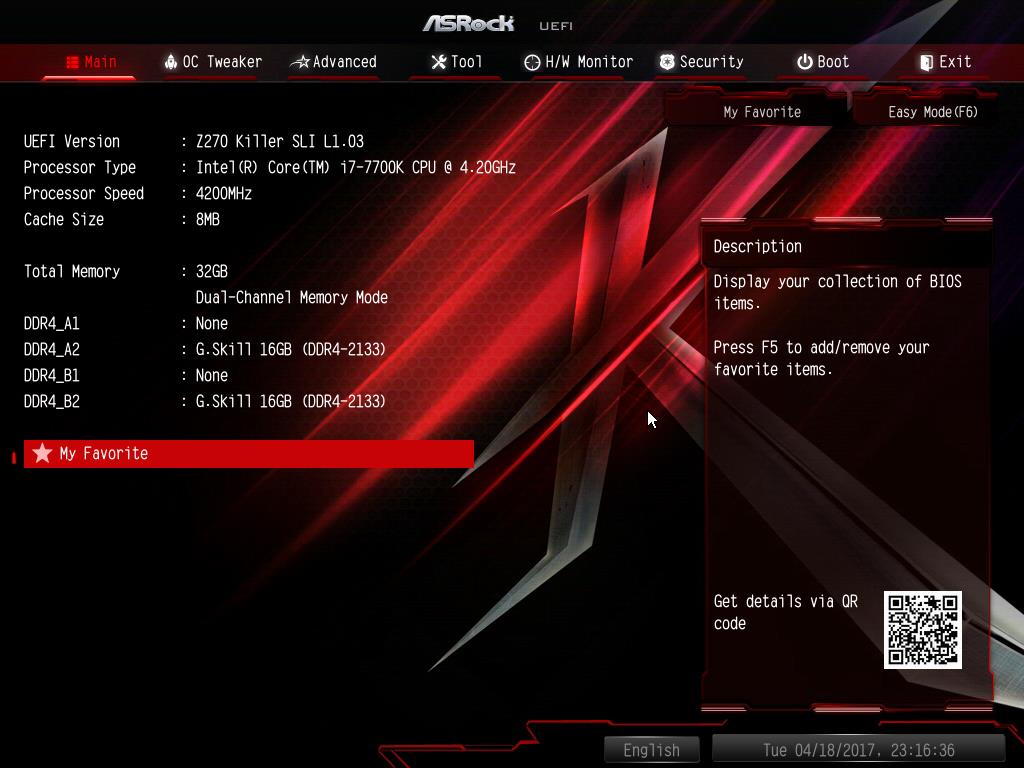
The Advanced BIOS mode brings out all of the motherboard’s options and features, cleanly organized under seven major tabs. The first tab is the “Main” Tab and only includes system information and a list of settings that have been flagged by the user as “Favorite”.
Naturally, the “OC Tweaker” tab includes the largest number of options and settings. For users that do not want to be bothered with extensive options, the company implemented the “Load Optimized CPU OC setting” option that will automatically overclock an unlocked CPU at the specified speed, offering options up to 500 MHz above the stock speed of the installed CPU. ASRock organized all of these settings into three submenus: one of the CPU settings, one for the DRAM settings and one for the Voltage settings.
The “CPU Configuration” submenu includes all of the CPU-related options, such as the multiplier, BCLK frequency, Intel-specific features and power limits.
The “DRAM Tweaker” begins with the XMP settings and basic RAM timings. As the user begins scrolling down, the menu expands to “primary”, “secondary”, “third”, “fourth” and “advanced” timings, offering a ridiculous number of possible timing adjustments that even seasoned overclockers will not be fiddling with.
Finally, the “Voltage Configuration” submenu allows for the manipulation of the CPU, DRAM, PCH and other voltage lines.


The “Advanced” tab includes all of the configuration options for the motherboard’s features and onboard devices. Once again there is a “CPU Configuration” submenu, with the options that ASRock probably assumed that they are not relevant for overclockers. Most of these options control features of the CPU, such as hyper threading and virtualization. Among these options lies the disabling of thermal throttling, which may be used by experienced overclockers but can be very dangerous.
The “Chipset Configuration” submenu includes advanced options for the chipset’s link speeds and iGPU, and allows the disabling of the onboard audio and LAN devices. The rest of the submenus are straightforward, with the “Storage Configuration” including the SATA and M.2 control options, the “Super I/O” the settings for the onboard COM port header, etc. There is nothing out of the ordinary in any of these submenus.
The “Tool” tab once again brings forward the tools that we previously saw in the EZ Mode, plus the “Aura RGB LED” tool. Once that option has been selected, another screen pops up with a chromatic wheel and an image of the motherboard. From this screen, the user can program the color and even basic visual effects of the onboard LEDs and of the optional RGB LED strip, if a strip has been installed. The color and effects of the chipset and of the strip can be programmed separately. Under the “Tool” tab there is also an option to contact the “UEFI Tech Service”, which is practically sends a direct message to ASRock’s customer support from inside the BIOS. Another interesting option is the Internet Setting under the “Network Configuration” submenu that allows the user to manually set up the system’s IP rather than having DHCP do it automatically.
The “H/W Monitor” tab appears to be purely informative at first. Scrolling down the page reveals the fan settings, allowing the user to choose pre-programmed or program new thermal profiles for the cooling fans connected on the motherboard’s headers.
Software
Inside the supplied DVD, ASRock includes the drivers and four software packages. These four packages are the App Shop, the Aura RGB LED control panel, the App Charger, the A-tuning software. There are also minor utilities, such as the Restart to UEFI utility that performs the single simple function of rebooting the system and automatically enters the BIOS instead of booting the OS.
However, ASRock’s DVD refused to even show us the launch screen into our Windows 7 based test system. Any attempt to manually launching the installer resulted to us receiving an error stating that “This utility is not for this platform”. Downloading and installing the App Shop manually worked but we received the exact same error when we tried to launch the application. We tested both x86 and x64 installations of the OS but ASRock’s software refused to work with Windows 7, even though the company states that it should be compatible. Therefore there is either a bug in the current versions of the software that prevents it from identifying the presence of ASRock’s motherboard in Windows 7 or ASRock silently dropped the support of the OS.
Nevertheless, the included software has been presented in detail in one of our previous reviews and, aside from the apparent incompatibility with Windows 7 installations, it does not appear to have any significant changes since then. For a detailed views on ASRock’s App Shop, A-Tuning, and other tools, please visit our review of the ASRock X99E-ITX/ac motherboard.


20 Comments
View All Comments
MarkieGcolor - Tuesday, May 2, 2017 - link
I like how the asrock has a pice slot above the gpu slot. Why don't more motherboards have more space between the cpu connected slots for sli/crossfire? I'll never buy another board that doesn't have 3 slot spacing for cpu's again!HollyDOL - Tuesday, May 2, 2017 - link
Usually that top PCIe 1x slot is where my audio card gets seated. It used to be recommended due to latency, no clue whether that reason still holds though, it became quite a custom for me.ImSpartacus - Tuesday, May 2, 2017 - link
Do you actually anticipate using sli or crossfire?I'm beginning to get the feeling that they are antiquated.
tsk2k - Wednesday, May 3, 2017 - link
The distance from the top PCIe x16 slot on the MSI to the CPU is the same as ASrock.GT710M - Tuesday, May 2, 2017 - link
so much detailsATC9001 - Tuesday, May 2, 2017 - link
Why no overclocking for a comparison?BurntMyBacon - Wednesday, May 3, 2017 - link
The article specifies the MSI board's VRM circuit as a 10 phase design and the ASRock as an 8(6+2) phase design. However, visual inspection (see photo of the CPU socket area with VRM heatsink removed) reveals both boards have the same number of chokes and MOSFETs under those VRM heatsinks. I presume I must be missing something. Please explain.blacksun123 - Wednesday, May 3, 2017 - link
From the test result, ASRock's power efficiency is much much better than MSI.blacksun123 - Wednesday, May 3, 2017 - link
Does MSI provide SLI bridge for this MB? Does it really support SLI? It costs USD$25~40 to buy a SLI HB bridge in the market.zafos888 - Saturday, September 9, 2017 - link
Amazing job on the reviewCan anyone tell me the height of the heatsinks around the CPU?
I want to use a Noctua D15 cooler and I dont know if the rams will fit underneath it, so I was thinking about rotatig it so the fan will be on top of the heatsinks instead of the rams. The space under the fan is 32mm. Thanks in advance