Shuttle's SV24: Our smallest desktop PC
by Jeff Brubaker on December 27, 2001 1:17 AM EST- Posted in
- Systems
PCI Card Installation
Actually removing the rear opening proved exceptionally difficult. The metal required quite a bit of effort to remove and to avoid accidentally damaging the internals, we removed everything. Once removed, getting the PCI card in the riser and the riser in the motherboard was just as frustrating. Removing the CPU's heat sink, again, yielded enough horizontal room to convince everything to fall in place.
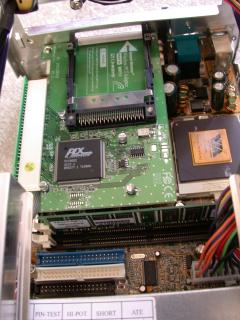
As one can see, things are snug with the PCI card installed. Note that the CPU heat sink hasn't even been put back on in this picture. Once reattached, the card almost touches it. The hard drive hangs directly above the PCI card, leaving about half an inch for air flow. However, our unit stayed within reasonable temperatures even after being left running for a while.
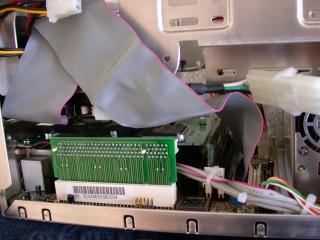
Here, one can see just how snug things fit from the side. The left end of the IDE cable is connected to the hard drive. The card sits directly below with the CPU behind it.
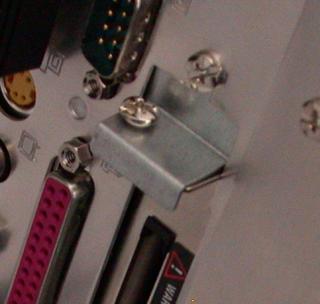
Note that the card's face fits flush against the case's back. This makes the typical screw attachment interesting as the short end of the card's face actually protrudes out the back. Shuttle addressed this with a small, V-shaped dongle, shown below.


0 Comments
View All Comments