Averting Disaster - A Guide To Computer Backups (2014)
by Brett Howse on May 21, 2014 9:00 AM EST- Posted in
- IT Computing
- Mac
- Apple
- Windows
- Cloud Computing
- macOS
Built-in Backup Tools Windows 8.1
While Windows 7 and Vista had the Backup and Restore applet, Windows 8 introduced File History as the default backup option. File History is a replacement for Previous Versions from Windows Vista and Windows 7. Unlike Windows 7, File History does allow backup to network shares for all versions of Windows 8 which is a good thing and makes the software far more useful. The downside is that scheduled System Backups have been removed from Windows 8 and 8.1. You can still manually create a system backup, and you can perform a system backup to a network share, but you can’t schedule this to be run. Also, File History only performs a backup of files in your libraries (Documents, Music, Pictures, Videos, and Desktop folders), as well as any files saved locally from OneDrive. Still, the most important information on your computer is your files, so let’s look at how to enable this feature to protect them:
- Windows 8.1 adds the ability to enable File History from PC Settings, however the options are just to enable File History and to select a backup target, so these instructions will focus on the Control Panel applet which offers more advanced options. To launch File History, right click the Start button and choose Control Panel. Next expand System and Security and select Save backup copies of your files with File History.
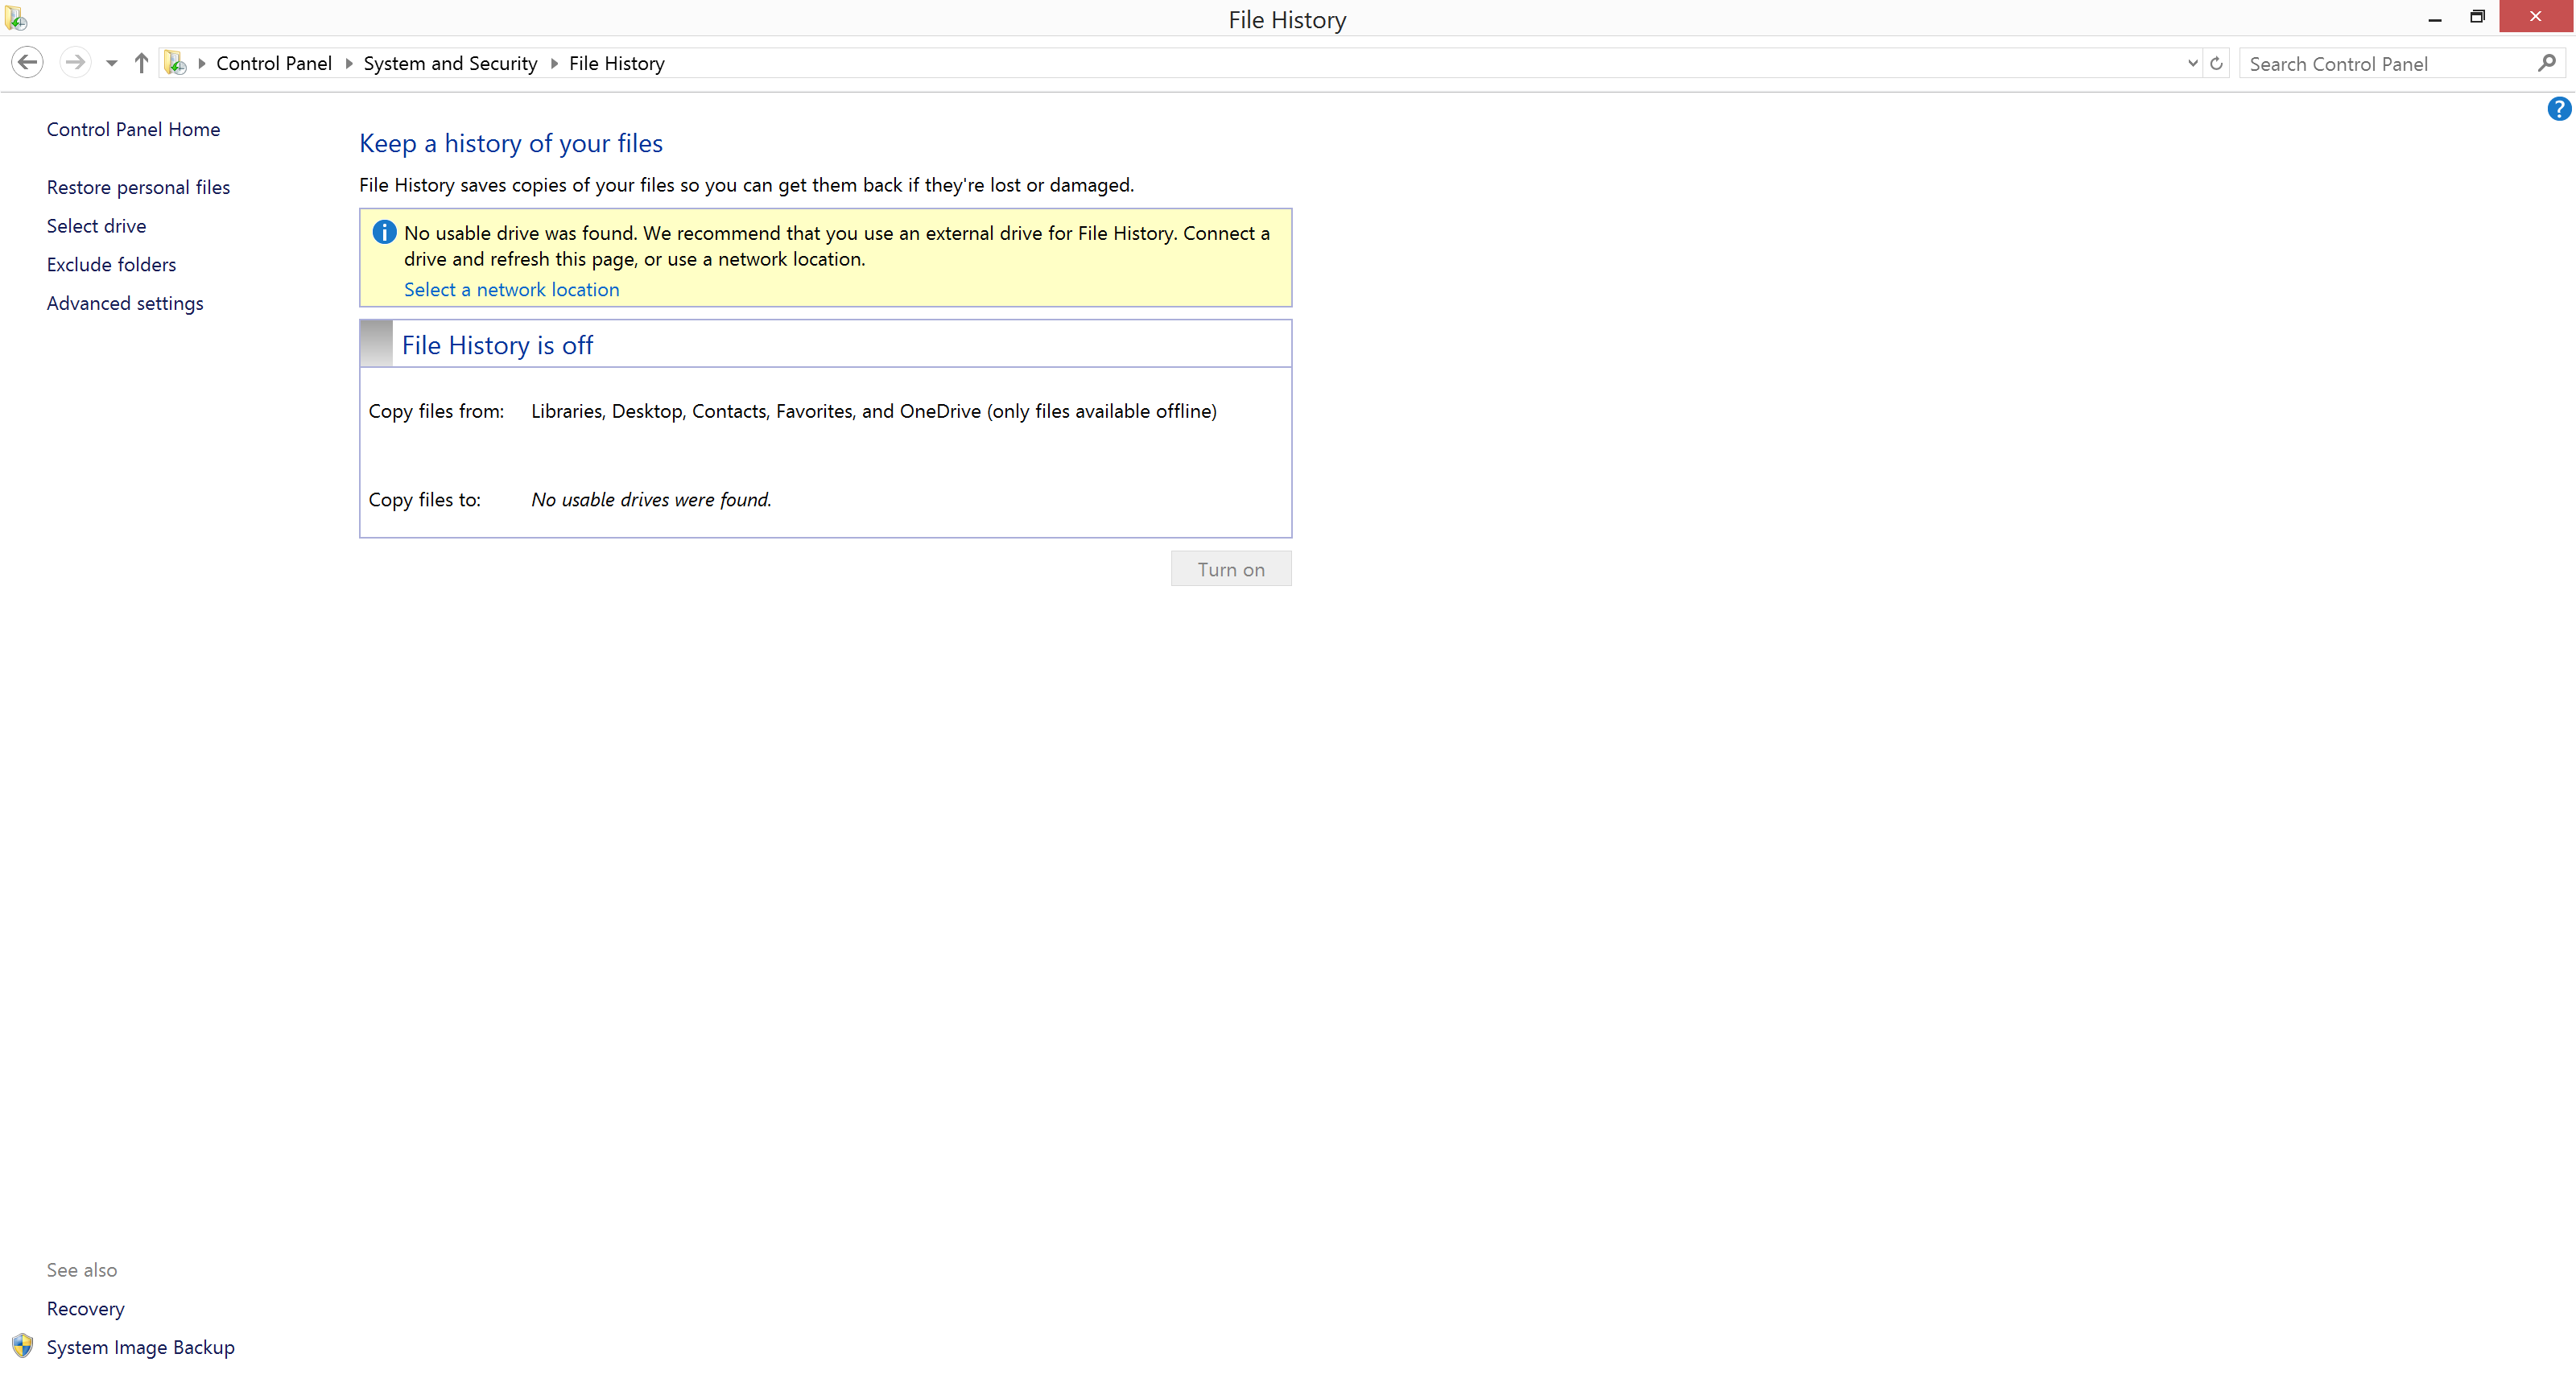
- If File History has never been configured before, the system will scan for available disks that it can back up to. You can choose the disk, or use the link Select a network location to configure the disk.

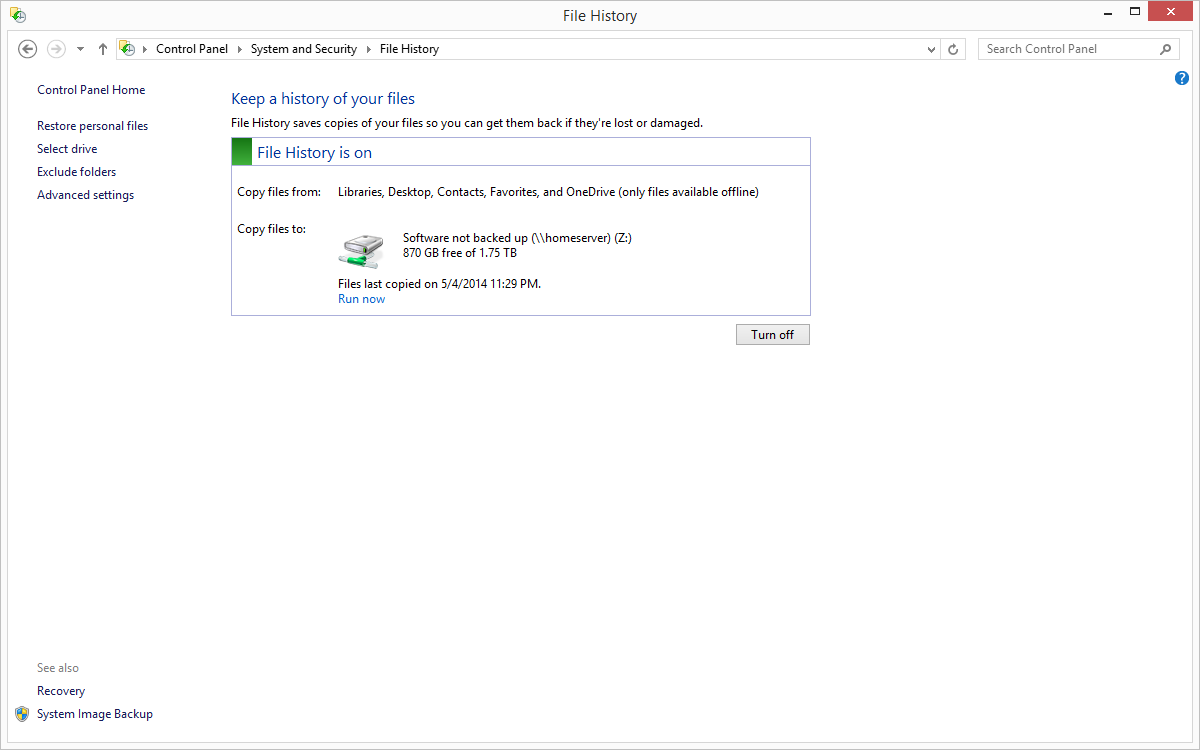
- Once configured, simply click Turn On, and File History is enabled.
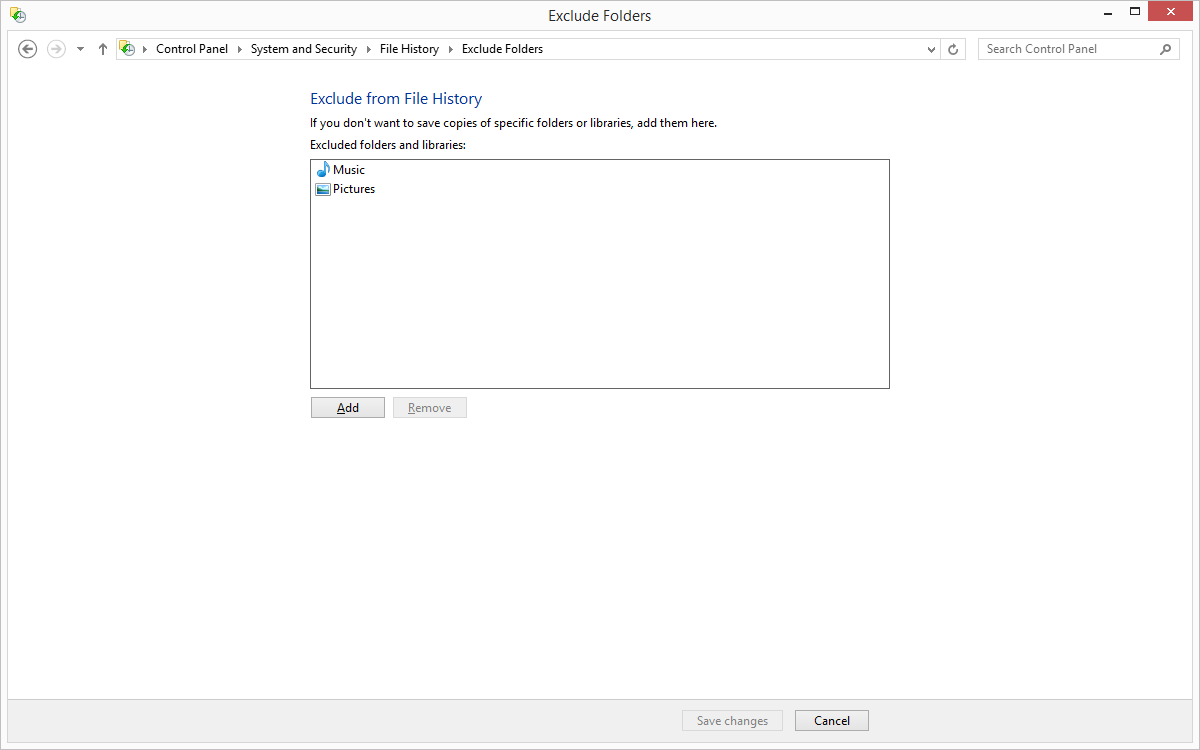
- If you’d like to modify your File History settings, that can be done in the File History applet. To exclude folders, choose Exclude Folders where you can select folders you wish to exclude from the backup. Unfortunately, you can’t add user defined folders here which you do want backed up. To add folders to be backed up, you either have to add that folder to an existing library, or create a new library.
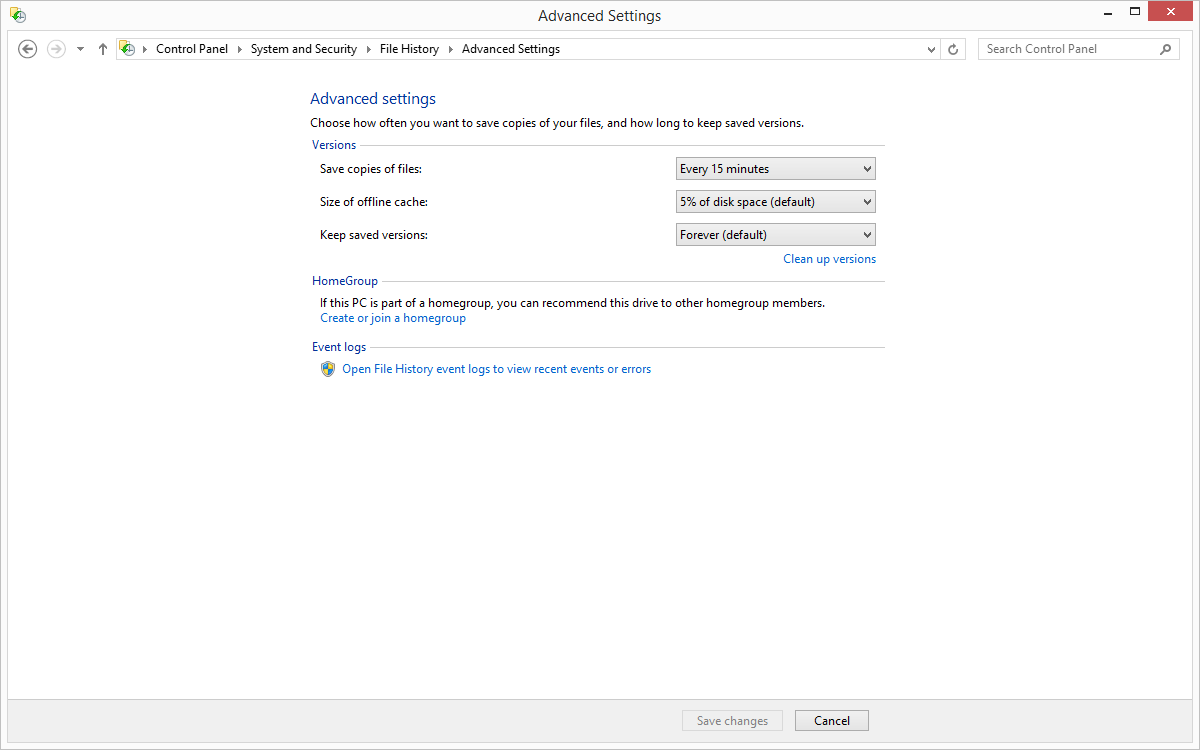
- Advanced settings are also available in the File History applet, and these allow you to specify how often to run the File History backup (from ten minutes to daily) as well as specify how much of the PC’s disk to use as an offline cache (2% to 20%) in the event you are travelling and not able to access your backups, as well as to specify how many versions of files to keep.


Unlike Windows 7, File History’s interface is all in the control panel. It’s not as elegant as Previous Versions was, where you could right click any file or folder and see a list of all versions, but the interface is fairly straightforward and does show you a list of all of the backups:
- Launch File History by right clicking the Start button and opening the Control Panel. Next expand System and Security and select Restore your files with File History.
- The interface that opens up will be a listing of the locations you are backing up. The most recent backup will be displayed by default. To restore a file, navigate to the folder it was in, select the file by clicking it, and then press the green Restore button to restore it to the original location.
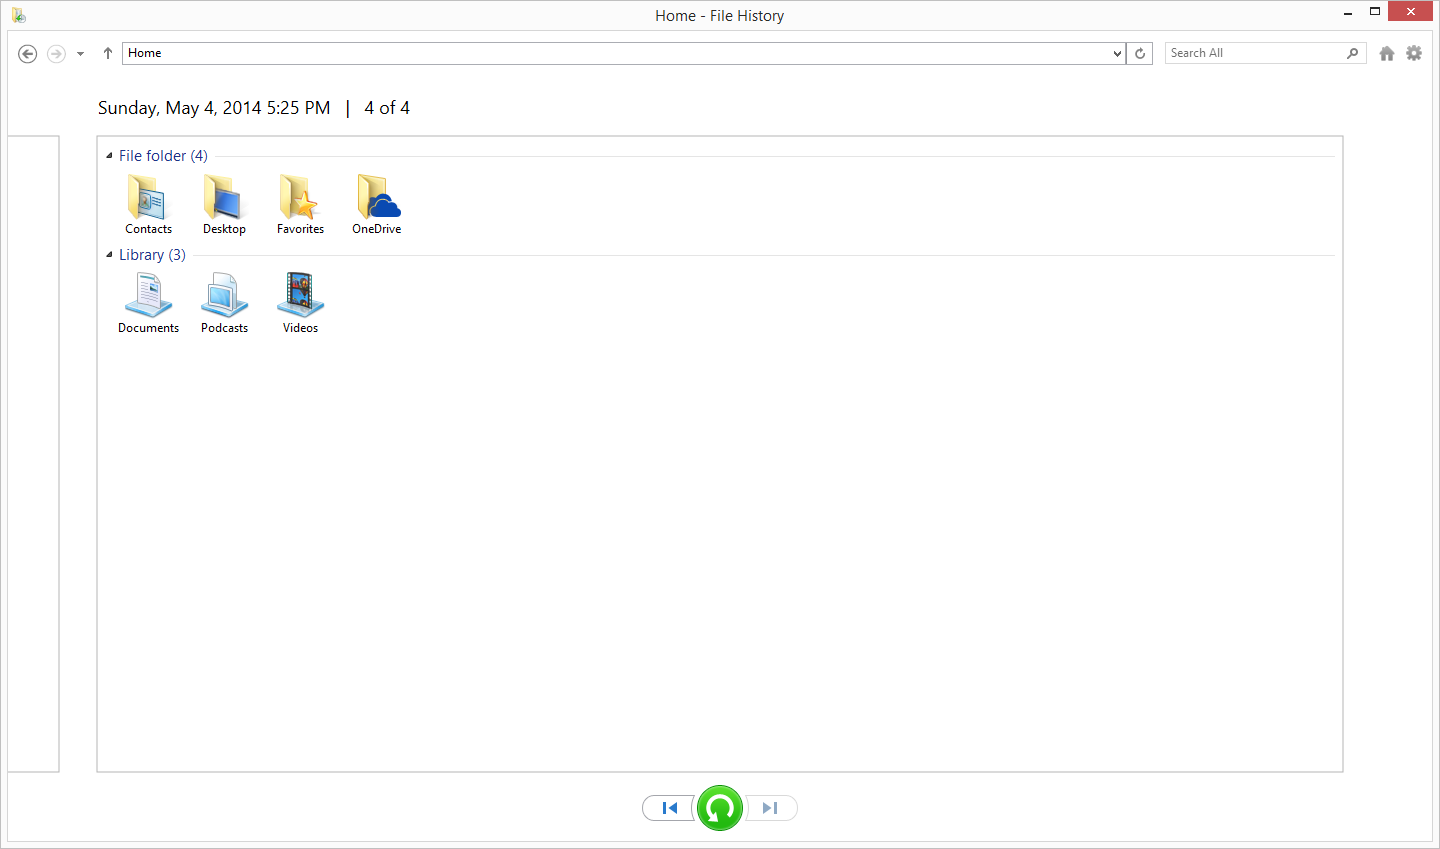
- If you’d like to restore it to a different location, right click the file and choose Restore To and then browse to your path.
- To navigate through your backups, you can use the skip buttons at the bottom of the page. The easiest way to sort though is to navigate to the folder where your file is (or was), and it will display only the backups that have changes in them. If a folder hasn’t been modified since you enabled File History, there will only be one backup for it. This is an easier method than trying to figure out which day you deleted a file.
Overall, File History is a decent built-in utility, but as is often the case, attempts to make the process easier to use often result in a system that is less powerful, and that’s certainly the case with this. Windows 7 lacked network backup for some versions, but overall the Windows 7 backup utility offered more features, especially with the automatic system backup. Previous Versions is also an easier way to find changes made to a file. File History also lacks a method of backing up files outside of your libraries and OneDrive folders which is not ideal by any means. Windows 8.1 forces you to make a system backup manually, and that can be done as so:
- Right click the Start button and open Control Panel. Expand System and Security, and then select Save backup copies of your files with File History which won’t actually be used, but is the shortcut to the System image backup.
- On the File History applet, click on System Image Backup in the bottom left corner.
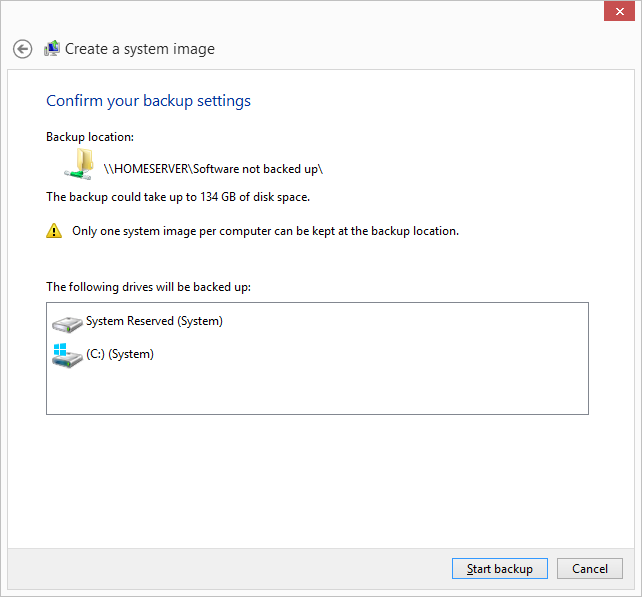
- Choose a location for your backup. If it’s on a network share, you can optionally enter login credentials if required. Click Next.

- Now you will be prompted to confirm, and if you are happy click Finish. The confirmation dialog will estimate how much disk space will be required, and warn you that only a single backup file will be kept. In other words, there is no versioning.
If you are using File History as your backup method of choice, you should definitely create at least one system backup to allow you to restore to a new hard drive or machine if necessary. If you ever need to restore this, you can create a recovery drive by choosing the Recovery option in the File History applet. If you don’t have another computer to create this on if needed, it’s a good idea to create one ahead of time.
It is possible to create full scheduled backups, but only from the command line using wbadmin but this is not something I would recommend for the average user.


133 Comments
View All Comments
cgalyon - Wednesday, May 21, 2014 - link
Previously I used Dropbox to sync between three systems, including my file server, and then periodically do a manual backup to a dedicated backup drive. Recently this failed me for the exact reason stated early in this article: user error. After doing a restore on one of my computers, Dropbox then synced forward and wiped out one of my folders almost completely because the computer was restored to an earlier date. I didn't notice for a long time and the rollback period on Dropbox had elapsed. I would advocate a different solution or more frequent archiving.pirspilane - Wednesday, May 21, 2014 - link
Re. Windows 8.1: 'Unfortunately, you can’t add user defined folders here which you do want backed up.' True, but can't you add those folders to a library that gets backed up?peterfares - Wednesday, May 21, 2014 - link
Yes. You can also create as many libraries as you want and put whatever folders you want in them.Brett Howse - Wednesday, May 21, 2014 - link
Hi. I've updated the guide to reflect this and make it more clear. Thanks!jeffkibuule - Wednesday, May 21, 2014 - link
My system is a bit more complicated but it works for me:1) Office documents and such are stored in OneDrive.
2) OneDrive sync to my Synology NAS with BittorrentSync.
3) Time Machine Backup on my Synology NAS whenever I am home.
4) Synology NAS backup nightly to Amazon Glacier with Glacier Sync.
This provides multiple local backups as well as a cloud backup that's mostly automatic. I don't directly back up to the cloud from my MacBook Pro simply because when I am out an about, internet connection usually sucks too much to bother.
Brett Howse - Wednesday, May 21, 2014 - link
I didn't really mention Glacier, but it's easily the most cost effective cloud storage. Obviously it has it's drawbacks but price sure isn't one of them. Are you happy with Glacier?SeanFL - Friday, May 23, 2014 - link
some have found Glacier pricing difficult to figure out. I have about 100 gig in pictures that I wanted to backup but was warned on some photo forums that the per item pricing can get costly and I should zip by year or some other form so not as many individual files were transferred. Sounded like too much human interaction so I passed on Glacier inside my Synology NAS for now.dado023 - Wednesday, May 21, 2014 - link
how come nobody mentioned https://copy.com?r=uABGaD ?You get so much space, especially if you invite people to it, atm i have 62GB, and i will get more if you use link above, plus you get 5GB via referral link.
I use it for my photos, this way i deliver photos to my client via public link.
kmmatney - Wednesday, May 21, 2014 - link
I use Windows Home server, with DrivePool to duplicate data across random drives. The automatic backups work great - and it stores backups for the last 3 days, a backup from 3 weeks ago, and one from 3 months ago, for each PC in the house. it works perfectly, and I never have to think about it, and pulling out data from a backup is easy.ander111 - Wednesday, May 21, 2014 - link
Okay, let me see if I understand this clearly: A "backup" is when you copy your important data to a different storage device, so that if anything happens to your original device, you still have a copy of your data, right? And there are various ways to do this, but they all basically involve copying your data from one device to another. I think even I can understand that.Still, it's important to have articles on things like this. It keeps writers busy and off the streets—so naturally, crime goes down... Good thinking!