Streacom's FC10 and Nano150: Building a Fanless Ivy Bridge HTPC
by Ganesh T S on December 22, 2012 3:30 AM EST- Posted in
- HTPC
- Fanless
- Ivy Bridge
Build Process
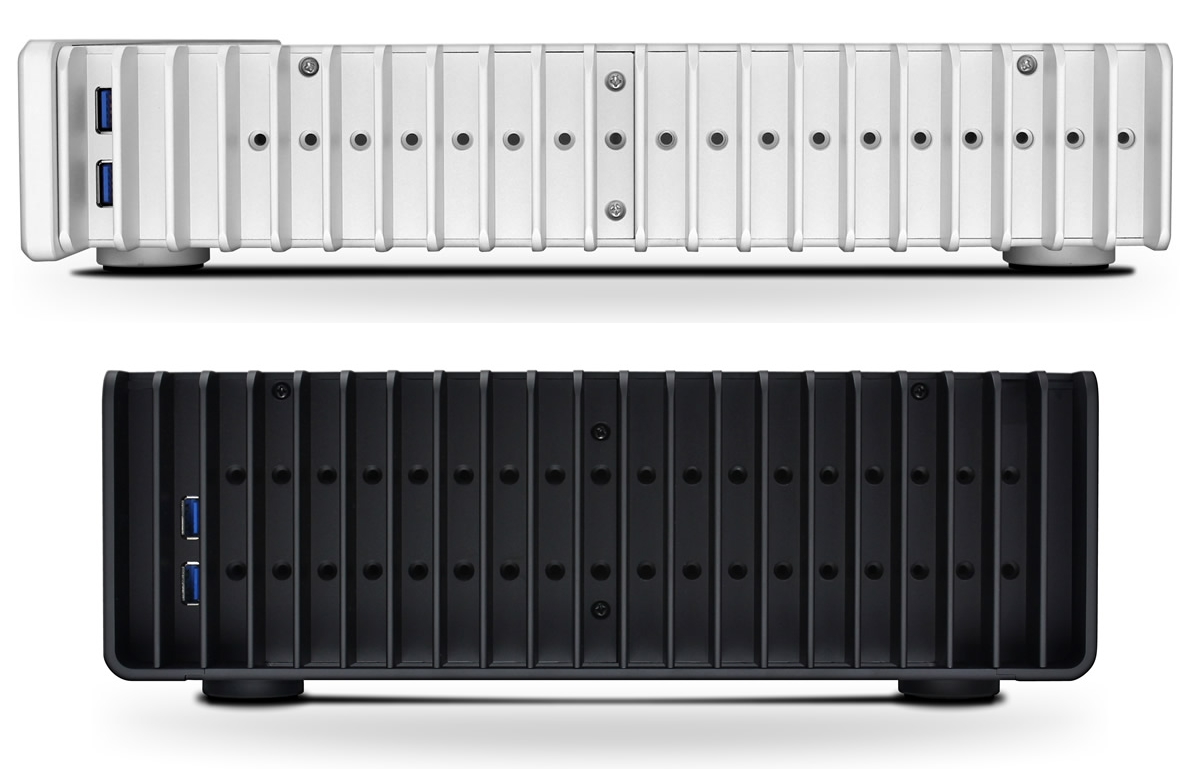
The FC10 chassis has limited external ports (only two USB 3.0 capable ports on the side panel other than the ODD button / power button and LED on the front panel). We don't have front panel audio, eSATA / Firewire ports or fancy LCD screens to connect to the main board. This is actually advantageous as it allows us plenty of room and resource efforts to direct towards assembling the cooling system. As we had mentioned earlier, Streacom is no newcomer to the fanless chassis bandwagon. In fact, their FC5 Evo Fanless chassis received good reviews. Unfortunately, the profile of the chassis, as well as the positioning of the screw slots for the heat pipe system meant that the choice of motherboards was extremely limited. Streacom touts extended motherboard compatibility as one of the strong points, and we were forced to test it out because of the design of the Asus P8Z77-I Deluxe motherboard.
Improved Motherboard Compatibility with Dual Heat Sink Mounting Levels in the FC10 (Bottom) Compared to the FC5 (Top)
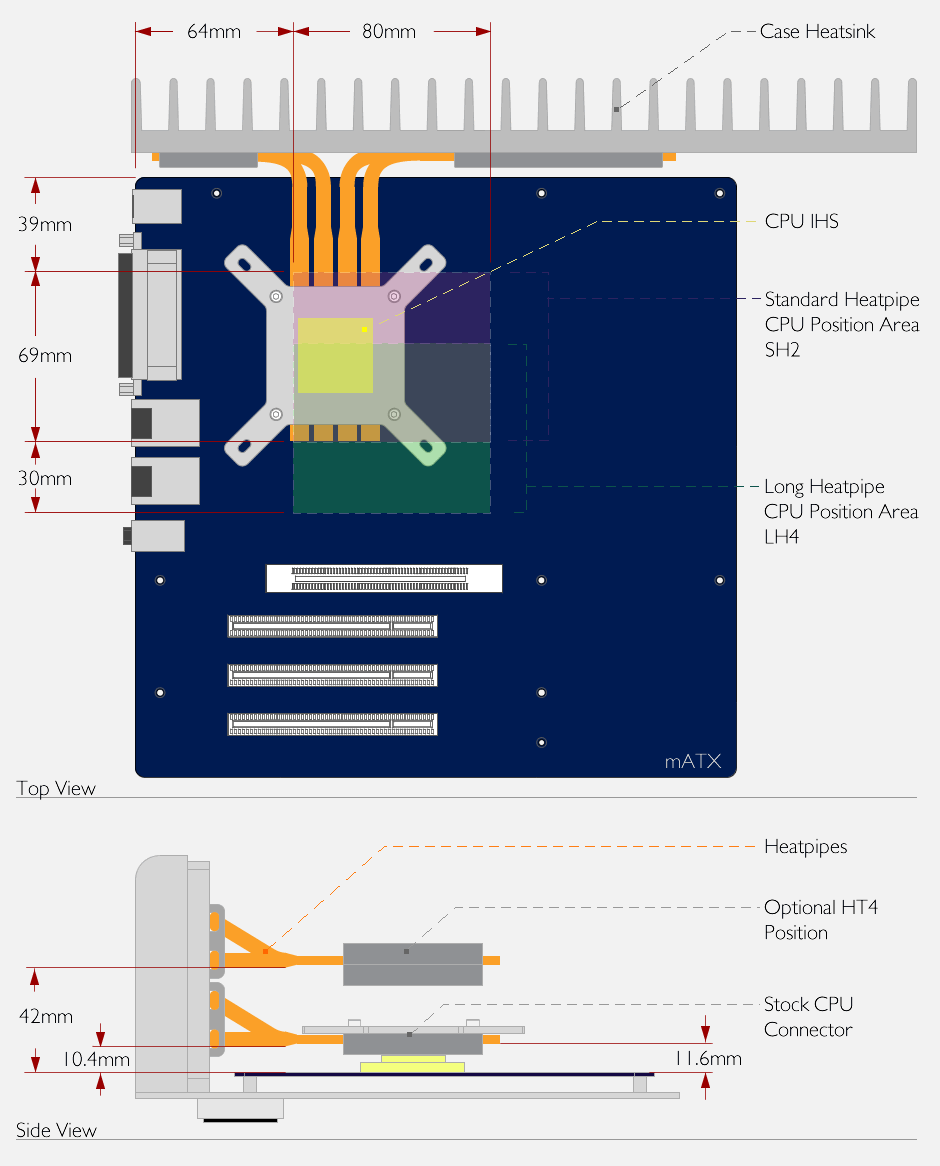
Streacom FC10 Motherboard Compatibility
Most motherboards would be served fine with the lower set of screw slots for the heat pipes, but the Digi + VRM for ITX module on the motherboard blocked the path, as evident from the photograph below.
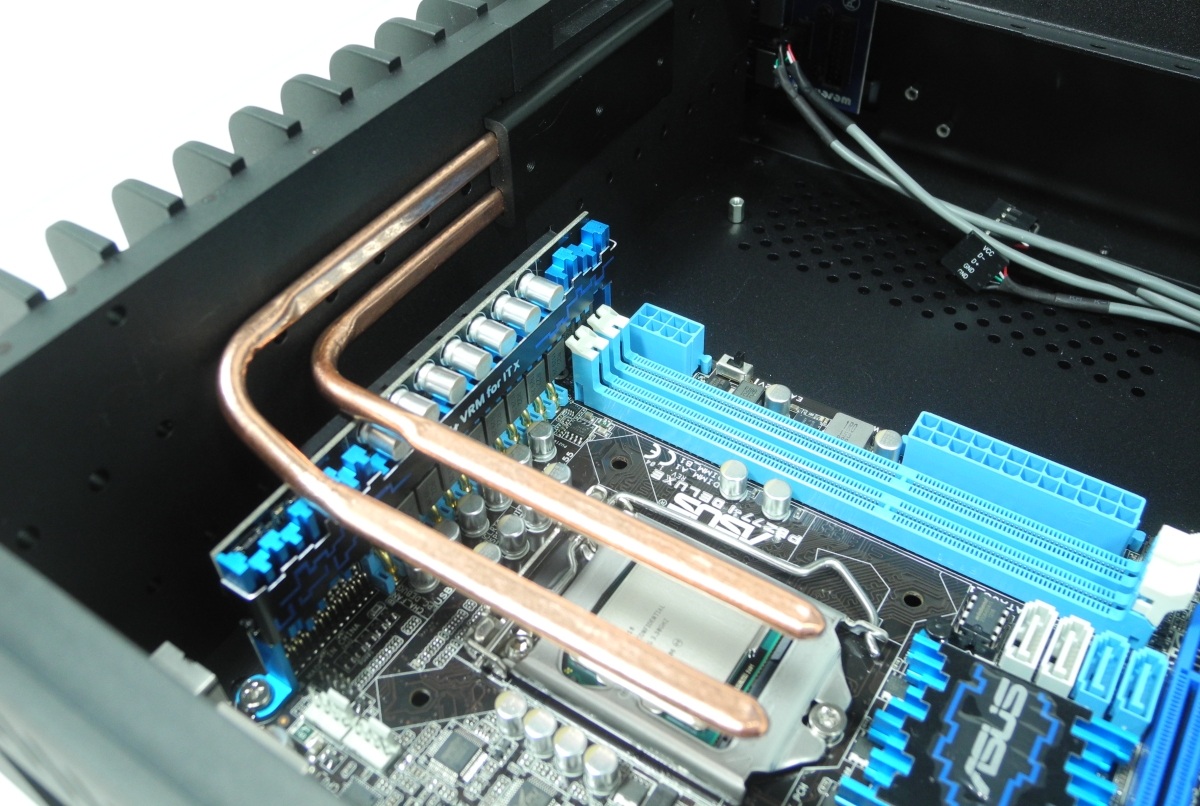
In order to raise the mounting height for the heat pipe blocks, it was necessary to use the Streacom HT4 Thermal Riser. This is a separate accessory needed only if the choice of motherboard makes it necessary. Streacom's US reseller, Perfect Home Theater delivered the HT4 to us on very short notice, and enabled us to proceed with the rest of the build.


Mounting the HT4 Riser
Streacom's website has user guides for all their products, but, unfortunately, the one uploaded for the HT4 wasn't current. Some time was lost in trying to assemble the riser following that guide, but Streacom finally came back with the updated version after we pointed out the error. The mounting process included spreading a generous dose of the supplied thermal paste on the processor and the base of the HT4 riser. The riser was then put on top of the processor. An interesting point to note here is that the contact surface between the processor and the riser is not entirely flat due to the presence of the copper heat pipes. We were a bit worried since the default assembly instructions (without the riser) indicated that the flat lower CPU mount would be placed on the processor. As we found out later, our fears were unfounded, and despite the not-so-flat riser being in contact with the processor, we had stellar thermal performance.


Streacom supplies both AMD and Intel-type upper CPU mounts. They have to manually be fitted with spring screws and are used to keep the lower part of the HT4 riser in place and in good contact with the CPU itself. After this, the heat pipes supplied with the FC10 chassis had to be arranged to align with the HT4's four copper segments. The FC10 also has thermal blocks (which have to be applied with thermal paste) into which the heat pipes have to be inserted before getting mounted on the side of the chassis (one of the segments is shown in the photograph above). After placement, the upper HT4 mount had to be fastened to the HT4 riser so as to sandwich the HT4's copper segments and the heat pipes together. It goes without saying that all points of contact had thermal paste applied liberally.


The FC10 chassis comes with a lower CPU mount (which has an appearance similar to that of the HT4 upper mount) which goes unused in the above configuration. We had unsuccessfully tried to use to the FC10 lower CPU mount instead of the HT4 upper mount (thanks to Streacom's original faulty user guide), and that explains the presence of thermal paste at unnecessary places in the above gallery. Even though it wasn't suggested, we applied thermal paste further on the upper side of the HT4 upper mount and placed the FC10's lower CPU mount on top of it.
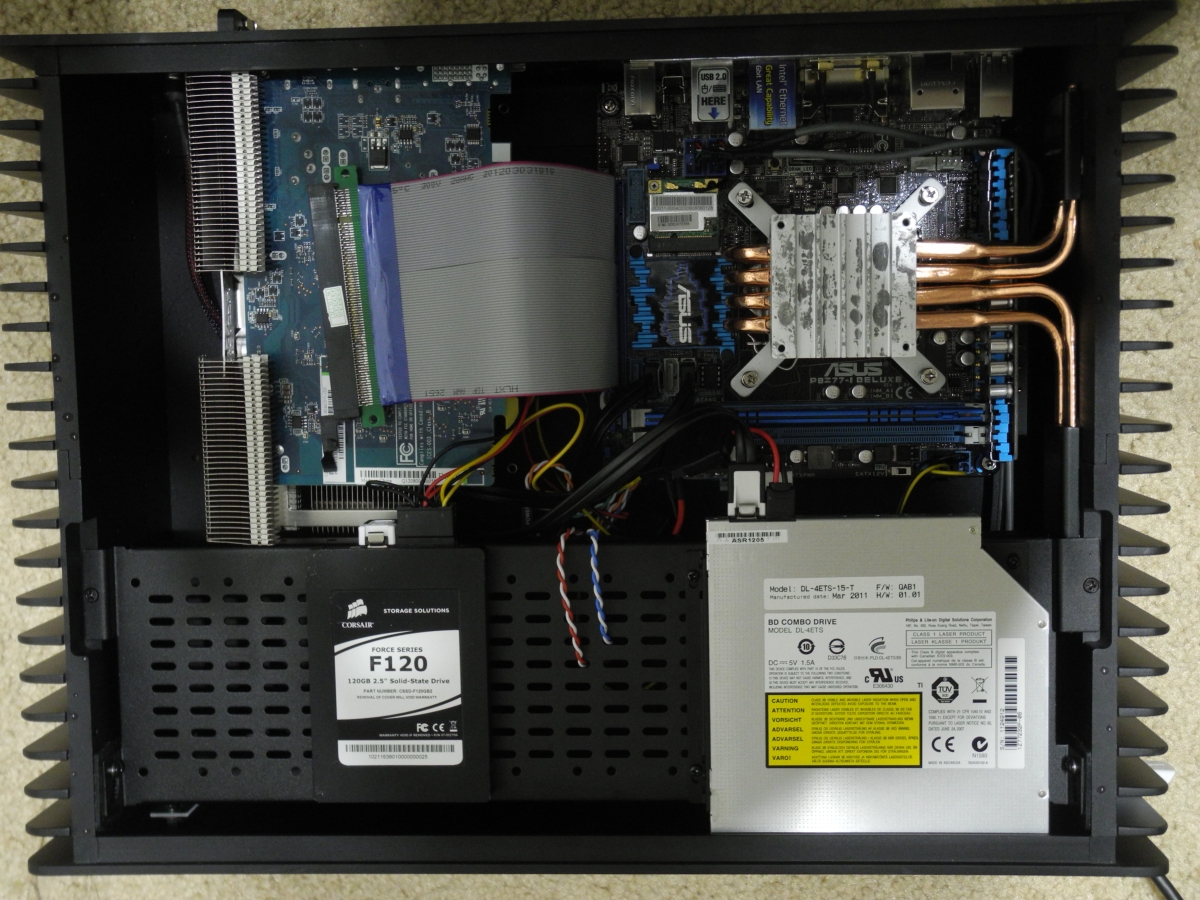
Mounting the SSD and ODD on the drive cage was fairly uneventful, except for some known issues with the ODD mounting. Since the same drive was mounted with all four screws in the ASRock HTPC drive cage, I think Streacom should pay a little bit more attention to the ODD brackets. The slimline notebook drive we used comes with a smaller SATA power connector, and we used an adapter to convert the full-size SATA power connector from the Nano150 PSU to the optical drive.
Before moving on to the thermal performance evaluation, it must be noted that we have mounted the Sapphire HD 7750 Ultimate in the PCIe slot and also connected a flexible PCIe riser to the motherboard. We wanted to test out whether the Nano150 would be able to power up such a configuration, and we were relieved to find that there were no issues. Another point to be noted is the capacitors in the Nano150 beneath the SATA data cable connected to the ODD. They abut into the space above the DIMM slot, and though we were able to fit in both the DRAM modules (with the heat sink of the DRAM module slightly scraping the capacitors), we decided to take the safe route by just installing one 4 GB DRAM module in the slot further away from the 24-pin connector.


63 Comments
View All Comments
brakteat - Saturday, December 22, 2012 - link
LauRoman is right. Last year I built four fanless computers for our office, using HD-Plex H3.S chassis. Since then they run fast (Core i3-2105+SSD), completely silently (no moving parts) and still very cool (under load, all components are usually below 55 C). Also, after one year there is no visible dust inside the chassis so there is no need for physical maintenance.Of course, if you want to play games at high resolution then HD 4000 is certainly not enough (and my HD 3000 even less so). I always play my games at 2560x1600 and built myself an inaudible gaming computer in a Coolermaster HAF-X. This works great thanks to seven large fans running at low speed. The graphics card is ony cooled by a 200 mm fan. The fans do collect a lot of dust though, even if the case has dust filters. Without maintenance the dust would eventually stop the computer from working.
EnzoFX - Saturday, December 22, 2012 - link
TRUE. The single best reason to go for passive is no dust. Can't argue against someone wanting zero maintenance.Death666Angel - Saturday, December 22, 2012 - link
I have an HTPC with one fan that serves double duty as the cpu heatsink fan and the case fan (I cut a large hole above into the case above the heatsink so the fan could get fresh air), I also have a dust cover just above it that works with magnets. Every time my wife or I vacuum the living room, we just take it off, vacuum it as well and put it back on. nearly zero maintenance and much more powerful if I wanted to. Also, silent in the current setup. I would never go with a fanless case.But I do see that for some people/situations, adding fans does not bring anything to the table because they just don't need the power or cooler running components. :)
EnzoFX - Saturday, December 22, 2012 - link
Yes exactly. Some people really want zero maintenance, and aren't going to be gaming on it =P. I myself am drawn to such a setup, but I've never been able to commit, and probably never will. So it does go to show that it's impractical for more hands-on users, seeing as with just a little work, you get much more in return.colonelciller - Sunday, December 23, 2012 - link
this case is perfect for playing 1080 P video streamed from a home media server (in another room).looks like a ZERO compromise machine to people who want silence.
For those who want a do-it-all noise maker next to there TV there are other cases.
ryccoh - Saturday, December 22, 2012 - link
Check out Silverstone cases. They like to mount two slow 180mm fans on the buttom blowing air out the top of the case with the motherboard turned 90 degrees.colonelciller - Sunday, December 23, 2012 - link
No no no absolutely NOTThe whole point of this case is silence with a capital 'S'.
The case is perfect as is. Even the quietest fans are not silent which is a complete FAIL for those seeking true Silence from the HTPC.
Couple this case with an efficient cpu with integrated graphics and a small SSD for OS only and you've got perfection.
Store all your media on a home server where it belongs. As soon as you try to turn a HTPC into a do-it-all machine you start making compromises.
CaioRearte - Saturday, December 22, 2012 - link
Hello, please evaluate how this build would turn out powered by one of AMD Trinity's APUs. They have 65W parts that can be passively-cooled and it might be interesting to see how the IGP performs, especially since Intel's integrated graphics don't perform at all.kyuu - Saturday, December 22, 2012 - link
+1random2 - Saturday, December 22, 2012 - link
Yes, but the i3-3225 sure performs. The integrated graphics on these APUs get their butts handed to them on a platter by the lowly 640 GPU used here. Added to that is the fact that CPUs do make a difference in times for individual frame rendering and in game frame rates.http://techreport.com/review/23246/inside-the-seco...