Overclocking The AMD Ryzen APUs: Guide and Results
by Ian Cutress & Gavin Bonshor on April 16, 2018 2:30 PM ESTHow to Overclock With ASRock UEFI BIOS
The ASRock BIOS design and layout is consistent throughout the AM4 motherboard range. Everything was present on our motherboard, except the ability to change the settings of the integrated graphics. The only options for overclocking the graphics were in the way of SoC voltage, and even then, it could only be set as an offset value, not a true value. This is a little disappointing given that the ASRock X370 Gaming-ITX/ac hasn’t got any hard issues within the BIOS for the graphics, but on the plus side, everything else is done well.
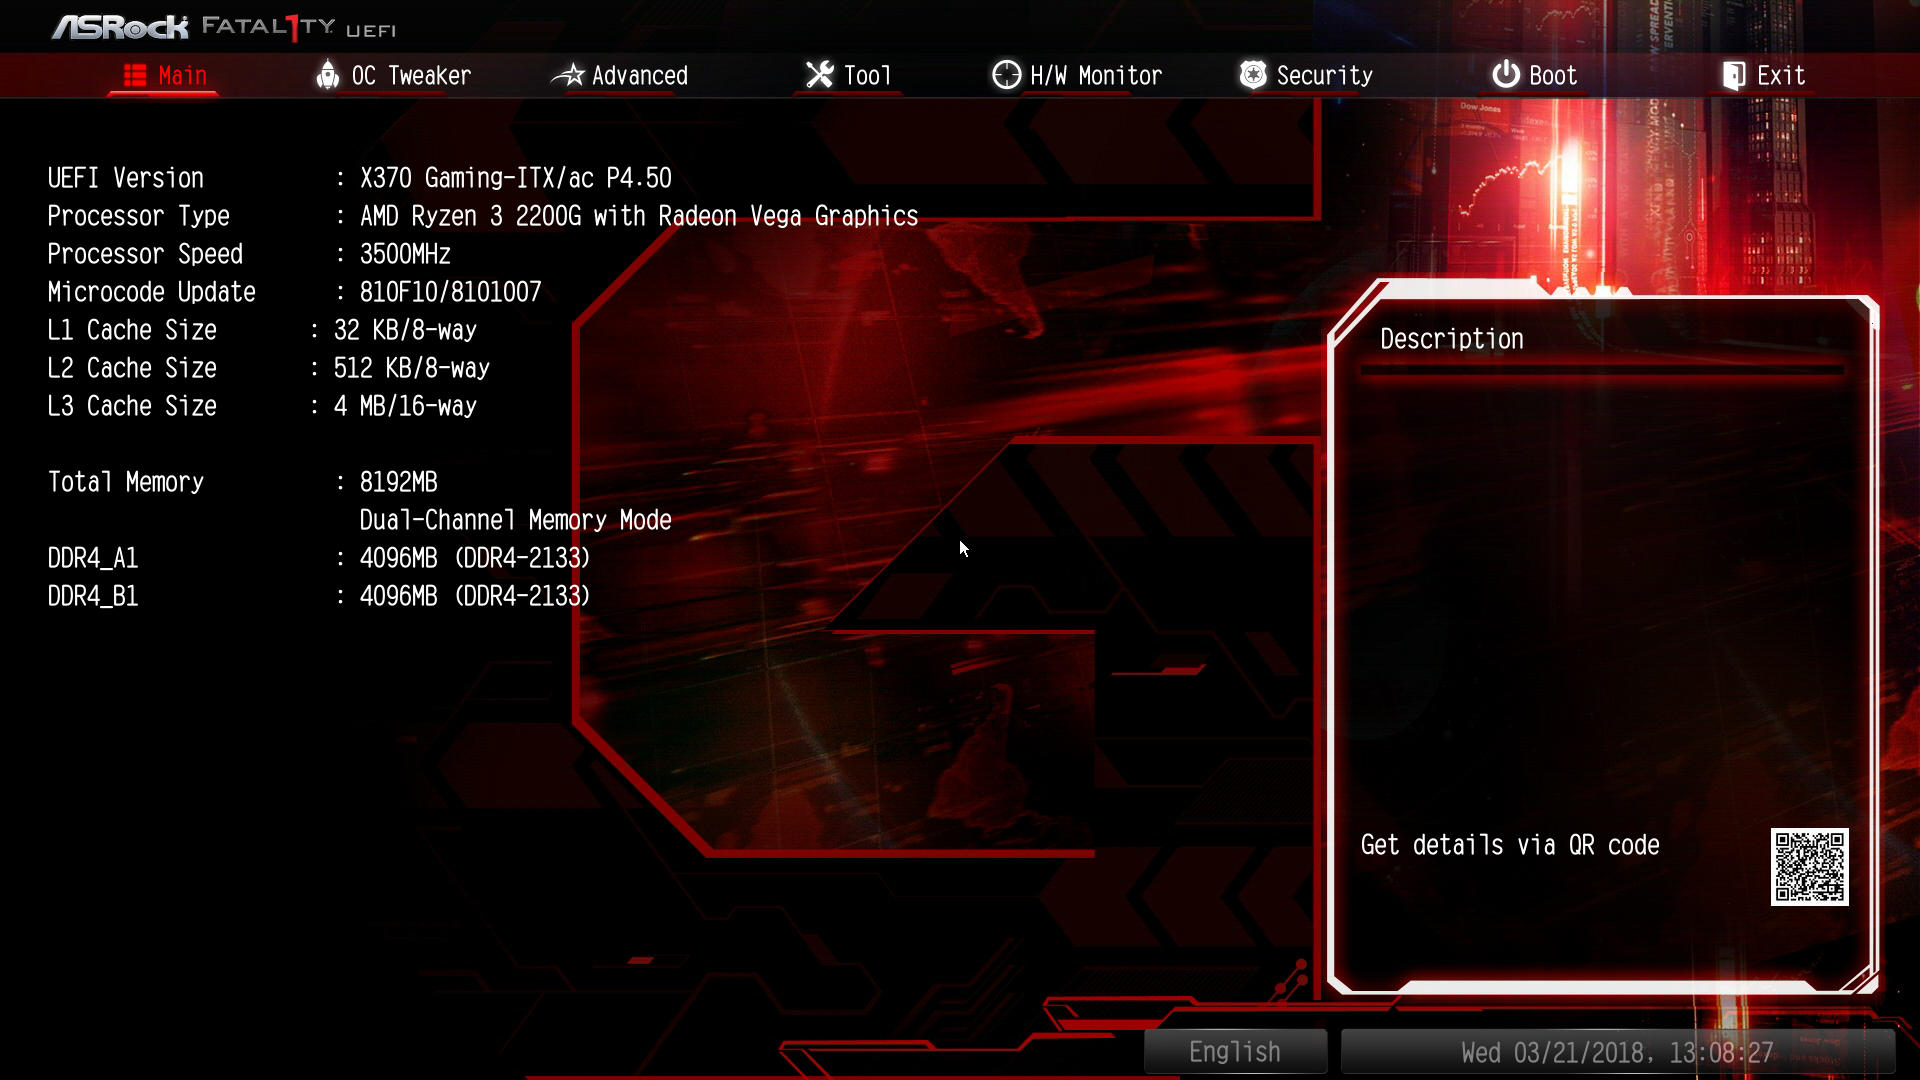
Upon entering the BIOS, the initial menu screen offers information about the board including the installed components including the processor. It is not an easy mode, and the information is very limited. Everything needed for overclocking is in the OC Tweaker menu.
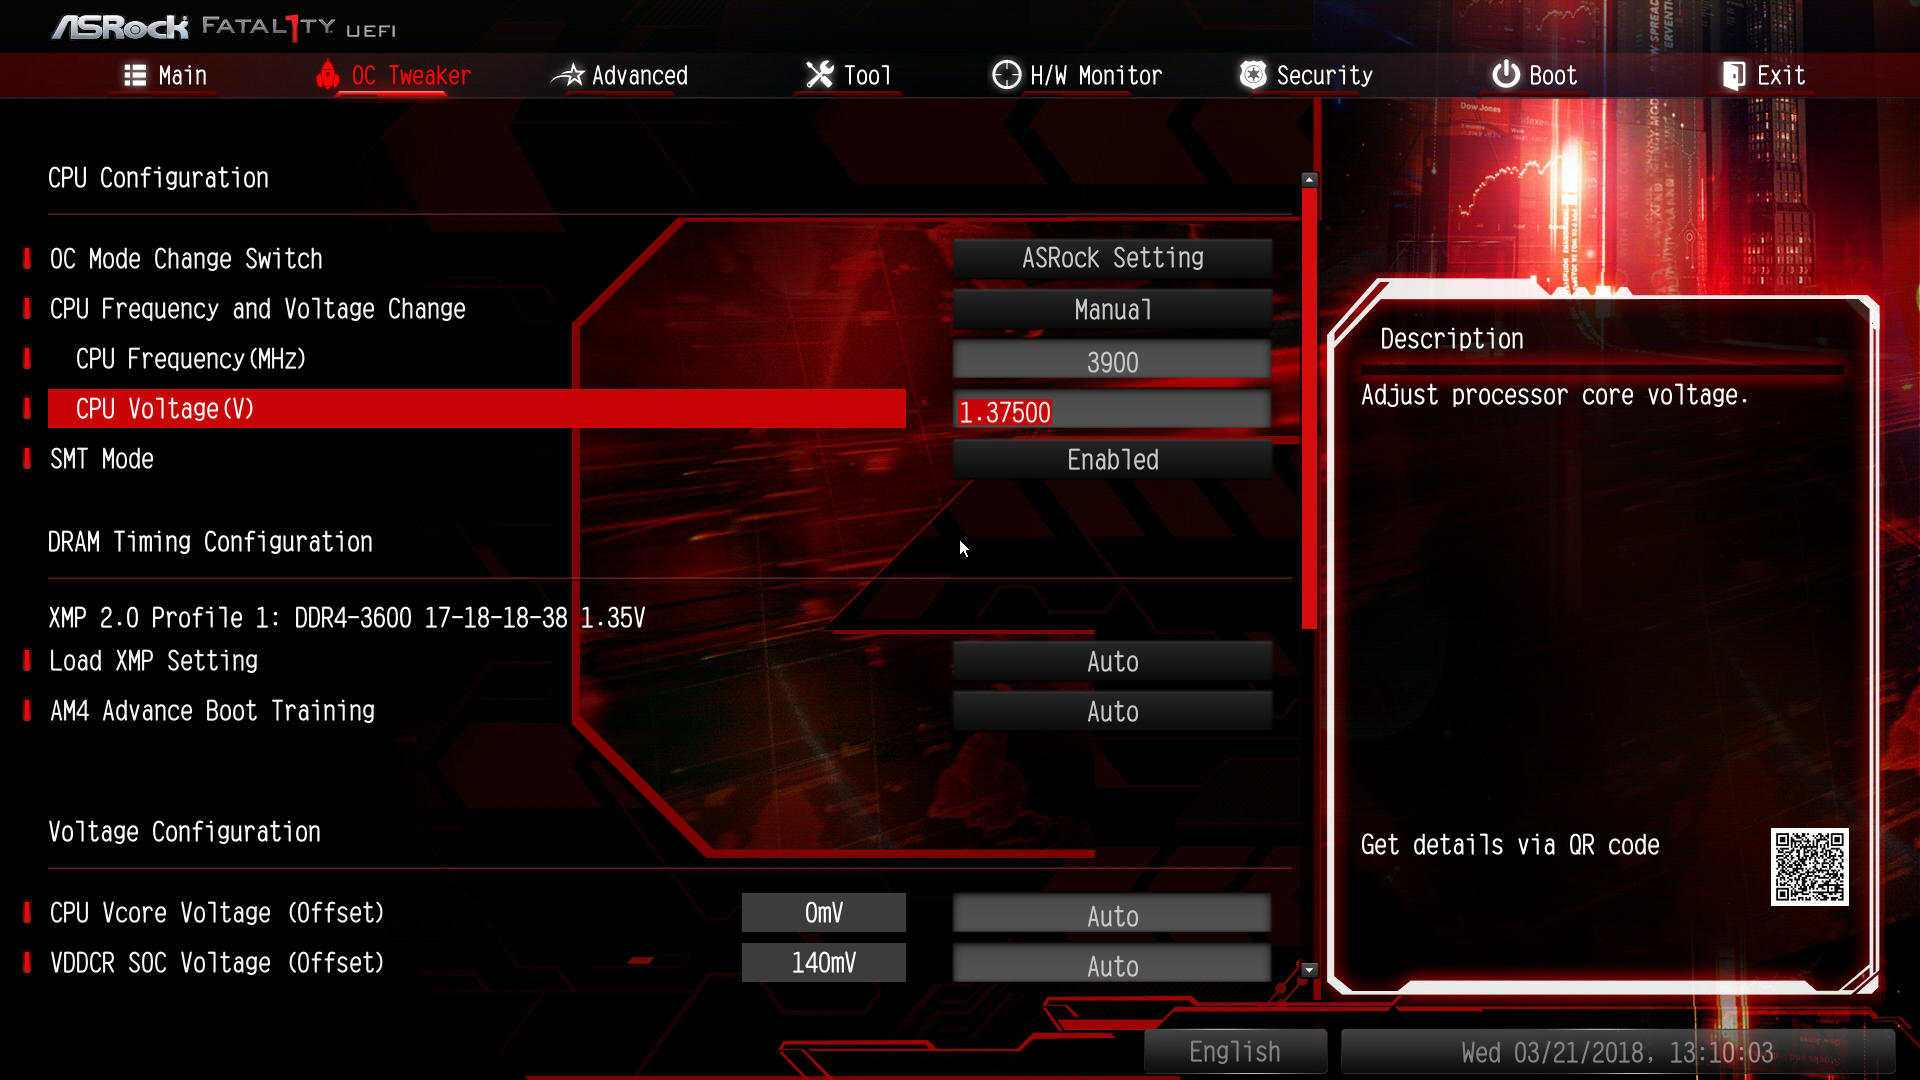
In the OC Tweaker menu, changing the 'CPU Frequency and Voltage Change' from auto to manual opens up the frequency and voltage options. At the top is the frequency, while down the bottom is the voltage. Starting with frequency, rather than offer a CPU ratio, ASRock just offers a plain frequency, and clearly does the multiplier manually.
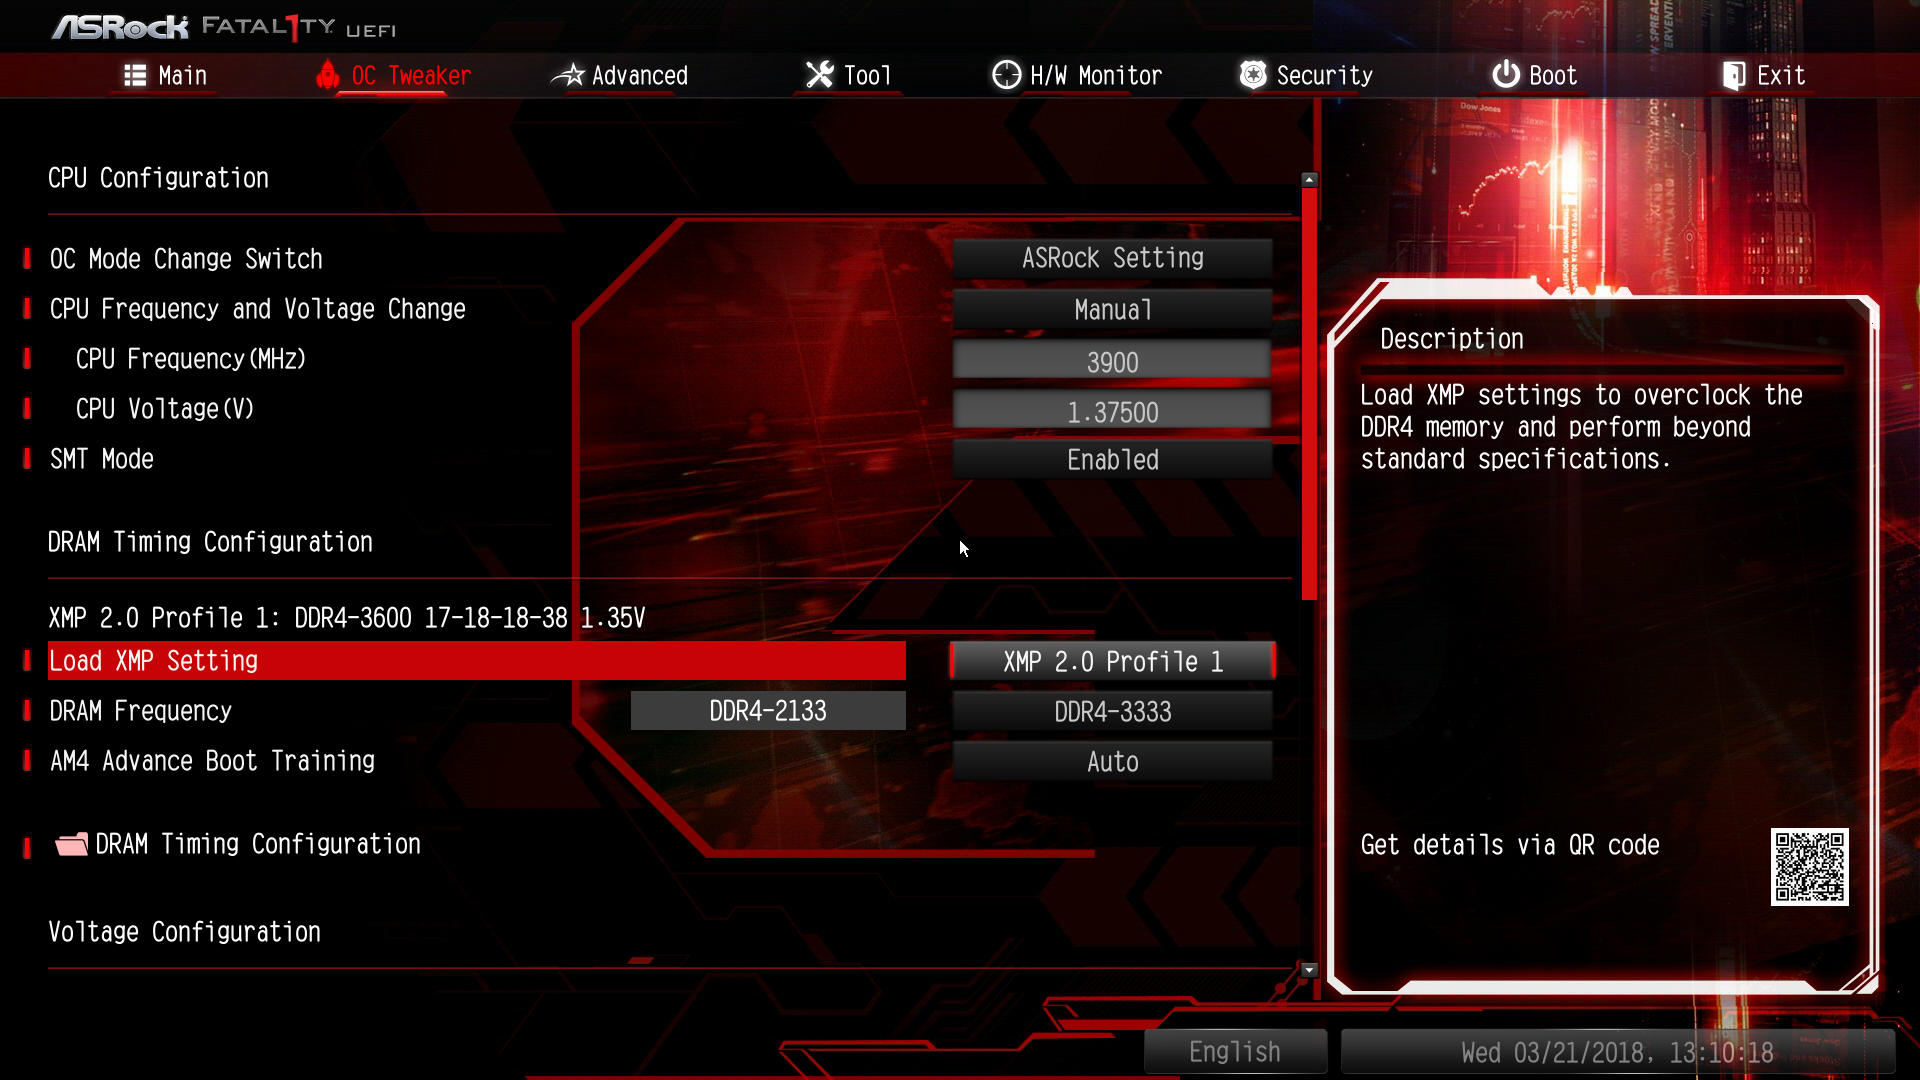
When it comes to applying the XMP profile, unlike the MSI board in our data testing in this article, the ASRock board only opens up a single XMP profile, the standard DDR4-3600 CL16 that the sticks are rated for. Enabling XMP and then changing the memory frequency to the setting that’s required is easy enough, as the value goes up in increments and can be adjusted using the + or – keys on a numpad. Alternatively, if the user presses enter a long list via a drop-down menu appears.
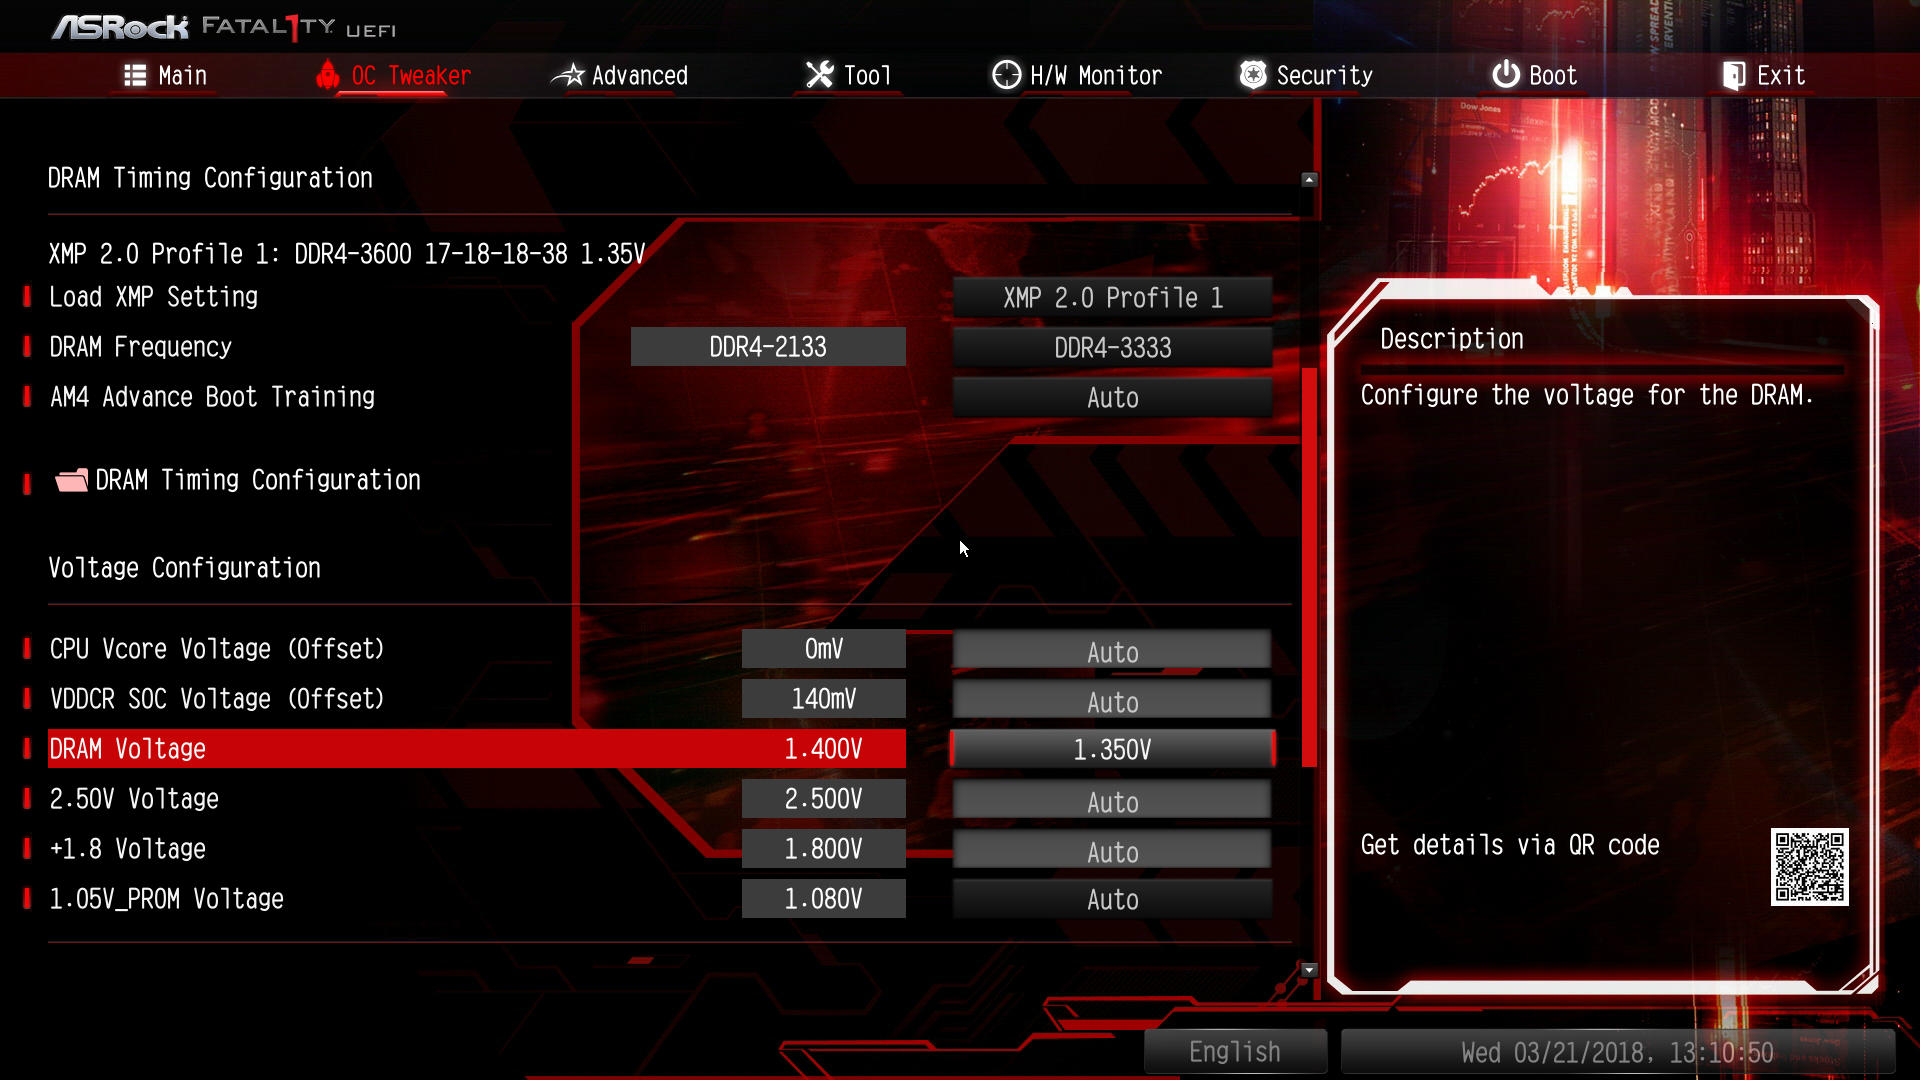
Further down the same page, options are present for changing the offset values to the SoC voltage or VDDCR. Just below these is the DRAM voltage, which when we enabled XMP automatically set the value to 1.4 volts, rather than 1.35 for which our kit is rated, which was a little odd.
Pressing F10 and selecting yes saves the settings and reboots the system. Unfortunately the options changed to not appear as in some other vendors Save and Exit popups.
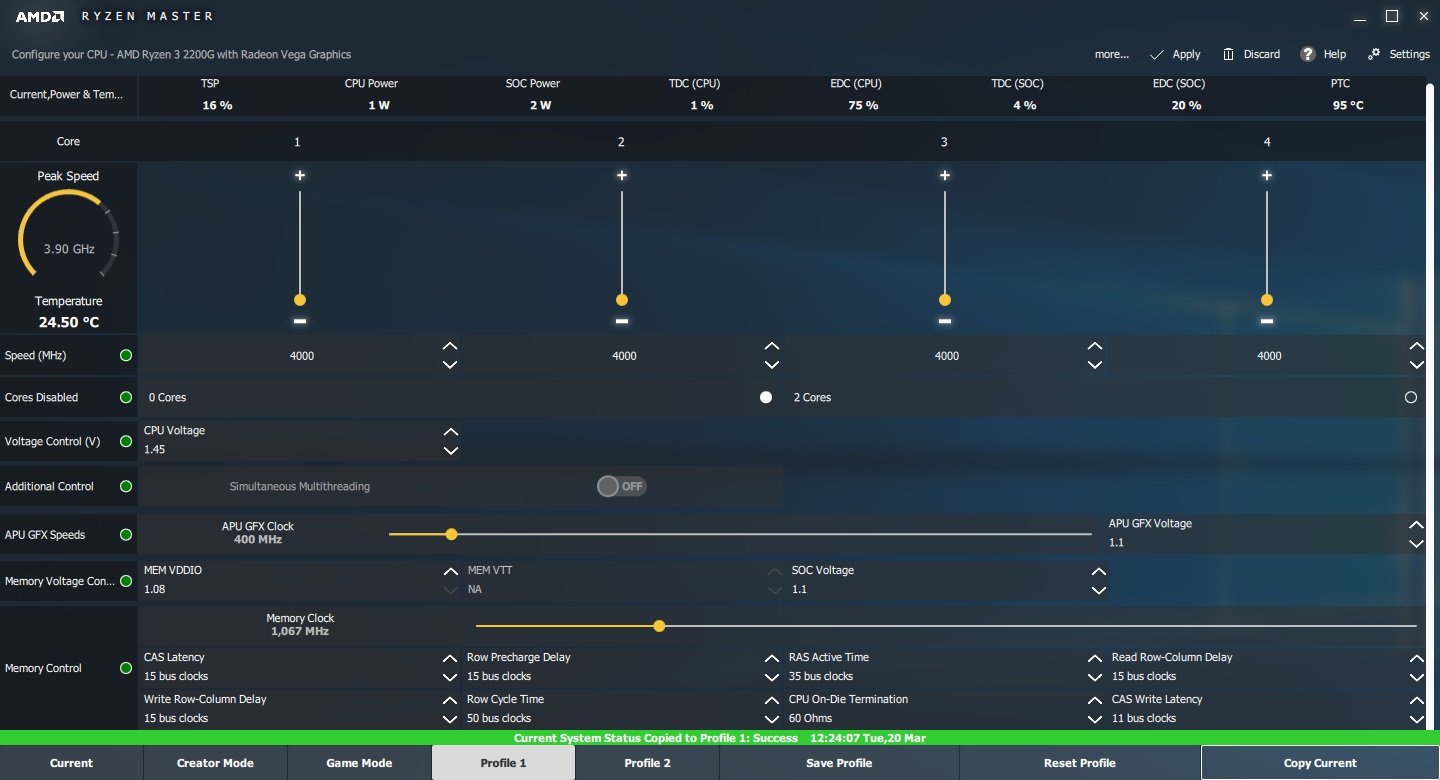
Note – To overclock the integrated graphics on this board, users will need to install the AMD Ryzen Master overclocking utility within Windows. We go into Ryzen Master on the next page.


63 Comments
View All Comments
0ldman79 - Wednesday, April 18, 2018 - link
Setting the multiplier manually automatically disables Cool'n'quiet, can it be reenabled afterwards while keeping the higher multiplier?I plan on overclocking mine the same as my FX 6300, keep Cool'n'quiet, keep turbo and just push it all higher. I like the idle dropping down to nothing and I prefer to keep my turbo so single threaded apps (still have a few) get everything they can possibly get.
gavbon - Wednesday, April 18, 2018 - link
You can re-enable it no problem, I only found it to automatically disable Cool'n'Quiet on MSI boards, there's absolutely nothing stopping you enabling it again :)YoloPascual - Wednesday, April 18, 2018 - link
Should have oced the gpu to 1600 instead of the cpu.krazyfrog - Wednesday, April 18, 2018 - link
Image compression is making my eyes bleed.PeachNCream - Wednesday, April 18, 2018 - link
The images in the article are fine and your eyes are working well enough for you to broadcast your whining to the rest of the world. Besides, the value in the article is in the written content, not the pretty pictures. If you want pictures as the primary content delivery mechanism, go buy a bunch of pre-literacy board books like The Very Hungry Caterpillar.dromoxen - Friday, April 20, 2018 - link
thess were my exact thoughts as many people here ... underclock the CPU and overclock the GPU for gaming (spend your heat budget on the GPU) and then on other tasks overclock the cpu and underclock the gpu) BUT I expect this cannot be done on one windows session . Actually using ryzen Master , it probably could . But youd need some scripts to o switch.If i ever take the plunge (waiting for 4000mhz dram) will examine this...
John_M - Friday, April 20, 2018 - link
A few things trouble me about this article.Firstly, the charts for 7-zip and 3DPM are incorrect. If lower really is better, then they show the stock 2200G outperforming the overclocked 2400G. If they are so blatantly wrong, then can the others be trusted?
Secondly, DDR4 defaults to 2133 MHz (2 x 1066) if you "forget" to enable XMP, not 2400. This is not a good representation of stock RAM frequency. I would have preferred to see you set 2933 MHz, as specified by AMD.
Thirdly, the Thermaltake Floe Riing 360 is an unrealistically expensive choice of cooler for either of those processors. Who spends more on the cooler than on the processor?
Fourthly, you can overclock the iGPU and adjust the SoC voltage in the ASRock UEFI BIOS, but it's rather hidden away!
cpupro - Saturday, April 21, 2018 - link
ASUS have the best looking UEFI.Galatian - Wednesday, April 25, 2018 - link
Thanks for the test, but I hope you will test all parts separately? I mean the FPS increase probably stems from the huge increase from the faster RAM, but you make it sound like the CPU and GPU overclock take equal parts.ballsystemlord - Wednesday, April 25, 2018 - link
Where did you get your data from when you wrote?"ed: I'm in the sliding scale camp, for what it is worth. I find it amusing to note that DRAM bit-errors, unaffected by overclocking, can happen on the scale of one per GB per four years (or less). That's about a worse case scenario, but it translates to about one bit-error per three months in a system with 16GB. that is something that can't be controlled by stability testing. Hopefully it occurs in DRAM that isn't being used."
Thanks!