The Asus ROG Strix Z270G Gaming Motherboard Review
by E. Fylladitakis on October 3, 2017 8:15 AM ESTAsus ROG Strix Z270G Gaming BIOS
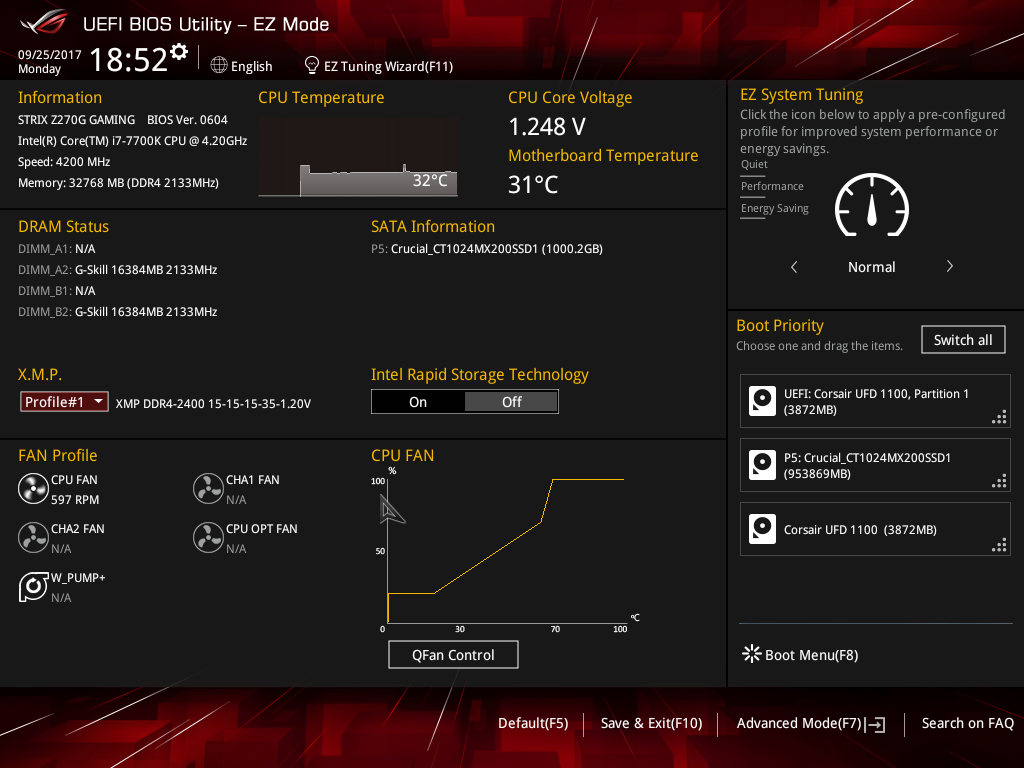
The BIOS of the Asus ROG Strix Z270G Gaming is graphical and multilingual, with mouse support. The default BIOS state is the “EZ Mode”, a single screen with very few tweakable options. From here the user can adjust the boot order, enable the RAM X.M.P. profiles (if applicable) and access the programmable QFan Control.
One very interesting feature here is the “EZ Tuning Wizard”, an automatic overclocking option that is accessible via the “EZ Mode” screen. The wizard begins by pressing F11, reads the system configuration, queries about the PC scenario and the CPU cooler, and then automatically overclocks the CPU, all without the user ever having to fiddle with frequency/voltage settings. It definitely is not utopian but it is a nice feature to have on a gaming motherboard for those inexperienced enthusiasts that simply want to squeeze a little bit extra performance out of their newly built system.
The full version of the BIOS is accessible by pressing F7, which brings the user into the “Advanced” mode (F7). It is split into eight main menus, with the majority of the options squeezed under just two of them.
The first main menu option, “My Favorites”, is initially empty. This section displays only the options that the user manually marks as favorites and nothing else. If nothing is marked, the BIOS automatically defaults to the second tab, the “Main” menu. The Main menu mostly is a informative screen, with options only to change the language, time and date.


The “AI Tweaker” menu hides nearly all of the tweaking and overclocking options. Clicking on it brings up a long, scrollable list of options and submenus that will overwhelm any amateur user, leaving him/her glad that Asus implemented that “EZ Tuning Wizard”. From here the user can change the RAM XMP profiles, the BCLK and RAM frequency settings, the CPU clock ratio (per core) and most of the important voltage values. There are also options for automated overclocking. Automated overclocking is essentially split into two parts. There is a TPU setting with two options, one for air-cooling and one for liquid-cooling. The first preset boosted our CPU to 4.6 GHz, the second up to 4.8 GHz. A little lower than the TPU options, there is also a third preset called “5G OC profile” that will ignore the previous presets and will try to overclock the CPU to 5.0 GHz.
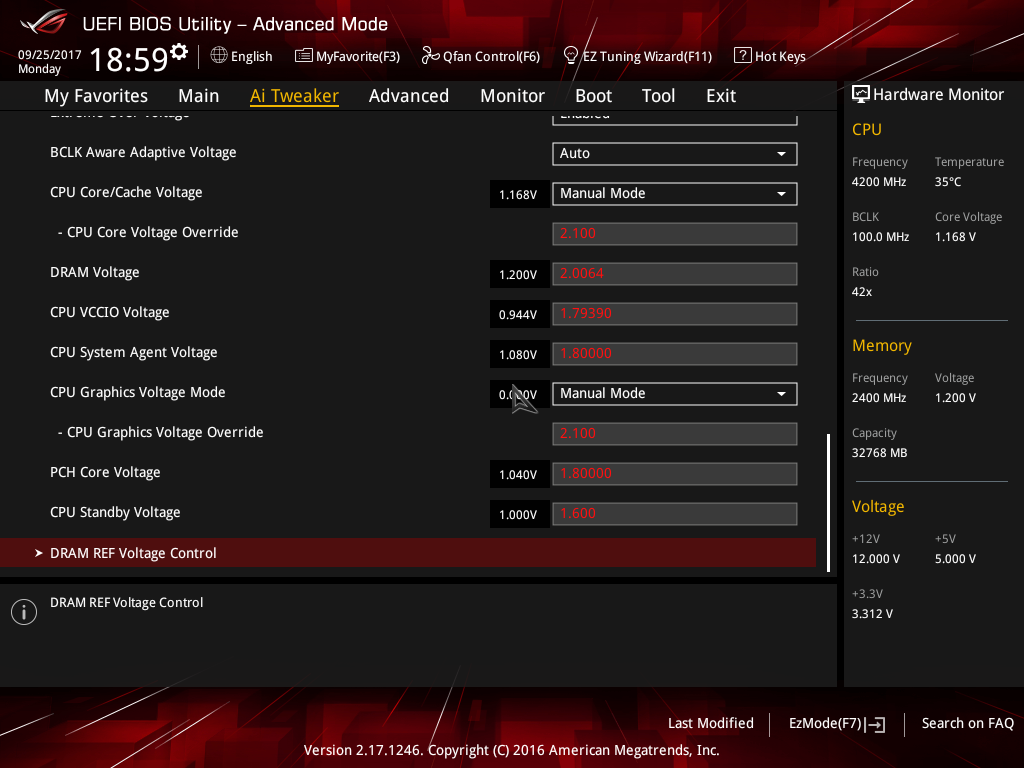
The maximum settings for each of these voltages
More specific options are accessible via submenus. The first submenu is called “DRAM timing control” and brings up dozens of RAM timing options, with even more options hidden inside other, secondary submenus. We believe that the vast majority of the users that will decide to manually adjust the timing settings of their RAM modules will stick to the three primary timing settings. The rest of the options exist virtually only for competition overclockers. The second submenu brings up the tweakable options of the Digi+ VRM, allowing the user to tweak sophisticated voltage, frequency, and current limit settings. The third submenu, “Internal CPU power management”, includes a few options for the Intel SpeedStep and Turbo Mode features. There also is the “Tweaker’s Paradise” submenu and it includes advanced chipset voltage and frequency options.
Below these submenus, there are even more tweakable options that control voltage and current limits. There is an option called “Extreme Over-Voltage” that widens the range of the voltage settings. Note that even with this disabled, the range of the voltage settings is very good, with the CPU core voltage, for example, reaching up to 1.7V. Enabling it allows the CPU core voltage to reach up to 2.1V, something that a Kaby Lake cannot endure for more than a few competition overclocking benchmarks. Our screenshots show the maximum possible values of all voltage and current options.
Finally, the last submenu in the “AI Tweaker” menu is the “DRAM REF voltage control” and, as its name suggests, includes advanced voltage control options for the RAM modules.
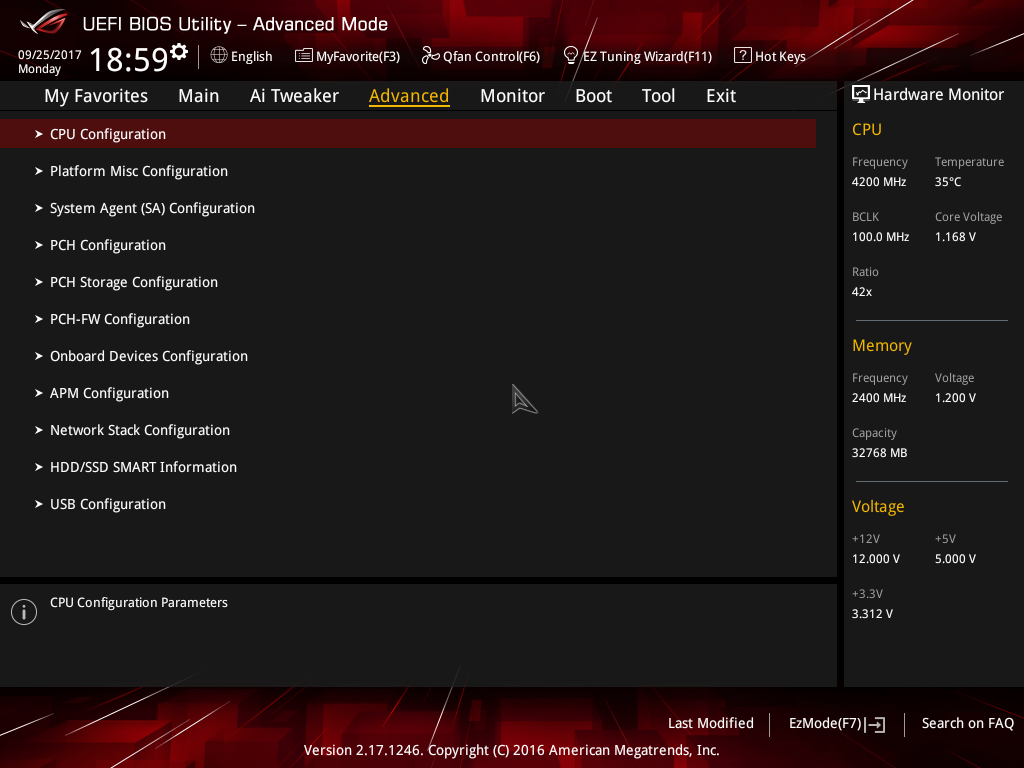
The “Advanced” menu is a long list of submenus, each of which includes tweakable options specific to a subsystem of the motherboard. Some submenus initially look informative but reveal a wealth of options once the user scrolls down. The “CPU configuration” submenu is the most prominent example, revealing over a dozen options and another submenu when the user scrolls down.
The “Monitor” menu initially appears to be purely informative as well, with only sensor readings visible at first, but scrolling down reveals several tweakable options that control the speed of the fans and allow for the programming of thermal profiles. The “Boot” menu is home to many tweakable boot-specific options but nothing out of the ordinary that stands out in comparison to most modern motherboards.
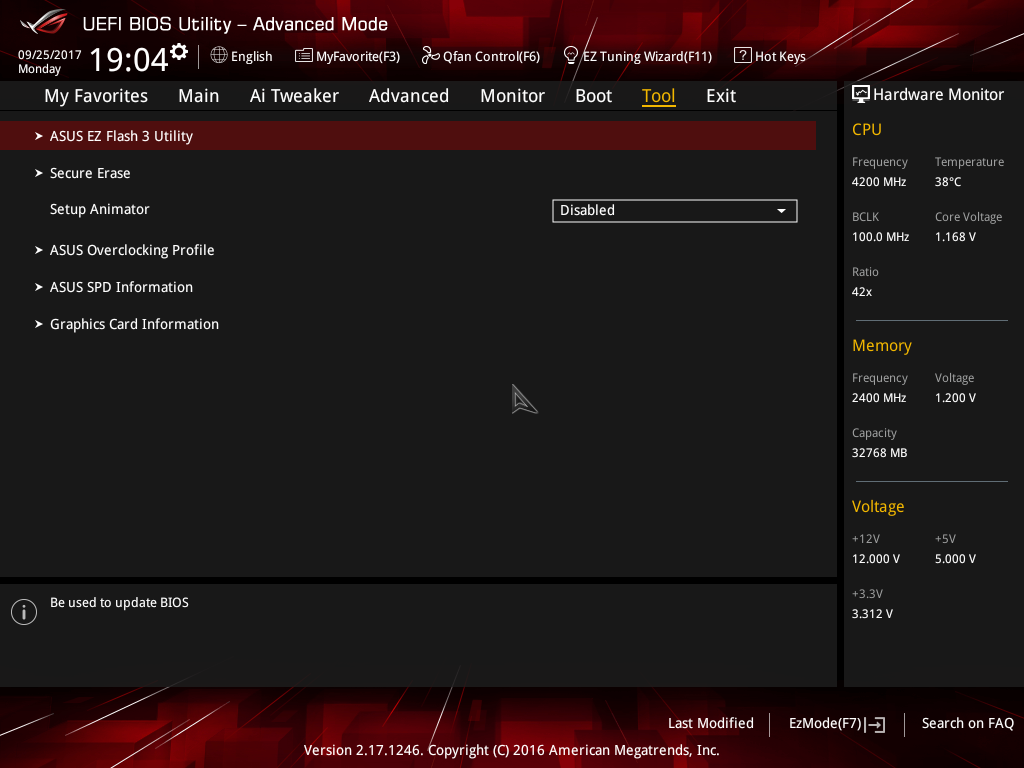
In the “Tool” menu Asus placed a few of basic applications, including the “EZ Flash 3” utility for upgrading the BIOS. The “Secure Erase” tool is a low-level format application that is designed to “restore the performance of your SSD”. It will irreversibly destroy all data on the said SSD, so it definitely is not a very practical solution, but it can be very useful for recycling/reselling drives with sensitive data on them.


26 Comments
View All Comments
yannigr2 - Wednesday, October 4, 2017 - link
Yeah right. An AM3+ motherboard I was using couldn't support an AM3 Athlon II 645 Zosma core(those nice CPUs that could unlock to 6 cores). Their reply. "The CPU is probably problematic". Well, that CPU was playing beautifully on an ASUS and a Gigabyte motherboard. It was also running with 6 cores at 4GHz.Great support, never again ASRock.
Drumsticks - Tuesday, October 3, 2017 - link
Thanks for the review. I'm looking at the Z370G Strix, since it's the only reasonably high end mATX announced so far. I hope most of the content of this review will carry over.yannigr2 - Wednesday, October 4, 2017 - link
Thanks to Intel, this is DOA.AMD motherboards will support today's Ryzen and tomorrow's Ryzen Plus and Ryzen 2 (or whatever their names will be). And here we are looking at a full review of another DOA Intel motherboard.
MadAd - Wednesday, October 4, 2017 - link
I approve of more uATX/mATX reviews.Very few people today wanting a mainstream PC should be thinking of an (almost) 20 year design as in full ATX. Sure there are niche applications which can use it but since both the press and the manufacturers still consider it a contemporary design then its hard to get the mainstream to adopt these smaller form factors. (u/mATX still seem to be the red headed step child compared to the whole ATX range from every mobo manufacturer these days).
DanNeely - Wednesday, October 4, 2017 - link
More space to spread things out can let you get away with fewer PCB layers and a cheaper overall board. Somewhat ironically while allowing smaller overall system volumes, m.2 SSDs are making this problem worse by needing large amounts of board space. Putting the drive on the back of the board is inconvenient and potentailly has thermal concerns to lack of airflow between the board and mobo tray. Mini riser cards are kludgy; and in the case of ones using a DRAM style connector to keep part costs down are probably going to have higher damage rates due to users trying to put ram in the riser slot or vice versa.meacupla - Thursday, October 5, 2017 - link
What a perfect feature set.Now if this only existed on an mATX AM4 board, then we are in business.