The Asus Prime Z270-A & GIGABYTE Z270X-Ultra Gaming Motherboard Review
by E. Fylladitakis on July 18, 2017 10:45 AM ESTBIOS
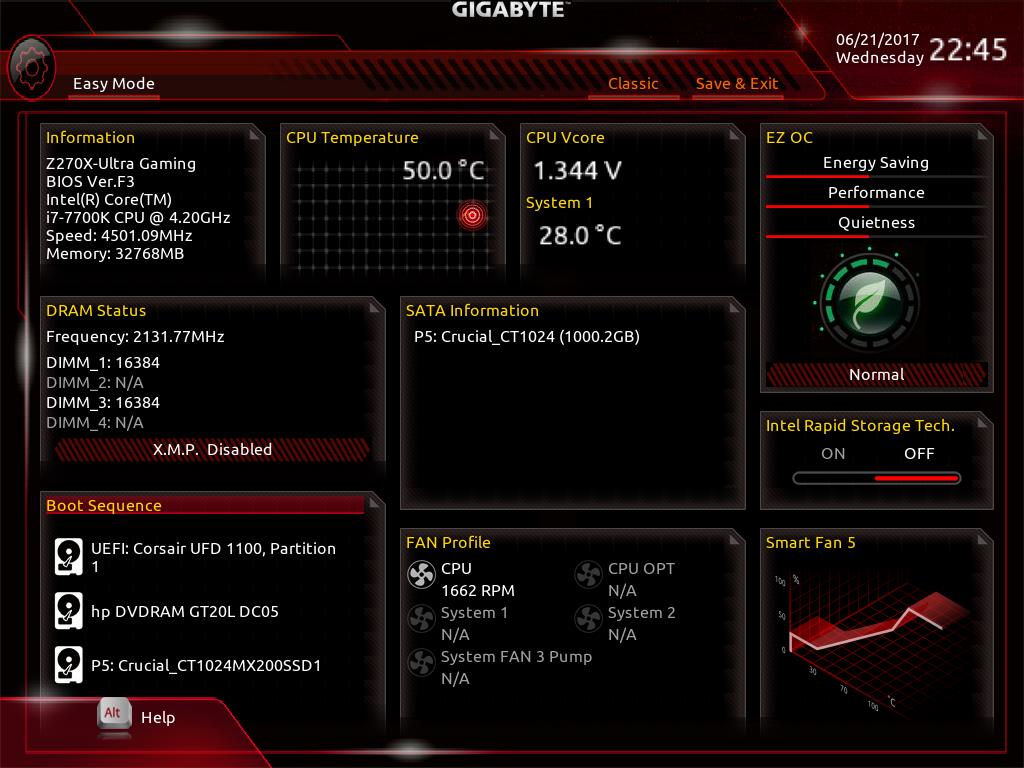
Like almost every modern motherboard, the GIGABYTE Z270X Ultra Gaming features a graphical UEFI BIOS that defaults to a simple, single page “easy mode”. This mode is generally informative and the user can only change the boot sequence, enable the RAM X.M.P. mode and/or the Intel Rapid Storage technology, and switch between a few pre-programmed overclocking/power saving modes. In order to access more options and features, the user needs to enter the “classic” mode.
The "classic" (or advanced) mode reveals the entirety of the motherboard's capabilities and options, which are distributed into six main tabs. The first tab is the M.I.T., by far the most complex section of the BIOS, as it includes all of the frequency, memory and voltage settings of the motherboard. It has five main submenus, with more submenus hidden inside them.
The frequency submenu allows for the adjustment of the CPU and memory clocks and ratios, including FCLK. Strangely, there is both a manual control of the CPU's clock ratio and a "CPU upgrade" option, both of which are virtually doing the same exact thing. The only difference is that the CPU upgrade option brings out a drop-down menu that is listing the end frequency of the CPU, probably for users who are not aware that the CPU clock ratio multiplied by the base clock is the exact same thing. The maximum system memory multiplier is 41.33 (4133 MHz). A look inside the Advanced CPU Core settings submenu is enough to scare even veteran users, offering dozens of frequency and power settings for each specific part of the CPU, including power limiters and per-core turbo boost settings. By default, the GIGABYTE Z270X Ultra Gaming has the Intel Turbo Boost at 45x for the first core and at 44x for the other cores.

The Advanced Memory Settings submenu initially brings up only the most basic settings, which are the clock and its multiplier, the boot mode, automatic enhancement settings and basic voltage adjustments. If the memory timing mode is switched from Auto to Manual, the user will be able to change the four standard timing settings of the memory into the memory sub-timing submenu. If the "advanced manual" option is selected instead, the available number of tweakable timing settings explodes up to 42. The Advanced Voltage Settings option brings up four other submenus, namely the Advanced Power Settings, the CPU Core Voltage Control, the Chipset Voltage Control and the DRAM Voltage Control. Each submenu offers a wide range of adjustments for the respective components and their subcomponents. The PC Health submenu is a little poor, monitoring only the absolute basic voltage lines of the motherboard and missing even the PCH voltage.


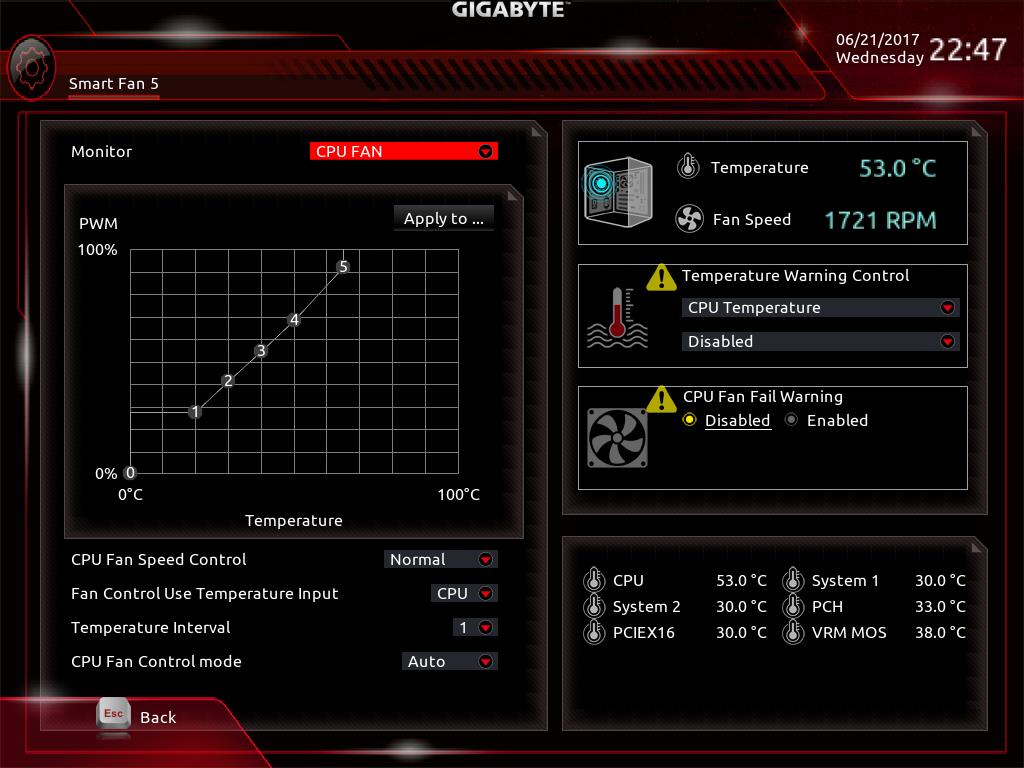
The Smart Fan 5 is more of an application than a submenu item, bringing up a graphic interface for the monitoring and adjustment of the fans that are connected to the onboard headers. There are three preset options, "Normal", "Silent" and "Full Speed", as well as manual control that allows the user to adjust the speed of each device according to a specific system temperature.
After the M.I.T. menus and submenus, the rest of the options in the BIOS are relatively basic. The “System” menu is mostly informative and the only adjustable option is the system’s language. The “BIOS” section includes the boot and security options, as well as a setting for the mouse's speed while in the BIOS. The “Peripherals” menu and its submenus allow for the monitoring and control of the connected devices and ports, while the “Chipset” menu allows for the control of the onboard devices. Finally, the “Power” menu includes settings for the power management of the system, as well as sleep/wake options.
Software
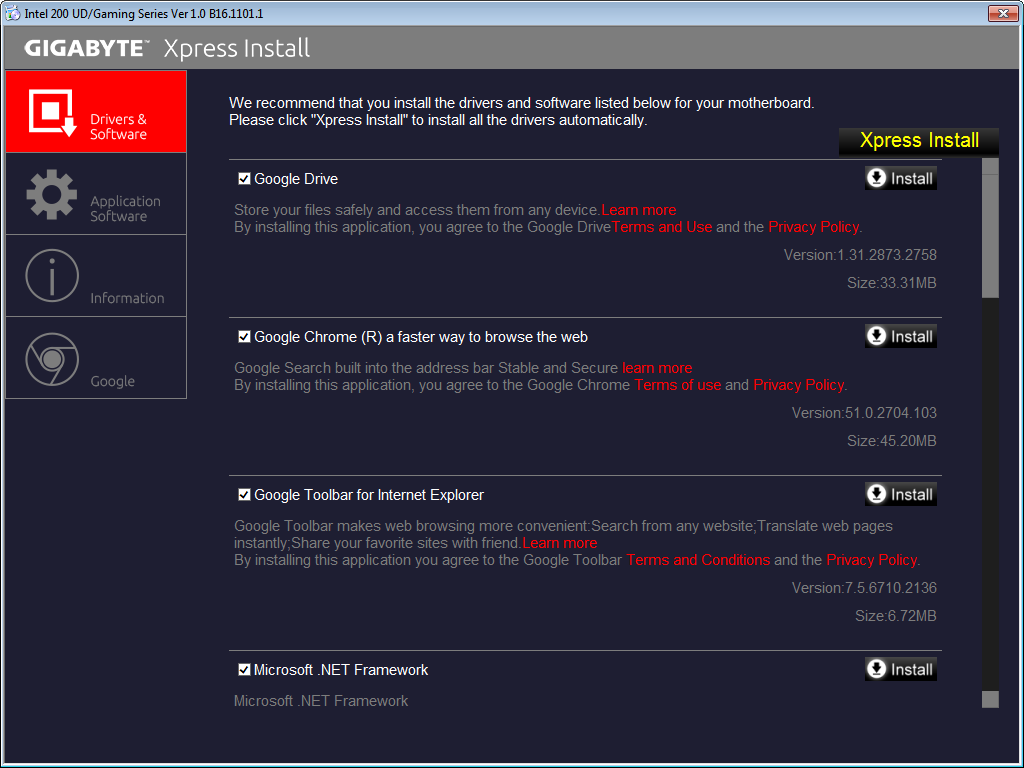
GIGABYTE’s DVD includes the necessary drivers alongside with Google software. The user can “Xpress Install” the selected drivers and software. This option will automatically install the selected software packages and reboot the system as many times as necessary without any user supervision.
The “Application Software” tab can be used to install the GIGABYTE App Center or the included OEM antivirus software. The user can also choose which applications of the App Center he or she wishes to install.
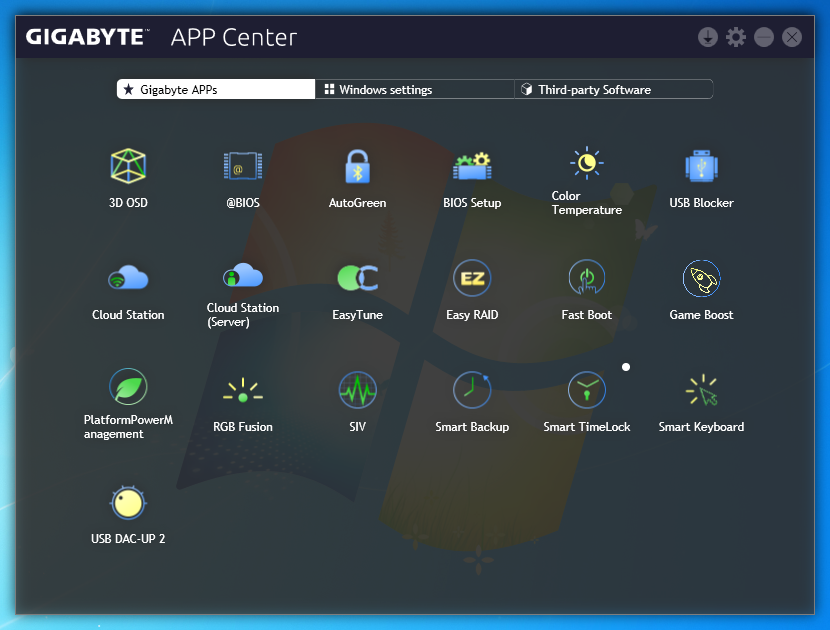
Launching the App Center brings up an interface with "Apps", icons that launch software packages designed for a specific purpose. Skipping the very obvious selections, the most complex of these "Apps" are the 3D OSD, the EasyTune, the Smart Keyboard and the RGB Fusion.
The 3D OSD is an option that projects information about the system onto the screen via a hotkey or while gaming. The list of the possible options to be shown is very long, including even the VBIOS version. If you would like to keep an eye on a certain temperature, watch your FPS or show your driver's version onto a screenshot, the 3D OSD can be rather useful. The text's size, color, and position can be adjusted and the application can be set to automatically launch alongside certain games.
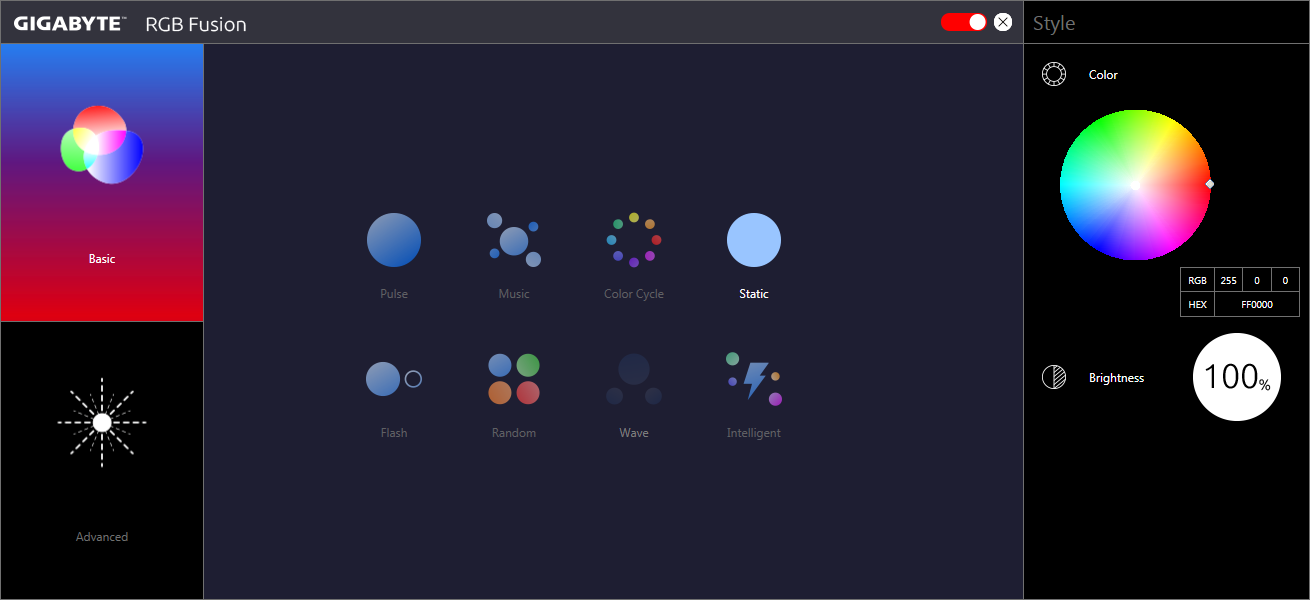
The RGB Fusion application is for the programming of the onboard and external RGB lighting. Note that the programming is by default synchronized, but the user can also separate the onboard RGB color/effects from those of the connected RGBW strip (if applicable). There is a wealth of pre-programmed options and effects, as well as a limited editor for the creation of unique effects.
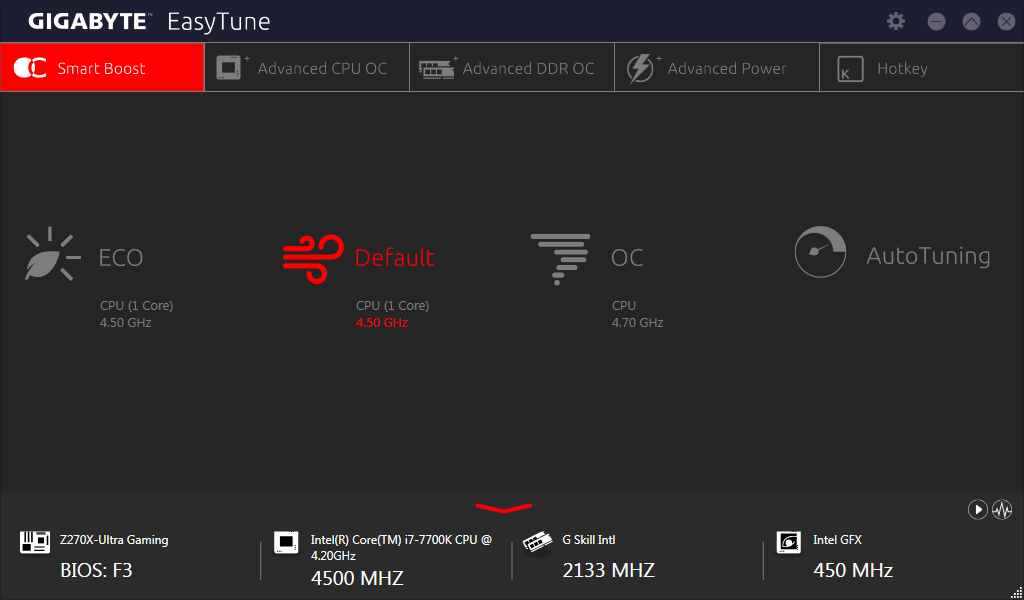
The EasyTune is the App that allows for in-OS monitoring, overclocking and tweaking, making it possible to easily adjust system options without having to reboot into the BIOS. The number of options is not as extended as it is in the BIOS, but the included options are more than sufficient for the majority of overclockers. Hotkeys can be set to switch between two profiles, such as, for example, a low-energy and a gaming profile.
The Smart Keyboard allows the reprogramming of the F1-F12 keys to initiate macros, launch applications and enter Sniper mouse mode. The Macro programming is basic and can be greatly improved, but it allows for the insertion of absolute mouse coordinates and clicks as well. If you do not own a programmable keyboard, this piece of software can become pretty useful in certain games and especially MMOs. It is a shame that it cannot be used to program keys outside the F1-F12 range.


The strangest option is the "Color Temperature", or "Blue-Light Killer". This is supposed to reduce the blue spectrum light of the LED display to increase comfort and protect your eyesight. The only issue here is that it (obviously) greatly affects the color profile of the system, making all colors warmer. At its maximum setting, the entirety of the screen is virtually orange. We cannot see who would enjoy using a setting that, even at its lowest possible setting, distorts the system's color output.
Another interesting option is the "Smart TimeLock", an option that allows the system's builder to limit every user's allowed time during the weekdays and weekends. If you want your children to hate you by forcing system shutdowns while they play MMOs, these are the settings you are looking for.


34 Comments
View All Comments
JoeyJoJo123 - Tuesday, July 18, 2017 - link
Yeah, at some indeterminate time after Windows 7 launch, it seems boot times have gone down the drain. Kinda funky how the best boot times I ever had on a PC was with a first generation SSD on SATA II, but today, with an MLC-based PCI-e M.2 SSD that's supposed to be orders of magnitude faster... is actually slower when booting.I never cared too much to investigate, though. I tend to let my PCs sleep overnight rather than full shut downs, and waking from sleep has been pretty quick still.
Rocket321 - Tuesday, July 18, 2017 - link
Doesn't XP only need about 150MB in Ram on a clean boot? Compared to... Like 2GB in Win10. I guess all the new hardware power keeps us out of 3.5 minute boot times.StevoLincolnite - Wednesday, July 19, 2017 - link
Does it really matter if a system boots in 3 seconds or 15 seconds? Booting a system isn't where you spend most of your time.Dug - Monday, July 24, 2017 - link
I agree. I have an old Gigabyte sandy bridge mini itx motherboard that takes just a few seconds to boot, even with windows 10.Not sure what is going on here, unless the motherboards are doing more checks.
SeeManRun - Tuesday, July 18, 2017 - link
I am actually a bit disappointed in my Prime Z270-A. I have been using it for several months. When trying the XMP profile, the board will not POST. When adjusting certain settings in the BIOS, it doesn't recognize something has changed and won't change the settings. There are other nitpicks around, like it sometimes comes out of sleep and seems to be "on" but nothing seems to be powered up. The GPU light is on, but no lights on anything else work. I have to hold power for 6 seconds and boot it back up. No idea what is happening with this.This board might be my last ASUS board after about 6 in a row.
blurp - Tuesday, July 18, 2017 - link
I own the same Mobo. No issue at all with XMP (Corsair Vengeance LED 16GB 2X8GB : supported by Asus). No issue either with sleep with current drivers in Win 10. Flawless. Left Gigabyte (Z97) with their subpar UEFI bios. Moreover the is minimal support with SpeedFan because the data sheet for the integrated fan controler is not public.SeeManRun - Wednesday, July 19, 2017 - link
You are having better luck than I then. My memory is also Corsair Vengeance (2x16GB) CMU32GX4M2C3000C15B. I have read that to run XMP you may need to overclock your processor, but this doesn't make a lot of sense to me. No other computers I have encounter the same issue.Dug - Monday, July 24, 2017 - link
XMP profile, while meant to be a nice easy solution can be a hit or miss for any motherboard/ ram combo.Just enter in timings manually. May have to set system agent voltage and io voltage anywhere from 1.15- 1.25.
e1jones - Tuesday, July 18, 2017 - link
I used this Gigabyte board in my desktop built early this year. After building a Asus 170-series based computer for my brother I decided to avoid them (also had no USB2 back panel ports and some weird issue installing windows from USB) and stick to Gigabyte which served me very well on my prior desktop.I chose this particular model because it has Intel Ethernet (vs Killer primarily) and the U.2 port for some amount of future proofing if that standard ever takes off before I build the next one. I didn't realize the power delivery was so short on phases, but I don't exactly overclock at all, so hopefully its not an issue. Yes, they have the SATA-Express as well, but I'm beginning to wonder if that'll ever go anywhere.
Something that wasn't mentioned is that the 2 yellow USB 3 ports are their DAC-UP ports with some sort of special isolated power/low noise delivery system.
DigitalFreak - Tuesday, July 18, 2017 - link
"The GIGABYTE Z270X Ultra Gaming features a native U.2 PCIe ×4 connector and SATA Express ports: both of which are storage interfaces that we rarely see implemented on sub-$170 motherboards that are targeted towards gamers."These ports are such a waste, especially SATA Express. 0 devices support that and 1 aging SSD supports U.2.