Z77 mITX Round-Up: Five of the Best – MSI, Zotac, ASRock, EVGA and ASUS
by Ian Cutress on December 31, 2012 7:00 AM EST- Posted in
- Motherboards
- MSI
- ASRock
- EVGA
- ZOTAC
- Asus
- Ivy Bridge
- Z77
- mITX
Zotac Z77-ITX WIFI BIOS
Since the inception of a graphical interface for a BIOS, we have had several attitudes towards the design by motherboard manufacturers:
a) Do Nothing
b) Change the colors and reorganize menus
c) Create a different feel, make the changes easier to comprehend
d) Embrace a graphical BIOS and shift the paradigm to an interactive experience
Ideally, we would want all motherboard manufacturers to take to option (d), allowing all users to have a prod and a play with what could be a very interesting interface. Only two experiences I have had ever come close to (d) – the games given in the early MSI P67 BIOSes, and my brief foray into an Intel Z77 BIOS. Apart from this, we are stuck with (a) to (c) for the time being.
For Zotac, writing a novel BIOS can be tough. Zotac is a relatively small player in the motherboard industry with a single-digit percentage in terms of market share, and I would not be surprised if they employed more than a handful of BIOS engineers that actively upgrade the BIOS. If anything, they are more than likely stuck writing code for new models or releasing patches rather than updating. As a result, Zotac fits firmly in the (b) menu of the list above.
Being in the (b) section is not all bad – Biostar have had a fair crack at it in a similar position and have come out with something just about useable but looks nice (as a personal subjective opinion). For Zotac, and this Z77-ITX WiFi, we get a selection of different colored text on a JPEG/PNG style background:
(Apologies for the quality of the images – Zotac are also one of the few motherboard manufacturers without a ‘F12 – Screen to USB’ button which optimizes this part of the review.)
My main issue with a multicolored background stems from my slight level of colorblindness. It deeply affected my ability to select options in an ECS BIOS a few months back, and while it does not affect me here to the same extent, the effect of having white text over a yellow background without a text border can sometimes make text difficult to see. I would chalk this up as a basic design error (like red text on a green background) systemic of an engineer being told to ‘give the BIOS some style’. It certainly has more style than a white-on-black or white-on-blue BIOS of old, but it is not executed as perfectly as one may have imagined.
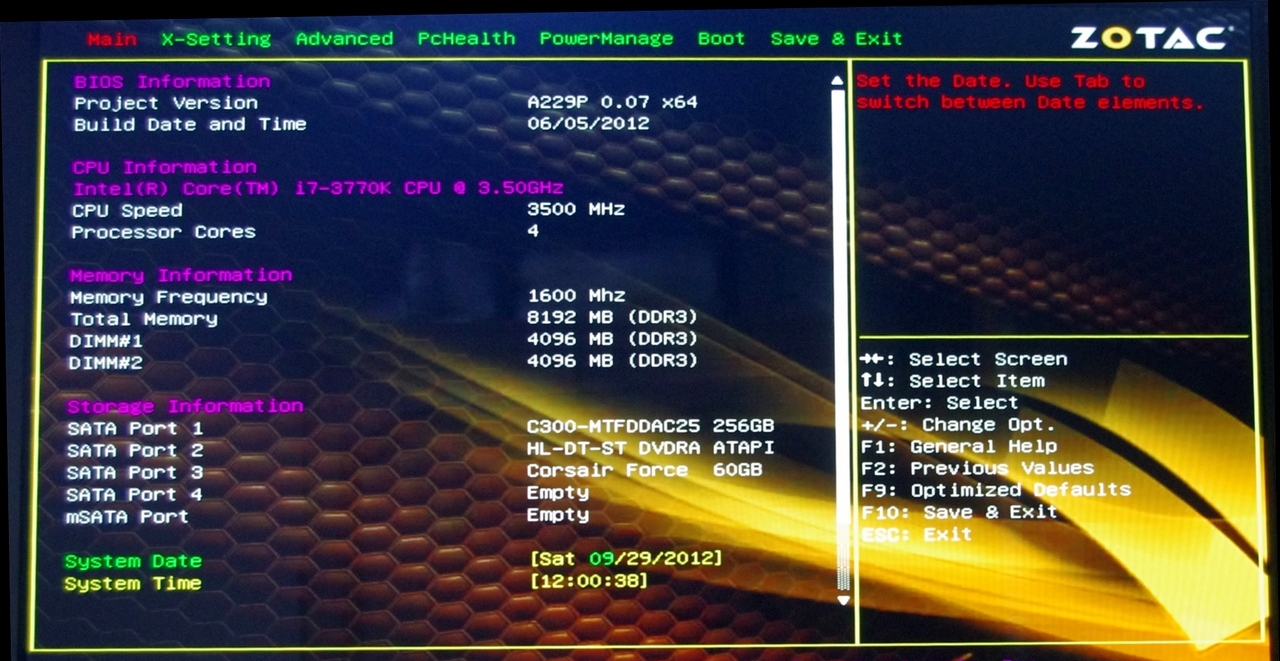
As for the functionality of the BIOS itself, the main screen above does a good job of informing the user when they enter the BIOS and land on the ‘Main’ page. We get the motherboard model and BIOS version, CPU information and memory size/speed. All that is missing is perhaps a temperature or voltage (or two).
For overclocking, we get the X-Setting menu:
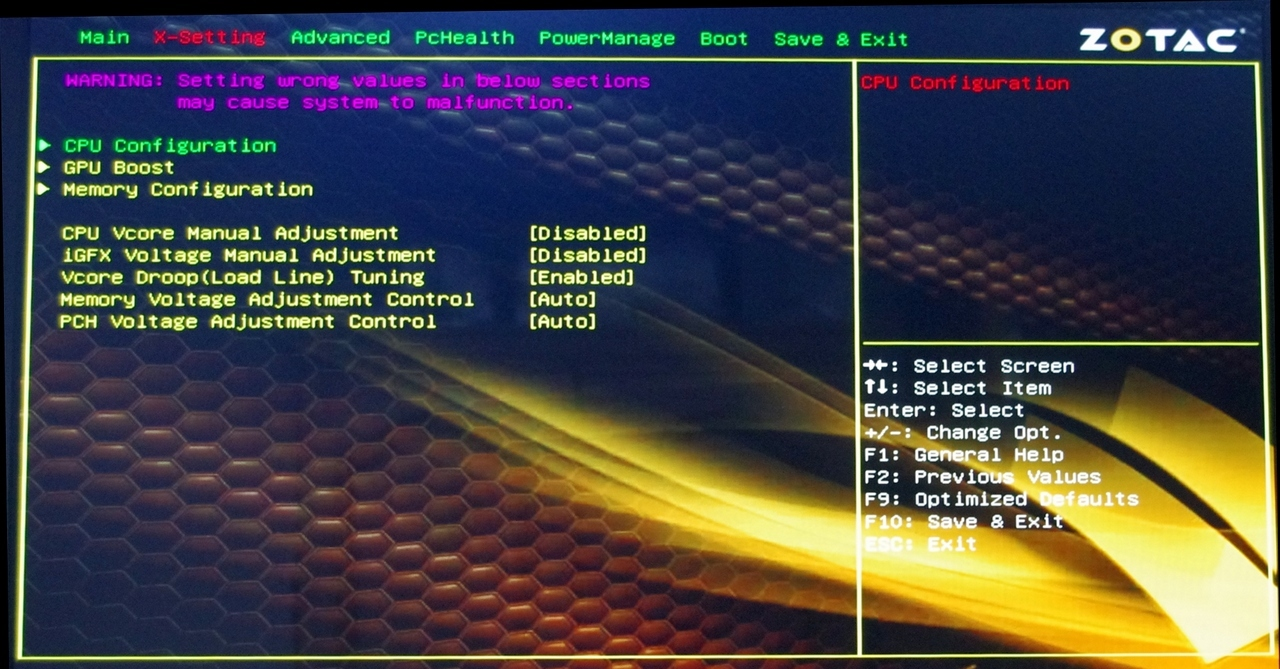
Rather than an endless list of options, Zotac have decided to place overclocking options in separate menus. Everything voltage related gets placed out in this main menu, but frequency settings are partitioned off into separate CPU, iGPU and Memory menus.
A good thing about the Zotac BIOS is that each option has an associated help description in the top right, and each setting will make sense to any user who has overclocked before. Raise the multiplier, perhaps raise the voltage, adjust LLC + power settings as necessary.
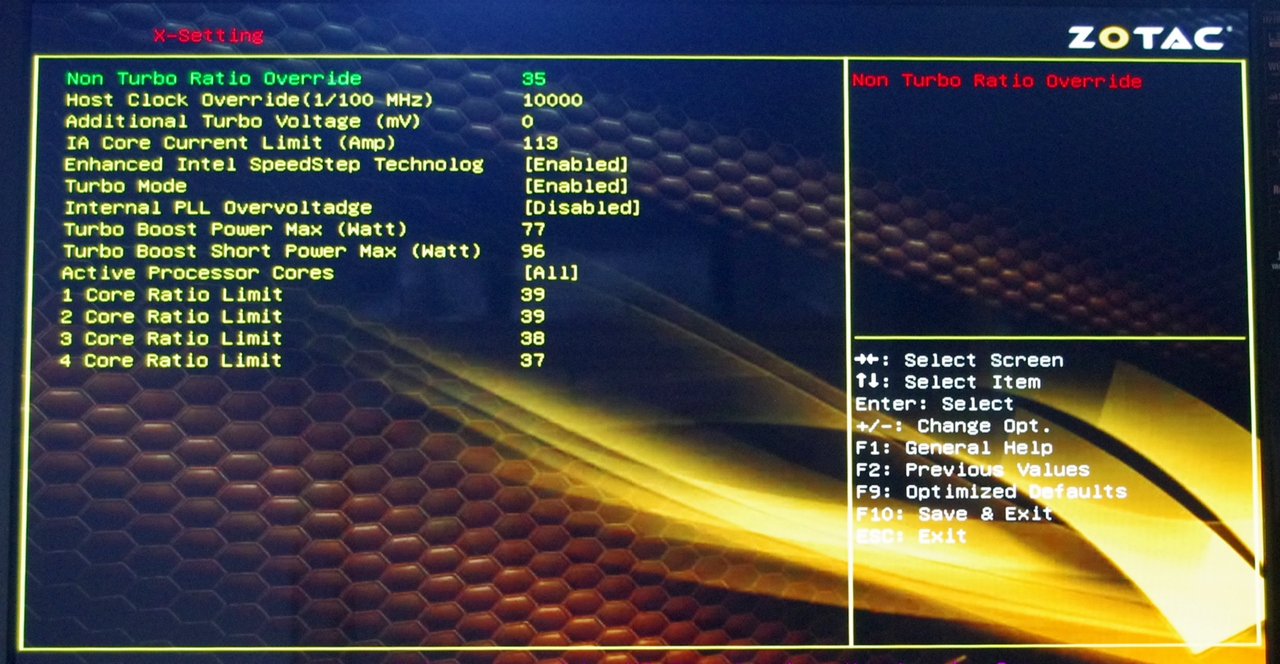
Unfortunately there is a little element of confusion in the Zotac BIOS. Some of the CPU overclock settings listed above are duplicated poorly in the Advanced -> CPU Configuration menu. As you can see below, despite the Core Ratio options being part of this menu, they are not configured properly to take into account the values found in the X-Setting section:
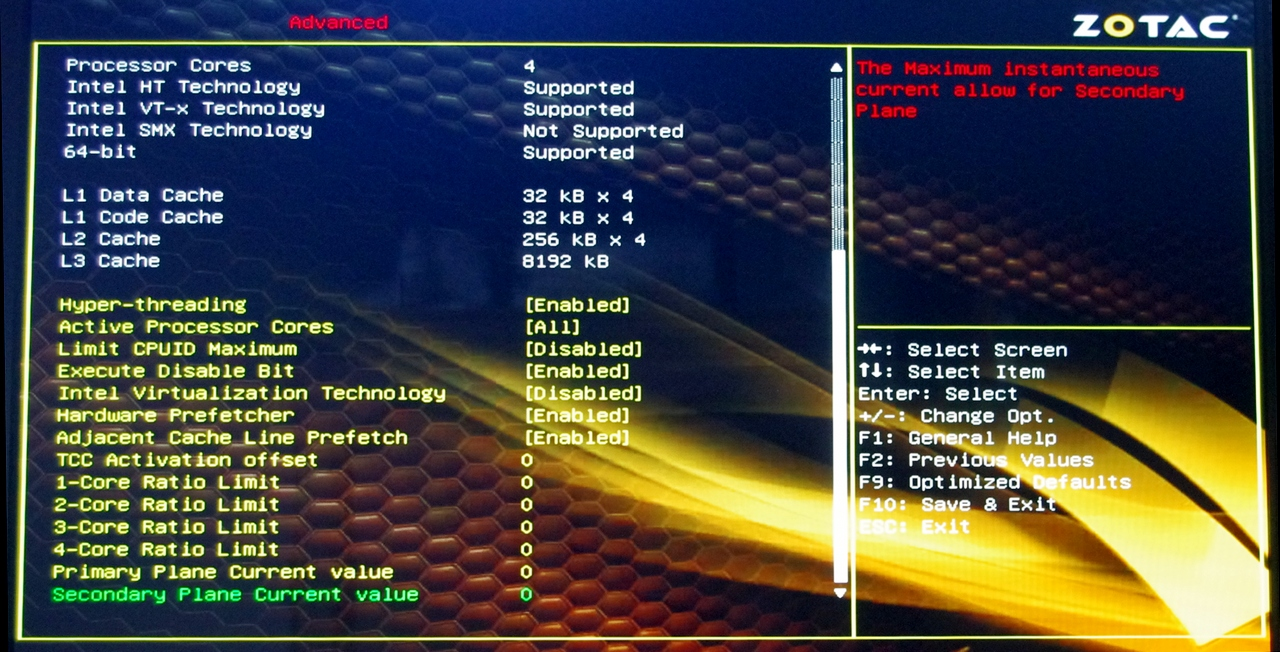
In the Advanced menu, we get the usual array of controller options and configuration sub-menus. The important thing to note is the default setting for SATA ports. In 2012 (and for most of 2011) it has become the de-facto standard to make the SATA Mode for the ports to be AHCI as every HDD and SSD sold today can take advantage of AHCI and a new OS is often installed on a newer system. Either Zotac did not get that memo or someone at HQ is not in the loop with modern system construction, because we get IDE as standard. Please make sure you remember to change this on your new build (and each time you might have to clear the CMOS).
Due to the two fan headers on board, we get a small about of fan control in the BIOS:
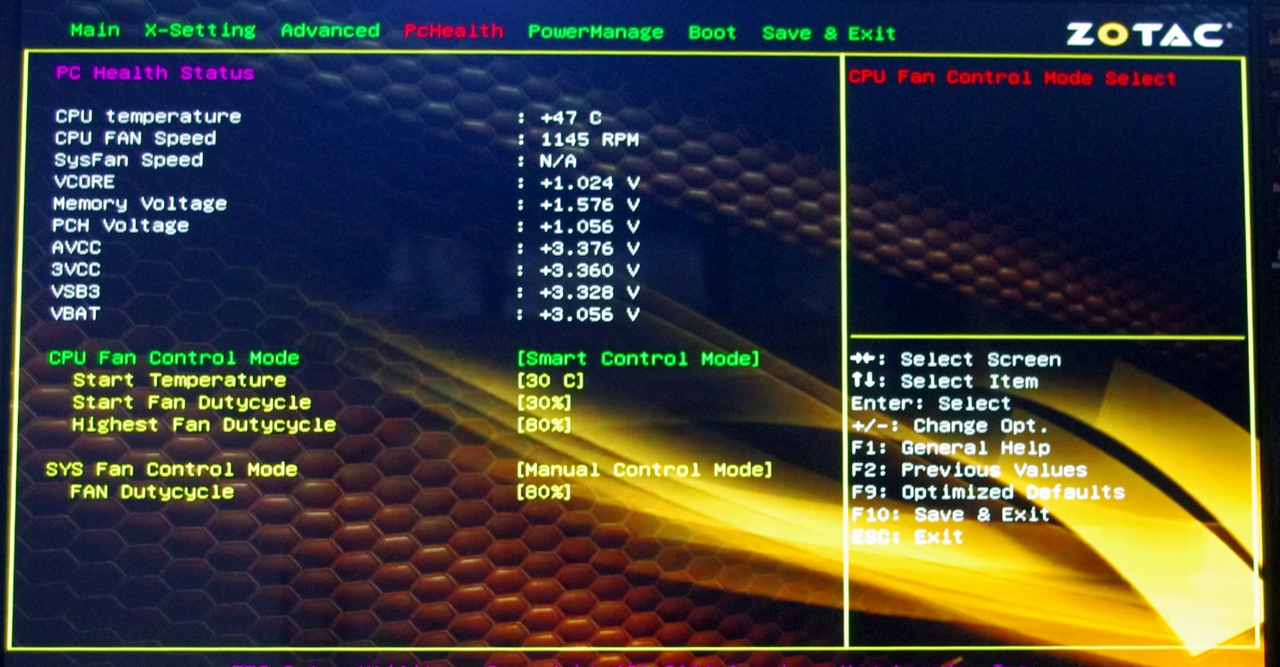
The fan control allows for a basic type of gradient to be defined, although as shown above the ‘final’ temperature is not possible to be chosen, suggesting that the BIOS uses the TJMax value of the processor to fully ramp up the fan. The system fan header gets a straight forward constant fan speed at the users’ discretion. [Insert my consistent rant regarding fan settings here.]
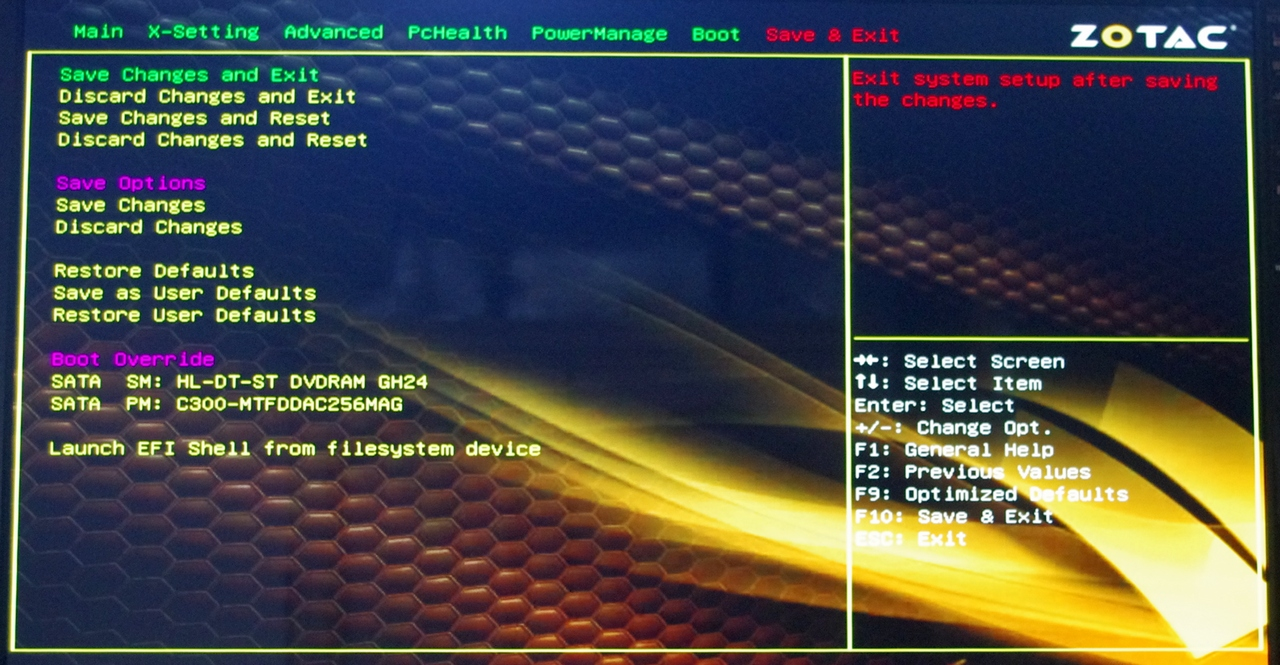
The last thing to mention in the BIOS is the boot override feature, which is becoming the norm on most motherboards and I am glad to see Zotac use it. With this feature we can select a single device to boot from as a one-time-only situation – useful for booting from USB.


54 Comments
View All Comments
ryedizzel - Monday, December 31, 2012 - link
Thank you so much for this Z77 roundup as I'm currently shopping for a new mobo and have been piecing together reviews from various sites. But as usual I always check here first, then Tom's, then Hardocp (in that order). Keep up the great work in 2013!Aikouka - Monday, December 31, 2012 - link
Ah, if only I held off on building my silent HTPC for a little bit longer. The hardest part about working with a Streacom case (other than building it) is finding a good motherboard that doesn't put too much in the way of the heat pipes. That's one reason why I was considering going with a board with mSATA, and I'm pretty certain that I stumbled across that ASRock board. Unfortunately, I looked at the photos, and didn't see a mSATA port, so I passed on it. Who would have thought to look at the back? Boy, do I feel like a bit of a dummy now! =$Although, speaking of the back mSATA connector, I recall seeing you touch on it on the recommendation page, but do you think it would work well on most cases? If I remember correctly, mSATA drives are fairly thin, so it might be fine. Going back to the Streacom, it does look like the ASRock offering would work well in regard to clearance even disregarding the mSATA port as the light gray SATA ports should clear the heat pipes. The USB3 port won't though.
philipma1957 - Monday, December 31, 2012 - link
I built 2 asrock builds with the msata as the only drive. btw this z77 review with no regard to oc is pretty weird.I have a 3770k with a hd7970 gpu and an msata in a small case the cooler master elite it is a very fast powerful machine. I use the asrock and love it. it does have a flaw the msata slot is sata II
Ananke - Monday, December 31, 2012 - link
I have i3-3225 (the same as in the article). In my opinion, for the money, the best is ASUS P8H77-I.It does have 6 SATA ports - a must for a file server. So, basically install Windows 8 on a SSD, add HDDs and create Storage Space - 5 SATA will allow you to create software RAID 5, without the need of SATA extension controller. BIOS is nice and stable. The board is $100 on Newegg.
The ASUS Z77 Deluxe is nice, if anybody needs all the additional functionality in a small form factor. However, only 4 SATA - means no good for video, file, backup server. You get the "overclocking" ability though. I doubt how practical is overclocking into so small space, probably to a handful of people. Teh board costs $185.
So, I would say $100 is better than $185, plus you get all the 6 SATA ports - priceless.
DarkStryke - Monday, December 31, 2012 - link
Not everyone who games wants to have a huge tower. I've built more then one system based around the silverstone FT03-mini that runs a 3750k / Z77 deluxe-i and a GTX 670.I bring mine to lan parties and people are amazed at the power in such a small box, and it's just as fast as any desktop single GPU alternative.
Ananke - Monday, December 31, 2012 - link
ASUS P8H77-I is a mini ITX board - the cheaper variant of the reviewed deluxe board. It costs $100.ggathagan - Wednesday, January 2, 2013 - link
I agree; the H77 makes much more sense for most ITX builds.I built a system with the P8H77-I, a GTX670 and the FT03-MINI.
I don't think the daughter card of the Z77 Deluxe would have fit in the case.
tramways - Monday, December 31, 2012 - link
I registered here because the reviewer is lamenting that some boards use the ALC889 instead of the ALC892 codecs.The 889 like the 882 before it and the 898 after it is a much better codec than the 892.
The 883,888,892 codecs are the cheaper low performance DAC/ADC chips.
I would buy a board with the ALC889 or preferably the ALC898,but not with the ALC892.
all the best in 2013
Paul
limki - Monday, December 31, 2012 - link
too bad I already ordered mine last week ... MSI Z77IAto tell the truth, i don't really mind [ at 136€ its a bit pricier than asrock with my supplier]
the conclusion for this board seems a bit biased to me
but hey, if you're not looking for a tiny powerhouse, you don't need z77
- in SUGO 05(and most small cases), MB is horizontally and PSU is above it, so cables and airflow will always be nasty
- using a discrete GPU, you don't care about not having DVI or DP
- no additional controller (USB/SATA) -> I don't plan on using more than 2(won't fit into case), so why bother?
//btw is the SATA 6/3/m correct 2+2? shouldn't be also 2+2+1?
- and if I'm to take the "military grade" stuff at least half seriously, ...
EnzoFX - Monday, December 31, 2012 - link
Do the post times include those pesky AHCI driver loading screen? I hate that it adds so much more to the boot process.