The ASUS X99 Rampage V Extreme ROG Review
by Ian Cutress on June 22, 2015 8:45 AM EST- Posted in
- Motherboards
- Asus
- ROG
- Haswell-E
- X99
ASUS Rampage V Extreme In The Box
For the products that attempt to encompass both gaming and overclocking in one big mental Venn diagram, the box contents should be aptly scrutinized. Any extra has to be suitable to both parties in order to optimize the value of the product, but also the extras have to introduce a community feeling should users want to take that route. Perhaps ASUS could sell a plain packaged Rampage V Extreme and it would sell just as well, but for buying the big bundle we get the following:
Driver CD
Manuals
Rear IO Panel
ROG OC Panel + ODD Bay Adapter
ROG Door Hanger
WiFi Antenna
Three Thermistors
Ten SATA Cables
Flexi-SLI Bridge
Flexi-CFX Bridge
Rigid 2-way SLI Bridge
Rigid 3-way SLI Bridge
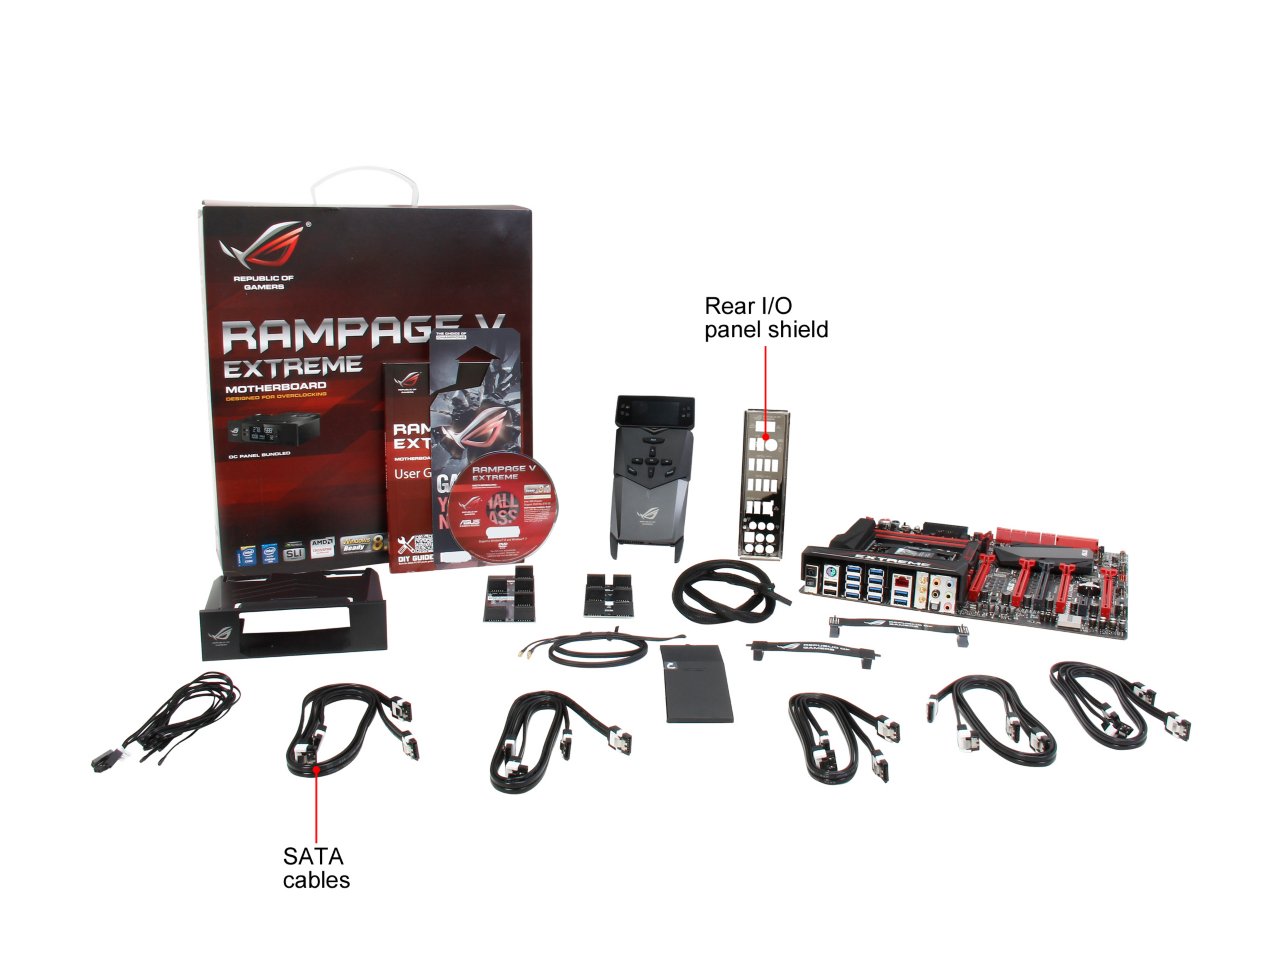
Being a multi-GPU gaming motherboard, it would have been a little naughty to not include 3 or 4-way bridges, but they are included. I’m surprised by the ten SATA cables, but then again as a high end motherboard you might expect the most and more of it. ASUS is pushing the thermal control by bundling three thermistor cables, otherwise users would have to source them elsewhere. Notice that there is no longer any ROG Connect cable bundled.
Many thanks to...
We must thank the following companies for kindly providing hardware for our test bed:
Thank you to AMD for providing us with the R9 290X 4GB GPUs.
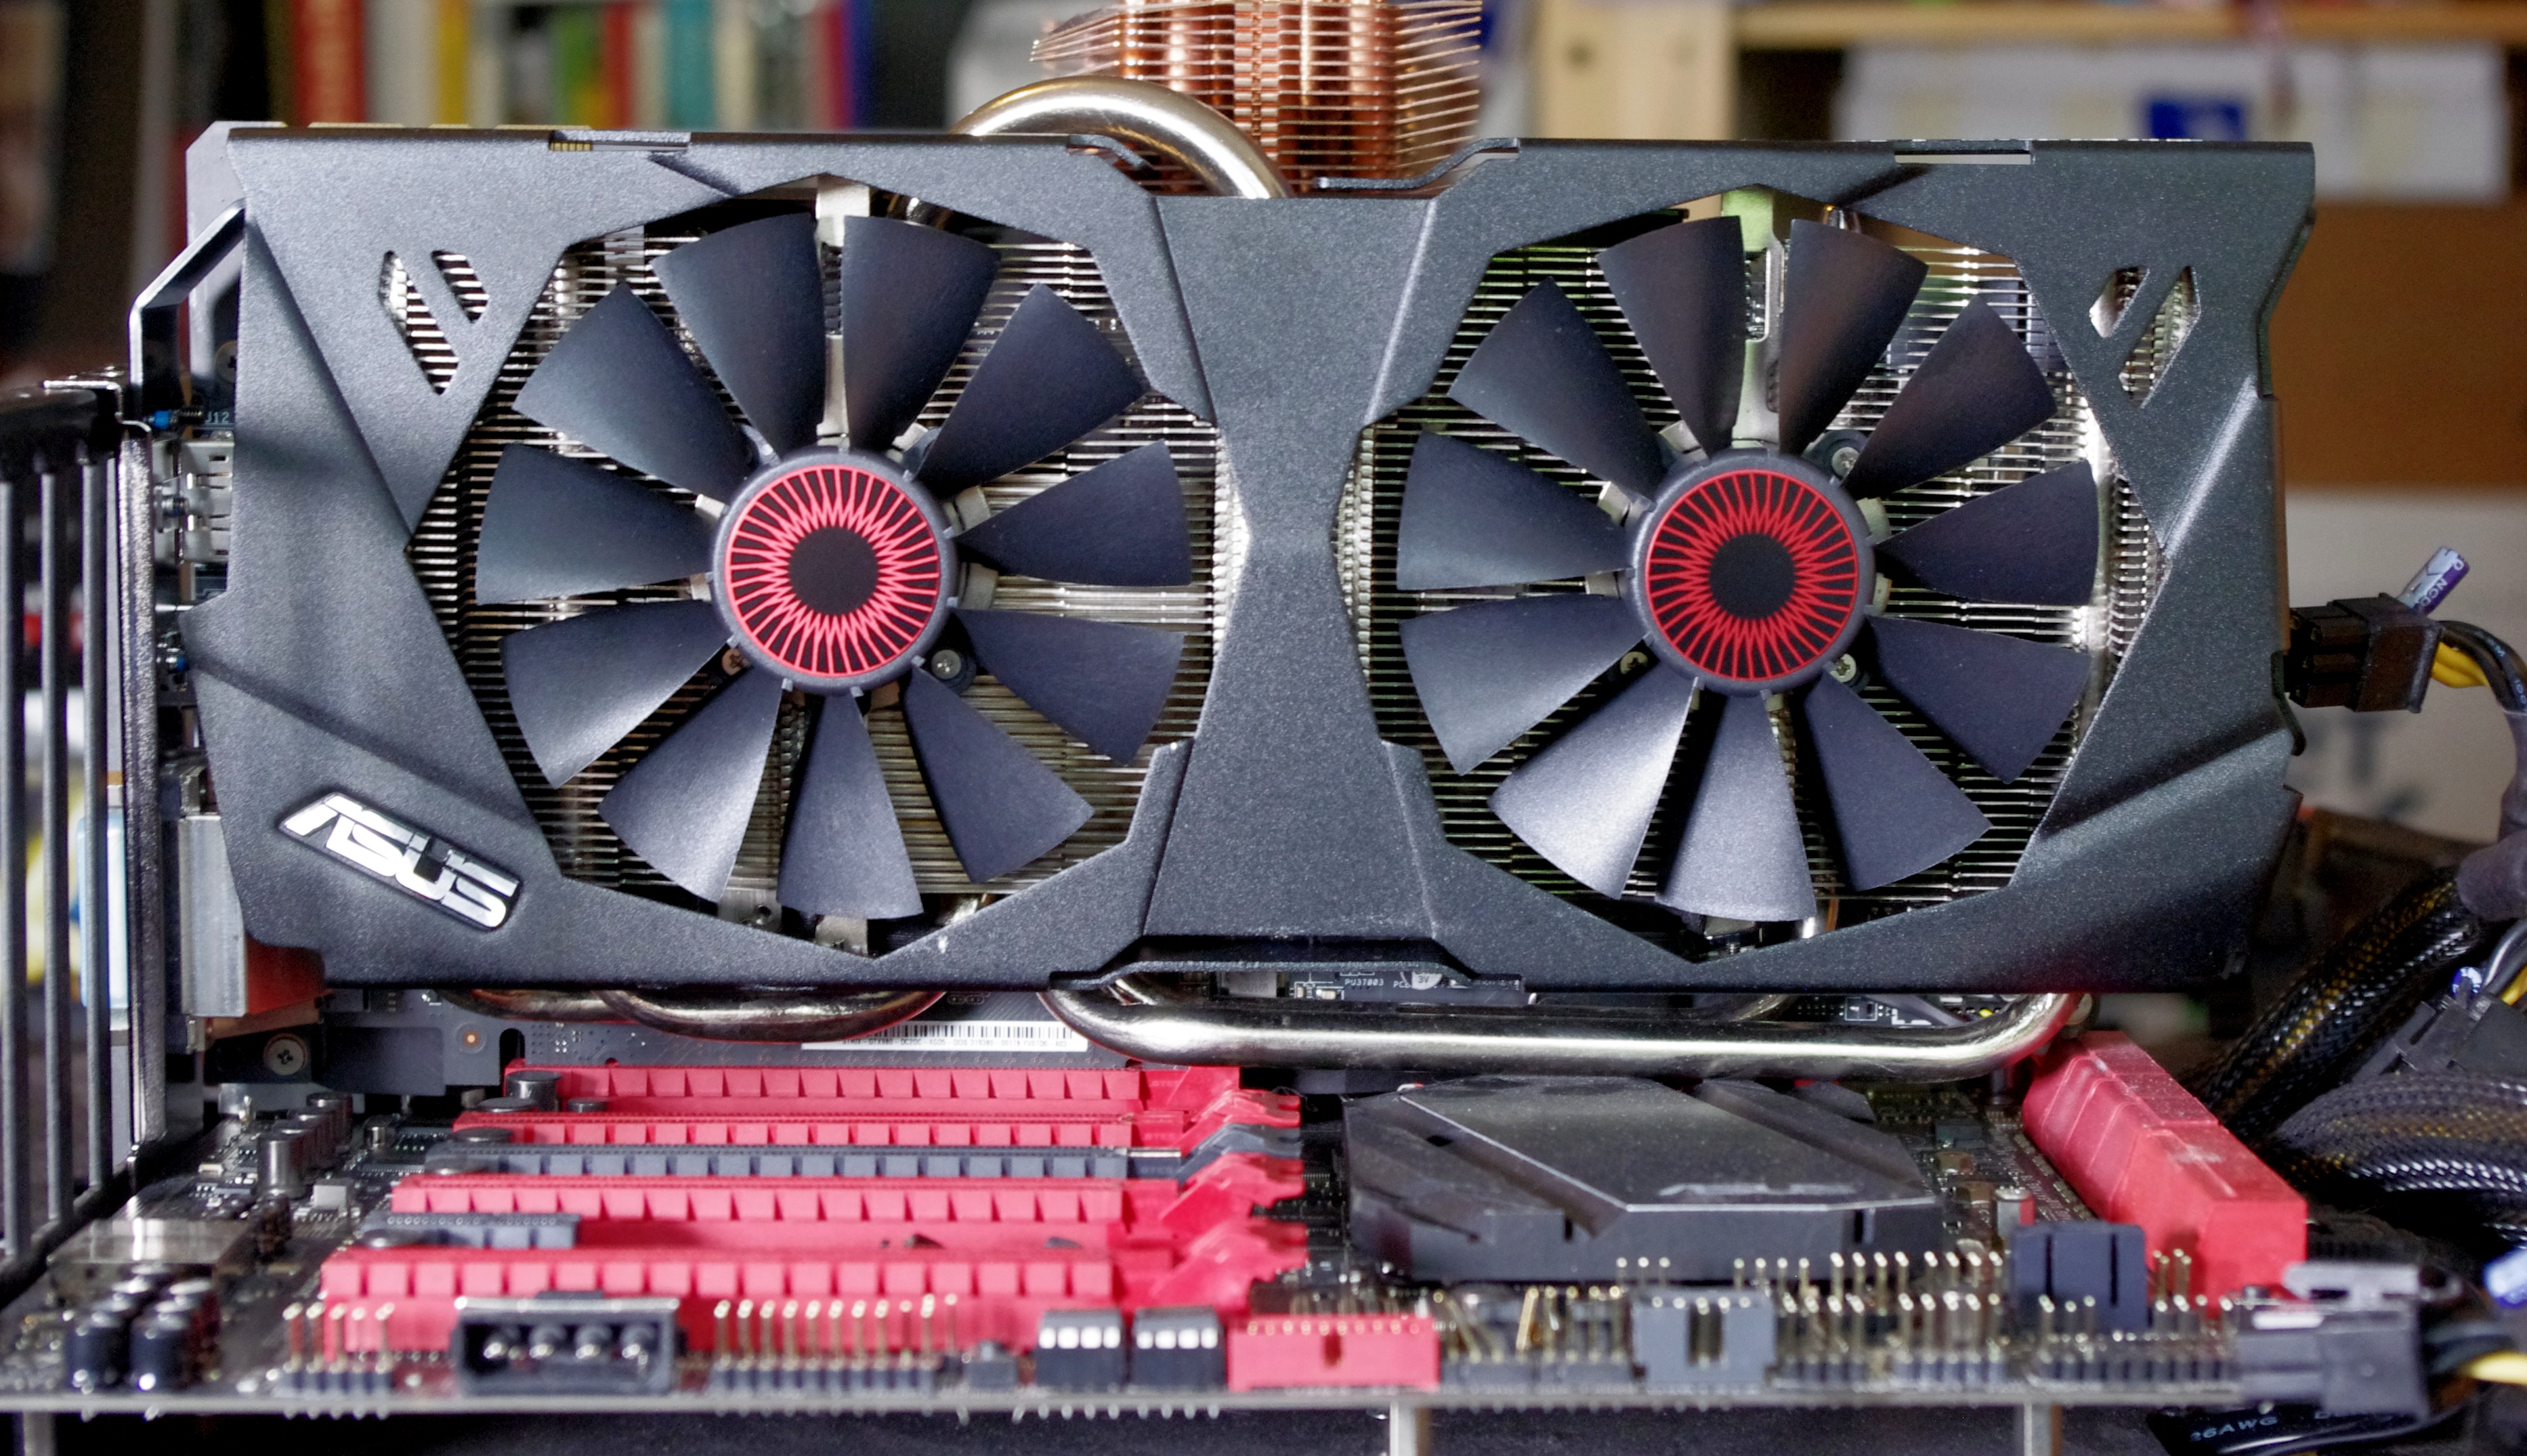
Thank you to ASUS for providing us with GTX 980 Strix GPUs and the R7 240 DDR3 GPU.
Thank you to ASRock and ASUS for providing us with some IO testing kit.
Thank you to Cooler Master for providing us with Nepton 140XL CLCs.
Thank you to Corsair for providing us with an AX1200i PSU.
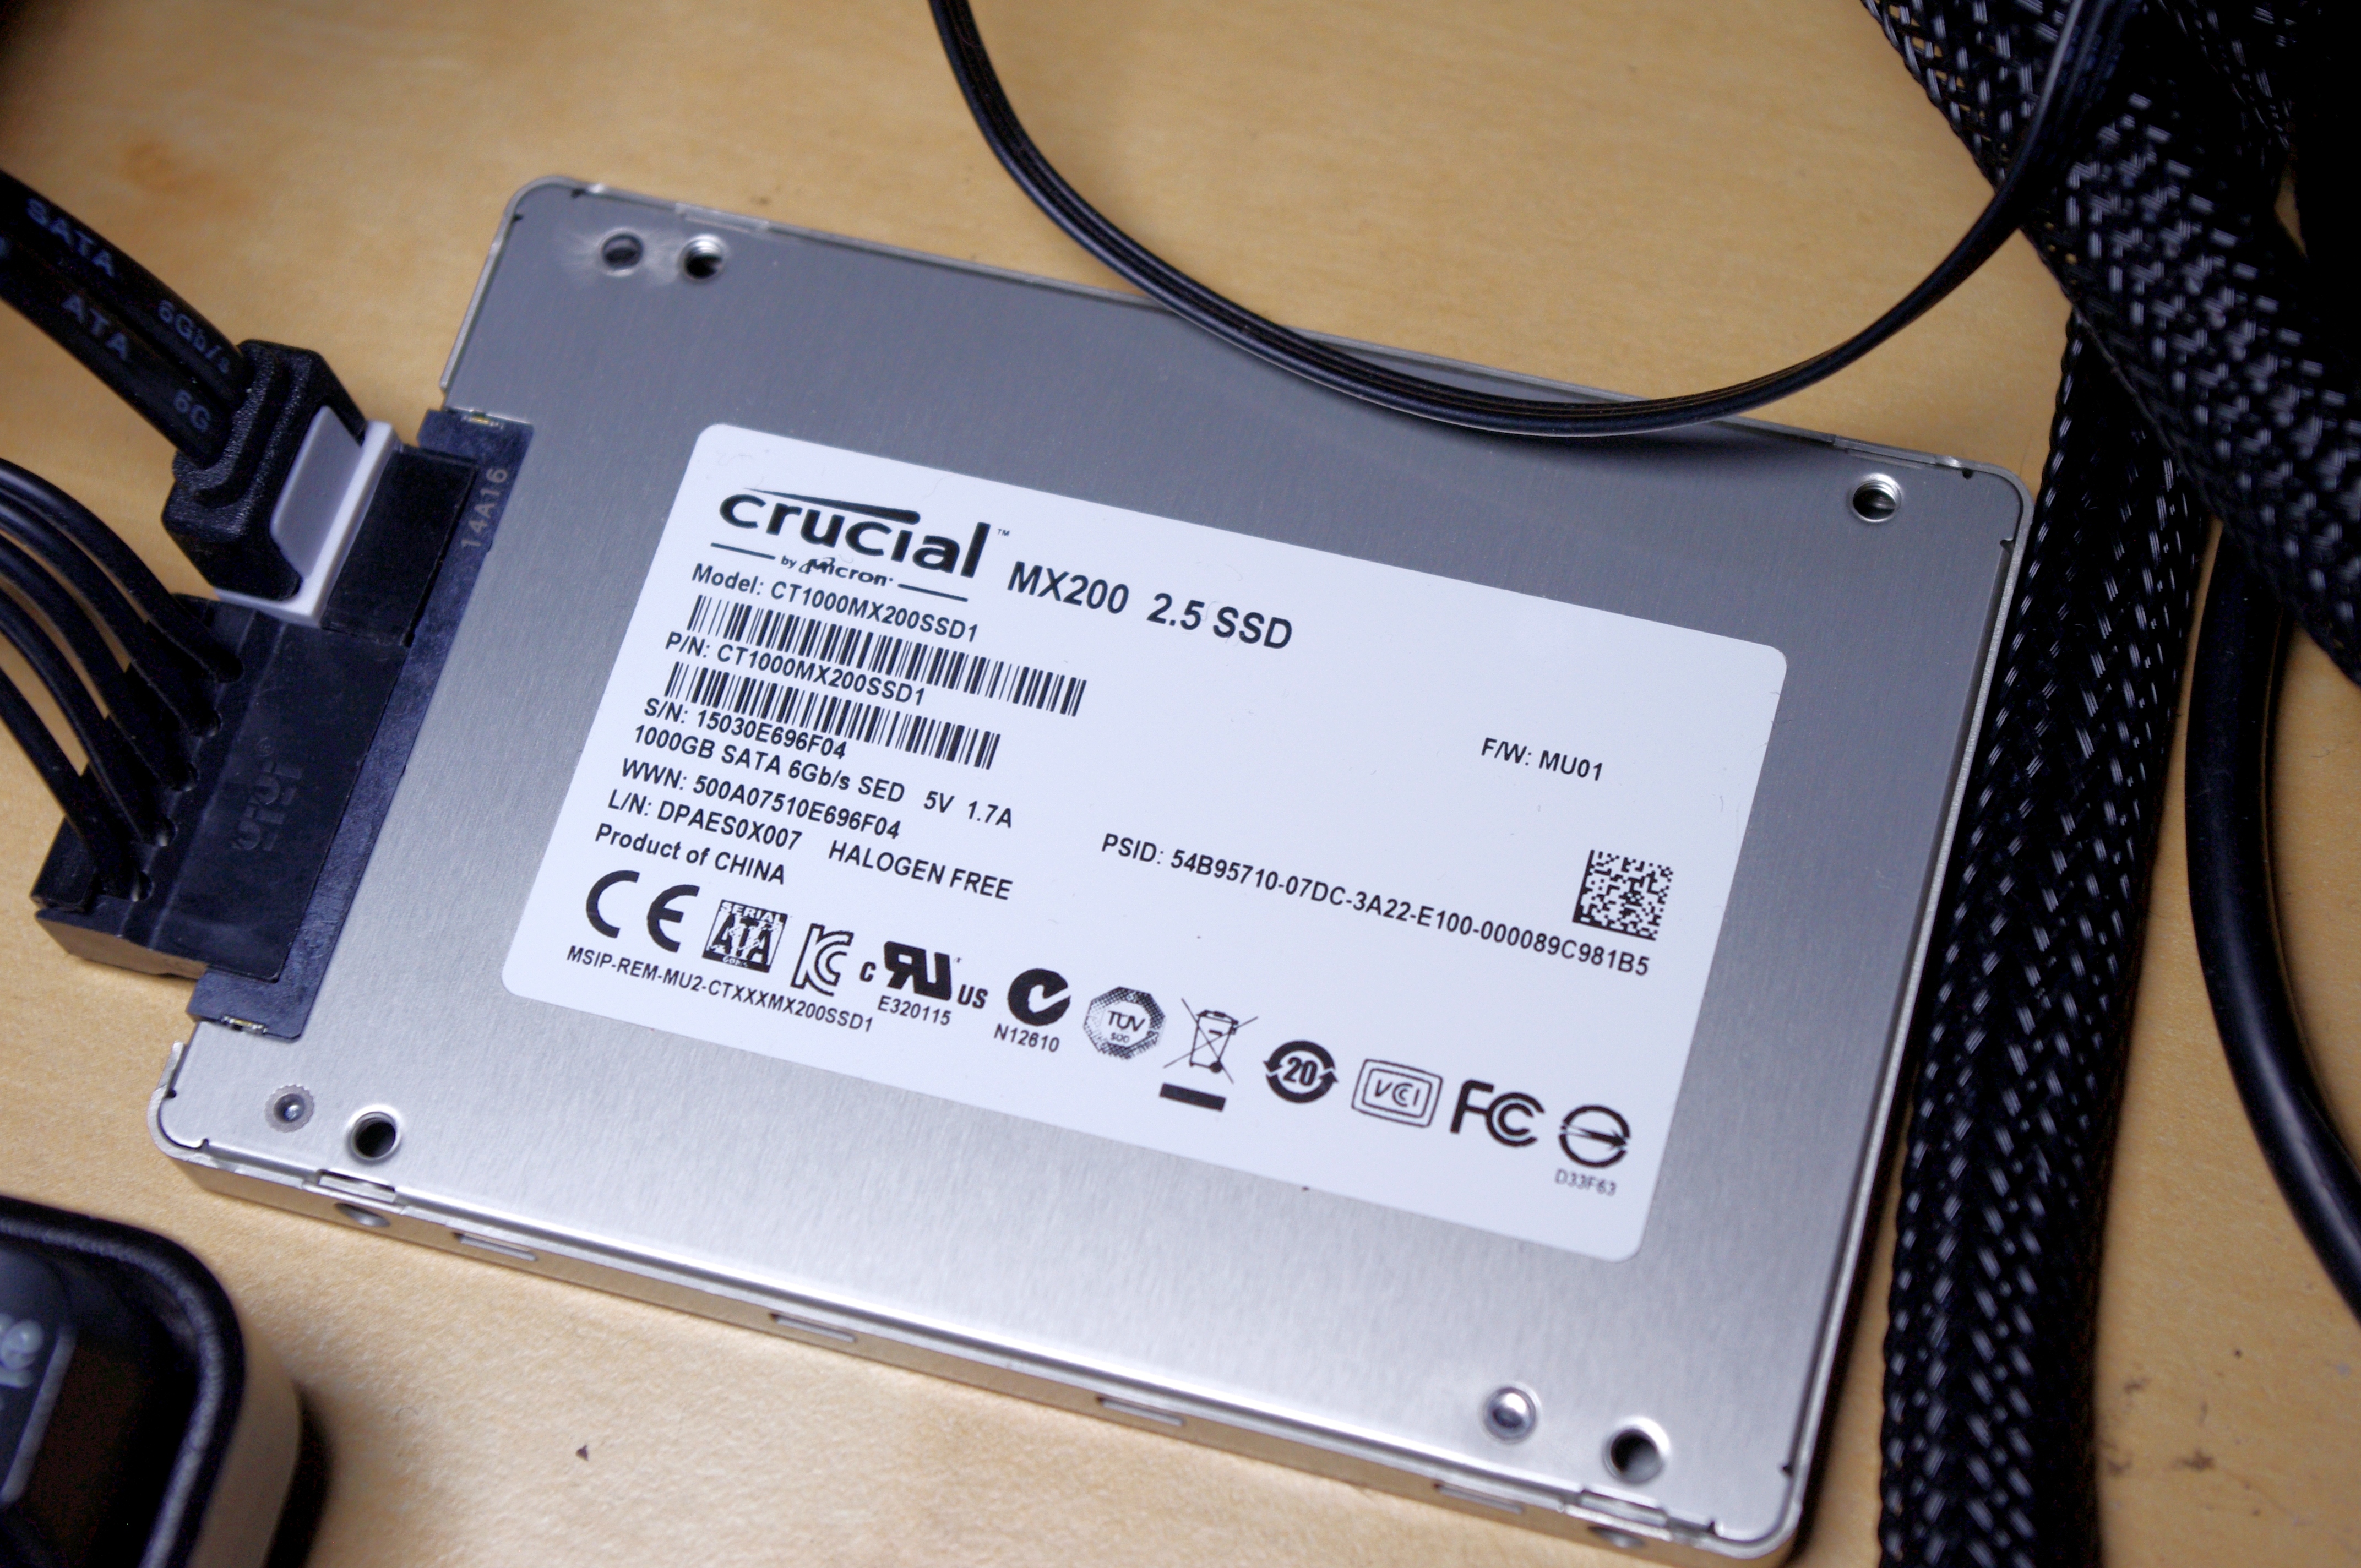
Thank you to Crucial for providing us with MX200 SSDs.
Thank you to G.Skill and Corsair for providing us with memory.
Thank you to MSI for providing us with the GTX 770 Lightning GPUs.
Thank you to OCZ for providing us with PSUs.
Thank you to Rosewill for providing us with PSUs and RK-9100 keyboards.
For our 2015 testing, I must give shout-outs to a couple of companies for providing us with test bed equipment.
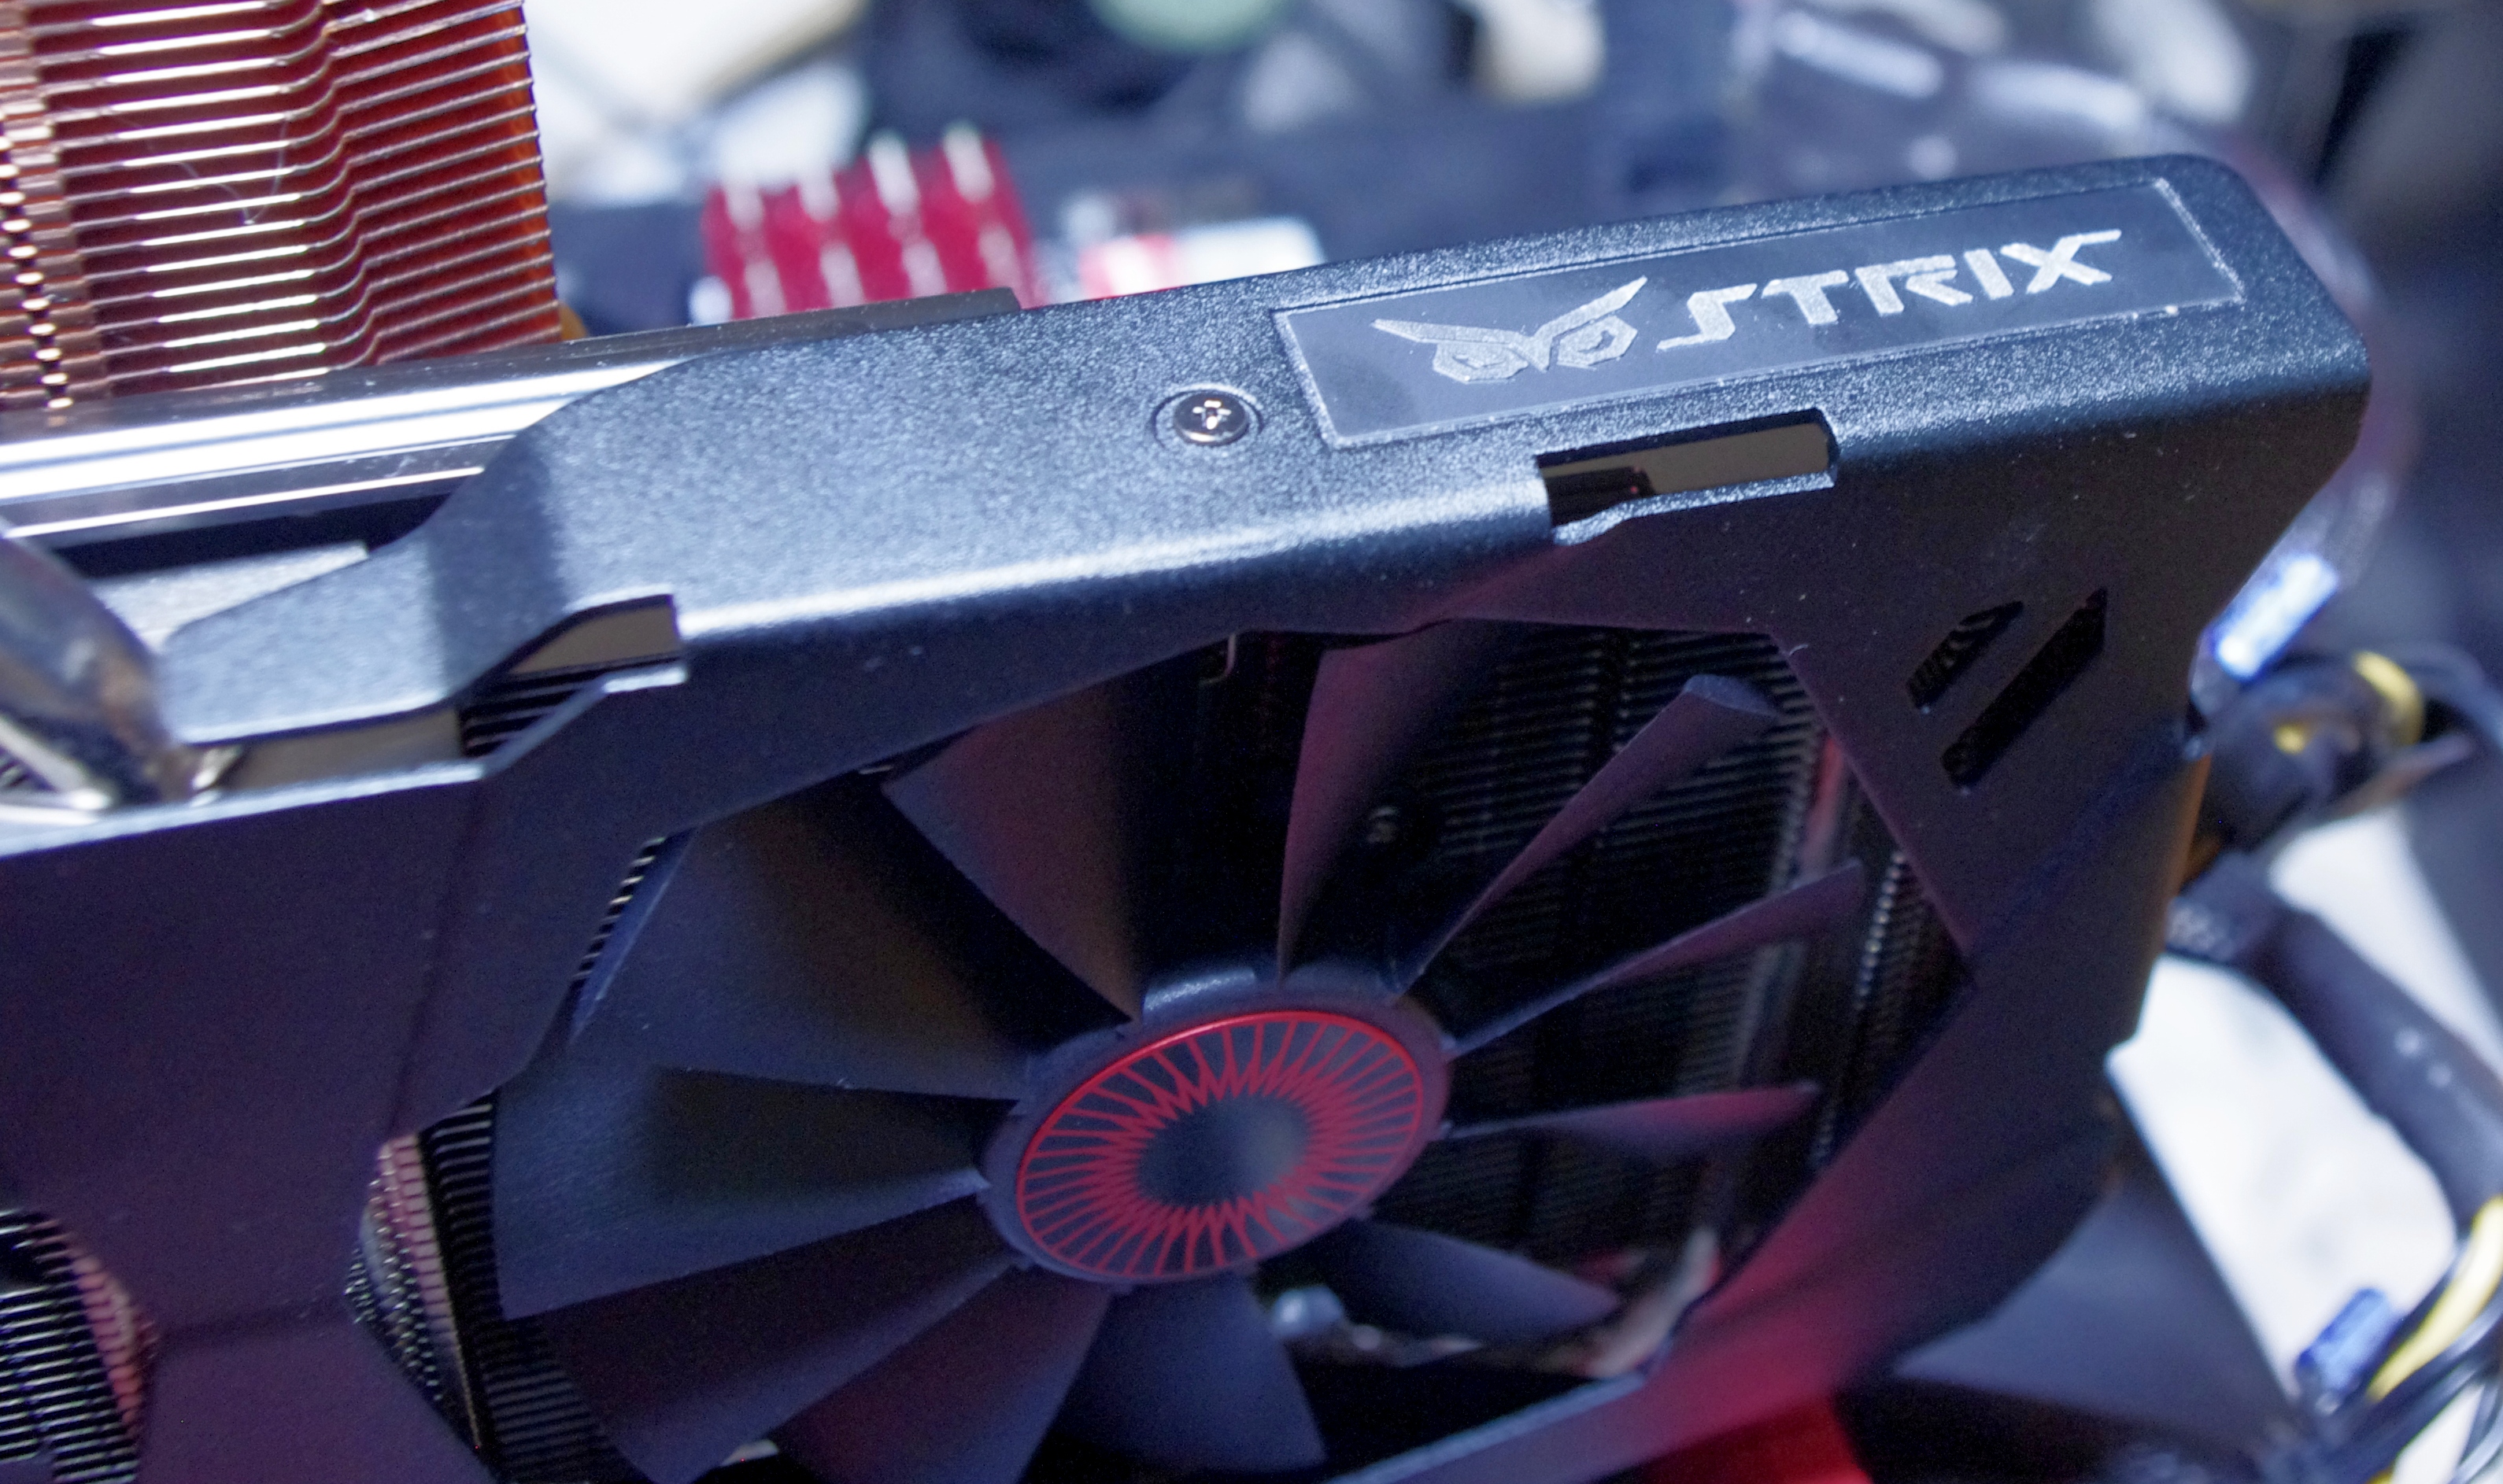
First up is ASUS, who sourced us three of their GTX 980 Strix 4GB cards. The GTX 980 sits second in the NVIDIA graphics card stack below the Titan X, but each card is designed to push gaming to the maximum settings in single monitor scenarios. Specifically with the Strix, ASUS is targeting it more along their mainstream line, compared to some of the highly overclocked cards, but the feature I like is the fact that the fans do not spin until some serious graphics rendering is required. Sitting on the test bed it almost seems odd to be doing most of the desktop oriented benchmarks and have the fans for the graphics card not spinning. Two fans per card and large heatpipes help with heat distribution, and the GTX 980 Strix can be picked up at Amazon or Newegg for around $550 a piece.
Since I started reviewing as the Senior Editor for AnandTech back in 2011, some of the first samples I received were SSDs from OCZ for our testbeds. These have been rocksteady since then, but due to our new gaming regimen, 128GB for an OS drive and 128GB for a benchmark drive started becoming too little. After meeting with Crucial at CES this year, they volunteered four of their highest capacity 1TB MX200 SSDs which we partition into 250GB/750GB segments. This suits our 300GB gaming suite just great, as well as room for expansion in the future. The MX200 builds on the success of the MX100, with Kristian’s recent review highlighting its features. The drives currently retail for around $110 for 250GB, $200 for 500GB and $427 for the 1TB model.
Test Setup
| Test Setup | |
| Processor | Intel Core i7-5960X ES 8 Cores, 16 Threads, 3.0 GHz (3.5 GHz Turbo) |
| Motherboards | ASUS Rampage V Extreme (X99) |
| Cooling | Cooler Master Nepton 140XL |
| Power Supply | OCZ 1250W Gold ZX Series Corsair AX1200i Platinum PSU |
| Memory | Corsair DDR4-2133 C15 4x8 GB 1.2V or G.Skill Ripjaws 4 DDR4-2133 C15 4x8 GB 1.2V |
| Memory Settings | JEDEC @ 2133 |
| Video Cards | MSI GTX 770 Lightning 2GB (1150/1202 Boost) ASUS R7 240 2GB |
| Hard Drive | Crucial MX200 1TB |
| Optical Drive | LG GH22NS50 |
| Case | Open Test Bed |
| Operating System | Windows 7 64-bit SP1 |
ASUS Rampage V Extreme Overclocking
Experience with ASUS Rampage V Extreme
The Extreme has always been about overclocking, and thus for the casual gamer ASUS provides both the Turbo Processing Unit (TPU) physically on the motherboard and CPU Level Up in software for an easier method to get to 4.0-4.4 GHz.
Options are expanded in software for enthusiasts, though for the meat of the pie you have to go into the BIOS. With LN2 mode enabled, sub-zero and competitive coolers should be satisfied with the level of options. Here's where we perform our manual overclocking tests. Extreme users can also equip the OC Panel which allows for voltage, multiplier and base frequency adjustments on the fly.
On the whole, our experience with the Extreme was reasonable in auto overclocking but manual settings somehow gave our mediocre CPU a not-so-impressive result. I double checked with both of our processors which are almost as bad as each other, but I wasn't able to gain anything secret through the system. We are using the Extreme in our DDR4 memory reviews (keep an eye out for those) and we've already seen DDR4-2133 at CL9 and some other modules at DDR4-3333, meaning it can stretch its legs in that regard.
Methodology
Our standard overclocking methodology is as follows. We select the automatic overclock options and test for stability with PovRay and OCCT to simulate high-end workloads. These stability tests aim to catch any immediate causes for memory or CPU errors.
For manual overclocks, based on the information gathered from previous testing, starts off at a nominal voltage and CPU multiplier, and the multiplier is increased until the stability tests are failed. The CPU voltage is increased gradually until the stability tests are passed, and the process repeated until the motherboard reduces the multiplier automatically (due to safety protocol) or the CPU temperature reaches a stupidly high level (100ºC+). Our test bed is not in a case, which should push overclocks higher with fresher (cooler) air.
Overclock Results
Since we have started reviewing X99 motherboards, I have had three i7-5960X CPUs. The first one, CPU1, was our better overclocking sample but has gone the way of the dodo and lives in some version of a silicon afterlife. I think it went where all the calculators go. The second CPU, CPU2, is a really bad overclocker so we use that for mildly overclocked DRAM testing. When CPU1 went belly up, we immediately sourced a third CPU. After testing CPU3 on a number of motherboards, it wasn’t much better than CPU2. But with the Rampage V Extreme, we tested CPU3 first:
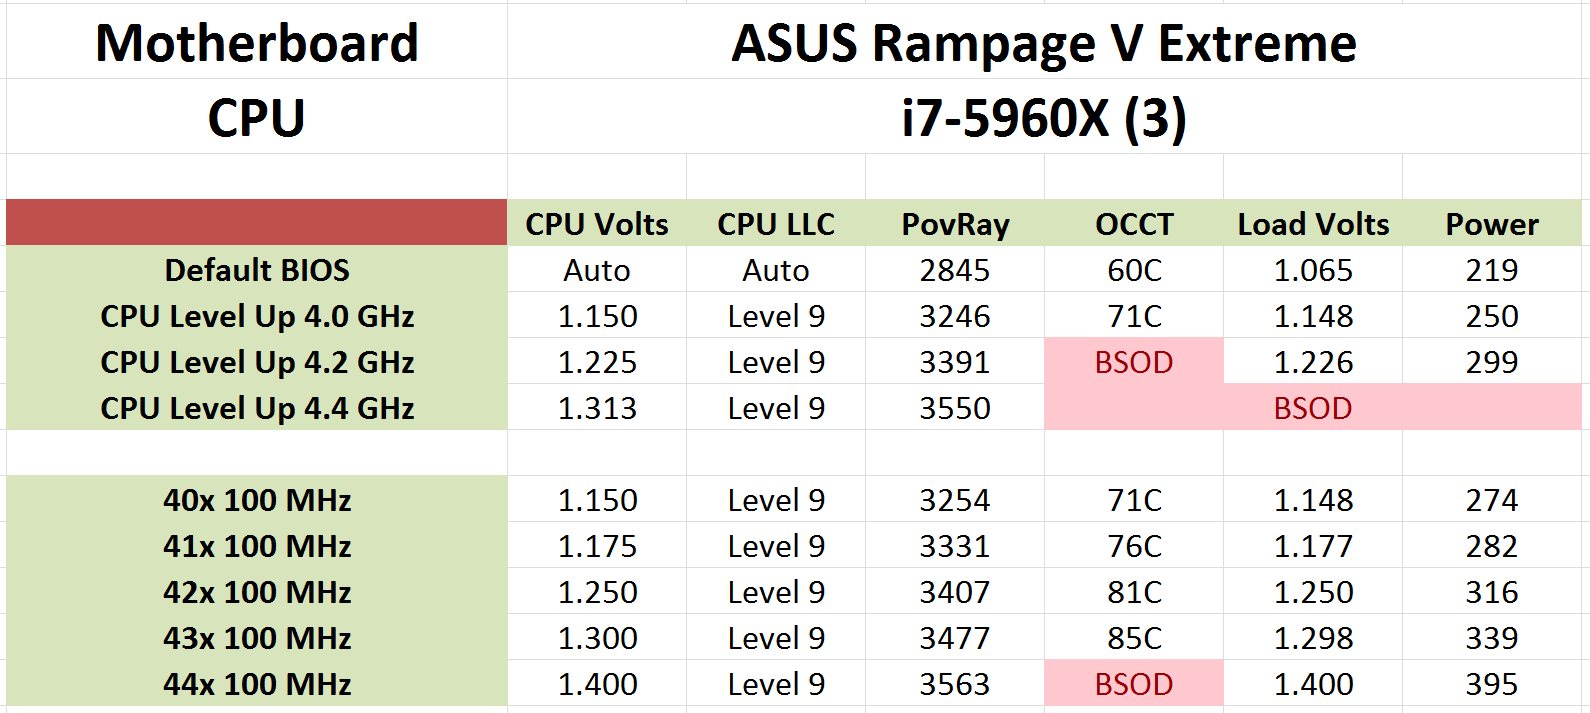
Performance wasn’t anything spectacular, by virtue of the poor CPU, but my initial response was for at least 4.4 GHz. I also thought I had put in the wrong CPU to test, but I then put in CPU2 and got worse:
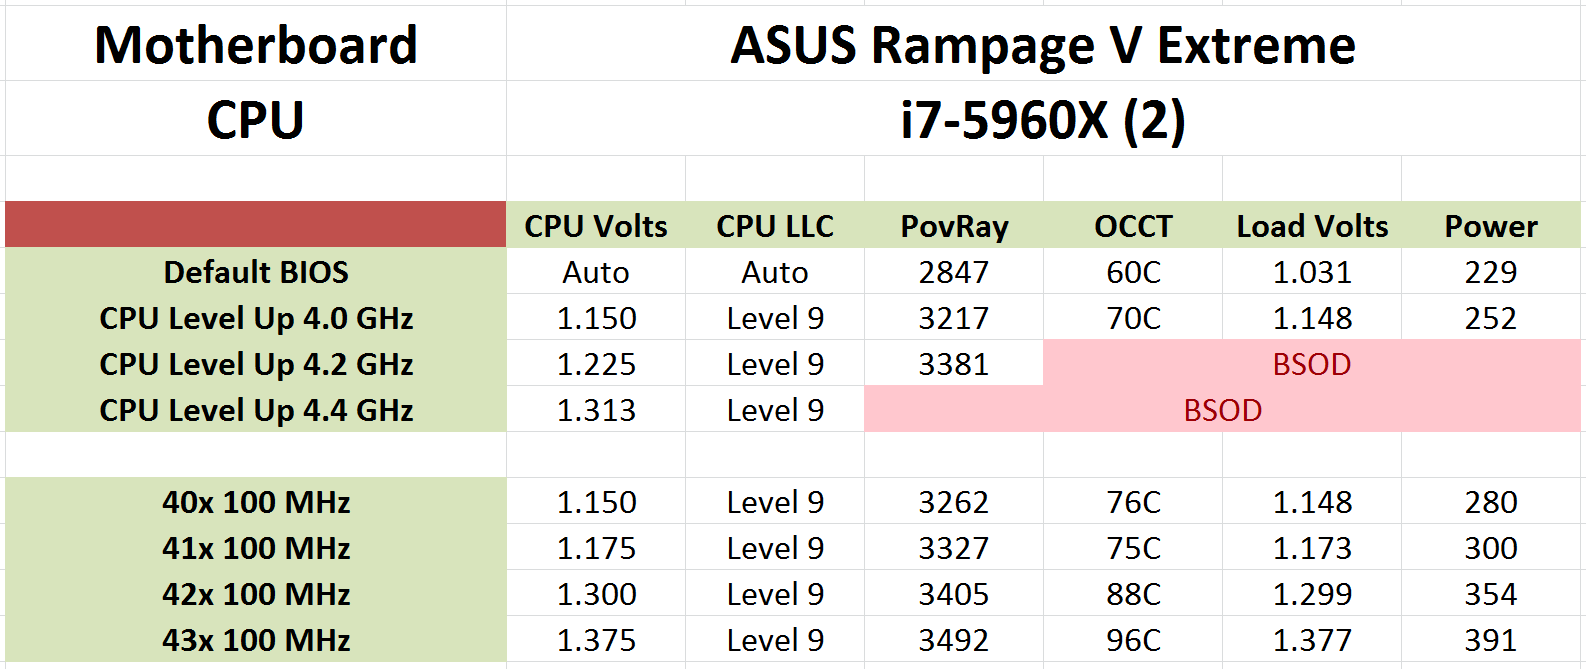
This isn’t a knock at the Rampage V Extreme, but my CPUs are pretty bad. In most boards CPU3 gets 4.3-4.4 GHz, so we can only point to the fact that our voltage was a little higher in the RVE than other boards, resulting in an overheat/BSOD during our high CPU stability test. Perhaps I should build a cold box, or move to Canada/Finland – it might be worth a few MHz here and there.


41 Comments
View All Comments
Malahmen - Friday, January 27, 2017 - link
I would like to warn you on this one.You can't even run a single GPU + a m.2 on that board with a 5820k because it has 28 lanes.
The board disables the 4th PCIe slot, which is shared with the m.2 slot, so no m.2 slot as soon as the bios takes over.
bottom line, you might boot from a pen drive, start to install your SO on the ssd, but after restarting, the bios wont detect the ssd (so you wont be able to select it as boot drive) because detecting your cpu, the board will shut the 4th PCIe (and your m.2 slot).
You might be able to do that with a 5930k though.