Intel Z87 Motherboard Review with Haswell: Gigabyte, MSI, ASRock and ASUS
by Ian Cutress on June 27, 2013 8:00 AM EST- Posted in
- Motherboards
- Intel
- MSI
- Gigabyte
- ASRock
- Asus
- Haswell
- Z87
- Shark Bay
- Lynx Point
ASUS Z87-Pro Software
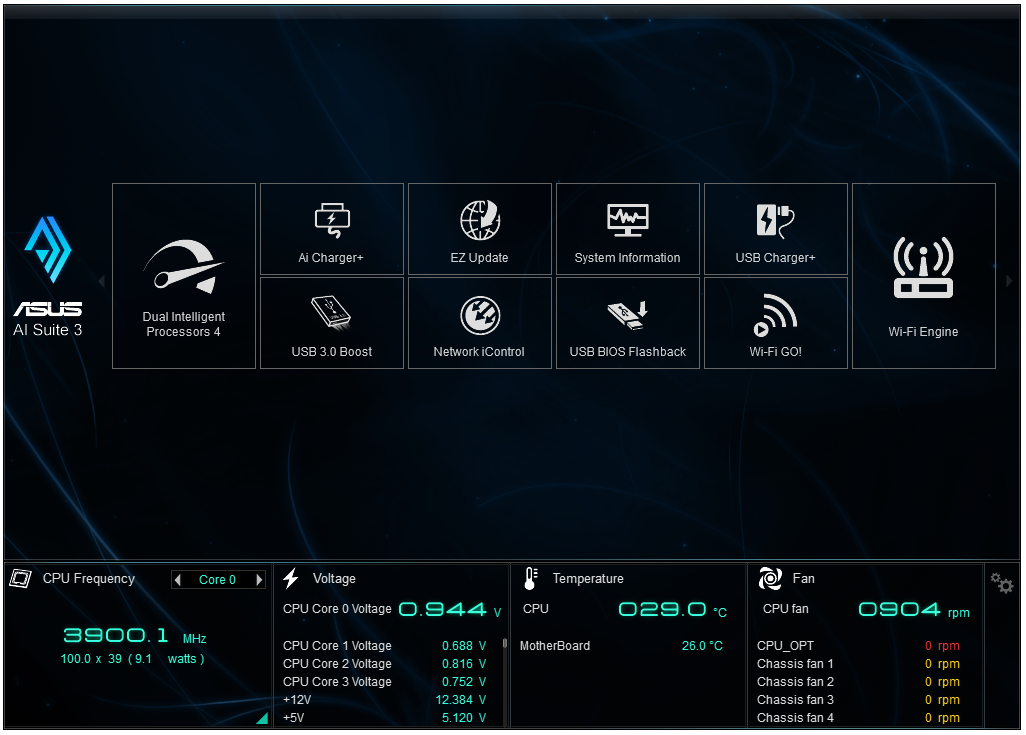
Z87 software updates seem to be a trend, and ASUS’ AI Suite gets a boost from the last generation. The number moves to AI Suite III, and the visuals are tuned to work with the new Dual Intelligent Processors IV on the motherboard itself. DIP4 is now an option to tune all areas of the system – TPU (Turbo), EPU (energy), DIGI+ (power control) and Fan Xpert 2 (fans).
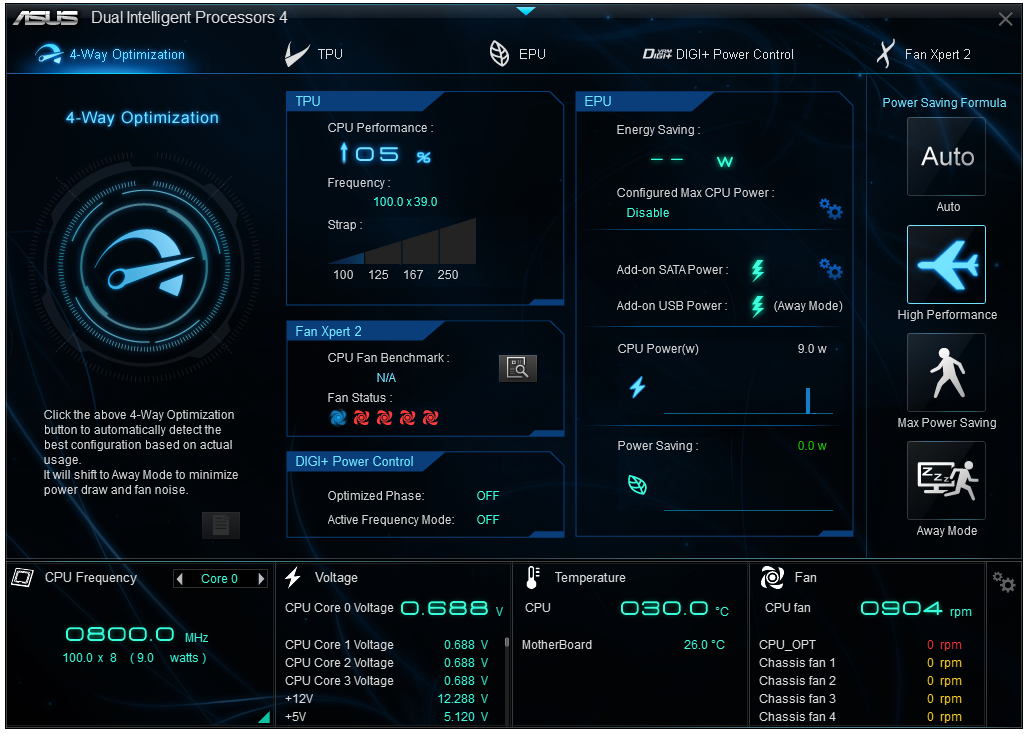
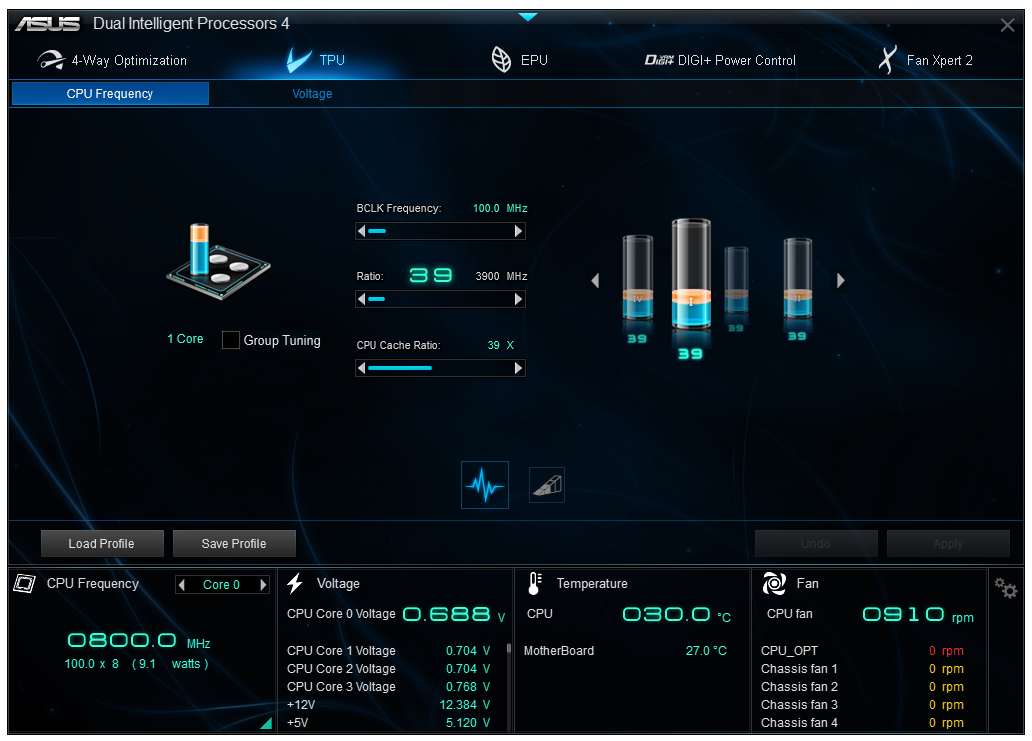
When the software is first loaded this is the main screen, offering a one button optimization tool on the far left as well as additional options for the extra modes on the right hand side, showing the results of some of the settings selected. At the bottom is a quick series of details about the CPU, voltage, temperature and fan controls. Ideally I would like to see the name of the motherboard being used, as well as the BIOS version and the CPU installed as well to make this info complete.
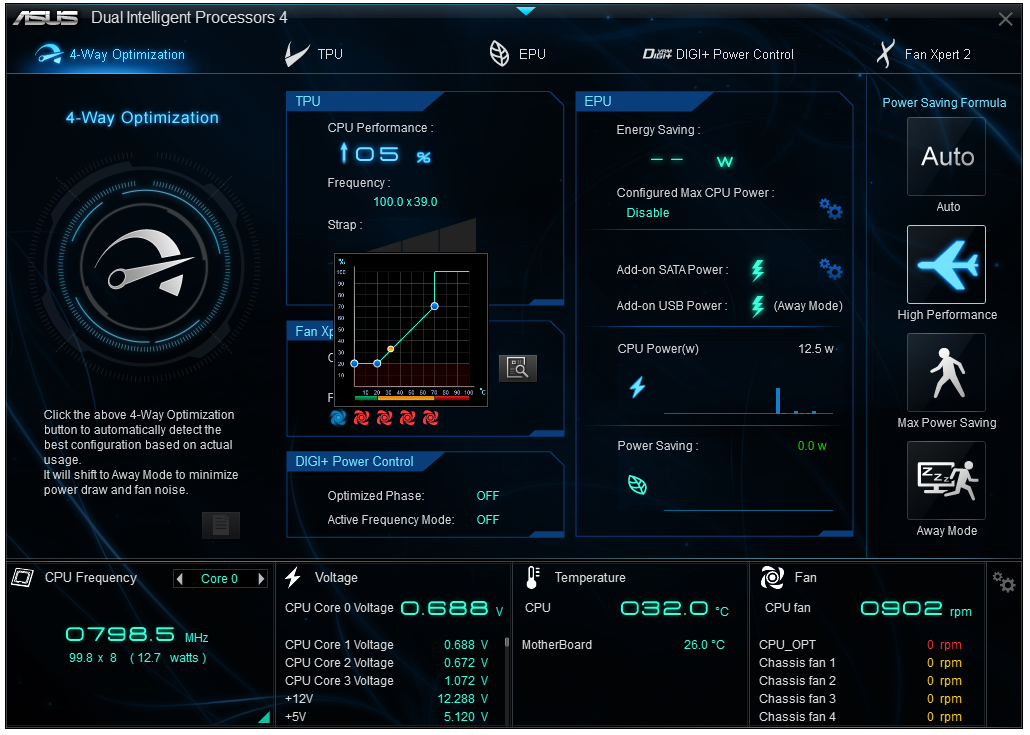
From this main screen each of the separate sections in its own small window has additional buttons to provide popups showing the settings, for example the fans:
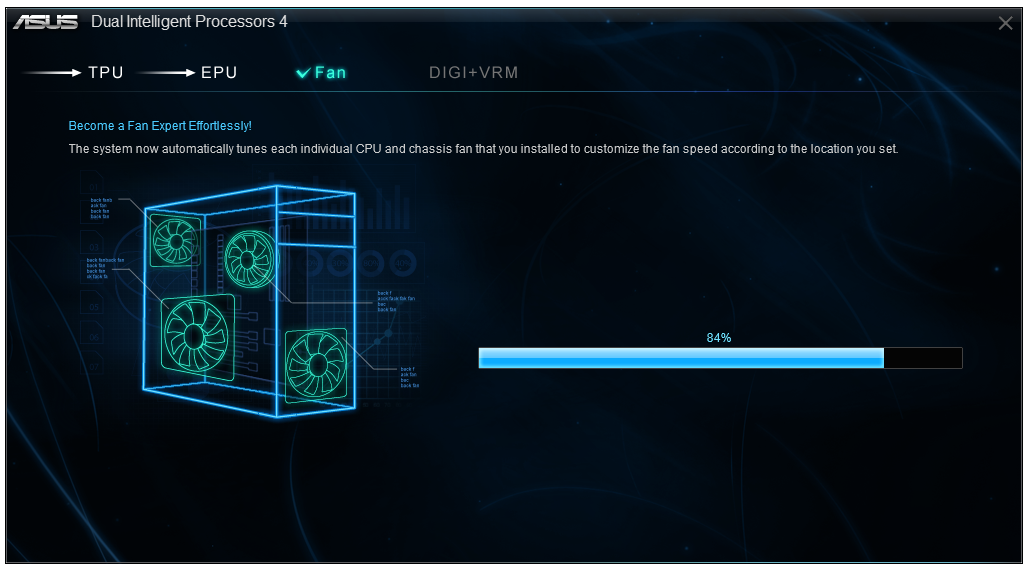
4-Way Optimization
The tool on the far left, when clicked, gives the user a set of additional options such that the 4WO can work effectively – such as labeling the location of fans, what settings to tune with the processor, and how to deal with energy saving and the fans themselves:
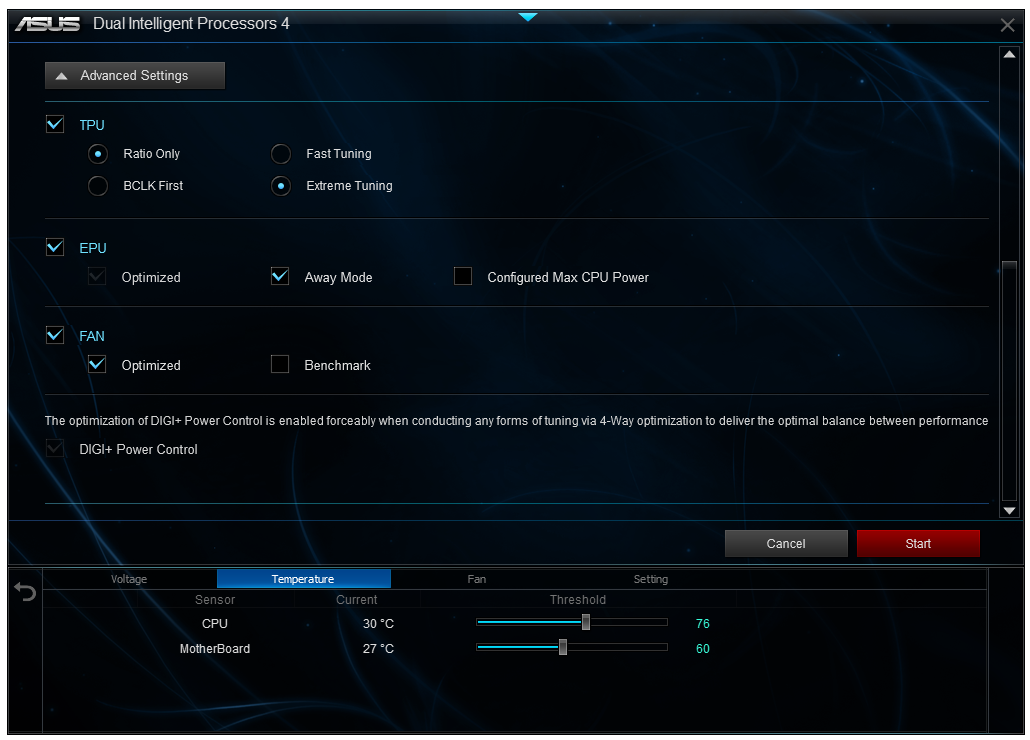
When enabled the system will test each part of the system to find a stable medium based on the advanced options. The system may need to reset once or twice to find the right default settings for the CPU overclock, whereby settings at boot time can dictate how far the system can be pushed.
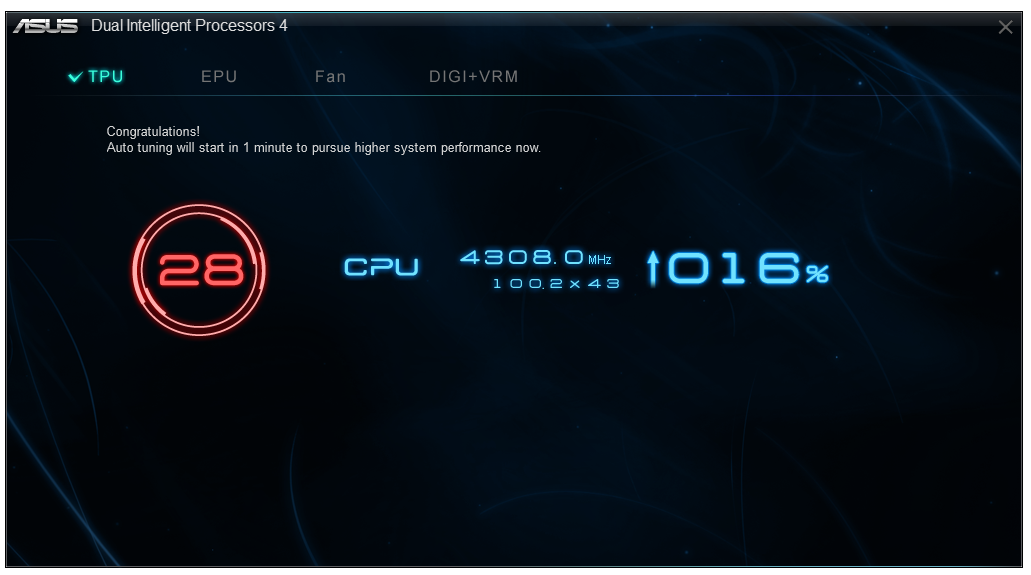
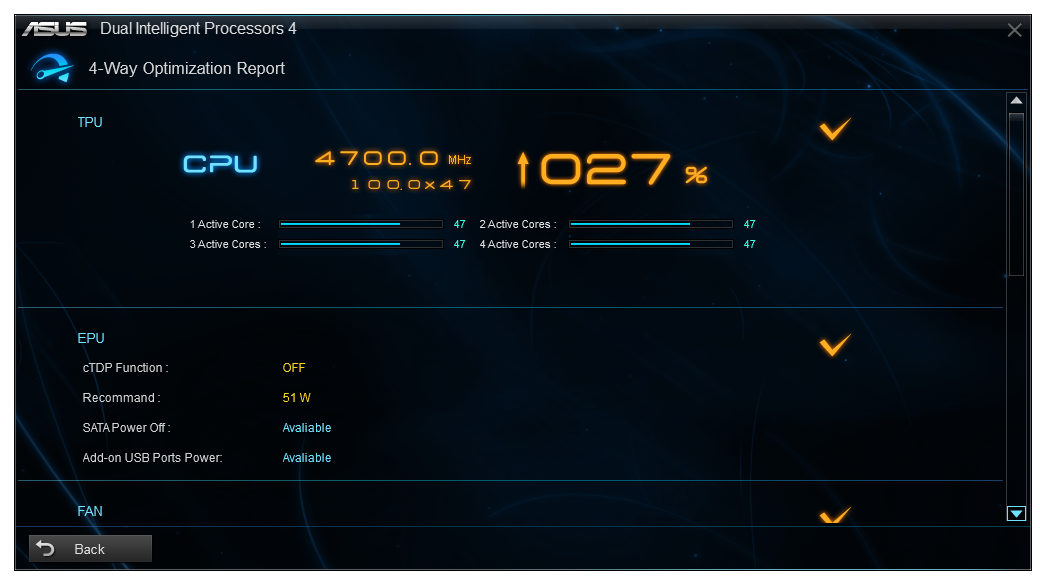
We will go more into the results of 4WO in the overclocking section.
TPU
For manual adjustments of overclocks, users need to head over to the TPU option. On the front screen we get basic options relating to BCLK, Ratio and CPU Cache Ratios:
But by clicking through to the voltage screen we get a more thorough option list on dealing with voltages.
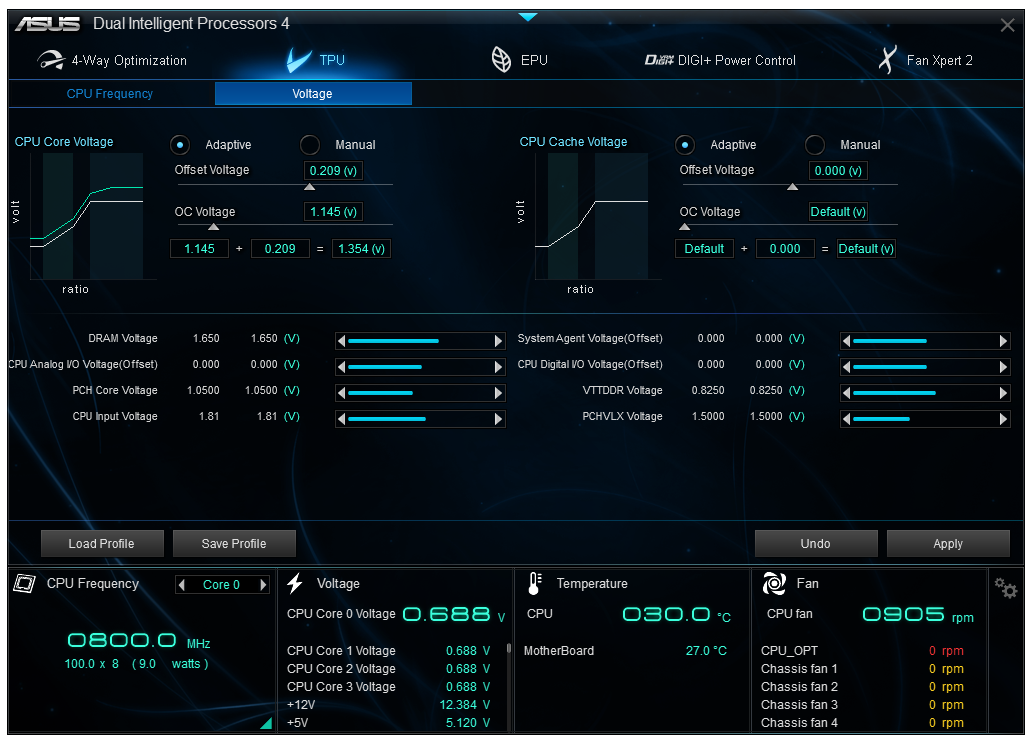
The best bits here are the graphs showing how voltage adjusts as the CPU moves in and out of power states. By adjusting the sliders for offset and OC voltages, the graph will change in various ways in order to respond to changes. What I would love to see, personally, is something like this in the BIOS, along with options for load line calibration. Obviously with OS software we have more to play with in terms of responsiveness, but I hope it can be moved into the BIOS to help overclockers.
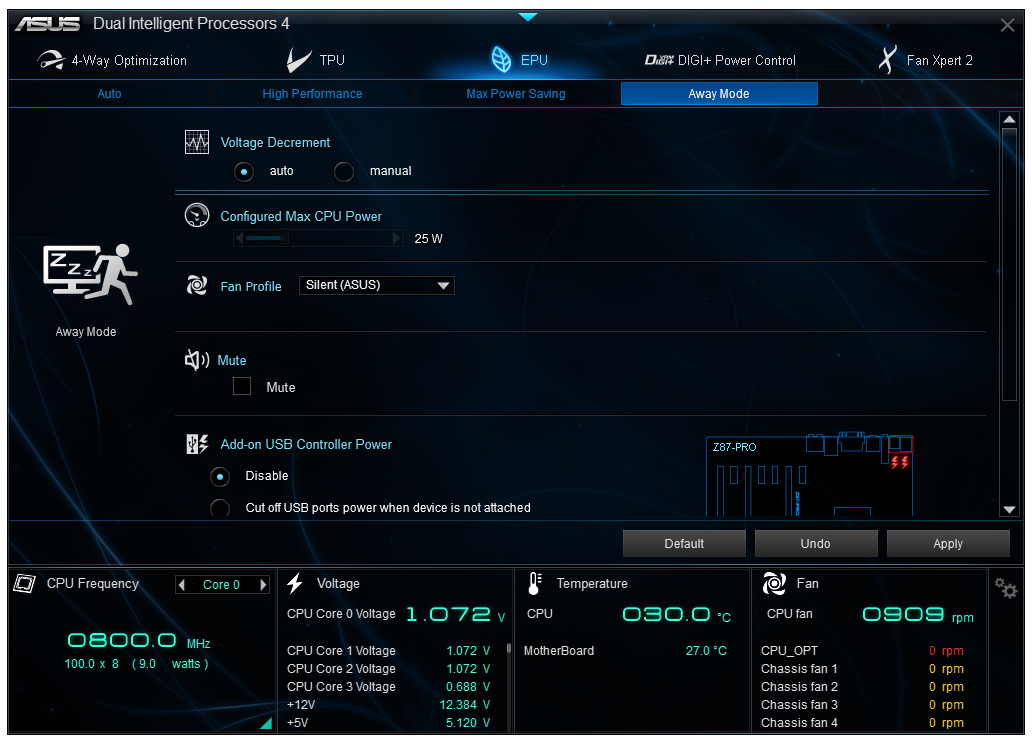
EPU
In the EPU section we can adjust features to save power, such as when to shut the monitor off, or configure maximum CPU power draw such that the CPU will push as much voltage and MHz only up to a limit. USB power states can also be managed, and fan profiles adjusted to draw less power.
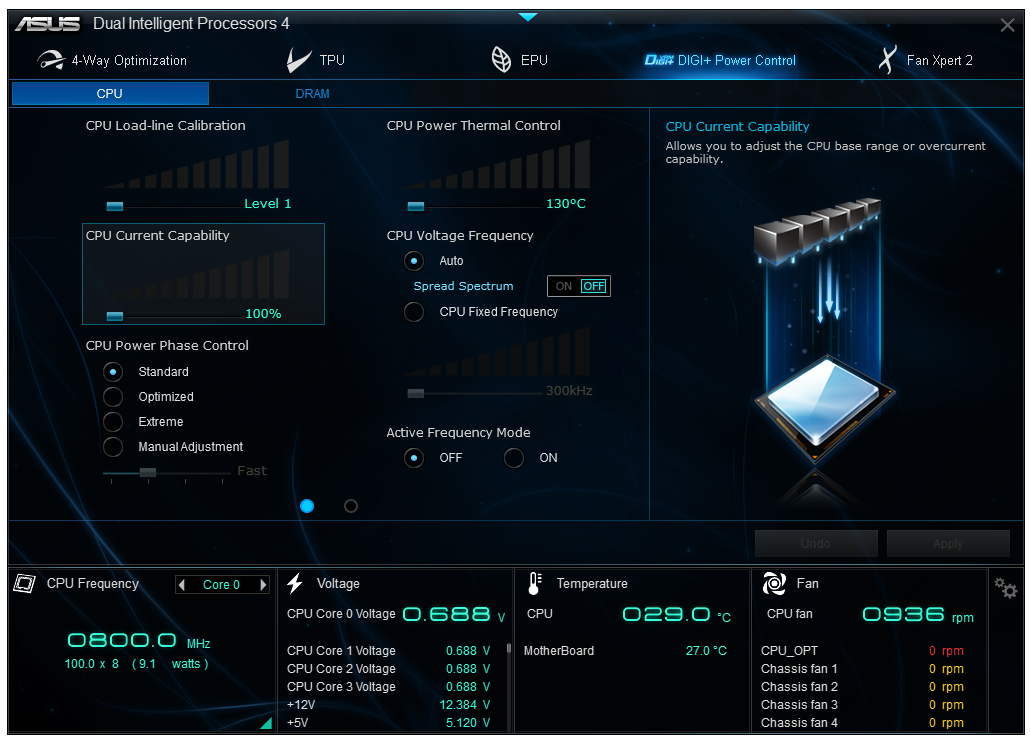
DIGI+ Power Control
As more manufacturers are jumping on the digital power bandwagon, it opens up options for the user to adjust how the power delivery of the motherboard reacts to requests for power and current. Most overclockers with some experience are used to discussing Load Line Calibration for dealing with voltages, but when pushing overclock limits it can help to give the power delivery an extra margin of headroom as not to limit the overclocks (as long as the user understands potential risks). ASUS were a prominent member in introducing digital power delivery options to consumers, and the DIGI+ Power Control in AI Suite 3 is the next step in presenting these options.
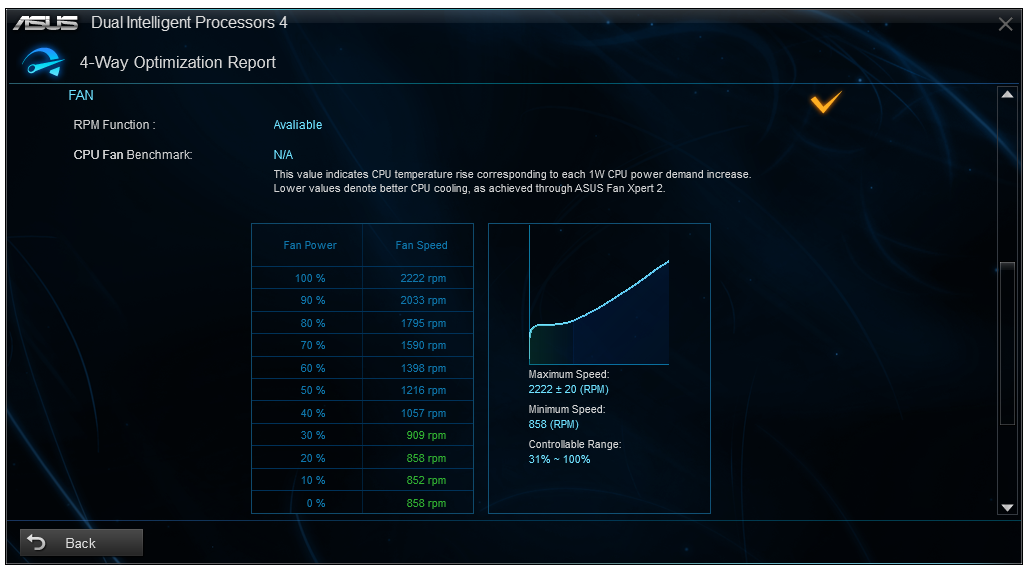
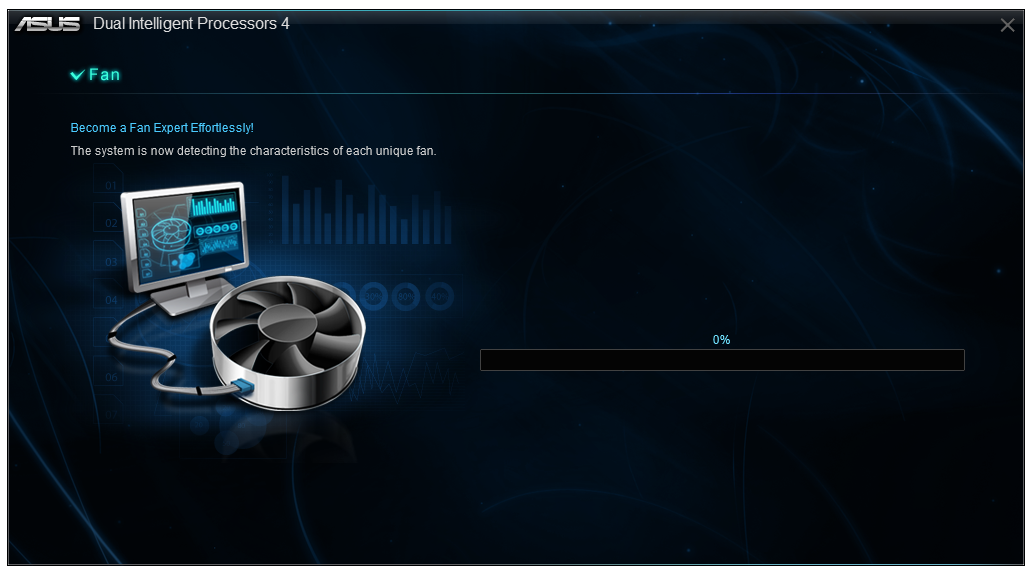
Fan Xpert 2
One of the major developments over the past 4 years of motherboards has been how to deliver the right level of fan controls to users. ASUS have been at the top of that game with Fan Xpert, and implementing it for AI Suite 3 gives users to look at fan profiles at-a-glance as well as offer predefined menu options for Silent, Standard, Turbo or Full Speed modes.

Coupled with this is an Auto Tuning option that tests the fan profiles to find the actual power-RPM profile of each fan connected to any header on board.
AI Suite Menu
By clicking on the pull down menu from above, users have access to the AI Suite 3 menu. This menu contains more of the regular options from the old version of AI Suite on Z77 – AI Charger+, EZ Update (now integrated), USB Charger+, USB 3.0 Boost, Network iControl, USB BIOS Flashback, Wi-Fi Go and Wi-Fi Engine.
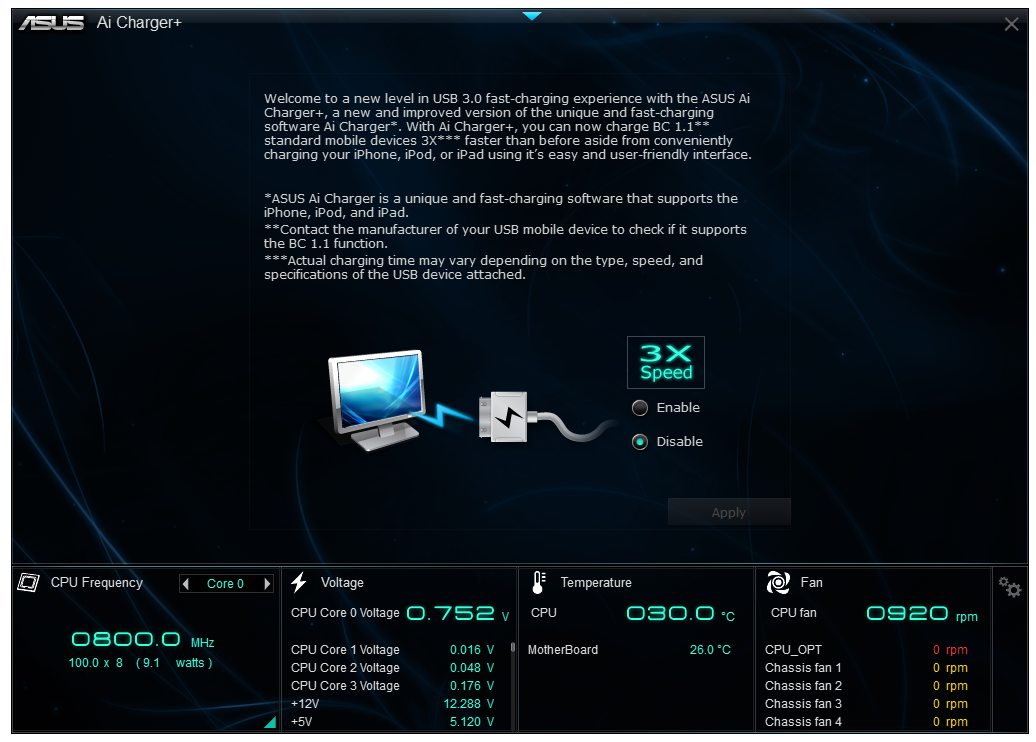
AI Charger+
With the USB Charging protocols there is a defined specification for varying amounts of current through a USB port. Typically a PC will adjust the current to ensure minimum working coherency and provide the best experience to keep the data stream intact. Unfortunately this means that the USB port does not know if you want to transmit data over a device or use the USB port purely as a charging device. Motherboard manufacturers, with the right set of controls, can force the USB port to provide more power than needed – this is the essence of AI Charger+. If your device that needs charging supports the BC 1.1 standard for mobile devices, this ASUS program will force USB 3.0 ports to triple their default current to enhance charging capabilities.
EZ Update
More motherboard manufacturers are coming to the realization that most users to not update the motherboard drivers above those found on the driver disk unless there is an immediate need due to errors or compatibility, and thus the user misses out on software and driver updates as they are improved. Having a software tool that automatically downloads and updates software/drivers is almost a mini-savior: one click and everything can be updated to the latest. MSI have had good success with the Live Update 5 software for several generations, and ASUS’ answer to this is EZ Update. EZ Update is designed to probe the ASUS servers for the motherboard being used for the most up to date software/drivers, and this is compared to a local inspection of the items, leaving any discrepancies up for download.
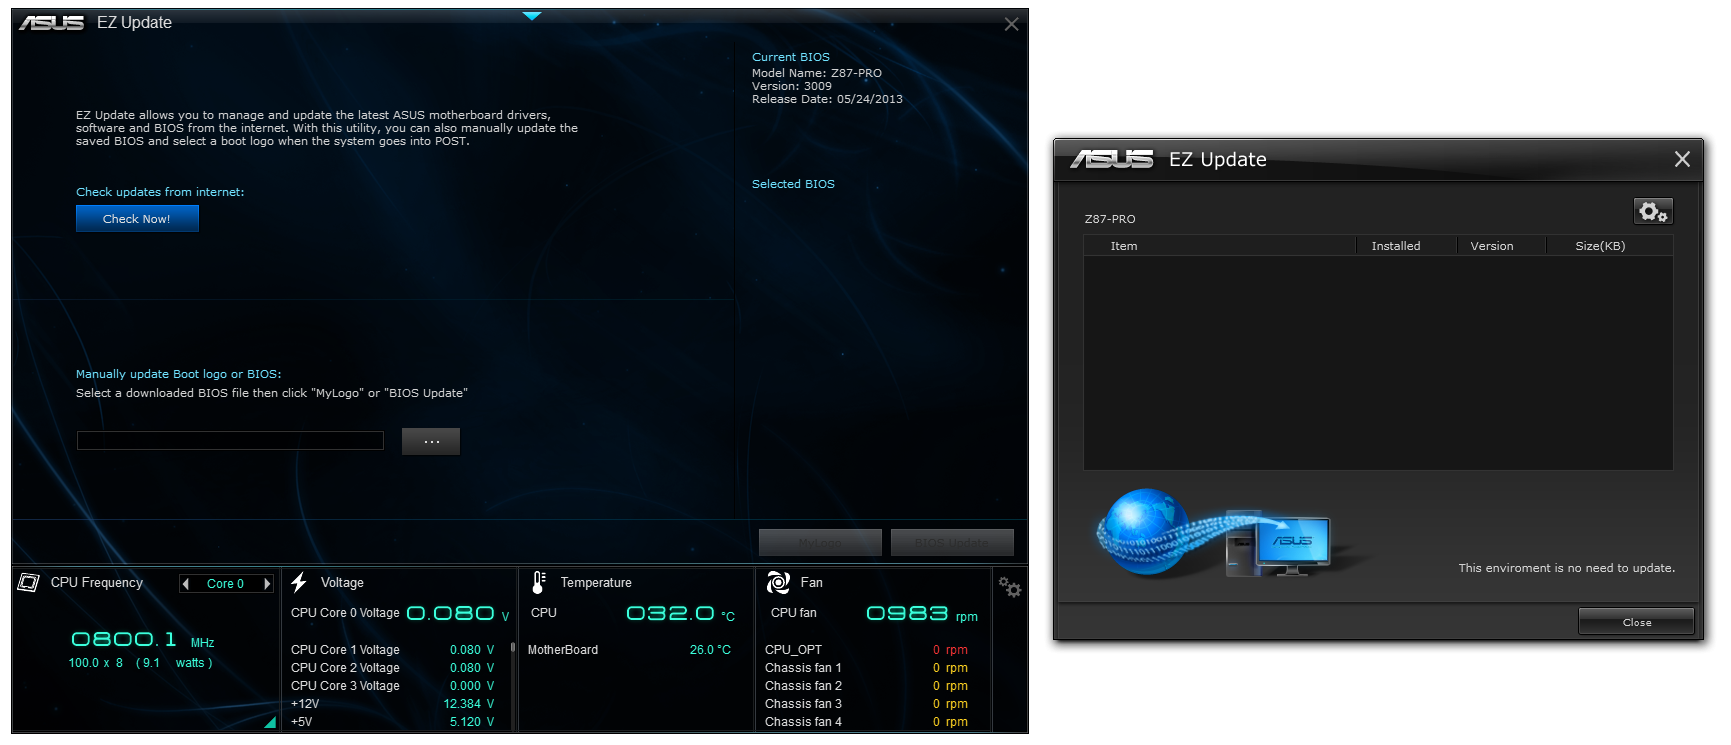
Unfortunately the tool with ASUS still exists more as an extra window tool rather than a part of AI Suite, and I am not sure whether it was because I was fully up to date or because I was testing this motherboard pre-launch, but I was offered no updates after a fresh install from my media sample.
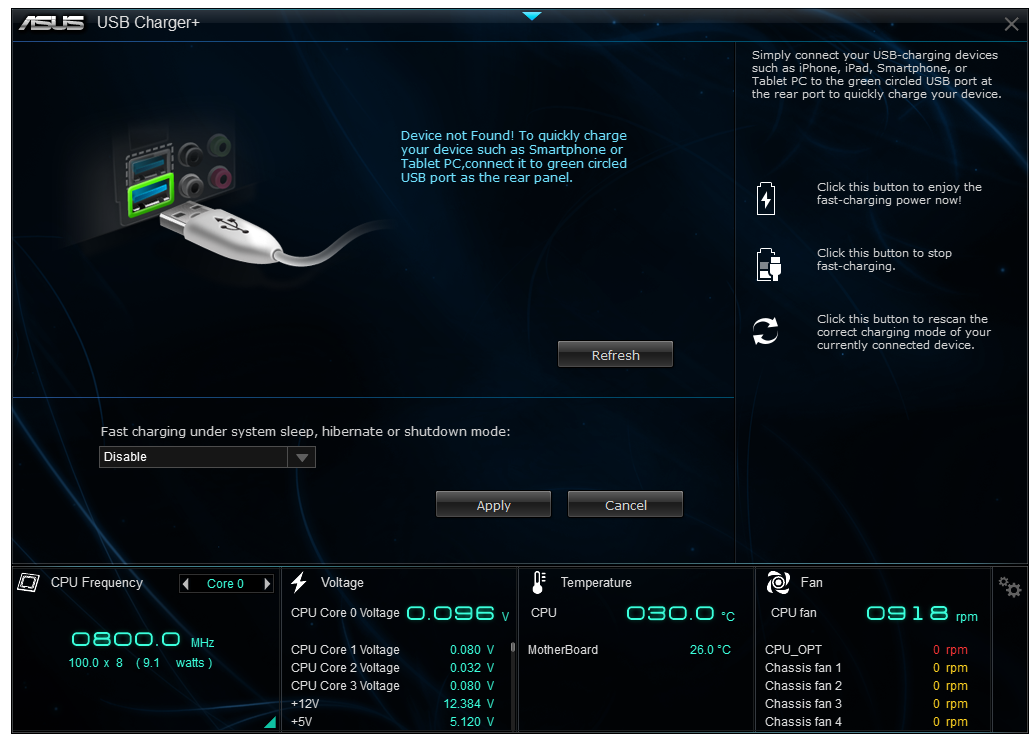
USB Charger+
For devices that do not adhere to the BC 1.1 standard for tablets and smartphones (such as camera chargers or other devices), ASUS have provided USB Charger+ to perform pretty much the same functionality for all devices but to a single USB 3.0 port which also charges at the higher rate when the machine is under sleep, hibernate or shutdown.
USB 3.0 Boost
In recent ASUS reviews, we have covered USB 3.0 Boost in extensive detail – due to the aged nature of the Windows 7 USB driver, it can be replaced with a version that prioritizes packet size over latency for a faster experience. In previous versions of USB 3.0 Boost ASUS had enabled UASP for ASMedia USB 3.0 and an enhanced BOT for Intel USB 3.0 – for Z87 the UASP element is dropped as it is now a native part of Windows 7, but also the Z87 USB 3.0 driver can take care of the ASMedia USB 3.0 without an additional driver. This essentially means that both the ASMedia and Intel USB 3.0 run at similar speeds and are able to use the enhanced BOT protocol afforded by USB 3.0 Boost in Windows 7.

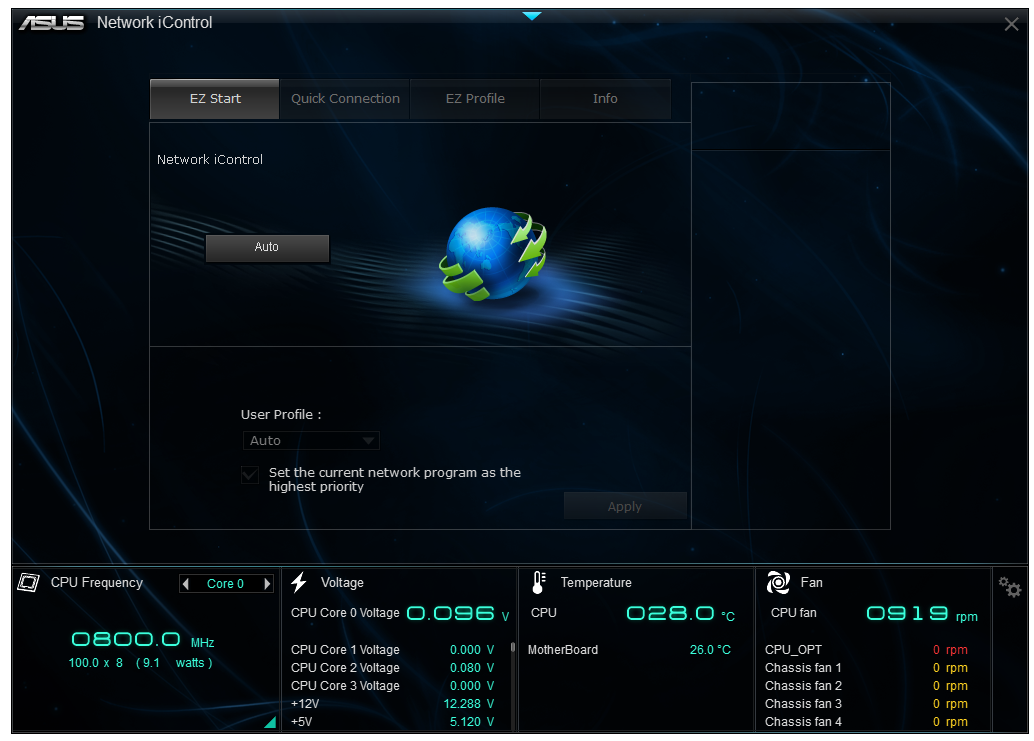
Network iControl
As with a couple of other motherboards in this review, the trend in the motherboard industry is to provide software to prioritize programs over others for network access. Where MSI has the Killer NIC and ASRock has XFast LAN (cFos), ASUS has Network iControl which is designed in-house unlike the others. Network iControl gives a few predefined options for general priority settings although users can create custom profiles as required.
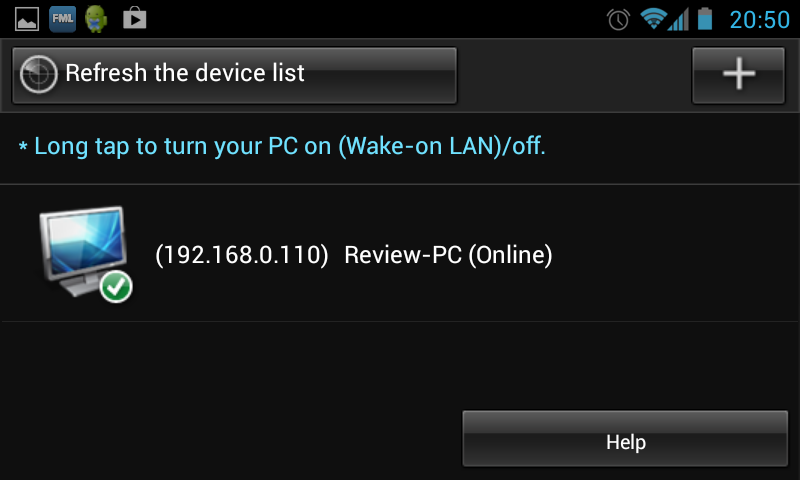
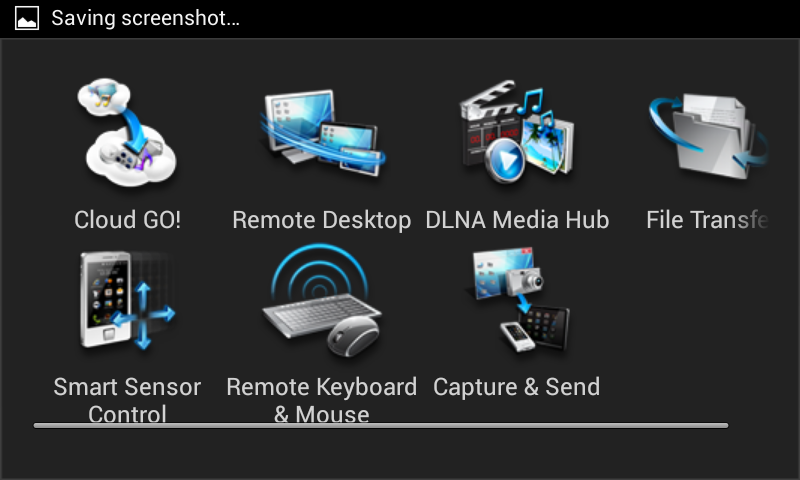
Wi-Fi Go! Remote Desktop
One last feature I wanted to test was Wi-Fi Go, which offers a remote desktop function. Personally I think being able to remote desktop into your PC from a smartphone is a nice idea, allowing a user to control a HTPC or WiDi enabled NAS at will. I downloaded the app for my SGS2 and connected it to my PC:
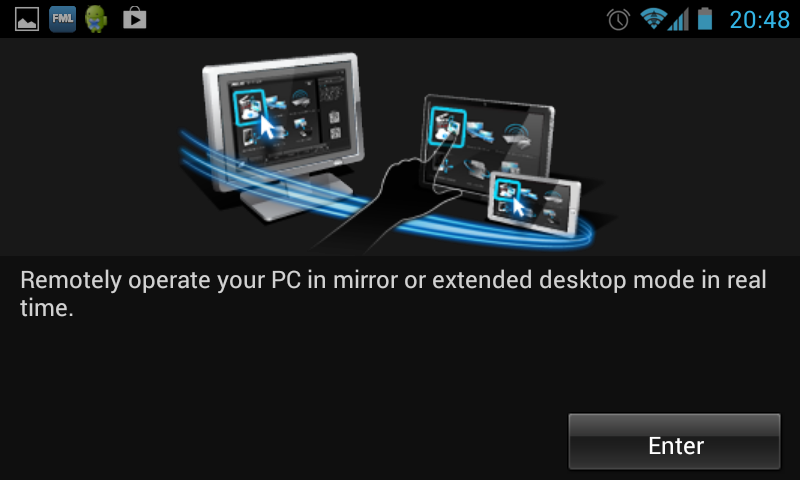
For whatever reason the 1440p resolution of my test bed did not translate well to the screen on my SGS2, resulting in what looked like a 1440p -> 1080p downscaled image then compressed on my screen. Nonetheless I attempted to run a couple of benchmarks:

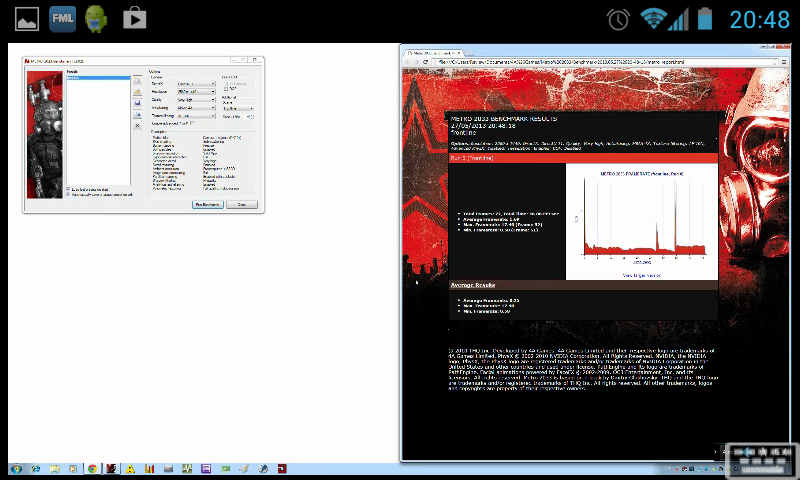
Performance over regular testing was down a few FPS overall, and due to the lag both the image on the smartphone and the screen did not correspond to the FPS number being shown. But this system is more for that HTPC testing rather than actually playing a game with a smartphone via a PC.


58 Comments
View All Comments
clyman - Tuesday, November 26, 2013 - link
In my personal experience and from ASUS tech support, the safest way to update bios is by first downloading it. This mobo has an excellent update program in bios that only looks at local drives, not online. I found it quite simple at each bios update.silenceisgolden - Thursday, June 27, 2013 - link
Great job Ian, really looking forward to the super high end motherboard review as well! I'm curious though, did you use the VGA port at all in any of these reviews, and also when was the last time you used a VGA port?IanCutress - Thursday, June 27, 2013 - link
My Korean 1440p panels are all via DVI-D. But the VGA comes in use when you have to use a DVI-I to VGA converter for DVI-I cables. Otherwise you need a DVI-D cable.JeBarr - Thursday, June 27, 2013 - link
Great review Ian. I very much appreciate your taking the time to explain the PCIe slot assignment and repeating the less-than-x8-no-good-for-SLI truth that needs to spread far and wide.What I took away from this review when analysing my own usage patterns and component choices is that each of the boards in this review would be better suited to the mATX form factor. There is no point in purchasing these mid-high end boards for multi-GPU, multi-display configs. There are only a handful of full size z87 boards that in my opinion earn their full-size status.
Shadowmaster625 - Thursday, June 27, 2013 - link
If it has fully integrated voltage regulators then why in blazes does it still need $20 worth of components buried beneath $3 heatsinks surrounding the cpu socket? Yeah, that's what I thought....DanNeely - Thursday, June 27, 2013 - link
What FIVR means to Intel isn't quite what you think it means. What's on package is the collection of VRs needed to provide power to all the separate sections of the CPU and to vary them as the chip clocks itself up and down. The motherboard itself still needs to do the heavy lifting to convert the 12V from the PSU to the voltage used by the DRAM and to a single input voltage the that CPU converts to the other levels it uses internally (IIRC this is the full load core voltage).I believe the reason why those regulators can be squeezed into the package while the ones still on the mobo are much larger is that the uncore/cache have relatively low power levels and the lower core voltages are only used at low CPU loads and thus don't need to push nearly as high of a peak current level.
WeaselITB - Thursday, June 27, 2013 - link
Wonderful review, Ian. Any chance of a Z87 vs Z77 vs ... comparison chart? It seems like functionalities of the processor are highly publicized, and the individual motherboard reviews chart the differences between chipset models within that family, but I don't recall seeing a comparison between chipset families. I know the chipset seems to be taking a smaller and smaller role these days, but it would still be helpful to exactly see the differences between generations.Thanks!
Kougar - Thursday, June 27, 2013 - link
It doesn't work with my 30" U3011 monitor either, yet another forum user with the same monitor didn't have any problem. Only difference was he used a Radeon and I use a GTX 480.
Creig - Thursday, June 27, 2013 - link
I only had time so far to skim this article, so I apologize if this question was already answered in the body. Is there any way to find out when each board starts shipping with the C2 stepping of the Z87 chipset? As some people are already aware, the C1 stepping has been shown to have issues with certain USB 3.0 controllers disconnecting when the computer awakes from sleep mode. The C2 stepping is apparently already shipping to manufacturers, but it would be handy to know a way to ensure that a person who orders a board in the near future receives the updated chipset.blackie333 - Friday, June 28, 2013 - link
I'm not sure that C2 stepping shipping already started, according to public available plan from May only samples have been sent to manufacturers. Mass production of C2 should start on 1st of July and manufacturers should start receiving them from the 30th of July. Boards based on C2 stepping should be available for end users from middle August.But you maybe have some more actual/insider information.