Z77 mITX Round-Up: Five of the Best – MSI, Zotac, ASRock, EVGA and ASUS
by Ian Cutress on December 31, 2012 7:00 AM EST- Posted in
- Motherboards
- MSI
- ASRock
- EVGA
- ZOTAC
- Asus
- Ivy Bridge
- Z77
- mITX
EVGA Z77 Stinger BIOS
Now that 2012 is almost over, it has been a full two years since the initial implementation of graphical BIOS systems, and the paradigm shift towards interactivity and engagement in the BIOS. It has been a keen topic of mine to discuss with the manufacturers about the true nature of how interactive a BIOS should be, how it should engage the user, and how there are a million and one (hyperbole not withstanding) ways in order to improve the current generation of BIOSes.
Implementing these graphical BIOS systems is easy for the bigger motherboard manufacturers – ASUS, MSI and ASRock were all on the bandwagon from Day One. Gigabyte took a little longer with their different implementation, but even Biostar, ECS, Zotac and Intel managed to skin something up to make the BIOS more appealing in terms of menu options and aesthetics. For EVGA, this is a task they still have to do.
While we have not got the white text on blue that marked out BIOSes pre-2011, the white on black with little EVGA icons for different sections is not really a step forward. I apologize in advance for the quality of the following images – EVGA does not have a screenshot button in their BIOS, and even when taking pictures with my DSLR, white text on a black background without a tripod is a tough task.

The main Overview screen actually does a lot of what I like when I first go into a BIOS – we get the name of the motherboard (in this case, Z77 Stinger = E692), the BIOS version, the processor installed, speed of the processor, the memory installed, the speed of the memory, some voltages and temperatures. If EVGA were to hire another BIOS engineer or two to wrap this up into a design, it could be a winner.
In the ‘Advanced’ menu is where the normal onboard device configuration, SATA configuration and hardware monitor options hang out:
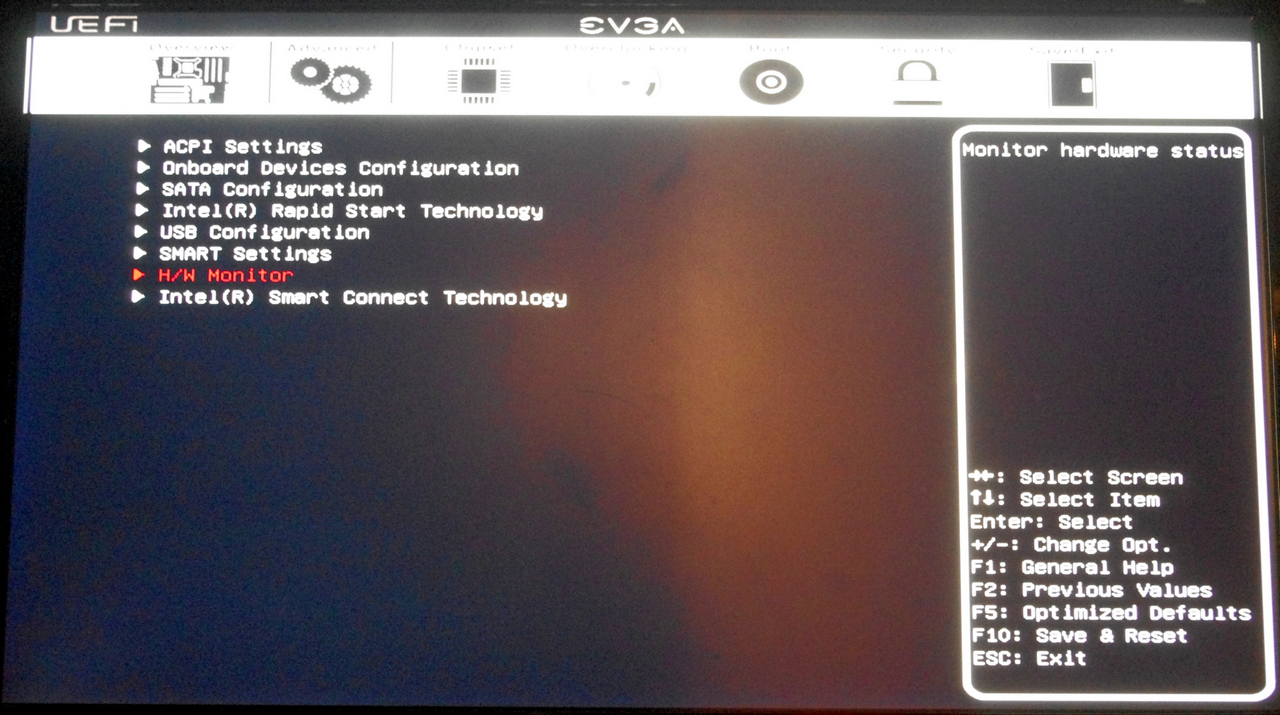
Thankfully EVGA resort to enabling AHCI by default on the SATA configuration. The more important menus in the Advanced section is the H/W Monitor, which holds the fan speed controls. As there is no fan speed control in the OS, all control comes through the BIOS. Opening the H/W Monitor menu gives the following:
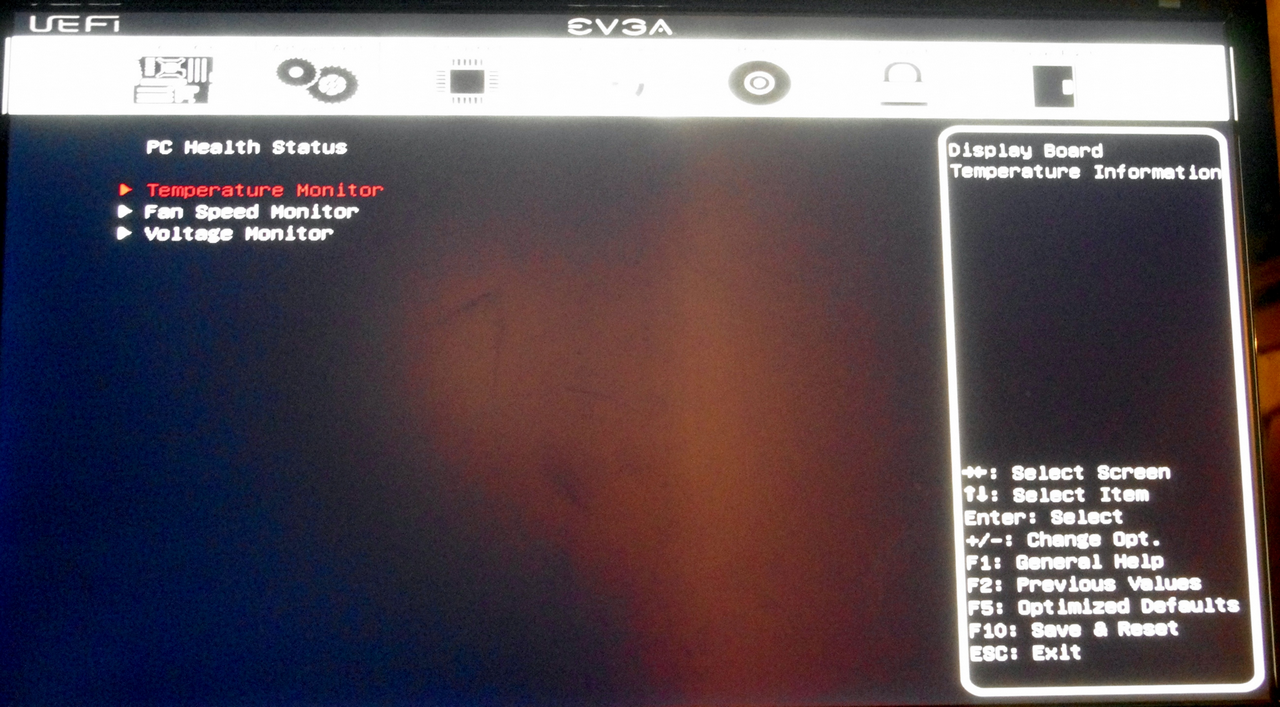
The Temperature Monitor and Voltage Monitor screens give pure information, whereas the Fan Speed Monitor allows the user to adjust the fan settings.
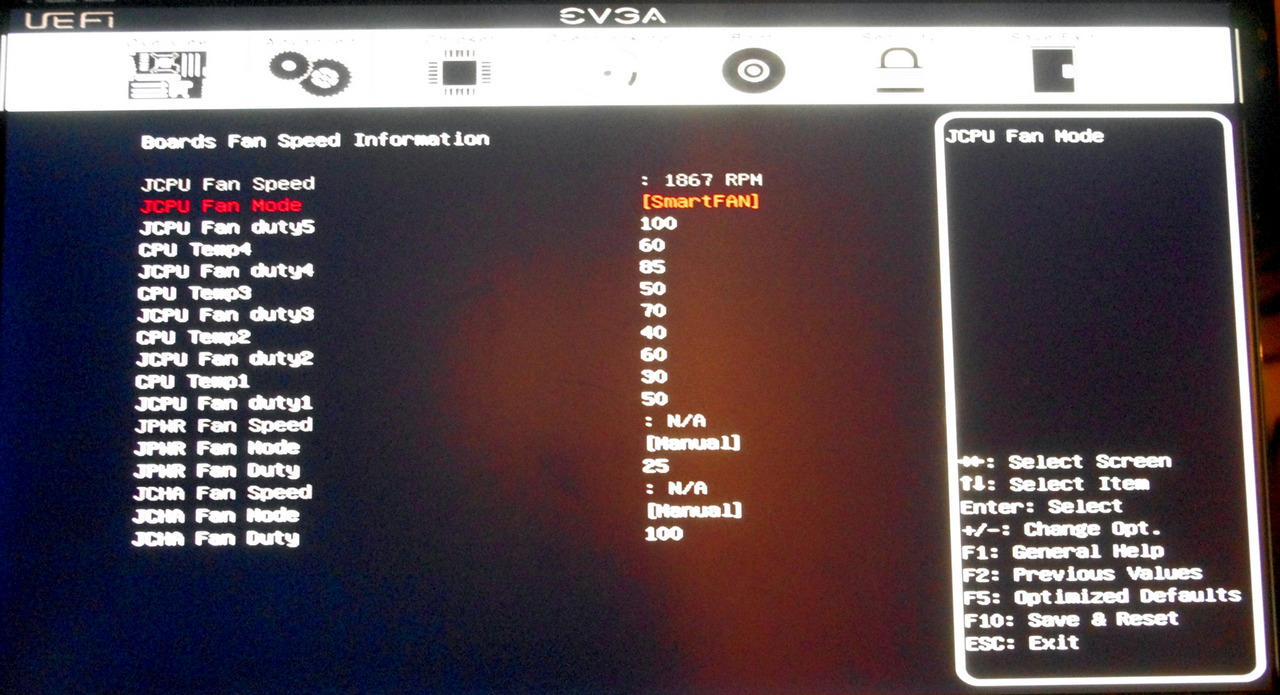
For the three fan headers on board we have two different styles of options. The main CPU header gets a full multi-point gradient in its design – users can specify the amount of power to the fan header as a function of temperature over several points. The downside of this is the assumption that fan speed is a linear function of power, which is not always the case – at <5% power any particular fan will do one of two things: (i) not start up, or (ii) run at a minimum RPM. This is why certain controls on other boards do a pre-test to find how a fan reacts as a function of applied voltage. The other two fan headers are offered at configurable duty speeds.
For overclocking, we head to the overclocking menu. This menu is very similar to previous EVGA boards we have tested in the past:
On the main Overclocking screen we have multiplier control, VDroop control, options for OCP and performance tweaks as well as voltage options. The OC Mode is a fun setting to have on a motherboard, as it automatically disables all the additional ports not used in extreme overclocking, like audio, NIC and so on.
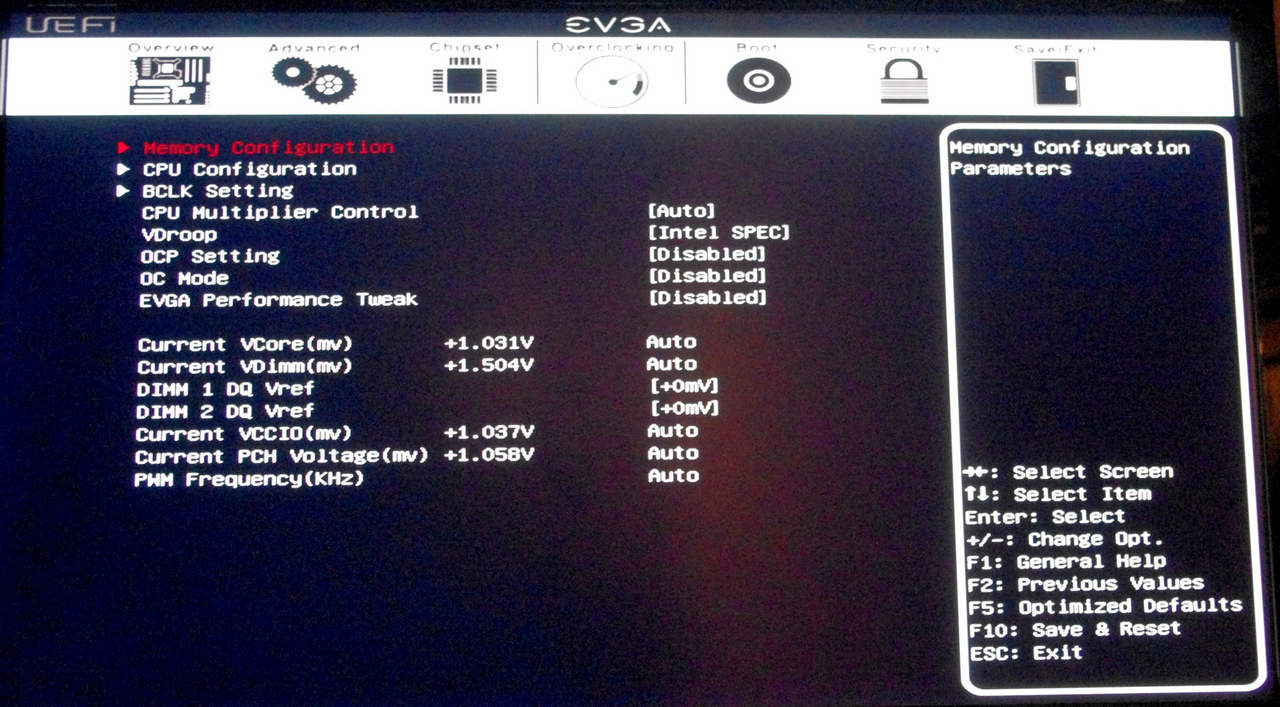
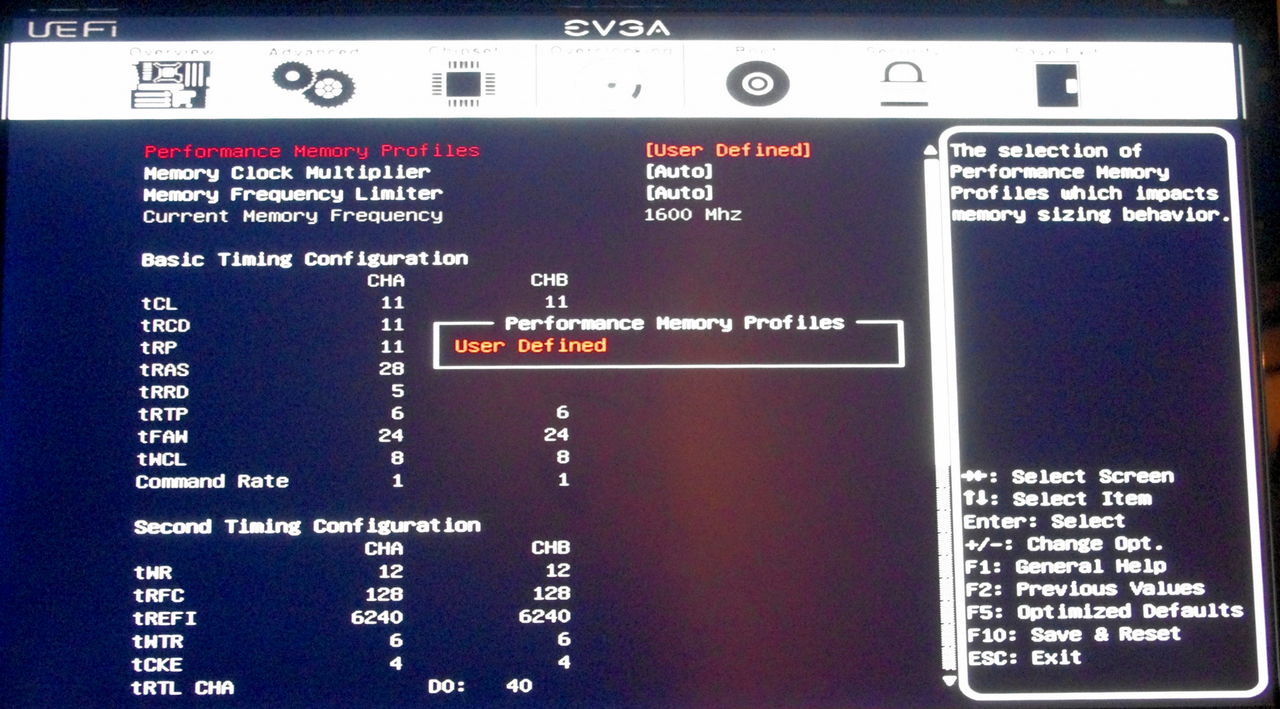
The memory configuration screen allows users to adjust the multiplier and subtimings on their memory. Despite having an option to enable an XMP profile, none of my memory kits I use in testing would work – no option was offered to enable XMP. As a result I had to go in and manually adjust timings. But as there are so many timings to change and only extreme enthusiasts would know exactly what every setting would be on their memory.
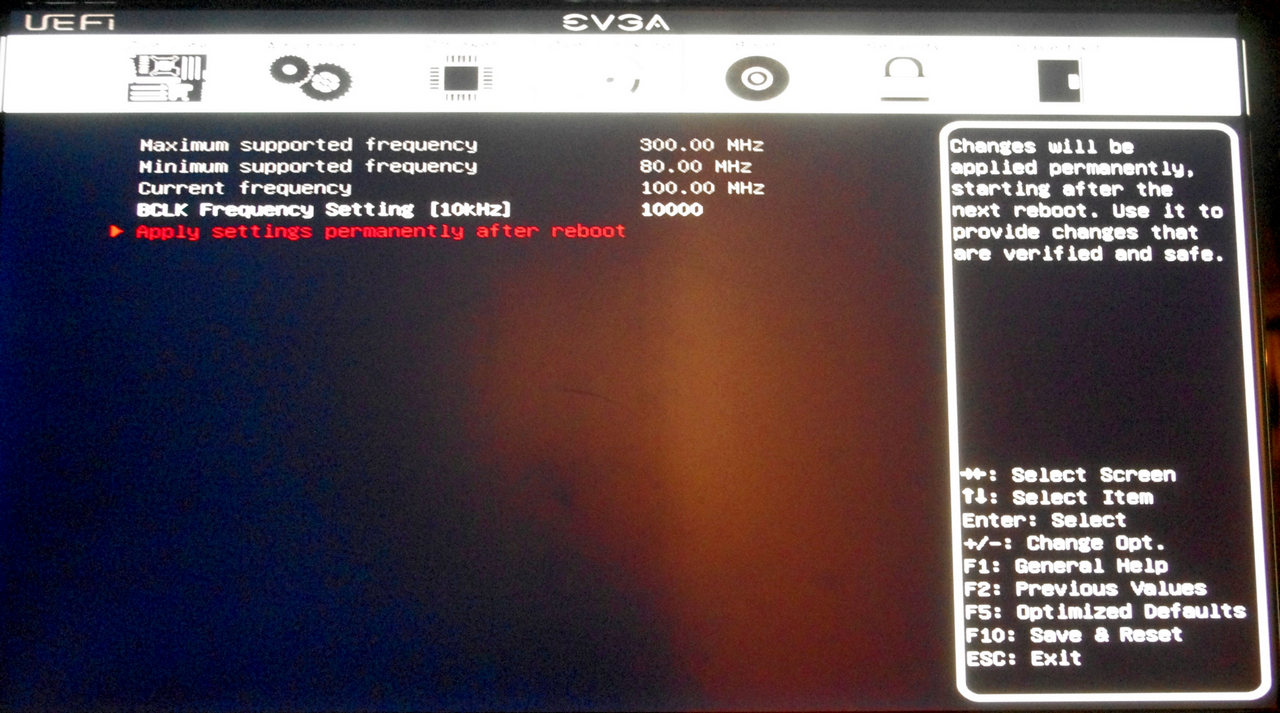
The CPU settings deal with additional options such as Turbo modes, CPU power limits, Hyperthreading and cores used, whereas the BCLK menu gives the user BCLK control. There is an issue with the BCLK menu however – when adjusted (in either the OS or the BIOS), this setting is not changed back to 100 MHz when the Optimized Default option is chosen. This is rather a large oversight, as when recovering from a bad overclock, you ideally do not want the board still booting at 105 MHz or something the processor cannot handle.
Elsewhere in the BIOS are options to adjust the boot order, security, and a handy Boot Override feature to allow a one-time boot from a detected device – a useful tool for installing OSes or testing software.


54 Comments
View All Comments
Sabresiberian - Tuesday, January 1, 2013 - link
Thanks for the great comparison review!It looks like there is a little mistake in the spec list for the Asus board, which shows it having a mini-PCIe connector. I would love it if it did, but I didn't see it on the board and it isn't mentioned in other spec lists.
It is important to me because I would ideally need connection for both a graphics card and a sound card (which I believe I could do through a mini-PCIe to PCIe x1 adapter if needed). This makes the EVGA Stinger the choice for me here, though the Asus board is the one I would prefer to buy.
I am truthfully a little disappointed in the EVGA board, which seems all too common with EVGA products in general these days. Great support is still there, but I'd rather they build bleeding edge components and not have to find out whether or not their support is as good as people say it is. The Stinger is a good board to be sure, and the Intel LAN alone puts it in the category of "will buy" for me, but I was hoping it would be something that would match or beat the Asus P877-I, and it just doesn't.
Foeketijn - Tuesday, January 1, 2013 - link
When you take overclocking out of the equation, B75 has it all, for the price just a tiny bit north of the old H61 chipset. Support for IB features (1600Mhz DDR3, PCI-e 3.0), Native Sata III, USB 3.0.It wasn't intended for the DIY market but fits the bill perfectly in my opinion. Only the very very few who need to OC, +16Gb ram or multiple SSD's @ full 6 Gb/s need the Z77 chipset.
The only thing is, that us mere mortals can't predict is, if a much cheaper chipset is used, did the OEM also cheapskate on the critical parts to? I would love to see some in-depth component analysis which I see for example, when a PSU is taken apart.
Which components are used? how well is the soldering done, does it still work at a sauna lanparty, etc.
I might be alone in this, but I would find that much more valuable information than all the performance benchmarks together (race to the bottom, be dammed!).
Including the northbridge in the CPU made motherboard and CPU reviews so predictible (or borring).Since then, I'm only interested in stability, ease of installation (nicely covered) and practical use (fan controll, MEM compatibility ect).
<offtopic> Oh I loved the XP-m 2500+ siverpainting 2001 era where you actually could get a noticeable improvement of performance and not necessarily have to sacrifice stability or risk bankruptcy</offtopic>
vanwazltoff - Tuesday, January 1, 2013 - link
i picked up an asus p8z77-i deluxe/wd before christmas and made a beast gaming computer out of it with an i5-3750k OCed to 4.5ghz and a gtx670 =]vanwazltoff - Tuesday, January 1, 2013 - link
*3570kBeaver M. - Tuesday, January 1, 2013 - link
Loved the POST screen measurements and the DPC latency testing. Something you dont see every day. Actually Ive never seen it, and yet I always wanted to know those.However I am not really interested in the Z77s, since they have a horrible layout for my needs. Only the Asus one comes close to what I need, but I just dont buy Asus anymore because of several very bas experiences.
So, I wish you would also test the B75 and H77s.
paksoy - Tuesday, January 1, 2013 - link
I love the features of this Asus mobo, but i want to use it in a really small form factor case like the Antec ISK 110 VESA Case.http://www.anandtech.com/show/6192/antec-isk-110-v...
I'm just worried that the height of the VRAM board would prevent it from using it with this case.
mi1stormilst - Tuesday, January 1, 2013 - link
I still opted for the Gigabyte Z77N and love it...Sivar - Wednesday, January 2, 2013 - link
Does this refer to the ALC889 playing an audio file encoded at 192KHz?If so, does it really matter? Failing a test is never a good thing, but I know of no widely available 192KHz audio source, and such a source would have no benefit, nor would a 96KHz source.
cjs150 - Wednesday, January 2, 2013 - link
I am a happy user of the AS Rock board in a silent HTPC. It works exceptionally well. However it is clear that some work still needs to be done on motherboard design.MSata on back is excellent - now can we have it as SATA 3 because the better MSata SSDs are all Sata 3.
Placement of Sata connectors is often awkward on these boards. On edge and at right angles please.
Similarly I would love it if someone either did the 24 pin ATX power connector at right angles or someone manufactured a right angled converter that did not require de soldering the motherboard connector. Cable management in Mini-OTX is very hard and that would really help.
Finally, careful choice of RAM can eliminate issues Ian had about the closeness of the CPU socket preventing the use of many after market coolers. I use the Samsung green low profie memory, which is so low that any after market cooler can be used (and runs at 1.35v, is an unbelievably good overclocker and reasonably priced!)
romrunning - Wednesday, January 2, 2013 - link
As has been mentioned previously, the H77 chipset is great for those who do not need overclocking. I've used the Intel DH77DF, and I heartily recommend it. Since the DH77DF has an eSATA port (not too common), I've even been able to keep an eSATA dock that I used before USB 3.0 was more readily available. If you install this board into a Fractal Design Node 304 case, you can use all of the SATA ports as well. I've used it with a Silverstone SG05 case, and the loudest part of my setup is the fan on the graphics card (Radeon 7850).One thing I've noticed, though, is the relatively low mic input from the front audio. Not sure if this is common to the Realtek ALC8xx chip series, but even after boosting the gain in Win7 to +30db, it still isn't quite as loud as an older AMD board I previously had (which didn't need a boost at all).