ClearPC, C3 and BeanTech: The Clear Chassis Comparison
by Kristopher Kubicki on March 15, 2003 3:14 AM EST- Posted in
- Cases/Cooling/PSUs
ClearPC Construction Continued
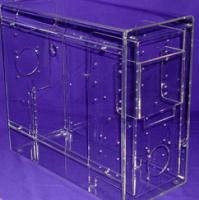
Forty-five minutes into the construction of our ClearPC case, we had only managed to get the motherboard and the expansion cards in the case. Granted, this could have been significantly quicker had we looked at the directions on the website. We were disappointed to see there were no thorough directions in the packaging of the case.
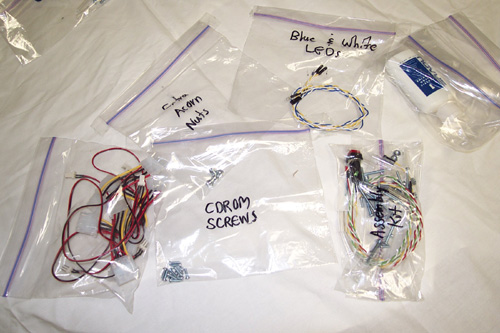
The ClearPC does not have designated 5.25” and 3.5” bays, but rather one large 5.25” bay. Essentially, the whole front panel comes out as one unit, so the drives can be mounted easily without any obstruction. It comes with 2 versions of mounting screws, so that you can mount 3.5” drives in the bay by using longer screws. Fortunately, the ClearPC does come with one 5.25” to 3.25” adaptor bay, so that a zip or floppy drive does not have to sit exposed.
Furthermore, the ClearPC also comes with a USB and Audio hub that can be re-aligned to any mount point on the 5.25” bay. This was a neat feature as most of the cases we have seen simply put the USB hub on the bottom of the case, where it can be easily kicked if the case is mounted on the ground.

An acrylic 3.25” bay kit was also included so that a floppy drive could be installed in the ClearPC. Keep in mind, the ClearPC comes with two 5.25” external bays exposed. Unfortunately, if you plan on not installing any external drive components (DVD, CDRW, etc), you will have a large gapping hole in the front of your case.
Breakdown
|
|


0 Comments
View All Comments