Original Link: https://www.anandtech.com/show/1672
Canon Digital Rebel XT: Hardly an Entry-Level DSLR
by Stephen Caston on May 3, 2005 12:05 AM EST- Posted in
- Digital Camera
Index
Recently, Canon introduced the EOS 350D (also called the Rebel XT) as their entry-level SLR replacement to the EOS 300D. Although our review model is silver and black, an all black model is also available - giving the camera a more professional appearance. The new Rebel has a large 8 megapixel sensor that can shoot images as JPEG or RAW files. Other than the higher resolution, some of the exciting upgrades include a smaller and lighter body, ultra-fast DIGIC II image processor, larger buffer, selectable metering and AF modes, and Custom Functions. In fact, the 350D has so many improvements over the 300D that it actually shares more in common with the prosumer EOS 20D. Given that so many people are casting aside their fixed lens point-and-shoot cameras to venture into the digital SLR world, we thought that it would be well worth a look at one of the most popular options.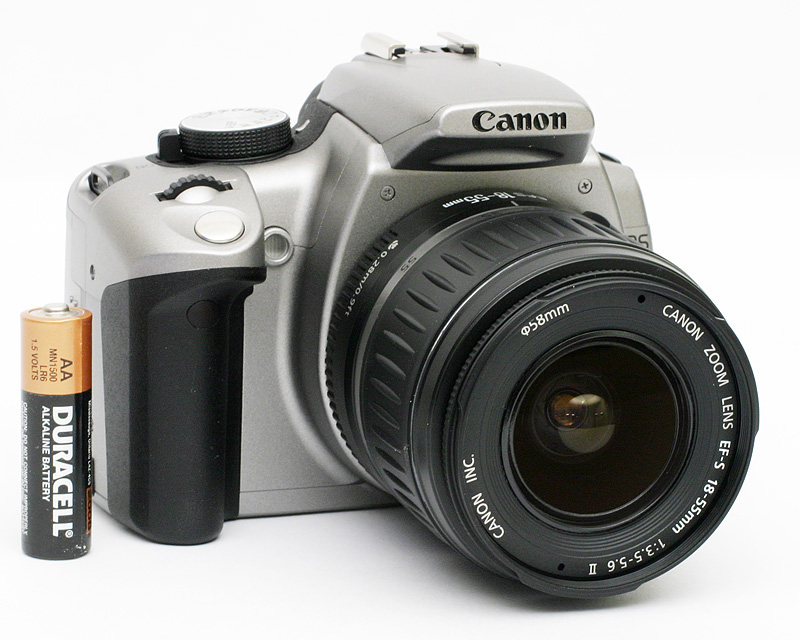
Click to enlarge.
* Firmware Ver. 1.0.1
* All image tests are performed with the use of a Canon 50mm Macro lens unless specified otherwise.
Product sample provided by Newegg.com
Canon EOS 350D Specifications
Differences are indicated in italics.| Feature | Canon EOS 350D | Canon EOS 20D | Canon EOS 300D |
| Release Date | February 2005 | August 2004 | August 2003 |
| Price | ~$890 (body only) | ~$1500 (body only) | ~$665 (body only) |
| Pixel Count | 8.0 Million | 8.2 Million | 6.3 Million |
| Camera Type | SLR | SLR | SLR |
| Highest Resolution | 3456x2304 | 3504 x 2336 | 3072x2048 |
| Lower Resolutions | 2496x1664, 1728x1152 | 2544 x 1696, 1728 x 1152 | 2048x1360, 1536x1024 |
| Sensor Type | CMOS | CMOS | CMOS |
| Sensor Size | 22.2 x 14.8 mm | 22.5 x 15.0 mm | 22.7 mm x 15.1 mm |
| Image Processor | DIGIC II | DIGIC II | DIGIC |
| LCD Screen Size | 1.8" | 1.8" | 1.8" |
| Lens Thread | EF, EF-S | EF, EF-S | EF, EF-S |
| Auto Focus | Yes | Yes | Yes |
| Auto Focus Type | TTL, 7 focus points | TTL, 9 focus points | TTL, 7 Point Focus |
| Manual Focus | Yes | Yes | Yes |
| Aperture Range | N/A | N/A | N/A |
| Shutter Speeds | Bulb, 30 - 1/4000th sec. | Bulb, 30 - 1/8000th sec. | Bulb, 30 - 1/4000th sec. |
| ISO | 100, 200, 400, 800, 1600 | 100, 200, 400, 800, 1600, 3200 | 100, 200, 400, 800, 1600 |
| Flash | Built-in, pop-up | Built-in, pop-up | Built-in, pop-up |
| External Flash | Yes, hot-shoe | Yes, hot-shoe, sync | Yes, hot-shoe |
| Flash Range | Guide no: 43 ft (ISO 100) | Guide no: 43 ft (ISO 100) | Guide no: 43 ft (ISO 100) |
| Flash Compensation | +/- 2 stops in 0.3 or 0.5 increments | +/- 2 stops in 0.3 or 0.5 increments | None |
| Exposure Compensation | +/- 2 stops in 1/3 or 2/3 increments | +/- 2 stops in 1/3 or 2/3 increments | +/- 2 stops in 1/3 increments |
| White Balance | Auto, daylight, shade, cloudy, tungsten, fluorescent, flash, manual | Auto, daylight, shade, cloudy, tungsten, fluorescent, flash, manual, Kelvin (color temperature) | Auto, daylight, shade, cloudy, tungsten, fluorescent, flash, manual, Kelvin (color temperature) |
| Bracketing | Yes, up to 2 stops in 1/3 EV increments; WB Bracket/Shift also available | Yes, up to 2 stops in 1/3 EV increments; WB Bracket/Shift also available | Yes, up to 2 stops in 1/3 EV increments, WB available as +/- 3 steps |
| Metering | Evaluative (35-zone), Partial, Center-weighted | Evaluative (35-zone), Partial, Center-weighted | Automatic: Evaluative (35-zone), Partial, Center-weighted |
| Color Space | sRGB, Adobe RGB | sRGB, Adobe RGB | sRGB, Adobe RGB |
| Aperture Priority | Yes | Yes | Yes |
| Shutter Priority | Yes | Yes | Yes |
| Manual Exposure | Yes | Yes | Yes |
| Continuous Drive | Yes, 3 fps for 14 frames (JPEG); 3 fps for 5 frames (RAW) | Yes, 5 fps for ~20 frames (JPEG), 5 fps for 6 frames (RAW) | Yes, 2.5 fps for 4 frames |
| Self Timer | Yes, 10 sec. | Yes, 10 sec. | Yes, 10 sec. |
| Storage Method | CompactFlash Type I and II, Microdrive | CompactFlash Type I and II, Microdrive | CompactFlash Type I and II, Microdrive |
| Storage Included | None | None | None |
| Compressed Format | JPG | JPG | JPG |
| Uncompressed Format | CR2 or CR2 + Large/Fine JPG | CR2 or CR2 + JPEG (Large, Medium, Small and Fine/Normal) | CRW (Raw file with embedded JPEG) |
| Quality Settings | Fine, Normal (JPEG) | Fine, Normal (JPEG) | Fine, Normal (JPEG) |
| Video clips | None | None | None |
| Battery Type | NB-2LH Lithium-Ion Rechargeable | BP-511A Lithium-Ion Rechargeable | BP-511 Lithium-Ion Rechargeable |
| Charger Included | Yes, 90 minutes | Yes, 90 minutes | Yes, 90 minutes |
| PC Interface | USB 2.0 Hi-Speed | USB 2.0 Hi-Speed | USB 1.1 |
| TV-out | Yes | Yes | Yes |
| Tripod Mount | Yes, metal | Yes, metal | Yes, metal |
| Weight (w/out battery or card) | 1.07 lb | 1.5 lb | 1.23 lb |
| Dimensions | 126.5 x 94.2 x 64 mm | 144 x 106 x 72 mm | 142 x 99 x 72.4 mm |
| Included in the Box |
The Design: Canon EOS 350D
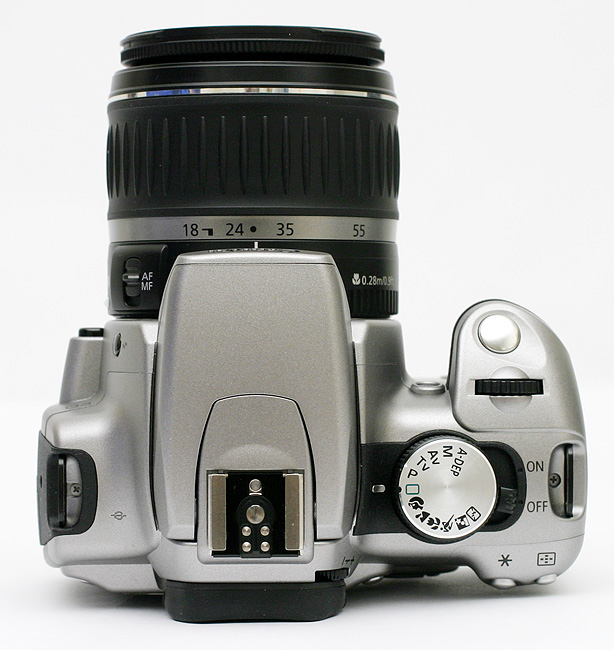
The Canon EOS 350D looks remarkably different than its predecessor, the 300D. In fact, it is so different from the 300D that it makes more sense to compare it to its older and more expensive brother, the Canon 20D. Both cameras have similar sensors, although the sensor in the 350D is slightly smaller. The 20D sensor is 8.2 megapixels and 22.5 mm x 15.0 mm while the 350D sensor is 8.0 megapixels and 22.2 mm x 14.8 mm. The 350D is the smallest digital SLR available from Canon, measuring just 126.5 mm x 94.2 mm x 64 mm. Some other similarities between the 350D and 20D are Canon's DIGIC II image processor, which makes for speedy image processing. Both cameras have remarkable startup times (nearly instantaneous) and incredibly fast transfer speeds from the internal buffer to flash media. Also, both cameras feature an EF-S lens mount that will accept all EF lenses as well as the newer EF-S lenses designed specifically for cameras with a 1.6x crop factor. Perhaps due to popular demand, Canon has implemented 9 Custom Functions into the 350D, which allow the user more extensive control over the camera's operations.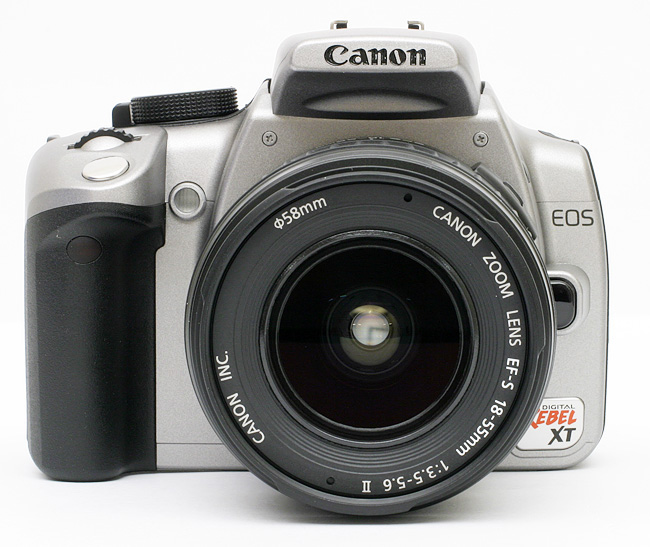
Click to enlarge.
Click to enlarge.
Click to enlarge.
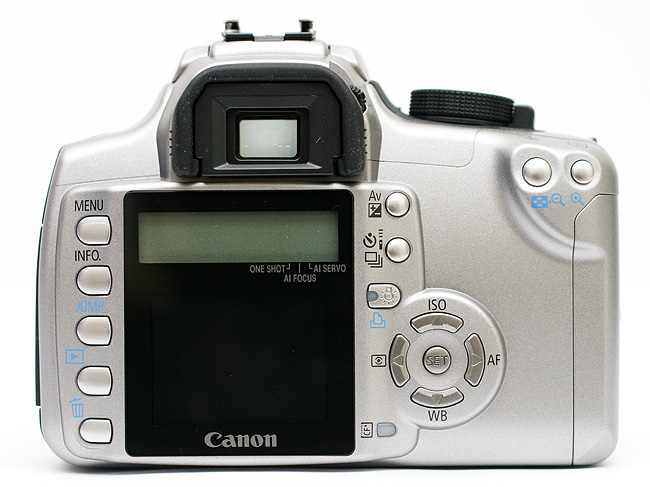
| Up | ISO |
| Right | Auto Focus |
| Down | White Balance |
| Left | Metering |
To the lower-left of the cross keys is the access lamp, which lights up whenever the camera is reading or writing to removable media.
Click to enlarge.
 |
 |
| Click to enlarge images. | |
On the bottom of the 350D is the door that conceals the battery compartment. The door can be opened by pressing the release lever. The battery is also secured by an orange clip that must be pushed to the side to release the battery. The 350D uses an NB-2LH Lithium-Ion battery (7.4V 720 mAh) as opposed to the BP-511A used in the 300D. The NB-2LH is physically smaller and has a smaller capacity (65%) than that of the BP-511A. In fact, the NB-2LH is the same battery type used in the Canon PowerShot S60 and S70. Directly below, the lens is the metal tripod mount.
 |
 |
| Click to enlarge images. | |
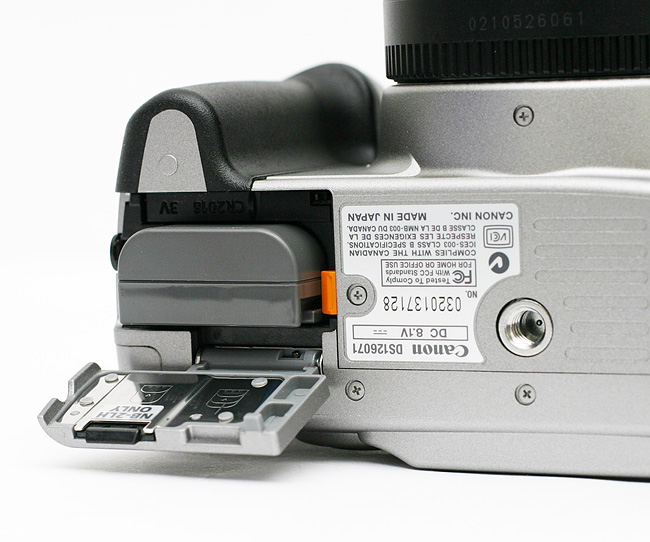
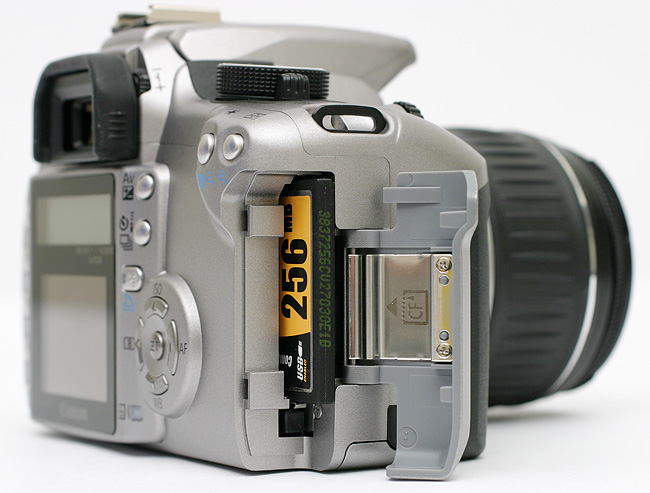
On the right side of the camera is a sliding hinged door that conceals the Compact Flash (Type I or II)/Microdrive media slot. Because it supports FAT32, the 350D supports removable media over 2GB.
 |
 |
| Click to enlarge images. | |
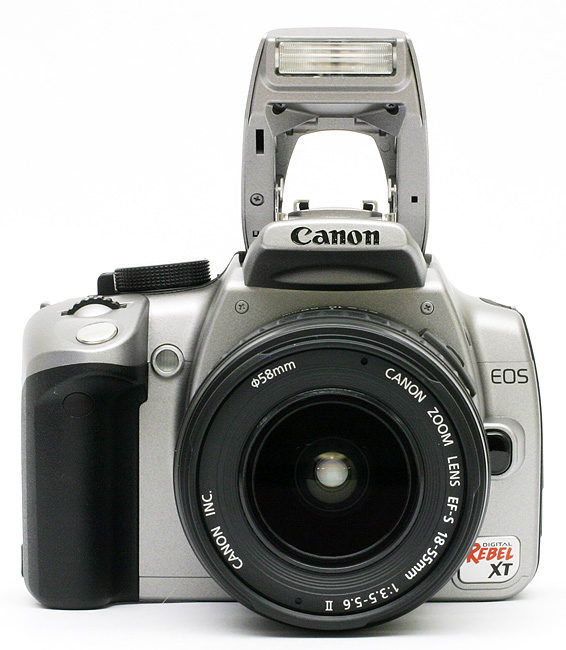
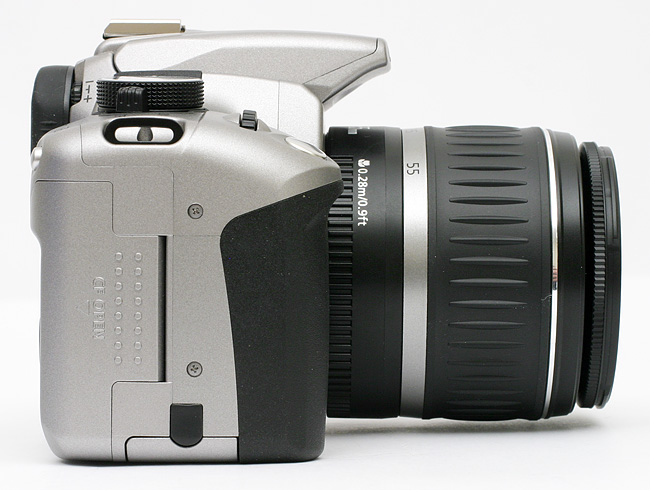
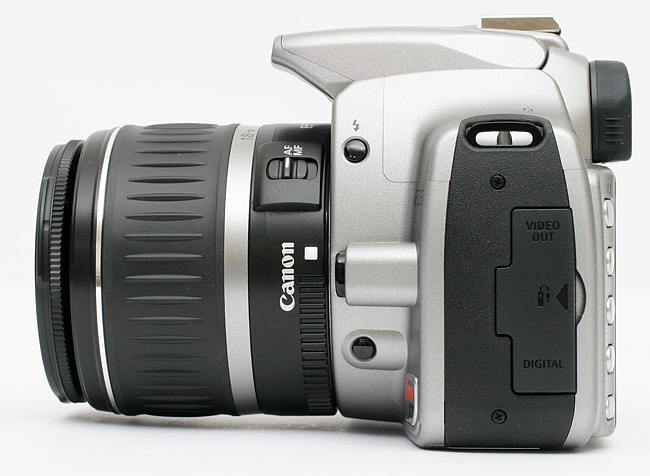
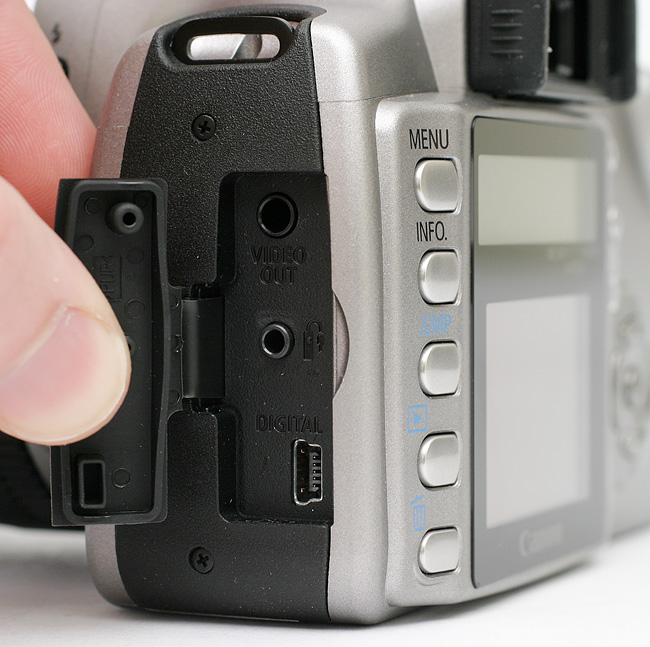
At the upper left is the Flash button. In order to release the flash in any of the advanced recording modes, this button must be pressed. Just below the lens release button is the DOF (depth-of-field) preview button. Normally, when framing an image, the camera will use the largest available aperture to ensure that the photographer can see clearly. By holding down the DOF preview button, the camera will close the aperture (stop down) to the selected value. This gives the photographer an idea of how the image will actually look with the correct DOF. The left side of the camera features 3 connections that are concealed by a rubber fitted tab. The top connection is a video-out port that can be used with the included video cable to view images on a television. The middle port is a remote control terminal that will work with the Remote Switch RS-60E3. Finally, the bottom connection is a USB 2.0 Hi-Speed port.
Recording Features
In all recording modes, the 350D can record images as either JPG, CR2 (RAW), or both. JPG files can be recorded with either Fine or Normal compression. When recording images as RAW files, you can choose to have a Large/Fine JPG stored at the same time. The image quality options are below:| Setting | Compression | Resolution (pixels) |
| L | Fine/Normal | 3456 x 2304 |
| M | Fine/Normal | 2496 x 1664 |
| S | Fine/Normal | 1728 x 1152 |
| RAW +Large/Fine JPEG | None | 3456 x 2304 |
| RAW | None | 3456 x 2304 |
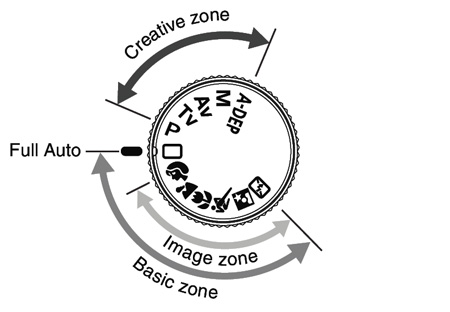
Image courtesy of Canon
| Creative Zone | |
| P (Program AE) | Aperture and shutter speed are set automatically. The Main Dial can be used to adjust both values at the same time while the camera ensures a proper exposure. |
| Tv (Shutter-priority) | The user selects the desired shutter speed with the Main Dial and the camera sets the appropriate aperture. |
| Av (Aperture-priority) | The user selects the desired aperture with the Main Dial and the camera sets the appropriate shutter speed. |
| M (Manual) | The user selects the aperture and shutter speed. |
| A-DEP (Auto Depth-of-Field) | The camera uses all AF points to determine the nearest and farthest subjects. Then, the camera sets the aperture and shutter speed to maximize depth-of-field. |
In the Creative Zone, there are numerous recording options available to the user via the Menu button. Below, we have outlined these options:
| Record Menu 1 (Creative Zone) | |
| Quality | L, M, S (Fine, Normal) |
| Red-eye | Off, On |
| Beep | Off, On |
| AF mode | One Shot, AI Focus, AI Servo |
| Metering mode | Evaluative, Partial, Center-weighted average |
| ISO speed | 100, 200, 400, 800, 1600 |
The 350D uses a 7-point auto-focus system (same as the 300D). The active focus point can be selected by pressing the AF point selection button and then rotating the Main Dial until the desired point is outlined in red. If all the focus points are selected, the camera will attempt to focus on the subject(s) closest to the camera. One Shot AF mode is intended to be used for still subjects. When it is selected, the camera will lock focus when the shutter is half-pressed. AI Servo AF mode is designed for moving subjects. When the shutter button is pressed halfway, the camera will refocus continuously as the subject moves. The 350D uses "Predictive AF" that allows the camera to track a subject moving at a constant speed. This allows the camera to predict where the subject will be to ensure a good focus when the frame is taken. AI Focus AF mode is recommended for more general circumstances when a subject may start moving. If the camera detects motion, it will switch over to AI Servo mode and begin tracking the subject. Evaluative metering uses information from the entire frame to determine the appropriate exposure setting. This is usually the best metering choice for normal situations. However, in circumstances where there is significant backlighting or large differences in light intensity across the frame, Partial metering is recommended. With Partial metering, the camera uses approximately 9% of the center of the frame to determine the exposure. Finally, Center-weighted average will measure light from the entire frame, but will give extra weight to the information in the center.
| Record Menu 2 (Creative Zone) | |
| AEB | +/- 2 stops in 1/3 or 1/2 stop increments |
| Flash exp comp | +/- 2 stops in 1/3 or 1/2 stop increments |
| White balance | Auto, Daylight, Shade, Cloudy, Tungsten, Fluorescent, Flash, Custom |
| WB SHIFT/BKT | Shift amount/BKT amount |
| Custom WB | Set |
| Color space | sRGB, Adobe RGB |
| Parameters | 1, 2, Set 1, Set 2, Set 3, B/W |
AEB (Auto Exposure Bracketing) and Flash exposure compensation are available as +/- 2 stops in 1/3 or 1/2 stop increments. The increment amount (1/3 or 1/2) can be set via a Custom Function, which we will discuss later. After a bracket is specified, the camera will indicate on the LCD panel the picture in the bracket that you are about to take. The order will be normal, underexposed, overexposed.
 WB Shift |
 WB Bracket |
The White Balance Shift/Bracket option is identical to the one seen on the Canon 20D. You are given the option to shift the WB along two axes: Blue-Amber on the horizontal axis and Magenta-Green on the vertical axis. To set up a WB bracket, you can simply rotate the main dial clockwise to create a Blue-Amber bracket or counterclockwise to create a Magenta-Green bracket. When a WB bracket is set, the camera will save 3 pictures each time that the shutter button is pressed. The order will be normal, blue, amber or normal, magenta, green. On the 350D, the options to select either sRGB or Adobe RGB color space are separate from the parameter options.
Parameter 1 VS Parameter 2
Hold mouse over image.
B/W parameter
| Basic Zone | |
| Full Auto | The camera selects the aperture and shutter speed. If the camera determines that more light is needed, the flash will pop up automatically and fire. Evaluative metering, AI Focus, Drive mode set to Single. |
| Portrait | The camera selects a large aperture to blur the background and keep the subject in focus. Evaluative metering, One shot AF, Drive mode set to Single. |
| Landscape | The camera selects a small aperture to keep the foreground and background in focus. Evaluative metering, One shot AF, Drive mode set to Single. |
| Close-up | Designed to take pictures of objects at a small distance. Evaluative metering, One shot AF, Drive mode set to Continuous. |
| Sports | The camera selects a fast shutter speed. Evaluative metering, AI Servo AF, Drive mode set to Continuous. |
| Night Portrait | The camera uses a slow-sync flash to capture ambient light along with the flash. Evaluative metering, One shot AF, Drive mode set to Single. |
| Flash Off | The camera will disable the flash. Evaluative metering, One shot AI Focus, Drive mode set to Single. |
In the Basic Zone, the camera uses preset camera options. Advanced options such as ISO, WB, AF mode, and Metering are unavailable. Below is a list of the options available via the record menu:
| Record Menu (Basic Zone) | |
| Quality | L, M, S (Fine, Normal) |
| Red-eye | Off, On |
| Beep | Off, On |
At any time, two Setup menus are available via the Menu button. Below, we have outlined the Setup menu options:
| Setup Menu 1 | |
| Auto power off | 1, 2, 4, 8, 15, 30 min, Off |
| Auto rotate | On, Off |
| LCD brightness | 5 increments |
| Date/Time | Set |
| File numbering | Continuous, Auto reset |
| Format | Cancel, OK |
| Shoot w/o card | On, Off |
The "Auto power off" option refers to the length of time that the camera should wait before going into standby mode when there is a period of inactivity. You can simply half-press the shutter button to bring the camera out of standby mode. When Auto rotate is enabled, the camera will tag portrait-oriented photos so that they will appear upright when viewing the photos in an application that recognizes the tag information (this includes viewing them on the camera's LCD monitor). Although the 350D offers 5 levels of LCD brightness, we found even the highest setting to be difficult to view in brighter lighting conditions (i.e. in the sun). The 350D offers two different file numbering options: continuous or auto reset. When set to continuous, the numbering system will not reset even if a new media card is inserted. When it is set to Auto reset, the camera will reset the folder name to "100" and the image name to "IMG_0001" each time a card is inserted. If a file/folder already exists on the flash card, however, the camera will start with the next available number. The option "Shoot w/o card" is a feature that was missing from the original Rebel (300D). When this is set to "Off", the LCD panel and viewfinder will blink "No CF" when trying to take a picture without a card. This is a great option to ensure that you don't shoot a bunch of incredible photos only to find that there was, in fact, no CF card in the slot.
| Setup Menu 2 | |
| Language | Select |
| Video system | NTSC, PAL |
| Communication | Print/PTP, PC connection |
| Custom Functions | (See additional table below) |
| Clear settings | Clear all camera settings, Clear all Custom Functions, Cancel |
| Sensor cleaning | Cancel, OK |
| Firmware Ver. | Update |
The Communication option allows you to specify whether the camera is connected to a computer or a printer. The Clear settings function lets the user clear all changes to the original factory default settings. There is also an option to reset the Custom Functions back to their defaults. The Sensor cleaning option will flip up the mirror to allow the user to clean dust off the sensor. It is absolutely necessary to have either a full battery charge or to have the camera powered by the optional AC adapter during sensor cleaning in order to reduce the risk of damage to the sensor or mirror. The Firmware Ver. option will display the current firmware version installed (1.0.1 for this review) and will give you the option to update.
| Custom Functions | |
| 01 SET button/Cross keys funct. | 0: Normal 1: SET:Quality 2: SET:Parameter 3: SET:Playback 4: Cross keys:AF frame selec. |
| 02 Long exposure noise reduction | 0: Off 1: On |
| 03 Flash sync. speed in AV mode | 0: Auto 1: 1/200sec. (fixed) |
| 04 Shutter button/AE lock button | 0: AF/AE lock 1: AE lock/AF 2: AF/AF lock, no AE lock 3: AE/AF, no AE lock |
| 05 AF-assist beam | 0: Emits 1: Does not emit 2: Only emits ext. flash |
| 06 Exposure level increments | 0: 1/3-stop 1: 1/2-stop |
| 07 Mirror lockup | 0: Disable 1: Enable |
| 08 E-TTL II | 0: Evalutative 1: Average |
| 09 Shutter curtain sync. | 0: 1st-curtain sync. 1: 2nd-curtain sync. |
One of the major upgrades from the 300D is the addition of some Custom Functions available through the second Setup menu. Custom Functions allow you to change the functions of some of the camera's operations. For example, the first function allows you to change the behavior of the SET button and the Cross keys. With the Long exposure noise reduction option enabled, the camera will use a dark frame subtraction method in an attempt to eliminate noise that may show up during a long exposure. With function 06, you can specify whether you want to make exposure adjustments in either 1/3-stop or 1/2-stop increments. Another new feature to the 350D is the option to enable mirror lockup. This helps to reduce blurring caused by mirror vibration. The mirror will flip up prior to the exposure so that any vibrations will be avoided. When the mirror lockup option is enabled, the self-timer delay changes from 10 seconds to 2. E-TTL II refers to the 350D's flash metering system. With the Custom Functions menu, you can change the metering type to either Evaluative or Average. With Custom Function 09, you can select when the flash will fire during an exposure. With 1st-curtain sync., the flash will fire at the beginning of the exposure. However, a more natural effect is created by selecting 2nd-curtain sync. Imagine a person running through the frame. With 2nd-curtain sync. selected, the motion trail will follow naturally behind the subject. If 1st-curtain sync. was selected, the motion trail would appear in front of the subject.

Info screen
Below is a table that we constructed to help visualize some of the major differences between the original Rebel (300D) and the Rebel XT (350D).
| Rebel XT (350D) | Rebel (300D) |
| 8.0 megapixels | 6.3 megapixels |
| DIGIC II processor provides very fast image processing | DIGIC processor (much slower) |
| Metering and AF mode selection | No control over metering or AF mode |
| Nearly instantaneous startup | Average startup |
| Continuous drive: 3 fps for 14 frames (JPEG); 3 fps for 5 frames (RAW) | Continuous drive: 2.5 fps for 4 frames (RAW and JPEG) |
| E-TTL II | E-TTL |
| Mirror lockup | No mirror lockup |
| Improved parameters now allow B&W shooting with Filter and Toning effects | No color filter options |
| Extensive WB Shift/BKT | No WB Shift, just bracketing |
| Custom Functions menu | No Custom Functions |
| RAW mode has option to record a separate JPEG file | RAW files include an embedded JPEG |
| Smaller and lighter body | Bulky and a bit heavier |
| Smaller battery (same as S60/S70) | Larger battery (same as 10D and 20D) |
Playback Features
Just like the speed advantages that we saw when we compared the 20D to the 10D, the Canon 350D is much faster than the 300D when it comes to reviewing images. It takes much less than half a second to load each image. With the original Rebel, the camera would load a low quality preview of each image followed by a high quality version. Thumbnail |
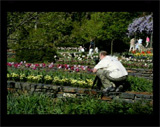 Image regular |
 Image magnified 10x |
You are able to magnify an image up to 10x by using the Enlarge/AF point selection button. While an image is magnified, the image can be scrolled vertically, horizontally, or vertically through the use of the 4-way cross keys. To view the images as thumbnails, you must press the Reduce button while an image is being viewed full screen. A 3x3 thumbnail view will be displayed. To delete an image, simply press the "Erase" button. You can then choose "Cancel", "Erase", or "Erase All".
 No Info. |
 Basic Info |
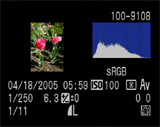 Detailed Info |
The Info button toggles the amount of information that is displayed about each image. The first option is to display no information on the screen other than the image itself. Another press of the Info button will result in the display of some very basic information including: file number, shutter speed, aperture, and image number out of the total number of images on the card. The third option contains a large amount of information including a histogram with blinking overexposed sections and the following: file number, date & time, ISO, metering, record mode, color space, shutter speed, aperture, exposure compensation, WB shift, white balance setting, image number out of total number on the card, and image size and quality.
Below, we have outlined the various options available via the Playback menu:
| Playback menu | |
| Protect | Select |
| Rotate | Select/Rotate |
| Print Order | Order, Set up |
| Auto Play | Set |
| Review Time | Off, 2, 4, 8 sec., Hold |
The Protect option allows you to mark images as "protected" so that they may not be deleted. However, formatting the card will erase all images, including protected files. The Print Order option allows you to select images for printing on a DPOF (Digital Print Order Format) compatible printer. After selecting the quantity for each image, you can specify the Print Type from "Standard", "Index", or "Both". Additionally, there are options to include a date and/or file number stamp on each print. The Auto Play option is a slideshow feature that cycles through the pictures on the flash card approximately every 4 seconds. The slideshow can be paused and un-paused by pressing the "Set" button. Review Time refers to the amount of time that the 350D will display an image immediately after it is taken. The "Hold" option means that it will display the image until either the shutter button is pressed or the camera turns itself off. Overall, the playback mode on the Rebel XT is much more enjoyable than it is on the original Rebel simply because of the speed. If you are used to the original Rebel, you will notice the enormous speed difference between the two immediately.
Battery Performance
Our general method for battery testing is to reset the camera to its default settings and change the recording mode to the highest quality option (RAW). Then, we take 5 pictures without the flash and 2 pictures with the flash until the battery is dead. For more information on our battery test, please refer to our Testing Procedures page. For this test, we used the supplied rechargeable lithium-ion batteries for each camera. For the Canon 20D and 300D, this was a BP-511A 7.4V 1100 mAh. The Canon 350D uses an NB-2LH 7.4V 720 mAh. The batteries were fully drained before charging overnight for the test.| Number of shots taken in one battery charge | |
| Canon 20D | 4,353 |
| Canon 350D | 3,818 |
| Canon 300D | 1,630 |
Despite having a smaller battery with a smaller capacity, the 350D performed extremely well in our battery test. We were able to take 3,818 frames with the 350D compared to 4,353 with the 20D. As the table above demonstrates, the 350D is more comparable to the 20D than it is to the 300D. We should also mention that the new BG-E3 battery grip is available for the 350D, which runs approximately $150. The grip can hold either 2 NB-2LH batteries or 6 AA's. We have heard of some people buying the BG-E3 grip in order to compensate for the smaller main grip. This is something to keep in mind if you think your hand might be uncomfortable with the main grip. The only way to find out is to actually hold a 350D in your hands to get a feel for how well the main grip will work for you. Even without the extra battery potential of the BG-E3, we are extremely impressed with the 350D's performance in our battery test. Keep in mind that the actual number of frames that you will get out of the 350D will vary based on a number of factors such as image stabilization, periods of inactivity, temperature, etc. Our battery test represents more of an ideal number of shots that you could achieve if you shot continuously until the battery was empty.
The Timing Tests
* NOTE: For all of our time tests, the camera is reset to its factory default settings and set to record using the highest resolution and quality setting. It is set to record in Auto mode. A 512 MB SanDisk Ultra II CF card was used.Before reading our results, please refer to our Testing Procedures page.
Startup Time
The startup time is recorded from the moment that the power button is pushed to the moment that the shutter sounds. The camera is set to record in Auto mode.| Startup time (seconds) | |
| Canon 20D | 0.23 |
| Canon 350D | 0.31 |
| Canon 300D | 2.76 |
As the table above demonstrates, the 350D is able to start up nearly instantaneously. The 300D takes nearly 9 times as long at 2.76 seconds. It is exciting to see that all the major digital SLRs are starting to incorporate "instant-on" capabilities, even on their entry-level models.
Auto-Focus and Shutter Lag
To record shutter lag, we perform two tests with the lens at its widest angle setting. For the first test, we pre-focus the lens and measure the amount of time that it takes the camera to take a picture after the shutter button is pressed. The second test measures the time that it takes for the camera to take a picture after we press the shutter button without pre-focusing. Each test is performed 3 times and the results are averaged. We used a Canon 50mm Macro lens for the Focus and Lag tests. The cameras were set to Shutter-priority at 1/640th sec. For more information regarding our testing procedures, please refer to our Testing Procedures page.| With Pre-focus (seconds) | Without Pre-focus (seconds) | |
| Canon 350D | 0.09 | 0.21 |
| Canon 20D | 0.09 | 0.23 |
There is no doubt that the 350D has a very fast shutter lag. It took just 0.09 sec. to take a picture when we pre-focused the lens. When we included focusing in the time, it took just 0.21 seconds to focus and take the picture. This is a very impressive speed. We found a very slight difference between the focus lag times of the 350D and the 20D, but this is well within the margin of error. Keep in mind that the amount of time needed to focus can vary greatly depending on the lens you are using.
Write Times
We recorded 5 different write times with a SanDisk Ultra II 512 MB CF card:Single Shot - The time that it takes for a single picture to be written completely to the flash card (the time that the "activity light" is on).
Shot To Shot (STS) - The time until the second shot can be taken after the first (shutter to shutter).
Shot To Shot w/Flash - The time that it takes the camera to take two pictures with the flash (from flash to flash).
Shot To Shot w/Buffer Full - The time between the last shot of a burst that fills the buffer to the moment that the shutter sounds again.
Clear Buffer - The time that it takes the camera to clear the buffer after a full burst of pictures is taken.
We performed each test three times and averaged the results. Below are the resolution, quality setting, and average file size used for the tests.
| 350D | ||
| Setting | Resolution (pixels) | Average file size (MB) |
| JPEG (Large/Fine) | 3456x2304 | 5.66 |
| RAW | 3456x2304 | 9.22 |
| 20D | ||
| Setting | Resolution (pixels) | Average file size (MB) |
| JPEG (Large/Fine) | 3504x2336 | 5.13 |
| Single Shot | Shot To Shot | Shot To Shot w/Flash | Shot to Shot w/Buffer Full | Clear Buffer | |
| 350D (JPEG) | 0.72 | 0.36 | 1.17 | 0.99 | 5.78 |
| 20D (JPEG) | 0.69 | 0.41 | 1.14 | 0.94 | 14.22 |
| 350D (RAW) | 1.34 | 0.36 | 1.62 | 1.47 | 6.44 |
It is clear by looking at the table above that the 350D and the 20D perform nearly the same when it comes to cycle times and writing JPEG images. The 350D is able to write a single 5.66 MB JPEG file in just 0.72 sec. When shooting without the flash, the camera takes just 0.36 sec. between frames. With the flash enabled, the 350D takes 1.17 seconds between frames. In Continuous Drive mode, we were able to shoot 8 frames at 3.33 fps. Occasionally, the camera was able to take 10 frames instead of 8. The number of frames that you can achieve will depend largely on the speed of your media and the detail in your image (file size). We used a 512 MB Ultra II SanDisk CF card that is able to write images at 60x (9 MB per second). With a faster card, you should be able to fit more frames in a burst because of the higher write speed. After we filled the buffer with 8 frames, the camera needed nearly a second (0.99 sec.) between frames. In order to clear the buffer of all 8 frames, the camera took 5.78 seconds.
When we shot images with the 350D in RAW mode, the results were very impressive as well. It takes just 1.34 sec. to write a single 9.22 MB RAW file. We found the same 0.36 sec. shot-to-shot time in RAW mode. With the flash enabled, the camera took 1.62 sec. between frames. When we set the camera to Continuous Drive mode, it took 5 frames at 3.42 fps. Again, the number of frames that you can take in one burst will depend on file size and the speed of your flash media. With the buffer full, the 350D took 1.47 seconds between additional frames. The 350D took 6.44 seconds to flush the full buffer out to the flash card. Unfortunately, we don't have comparison numbers for the 20D in RAW mode because in our 20D review, we had the 20D set to RAW +Small/Normal JPEG and the 350D doesn't have this option.
Overall, the 350D is incredibly fast at processing images. This is thanks to the DIGIC II image processor (same as the 20D). Unfortunately, we couldn't get our hands on the original Rebel to make a direct comparison and our testing methods have changed a bit since our original review of the 300D. For a good idea of how the 350D would compare to the 300D, take a look at our 20D VS 10D timing table. The 10D has the same image processor as the 300D and therefore, has a very similar performance.
Resolving Fine Lines
For our resolution test, we reset the camera
to its default settings and then used the highest resolution and quality setting.
The camera was then set to Aperture-priority (f/11), Manual WB, Parameter 2, and
sRGB. For more information, refer to our Testing
Procedures page. When reading this chart, the numbers represent lines per
picture height (LPH). For example, the number 16 would represent 1,600 LPH. Click
on a thumbnail below to see the full chart at 100%.
|
350D (+1.3 E.C.) |
20D (+1.3 E.C.) | |
| JPEG/Fine | Download | Download |
| RAW (JPEG) | Download | Download |
| RAW (original) | Download WARNING: 7MB | Download WARNING: 8MB |
Canon 350D VS Canon 20D (JPEG)
Roll your mouse over the 200% crops below to see the difference between the Canon 350D and the Canon 20D JPEG resolution charts.
Hold
mouse over image.
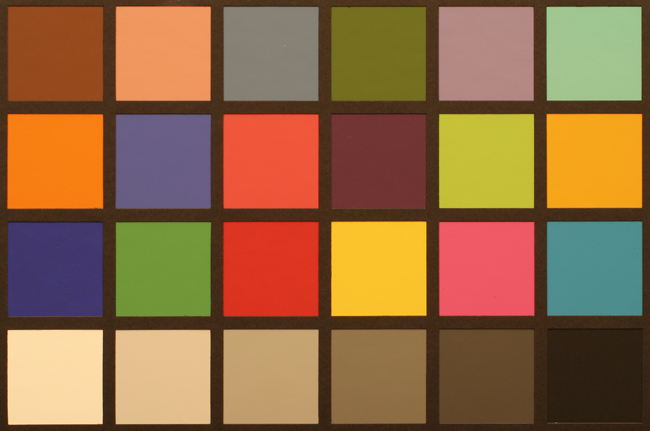
Color Reproduction
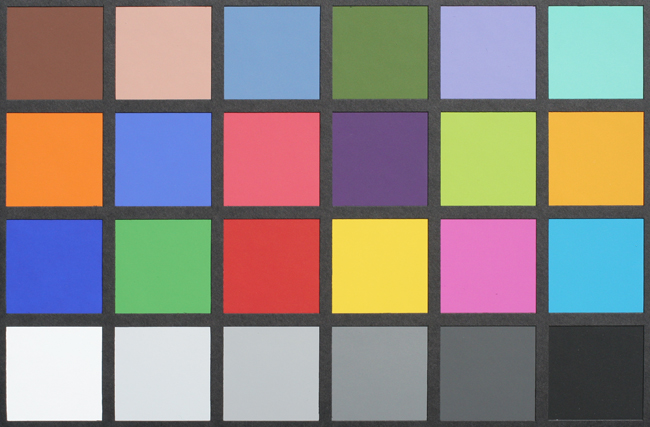
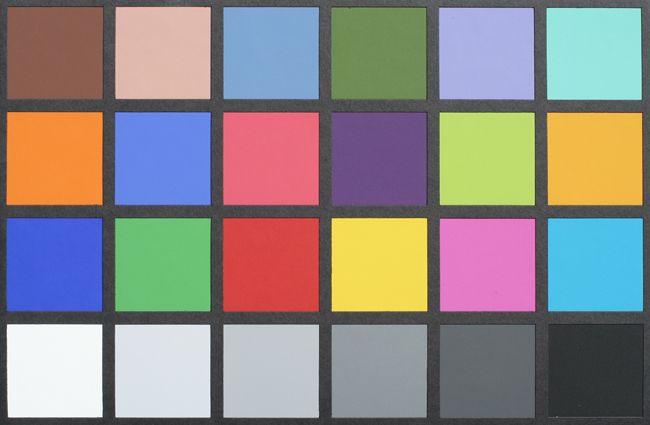
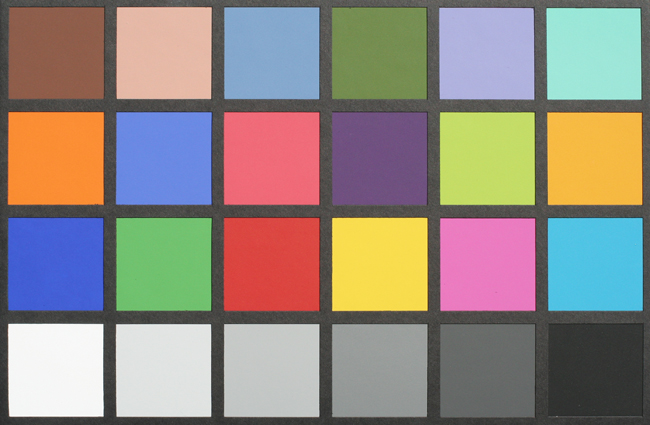
* For all of our color tests, we reset the 350D to its factory default settings. It was then set to record using the highest JPEG image quality option. All images were shot with Aperture-priority mode, Parameter 2, and sRGB.We took a picture of our color chart using each of the following WB settings: Auto, Incandescent, and Manual. Click on a thumbnail below to view the full-size image.
Incandescent
| Auto WB | Incandescent WB | Manual WB |
 Click to enlarge. |
 Click to enlarge. |
 Click to enlarge. |
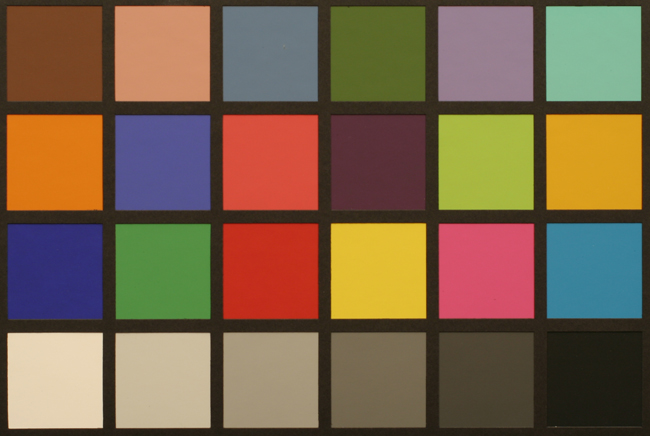
 Reference Chart ("actual colors") |
||
| Auto WB | Incandescent WB | Manual WB |
 |
 |
 |
With Auto WB under tungsten lighting, we weren't too surprised to see a fairly strong yellowish cast. Almost every camera that we have tested seems to produce this yellowish cast with the possible exception of Kodak. When we used the Incandescent WB setting, the colors are much more accurate. However, we are a little disappointed to see that a faint yellowish cast remains. With Manual WB, the 350D produced some extremely accurate colors.
Daylight
| Auto WB | Daylight WB | Manual WB |
 Click to enlarge. |
 Click to enlarge. |
 Click to enlarge. |
Reference Chart ("actual colors") |
||
| Auto WB | Daylight WB | Manual WB |
 |
 |
 |
There were no major differences between any of the WB settings in direct sunlight. All three settings yielded very accurate colors and bright exposures.
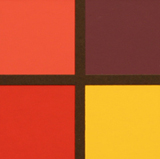
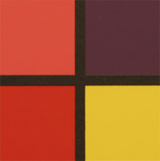
Built-in Flash
For the flash test, we compared the differences between Auto mode and P (Program AE). The pictures were taken from 5 feet away.| Auto (Parameter 1) |
P (Program AE) (Parameter 2) |
 |
 |
| Click on images to download. | |
In both Auto and Program modes, we were very impressed with the color reproduction capabilities of the 350D. Although both modes produced very accurate colors, notice how Auto mode produces images with higher contrast than Program AE mode. Since Auto mode does not provide the option to select a parameter through the Record menu, the camera uses Parameter 1 automatically, which boosts contrast and sharpness.
Noise
The noise test consists of pictures of our studio shot taken at increasing ISO levels to show the effect on the image. The pictures were taken after resetting the camera to its factory default settings. The camera is then set to record with the highest quality JPEG option with manual WB. Click on a 100% crop below to view the full-size image. All images were shot in Aperture-priority mode, Parameter 2, and sRGB.| 350D | 20D | |
| ISO 100 |  Click to enlarge. |
 Click to enlarge. |
| ISO 200 |  Click to enlarge. |
 Click to enlarge. |
| ISO 400 |  Click to enlarge. |
 Click to enlarge. |
| ISO 800 |  Click to enlarge. |
 Click to enlarge. |
| ISO 1600 |  Click to enlarge. |
 Click to enlarge. |
| ISO 3200 | N/A |  Click to enlarge. |
We mentioned early on in the review that the 350D is much more like the 20D than the 300D. As the crops above demonstrate, it is virtually impossible to see any difference in noise levels between the 350D and the 20D. Probably one of the first things that you will notice in looking at our sample images is that the 350D seems to have done a considerably better job metering our studio shot. We have no explanation for this, considering that the shot was set up the same. Perhaps the slight differences in framing could account for it. In our experience with the 350D, we have been very impressed with the evaluative metering system, even in backlit conditions. However, both cameras are capable of some incredibly low-noise images. It isn't until ISO 400 that either camera starts producing noticeable noise. Also, there isn't any discoloration or noteworthy detail loss until ISO 1600. Of course, the 20D has the advantage of using ISO 3200 while the 350D maxes out at 1600. If you shoot subjects frequently in very low light environments, it might be worth it to take a look at the 20D instead. Otherwise, the absence of ISO 3200 probably won't be a concern for most people.
For another comparison, below are rollovers of the 350D and 300D. Roll your mouse over the original 350D crop to see the 300D crop.
| ISO 100 |  Hold mouse over image. |
| ISO 200 |  Hold mouse over image. |
| ISO 400 |  Hold mouse over image. |
| ISO 800 |  Hold mouse over image. |
| ISO 1600 |  Hold mouse over image. |
Compared to the original Rebel (300D), the 350D shows a dramatic improvement. From ISO 100 to 200, they both show relatively low noise. However, from ISO 400 to 800, we can see that the 300D begins to show more noise than the 350D. In fact, at ISO 800, the 350D image is comparable to ISO 400 on the 300D. At ISO 800 on the 300D, the image is characterized by discoloration and grain while the 350D image remains smooth and clear. At ISO 1600, there is no contest; the 350D retains clarity with minimal discoloration while the 300D produces an image with a "webcam-like" quality.
General Image Quality
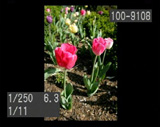
For these pictures, the camera was reset to its factory default setting. Then, it was set to its highest quality recording setting. The pictures were then taken in Aperture-priority mode with Auto WB unless stated otherwise. Portrait-style images have been rotated automatically with the "Auto rotate" feature on the 350D. Click on a thumbnail to view the full-size image. All images were shot with Aperture-priority mode, Parameter 2, and sRGB.  16-35mm ISO 100, 1/250th, f/4.0 Click to enlarge. |
 50mm Macro ISO 100, 1/800th, f/5 Click to enlarge. |
 28-135mm IS ISO 200, 1/320th, f/8 Click to enlarge. |
 |
 |
 |
 28-135mm IS ISO 100, 1/250th, f/4.5 Click to enlarge. |
 16-35mm ISO 800, 1/200th, f/2.8 (Fluorescent WB) Click to enlarge. |
 16-35mm ISO 1600, 1/100th, f/5.0 Click to enlarge. |
 |
 |
 |
In the first sample image, we found the 350D capable of reproducing very impressive details when matched with a top quality lens. The image has a cool color cast, which resulted from the Auto WB setting. Had we selected the Shade or Cloudy setting, the colors would have been much more accurate. In samples 2 and 3, we want to point out that images right out of the camera will most likely be on the soft side with relatively low saturation. If a "punchier" image is desired right out of the camera, you will have better luck selecting a custom parameter in order to tweak the sharpness, contrast, etc.
In the fourth sample, we wanted to take a look at the 350D's dynamic range. Although this is a rather extreme example, the 350D has clearly overexposed the information in our crop. Avoiding overexposed subjects is an ongoing struggle with digital cameras and one way to deal with this is to shoot in RAW mode. More than likely, if this image had been taken as a RAW file, the highlight detail could have been saved. Sample 5 is another reason to shoot in RAW mode. Although we were satisfied with the detail and image quality, the colors aren't quite right. We set the camera to Fluorescent WB, but really, there was a mixture of fluorescent, tungsten, and indirect sunlight. In tough situations like this, it is best to shoot in RAW mode because you can easily adjust the WB later. Finally, in the last sample image, the 350D proves that it can take very detailed images even at ISO 1600. It is in shots like this that the 350D really benefits from the low-noise DIGIC II image processor. Overall, we are extremely impressed with the image quality of the 350D. Having shot with both the 20D and the 350D, we don't feel that there is any noticeable difference with regard to image quality other than the extra ISO option on the 20D (ISO 3200).
Long Exposure
 16-35mm ISO 100, 20 sec., f/7.1 Noise Reduction Off Click on images to download. |
 16-35mm ISO 100, 20 sec., f/7.1 Noise Reduction On Click on images to download. |
 Hold mouse over image. |
|
In comparing the two 20 sec. exposures above with and without noise reduction, we saw virtually no difference in the level of noise. We were extremely impressed with the image quality and couldn't find any stuck pixels throughout either image. The only difference between the two images that we could observe was an incredibly small difference in sharpness. The image taken without noise reduction appeared to be a tiny bit sharper than the image taken with noise reduction. You'll have to forgive the lopsided-ness of our night samples. We drove 110 miles to Greenville only to realize that we left our tripod at home.
Final Words
There is no doubt about it. The Canon EOS 350D is incredibly impressive for an entry-level digital SLR. In virtually all of our tests, it performed on par with its older and more expensive prosumer brother - the Canon EOS 20D. One of the biggest performance upgrades from the original digital rebel is the DIGIC II image processor. The DIGIC II processor provides the 350D with blazing fast processing speed and very low-noise images. In our timing tests, the 350D proved to be just as fast as the 20D, which is leaps and bounds faster than the original DRebel (300D). It has a remarkable startup time of 0.31 sec and, of course, shutter lag is of no concern. Where the 350D truly shines is with regard to cycle/write times. You are almost never left waiting for the camera to process/write images. The 350D has a much larger buffer than the 300D and thanks to the DIGIC II processor, the images are processed and dumped to the CF card at a very high speed.With regard to image quality, the 350D does not disappoint. With the neutral processing parameter (2) selected, we found images to have excellent detail and overall exposure. The 350D also provides several preset and adjustable parameters allowing users to tweak the in-camera processing levels. Of course, as with all SLR cameras, it is expected that users will spend some time fine-tuning sharpness, contrast, etc. in post-processing. In comparing resolution capabilities, we found the 350D to have an identical resolution performance to the 20D. In addition, both the 350D and 20D show the same low level of noise in our noise analysis. The advantage of the 20D is that it has an option for ISO 3200 where the 350D only goes to ISO 1600.
As you can see, we couldn't find a lot to complain about with the 350D. We did think that the LCD monitor was a bit darker than it was on the 300D. This meant that we had to shield the monitor from the sun when reviewing images outdoors. Also, we are still rather disappointed with the Auto WB system under tungsten light as it produces a fairly strong yellowish cast. Finally, the size of the handgrip was a bit too small for us, which caused an uncomfortable strain in our hand after long periods of shooting. Anyone with larger hands will want to try holding the camera before purchasing it to make sure it feels right. Otherwise, we recommend getting the BG-E3 battery grip to provide more gripping support for ~$150. Along with the smaller body came a smaller battery as well. However, we are happy to see that the battery had no trouble lasting through several thousand frames in our battery test. All in all, the Canon 350D is an amazing deal at ~$890 for the body itself or ~$940 with the kit lens. If this camera looks appealing to you, take our word of caution about the grip seriously. Try to get your hands on one so that you can really get an idea of how it feels. It is exciting to see that the digital SLR market is rapidly expanding with faster and higher-quality cameras, and we are looking forward to what will come next.
| Pros | Cons |
|
|
Thanks again to Newegg.com for loaning us the Canon Rebel XT for review.


