Gateway FPD2485W: 24" LCD Beauty or Beast?
by Jarred Walton on February 22, 2007 10:00 AM EST- Posted in
- Displays
Features and Appearance
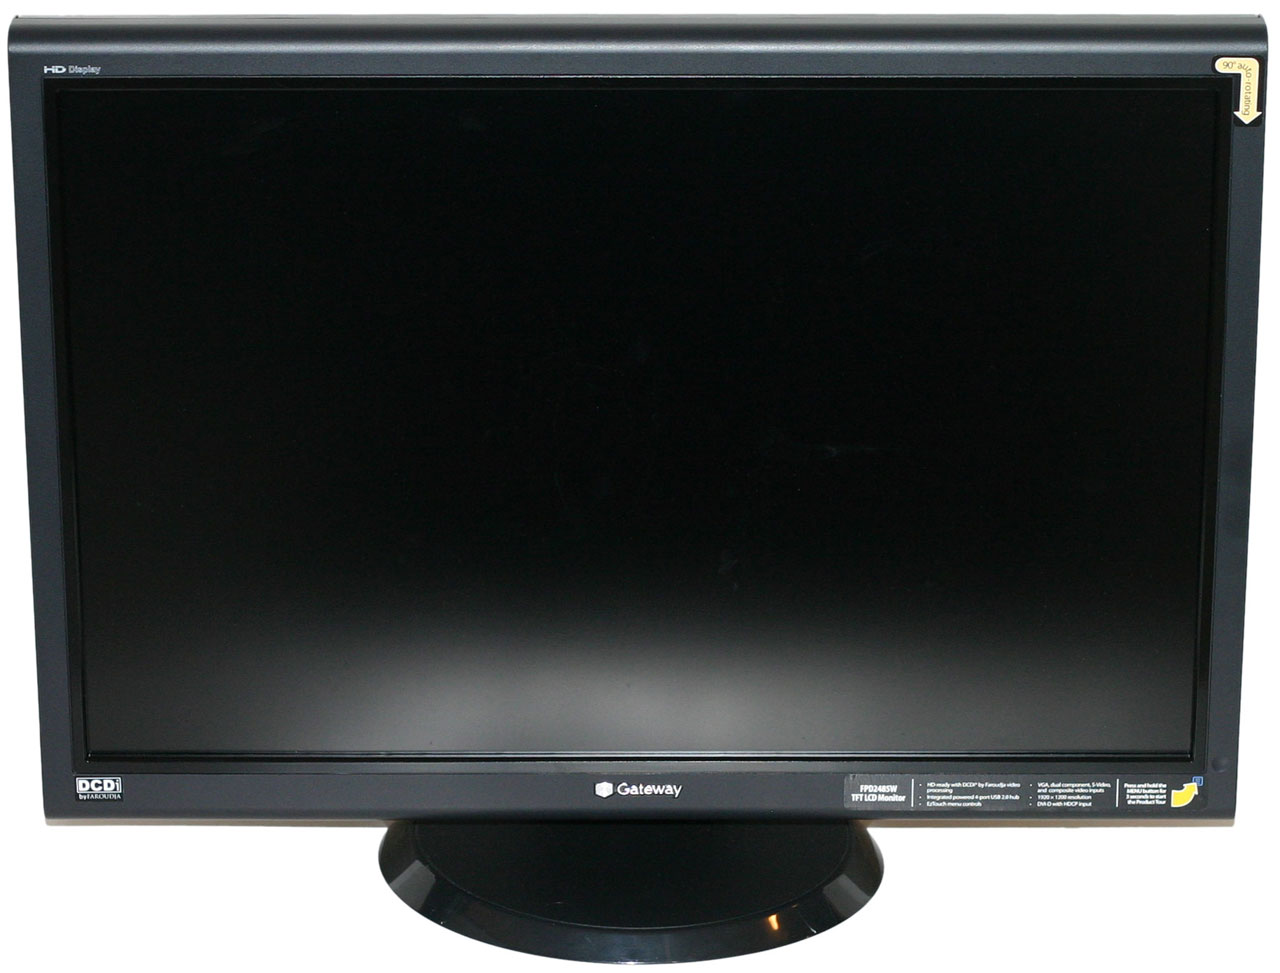
We've already covered some of the features on the specifications page, but we're going to take a closer look at the display here and provide images from various angles. Assembling the display is extremely simple: after removing the three major pieces from the box (the display as well as the two parts of the base stand), you first attach the circular base to the mounting arm and lock it into place using the provided screw on the bottom of the stand. After that all you have to do is insert the top of the LCD mounting mechanism into the stand and then lower it until it snaps into place.
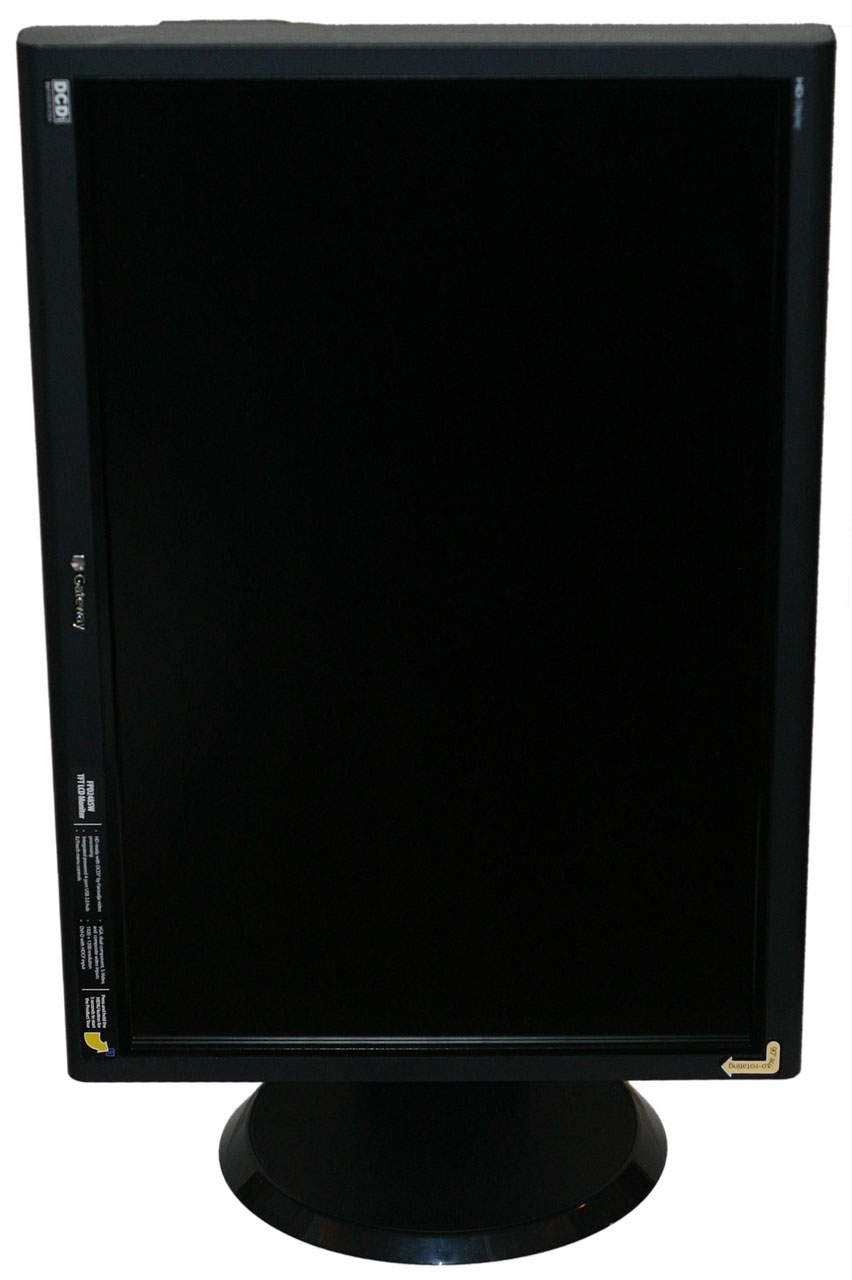
The base stand provides five inches of vertical travel, which gives you a reasonable amount of height adjustment. The stand also allows you to rotate the LCD and use it in portrait mode. While we can't say using a 24" LCD in portrait mode is something we found to be particularly useful, some people might feel otherwise. One of the great things about having such a large LCD is that it gives you the ability to view two documents (or document pages, web pages, etc.) side-by-side with room to spare, making portrait mode largely unnecessary.
With the display in portrait mode, you don't get quite as much vertical travel, and cable routing can be a bit trickier as well. The display supports auto rotate functionality, so as soon as you rotate the display Windows will automatically recognize the new orientation and change your resolution as appropriate. It is unlikely that this functionality works outside of Windows, due to a lack of native drivers for other operating systems, but we did not actually test this functionality outside of Windows; regardless, as stated already we don't find portrait mode to be particularly necessary on widescreen displays.
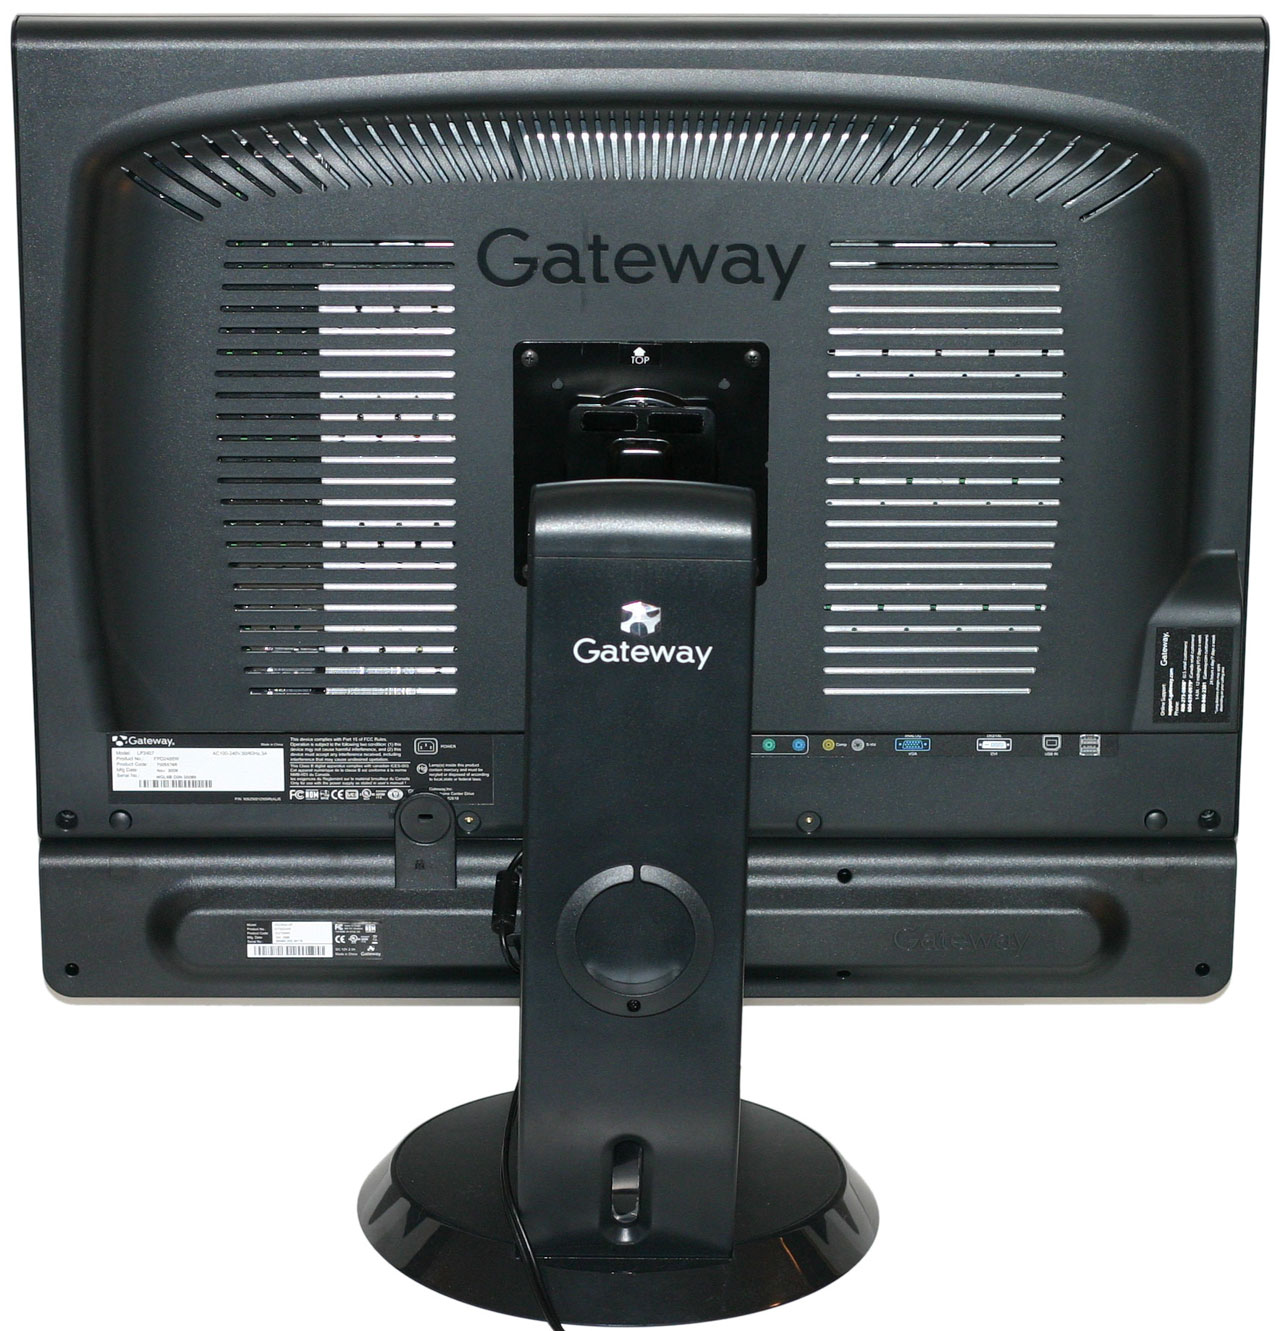
Here you can see a shot of the display with the optional speaker bar installed. The speaker bar attaches to the bottom of the LCD and receives power via a short cable that connects to the rear of the main display. The speakers only support stereo audio inputs (standard 1/8" DIN or RCA jacks), but they can try to emulate 3D surround sound if you'd like and the overall quality is pretty good given their size. There are plenty of better sounding speaker options available for $70 or less, but one nice benefit of the attached speaker bar is that you get reasonable quality audio without taking up much desk space. If you're more concerned with eliminating cable clutter than with getting premium quality audio, we would definitely add the speaker bar to a purchase of this display. The speakers also have the potential disadvantage of making portrait mode more difficult to access, so if you do intend to use the portrait mode we would forgo purchasing the speaker attachment.
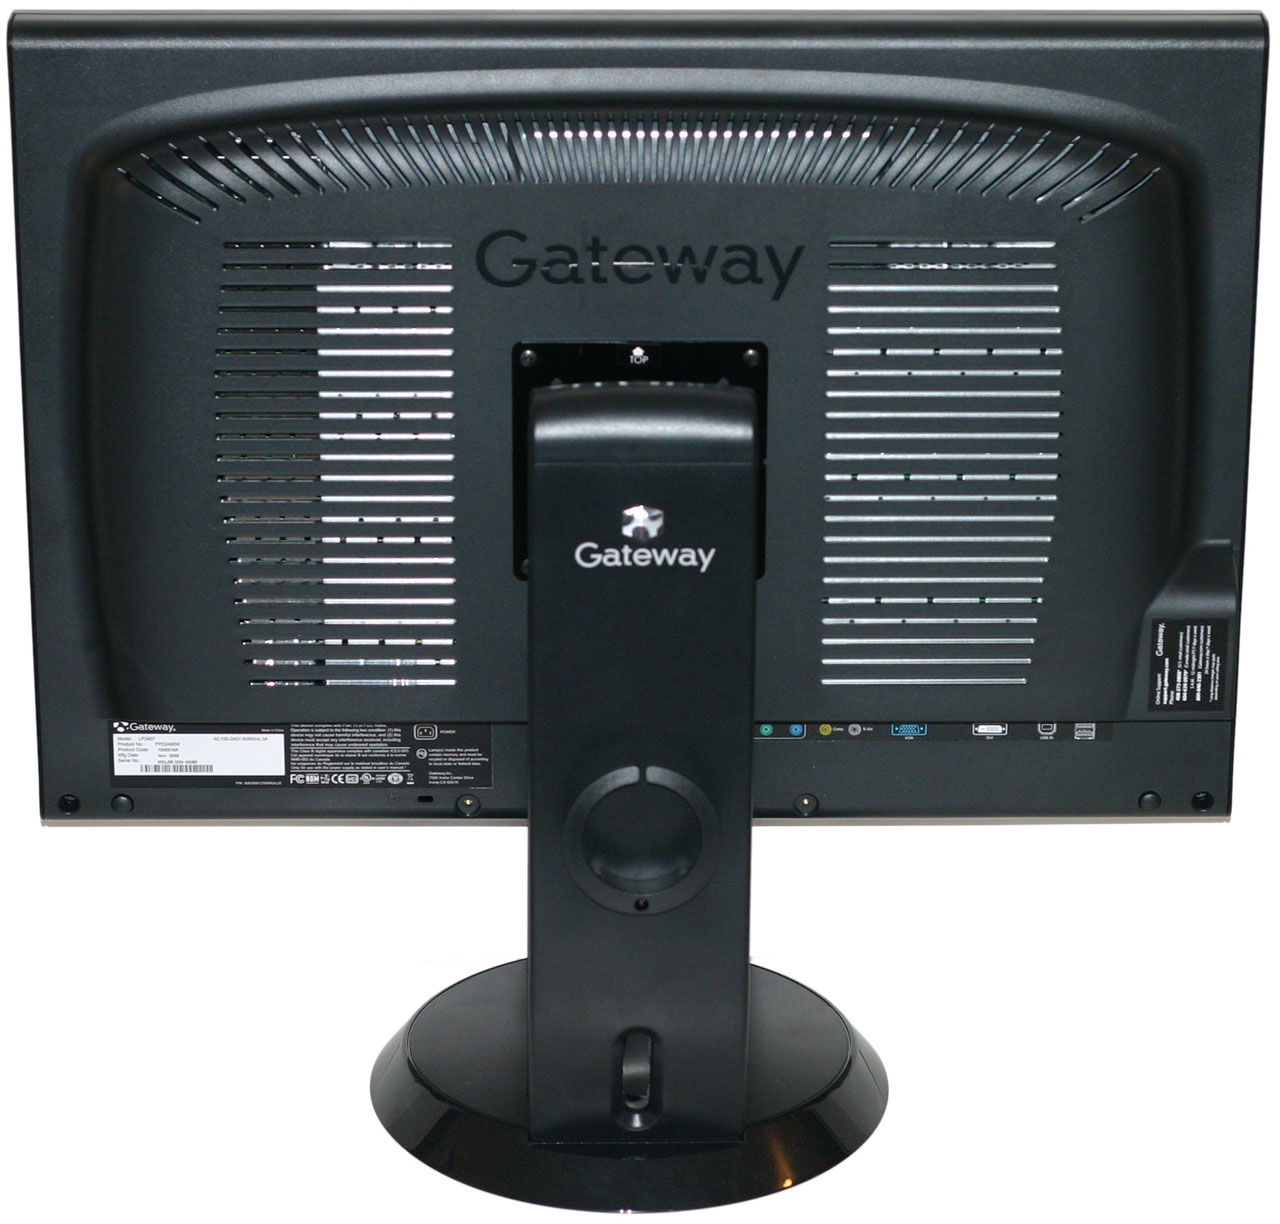
Here you can see the rear of the unit, with or without the speaker bar. The back of the base stand also includes a small ring that can be used to aid in cable routing. If you would rather do without the base stand, you can of course remove the mounting bracket and use a standard VESA wall mount instead.
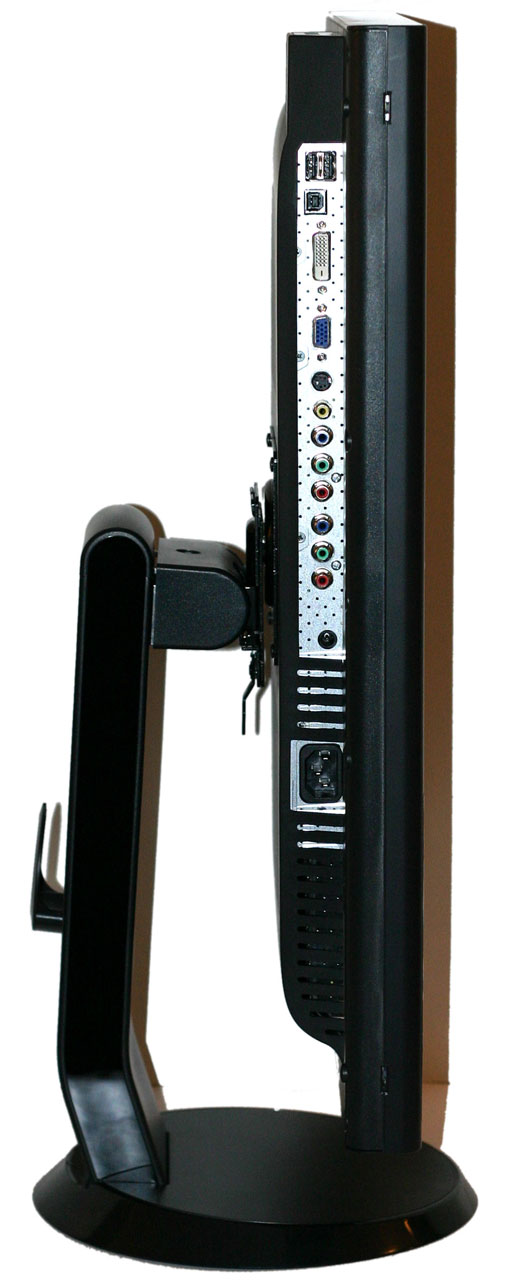
All of the input ports are located on the back of the unit, facing downward. One of the advantages of being able to rotate the display is that it makes it easier to install the cables initially. The only ports not located on the bottom of the display are two additional USB ports which are located on the left side. The ability to have the display function as a USB hub can be useful, although personally we prefer the integrated flash memory readers found on competing Dell LCDs. Flash memory readers are cheap, but integrating them into the display is one more way of eliminating cable clutter. If you have a flash reader integrated into your PC, of course, having a second reader on your display is largely superfluous.
We've already covered some of the features on the specifications page, but we're going to take a closer look at the display here and provide images from various angles. Assembling the display is extremely simple: after removing the three major pieces from the box (the display as well as the two parts of the base stand), you first attach the circular base to the mounting arm and lock it into place using the provided screw on the bottom of the stand. After that all you have to do is insert the top of the LCD mounting mechanism into the stand and then lower it until it snaps into place.
 |
 |
| Click to enlarge | |
The base stand provides five inches of vertical travel, which gives you a reasonable amount of height adjustment. The stand also allows you to rotate the LCD and use it in portrait mode. While we can't say using a 24" LCD in portrait mode is something we found to be particularly useful, some people might feel otherwise. One of the great things about having such a large LCD is that it gives you the ability to view two documents (or document pages, web pages, etc.) side-by-side with room to spare, making portrait mode largely unnecessary.
 |
| Click to enlarge |
With the display in portrait mode, you don't get quite as much vertical travel, and cable routing can be a bit trickier as well. The display supports auto rotate functionality, so as soon as you rotate the display Windows will automatically recognize the new orientation and change your resolution as appropriate. It is unlikely that this functionality works outside of Windows, due to a lack of native drivers for other operating systems, but we did not actually test this functionality outside of Windows; regardless, as stated already we don't find portrait mode to be particularly necessary on widescreen displays.
 |
| Click to enlarge |
Here you can see a shot of the display with the optional speaker bar installed. The speaker bar attaches to the bottom of the LCD and receives power via a short cable that connects to the rear of the main display. The speakers only support stereo audio inputs (standard 1/8" DIN or RCA jacks), but they can try to emulate 3D surround sound if you'd like and the overall quality is pretty good given their size. There are plenty of better sounding speaker options available for $70 or less, but one nice benefit of the attached speaker bar is that you get reasonable quality audio without taking up much desk space. If you're more concerned with eliminating cable clutter than with getting premium quality audio, we would definitely add the speaker bar to a purchase of this display. The speakers also have the potential disadvantage of making portrait mode more difficult to access, so if you do intend to use the portrait mode we would forgo purchasing the speaker attachment.
 |
 |
| Click to enlarge | |
Here you can see the rear of the unit, with or without the speaker bar. The back of the base stand also includes a small ring that can be used to aid in cable routing. If you would rather do without the base stand, you can of course remove the mounting bracket and use a standard VESA wall mount instead.
 |
 |
| Click to enlarge | |
All of the input ports are located on the back of the unit, facing downward. One of the advantages of being able to rotate the display is that it makes it easier to install the cables initially. The only ports not located on the bottom of the display are two additional USB ports which are located on the left side. The ability to have the display function as a USB hub can be useful, although personally we prefer the integrated flash memory readers found on competing Dell LCDs. Flash memory readers are cheap, but integrating them into the display is one more way of eliminating cable clutter. If you have a flash reader integrated into your PC, of course, having a second reader on your display is largely superfluous.


77 Comments
View All Comments
erwos - Thursday, February 22, 2007 - link
No 1080p over component sucks - when will manufacturers realize that people want this? An additional DVI-HDCP or HDMI input would have been nice, too. That said, it's still a beautiful LCD, from what I've seen of it in the stores.OrSin - Thursday, February 22, 2007 - link
A second DVI or HMDI connection would be very usefull. Is that why you want 1080P so you can have a second 1080p connection to the monitor?OrSin - Thursday, February 22, 2007 - link
Component was never orginally spec'ed for 1080p. Alothought it can be done it being out of spec makes most compnays not put the effort in to doing it. Also it was only recently you could get 1080p from any source so why go through the effert to make something when no one could even use it. By the time 1080p showed up HDMI was almost the standard. All broadcast HD is still 720p or 1080i. So you need HD-dvd or Blue-ray for any 1080p.I dont think many people really need component 1080p, single not a single 1080p TV comes without HDMI and and high end monitors comes with DVI. Why do you want this again?
mlambert890 - Saturday, February 24, 2007 - link
My guess is people want 1080p over component for gaming. Some people probably want it to try to bypass HDMI security, but I think the majority are thinking XBox 360 or PS3 gaming and, possibly at some point, dl'd video.JarredWalton - Sunday, February 25, 2007 - link
Xbox 360 is the primary reason anyone is talking component 1080p as far as I know. I'm not sure if PS3 does component output with 1080p or not, and I somehow doubt it. Anyone with a PS3 feel free to speak up, though.questech - Wednesday, May 29, 2013 - link
I have one of these, and it is a great monitor, when it is working. I mean it has great clarity and an interesting resolution, that not all graphic cards can support.They have a big problem with the cheep capacitors they use, and my monitor started taking longer and longer to boot up until one day it wouldn't. I replaced the capacitors with their high quality counter parts and that did the trick!
Unfortunately one day the internal fuse on the power board blew. I thought that maybe it might be an anomaly and replaced it... but it was the sign of something more involved.
I troubleshot it to the point of narrowing the culprit to either the transformer, or bridge rectifier.
Then things went from bad to worst... I left the monitor face down on a rubber mat, meaning to get back to the project in a short time, but I got busy with my film business and it sat there for a few weeks. When I got back to it, much to my horror, the rubber mat stuck to the bezel of the monitor and it made a mess.
OK, that wasn't bad enough, while cleaning the monitor face, I put a scratch in it. Now I'm not sure if it's an actual scratch, a mark that can be rubbed out, or what... but I'm not touching it again for fear that I'll completely destroy it :-)
At this point I am embarrassed and have decided to sell it for parts. If anyone is interested here's a link: http://tinyurl.com/pg6s3yh
Anyway, that's my Gateway story, I hope that it will make some of you feel better about any calamities that are happening in your life!
ZxxAssAssinxxQ - Saturday, February 7, 2015 - link
love this monitor, my dad bought it in 2007 and it crapped out in 2013, pop off the back, replace a few bulging capacitors (already had the replacements sitting around the house) and voila good as new. the thing is a little dark and the colors arent so great anymore but if you see one on ebay / craigslist i highly recommend it.