Averting Disaster - A Guide To Computer Backups (2014)
by Brett Howse on May 21, 2014 9:00 AM EST- Posted in
- IT Computing
- Mac
- Apple
- Windows
- Cloud Computing
- macOS
Built-in Backup Tools - OS X
Apple introduced Time Machine back with the Leopard release in 2007. Time Machine is an all-in-one built-in backup utility, allowing both file and image level backups with versioning. Time Machine will back up to internal or external disks, as well as the AirPort Time Capsule which is Apple’s own NAS specifically for backups. You can also back up to another Mac running at least Leopard, and with Mountain Lion Apple added the ability to backup to multiple destinations, with the backups alternating among the backup targets to provide additional levels of redundancy. Officially, Time Machine is not supported on other NAS devices. It does not work natively with Server Message Block (SMB) or Network File System (NFS) shares but instead requires the Apple Filing Protocol (AFP). If you are not going to use an AirPort device, ensure the NAS you select specifically supports Time Machine. Time Machine is simple to use, and yet powerful enough to be an almost complete backup solution for the Mac. Let’s look at how to set it up:
- First you need to configure a backup disk. Ensure you have your backup disk connected, or your AirPort Time Capsule configured, and then open the Time Machine menu from the menu bar by clicking the Time Machine icon and choosing Open Time Machine Preferences…
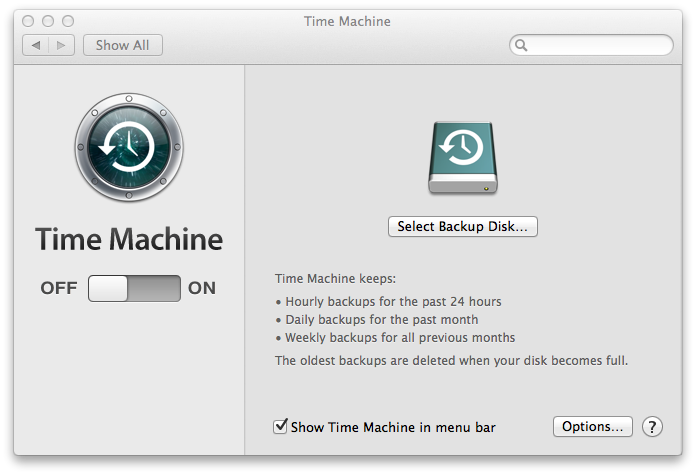
- On the Time Machine menu, click Select Backup Disk…
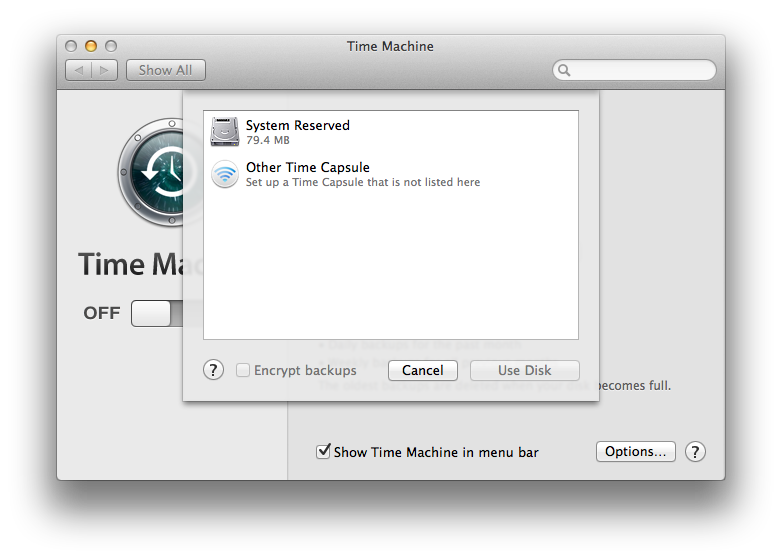
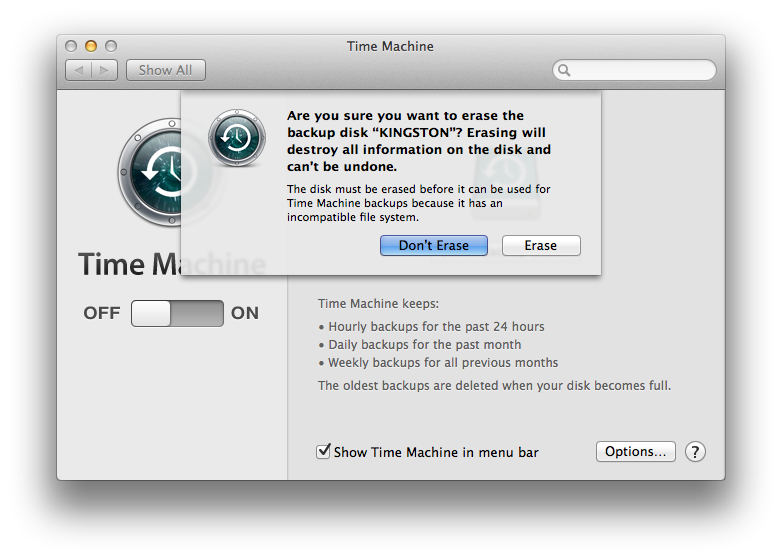
- Here it will display the available backup targets. Choose the backup target you’d like to use, whether it is an attached hard disk or the AirPort Time Capsule and click Use Disk. If the hard disk is not formatted with HFS+, you will be prompted to erase the disk and reformat which will of course delete any data currently on the backup target.
- Now that you’ve selected a disk, Time Machine will automatically start backing up.
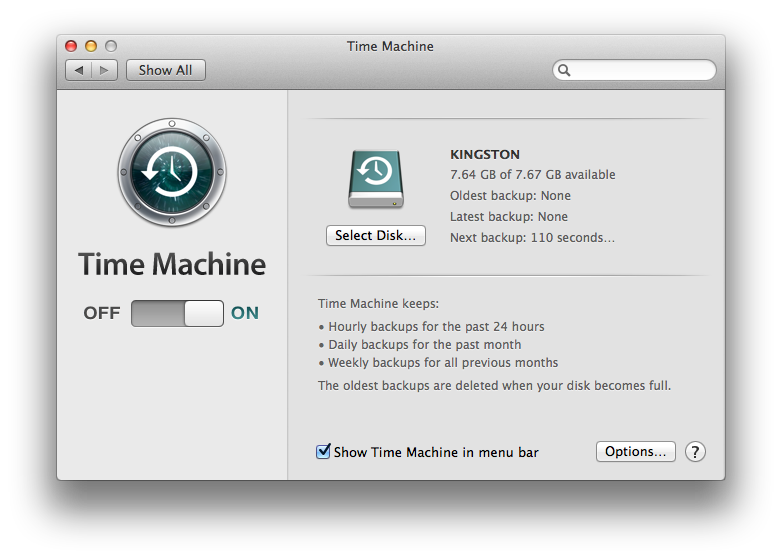


Time Machine does a full backup of your system, and then it starts to back up every hour. If the backup target is unavailable it will delay the backup until it is available again. Because only changes are backed up, each successive backup is relatively quick. If you would like to exclude some files from being backed up, click the Options button in the Time Machine menu to add exclusions.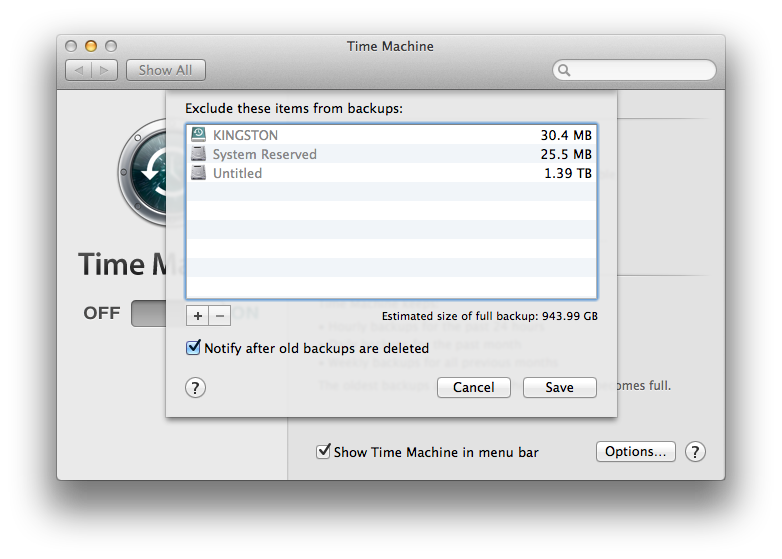
Other advanced options are not available, so there is no way to increase or decrease the frequency of backups or specify how many versions of a file to keep. The program will just back up indefinitely until it fills the available backup target, at which point it begins to delete the oldest files first.
Restoring files is relatively easy as well:
- Navigate to the folder where the file you want to recover should be (example – Documents).
- Click on the Time Machine icon in the menu bar and choose Enter Time Machine.
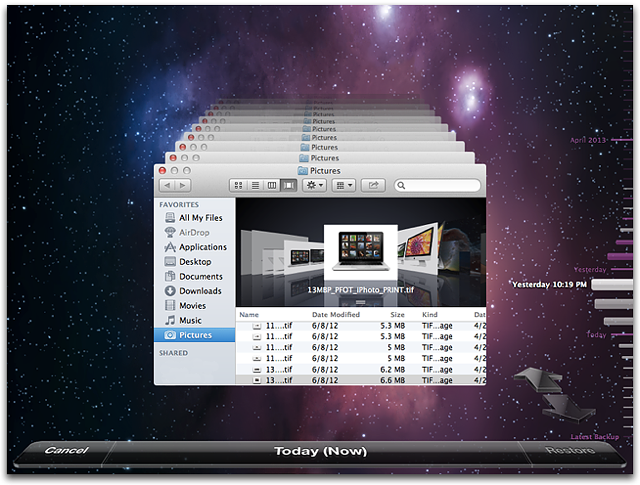
- This will open the restore interface, which shows a list of all of the previous backups sequentially. Using the arrows allows you to move from one backup to the next, or you can utilize the date bar on the right side which will allow you to move back to a known date. Selecting a backup date will then display the folder exactly as it was during the backup.
- Once you’ve located the file you wish to restore, select the file, and then click Restore. If the file was deleted, it will just be restored, but if the file still exists in its original location, you will be prompted to overwrite the file.
Time Machine can also be used within certain programs such as contacts, and restores operate in the same manner as files.
To restore the entire system to a previous state, hold down the Command and R keys at startup to enter the Recovery mode. In Recovery mode, one of the options is to restore from a Time Machine backup.


133 Comments
View All Comments
tribunal88 - Wednesday, May 21, 2014 - link
Any reason that CrashPlan wasn't considered?DanNeely - Wednesday, May 21, 2014 - link
1) "Of course this list is certainly not exhaustive, with many companies now offering online backup solutions. A quick search in your favorite search engine will provide dozens of options. Be sure to choose the one that works best for you."2) Look at the 5th item on the bulleted list above the paragraph I just quoted...
antef - Wednesday, May 21, 2014 - link
CrashPlan is fantastic. I used to use JungleDisk with S3, but the software was forgotten and became problematic and buggy. I gave it up and switched to CrashPlan. The client is easy to use and backups seem to happen fast and reliably.Kenazo - Tuesday, May 27, 2014 - link
Crashplan's friend to friend option is amazing. I have 3 or 4 people backing up to my home NAS, and my personal pictures and important documents all back up to my PC at work.Haravikk - Wednesday, May 21, 2014 - link
For most regular consumers, CrashPlan is something I'd definitely recommend; it's pretty easy to use and has unlimited storage, plus if you like you can specify the encryption key that is used (though of course you then have to find a way to keep that safe instead). Given the pricing of cloud storage it's also pretty well priced. I'm sure there are other cloud backup services, but CrashPlan is what I'm using.Personally though I've gone for the total overkill approach; I have my Mac's main system volume which I'm about to switch over to RAID-5, a Time Machine backup volume on RAID-5, a Synology NAS (no RAID since it's only two-disk), and the NAS is also configured to heedlessly run CrashPlan to backup my files. So I have a total of three redundant copies of my data, albeit one in the cloud that is usually a day or two behind, and would take weeks to re-download, but in the event of a fire burning down everything else I'd rather have that off-site protection.
Still, I'd personally recommend local back-up drive + NAS for most serious computer users, especially if working with that computer is your job, as a single backup isn't enough IMO, as the last thing you want is to be in the middle of restoring your system, only for the backup to fail as well.
NonSequitor - Wednesday, May 21, 2014 - link
Be really careful about RAID-5. It protects very well against a complete drive failure, but drive corruption or a drive that starts returning garbage will trash everything on the disk. You need a RAID level that does double parity or checksums, such as RAID-6 and RAID-Z, to actually protect against almost all hardware failures. Of course it still is not then a backup.pdf - Wednesday, May 21, 2014 - link
The bigger problem is that with large modern disks, a drive failure in RAID5 means that you're extremely likely to encounter unreadable sectors trying to resilver a replacement disk. A drive that starts returning garbage during regular operation should cause no problem with any competent RAID implementation though.Also, RAIDZ is single-parity - RAIDZ2, RAIDZ3, etc are the multi-parity versions. The other bonus with ZFS-based RAID implementations is full checksumming of all data and metadata on-disk, plus COW snapshots, and the latter means it can actually serve the role of a self-contained backup solution, using something like zfs-auto-snapshot to provide granular, aged snapshots of changed data.
Morawka - Wednesday, May 21, 2014 - link
i havent heard RAIDZ recommended for 10 yearspiroroadkill - Wednesday, May 21, 2014 - link
What are you even on about?ZFS was only widely available in November 2005.
Mr Perfect - Friday, May 23, 2014 - link
Guess that's only eight and a half years then.