Spotswood Custom Computer Cases
by Derek Wilson on August 27, 2008 12:00 AM EST- Posted in
- Cases/Cooling/PSUs
Installing a System
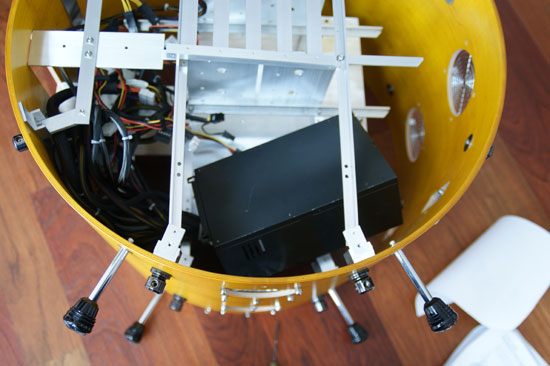
Working with the largest box (err… cylinder) that Spotswood makes, we expected to have a lot of room to work inside the case. This is true to some extent. There is actually plenty of room for internally mounting radiators for water-cooling systems. However, the extra space doesn't really do as much for ease of install and system access as we would normally expect from a large case. Don't look for anything highly modular, and while there are some thumbscrews, most of the work will be done with a variety of hex screws (the kit actually does come with tools, but you might need to supply your own wrench or pliers for holding some of the nuts at the back of some screws).
This case is not for the faint of heart. The two types of people we would recommend taking on the challenge are those with a lot of experience fighting cases (who have built a lot of PCs) or people who just like building stuff in general (and are comfortable improvising a solution if need be). If you're looking for a quick PC build, you'll want something else - but then you're not going to get a "drum" case, of course.
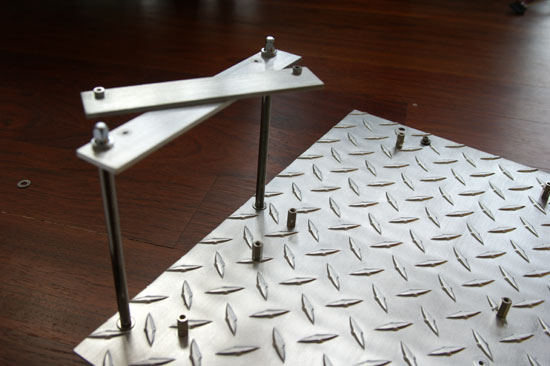
After removing the side panels, we remove the motherboard tray. Rather than having individual screws for each expansion card, it has two flat pieces of metal that sandwich the mounting brackets for the cards. This is pretty straightforward.
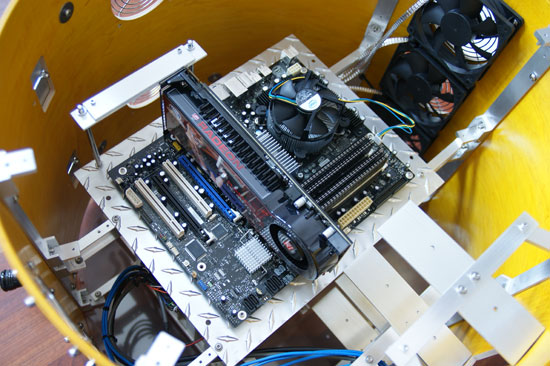
Installing the motherboard and add-in cards is simple enough, as is dropping the tray back into the system. I would actually recommend holding off on putting the tray back in until after installing the power supply and drives, as things are a little easier to reach this way.
Turning over to the power supply, the instructions state that we may need to remove the lower hard drive mounting bracket in order to fit an oversized power supply. As we wanted to use our 1200W PCP&C PSU (which is definitely large), we did need to remove this hardware.
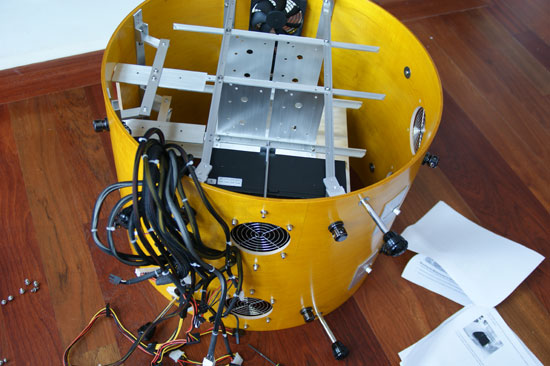
Even after this, it was a bit tricky to get the PSU to fit. If you are going with this case to build your prized enthusiast system with 3-way SLI or 4-way CrossFire, RAID arrays, and other goodies (with a matching power guzzler of a PSU), you might have to spend some time coaxing everything into place.
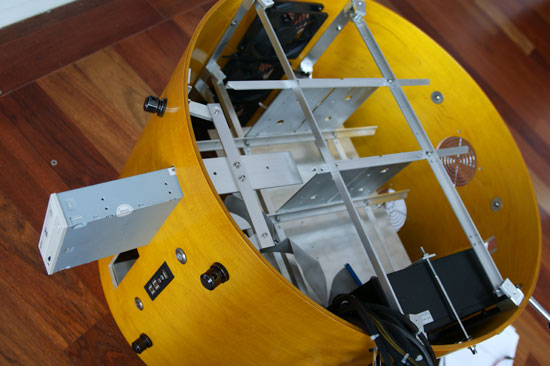
Optical drives install through the front. Standard drive bay covers likely will not work on this monster, and they will definitely mar the exterior. You can see we left one side open, which looks out of place on such a case. Since these things are custom, it's a good idea to only have Spotswood cut as many external drive bays as you need.
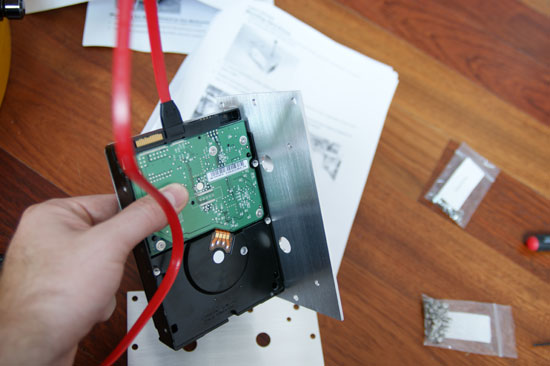
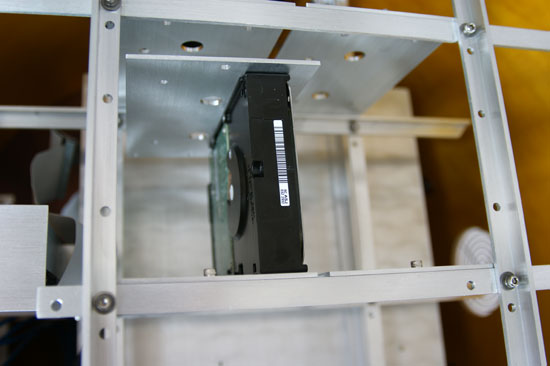
Mounting hard drives involves screwing them into plates and then screwing those plates into the rack.
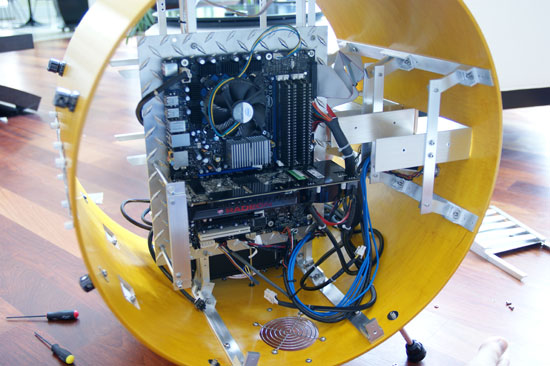
Plugging everything in was not easy, even with the long cables on our PSU. Despite the fact that the PSU is basically mounted right behind the motherboard, the cables start at just about as far away as possible from where they need to go. We had to finesse our 8-pin EPS12V power connector around the back, and we fought for every millimeter.
Here is the full gallery of our build process.


36 Comments
View All Comments
Spotswood - Wednesday, August 27, 2008 - link
As the President, builder and designer, I have a responsibility to clarify a few points in this review that are inaccurate, misrepresented or not at all addressed. I offer the following facts and information.- The two rear ports aren't meant for mounting case fans, rather they are there to access the inside of the case without having to remove a side panel/head.
- The hardware to convert the C-24 to an L-24 was provided to the author solely for the purpose of not having to supply two separate cases for review. An L-24 case normally has all of the hardware already attached to it.
- The mounting position of the motherboard tray is adjustable. The issues with the length of the PSU cables would have been eliminated if the author mounted the motherboard tray lower and more toward the front of the case. The instruction manual explicitly details the adjust-ability of the motherboard mounting.
- In the future, the motherboard tray will be revised with large holes to help facilitate routing cables from behind and underneath the motherboard itself.
- The case supplied for the review was built to have airflow move from the bottom to the top. However, when placing an order the customer is free to choose the total number of case fans (0-9), there location, along with the make and model.
- The three fans supplied with this particular case were SCYTHE S-FLEX™ 1200rpm fans (SFF21E). These fans are highly regarded by enthusiasts for there high CFM and low noise.
- The author failed to present any temperature or noise measurements prior to offering a series of solutions to perceived problems with cooling and noise.
- The case was built to be reviewed as a water-cooled case. A complete CPU water-cooling rig (D-Tek Fusion waterblock, Swiftech MCP655 pump, ThermoChill PA120.3 radiator, etc.) was supplied to the author for the sole purpose of this review.
Richard Chomiczewski, President
Spotswood Custom Computers, Inc.
cggkevin - Wednesday, August 27, 2008 - link
A better deal would be to go to a pawn shop and pick up a drum set for a couple of hundred and then just set a real PC case inside. This is kinda like a non-mini mini-ITC project.MagnumMan - Wednesday, August 27, 2008 - link
So basically they've tried to put a square peg in a round hole, on stands. Yuck.KIAman - Wednesday, August 27, 2008 - link
LOL, people have forgotten that style AND good performance should be considered in a case design.Drums? Come on, where's the creativity? I can brainstorm about 4 other designs without blinking.
1. Empty 5 gallon Aquafina jug
2. 1/8 scale model of Hummer
3. A 1 foot radius Earth globe
4. Toy model castle
mikeblas - Wednesday, August 27, 2008 - link
"(think oil rather than musical)"Are you sure? Because it looks way more like a musical drum than an oil drum, to me. And the review even says it's designed to look like a kick bass. Who edited this? Were they awake?
strikeback03 - Wednesday, August 27, 2008 - link
To me the article was not the most clear on the difference between C and L series cases, but as far as I could tell the C series are cylindrical but just have plain endcaps, not the drumheads and hardware. So sitting with the cylinder axis vertically and no bass drum hardware, it does sort of resemble a sawed-off oil barrel.Spacecomber - Wednesday, August 27, 2008 - link
I've always been skeptical about case designs, such as acrylic cases, that lack a metal exterior that can act as shield against the computer radiating electrical interference. This seems like it might be a particular concern in an environment where you are using analog audio equipment, such as in home theater, music server and music recording applications.While that's the theory, does anyone have some practical experience with regard to this potential problem?
wisfal - Wednesday, August 27, 2008 - link
I think that the style and uniqueness of the case is pretty good, I never thought of turning my drum kit into a computer case. I would go great for anyone with a music oriented room. But for a price like that, I could go to a pawn shop and Home Depot and build 10 of them for the price of one.Spivonious - Wednesday, August 27, 2008 - link
That is really cool! It reminds of the days when people were making cases out of chairs, tables, books, and anything else they could get their hands on. I imagine that it blends in nicely with the other instruments in your dining room.ChrisPL - Wednesday, August 27, 2008 - link
These "cases" are the most retarded thing I've ever seen... Waiting for a case made on a basis of refrigerator chasis...