Original Link: https://www.anandtech.com/show/1726
Aspire X-QPack: A Lanparty Dream
by Joshua Buss on July 2, 2005 1:15 PM EST- Posted in
- Cases/Cooling/PSUs
Introduction
Aspire seems to be a company that does not mind marching to the beat of a different drummer. We have seen more boldly themed cases from Aspire than just about any other case manufacturer out there. This is not a bad thing at all though, as many, such as the X-Navigator we reviewed last year, actually represent a very good performance per dollar niche especially for the gamers out there.
Continuing in their tradition, Aspire has recently come up with a Micro-ATX form factor case dubbed the X-QPack, and let us be the first to tell you, this is by no means a case that only gamers should get interested in.
A quick search through your favorite engines on the web for "micro atx cases" will most likely yield droves of squatty-looking mid-towers with no real features separating them from their slightly-bigger mid-tower brothers. One has to wonder what the point is of getting a case that does not allow the use of larger motherboards if it really doesn't have much to offer over the nicer (not to mention only marginally bigger) mid-tower cases.
Well the X-QPack definitely aims to change all that. After a couple days of working with the unit, here is a brief summary of how we feel about the new chassis:
| Aspire X-QPack | |
|
|
- Excellent layout (good expansion) |
|
| - Rounded edges - Tool-Less Features (minor) |
|

Much to gamers' delight everywhere the case comes in red, yellow, green, blue, and silver, and the model we received for review was of the blue variety.
More information on the X-QPack on Aspire's website.
External Design
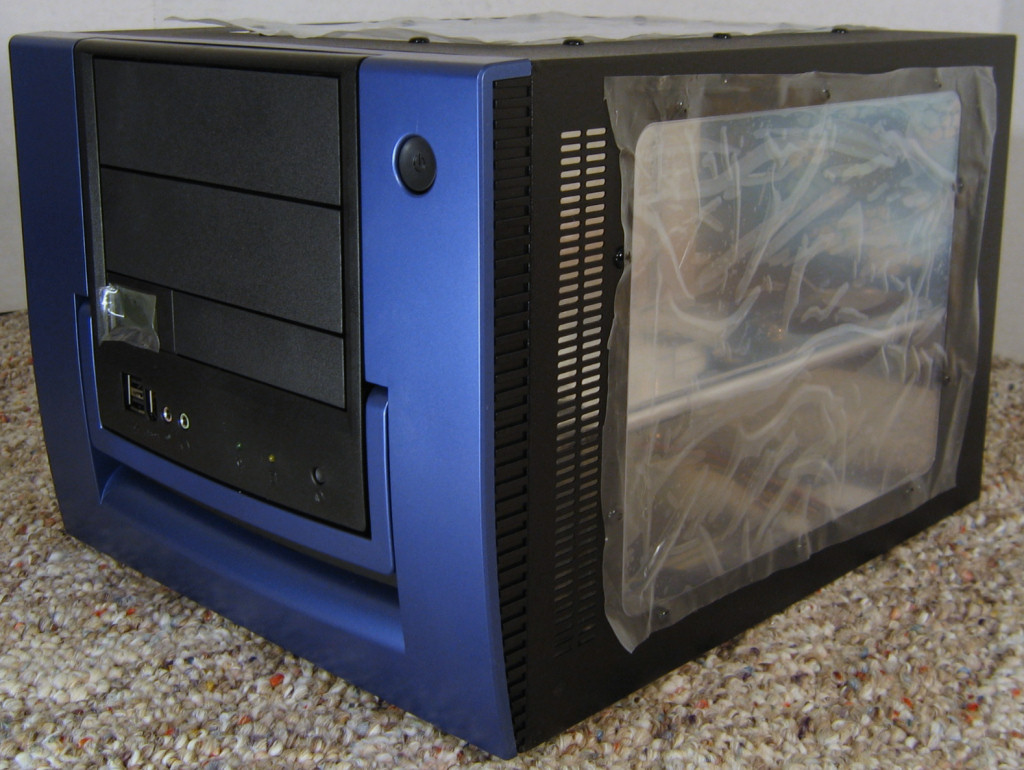
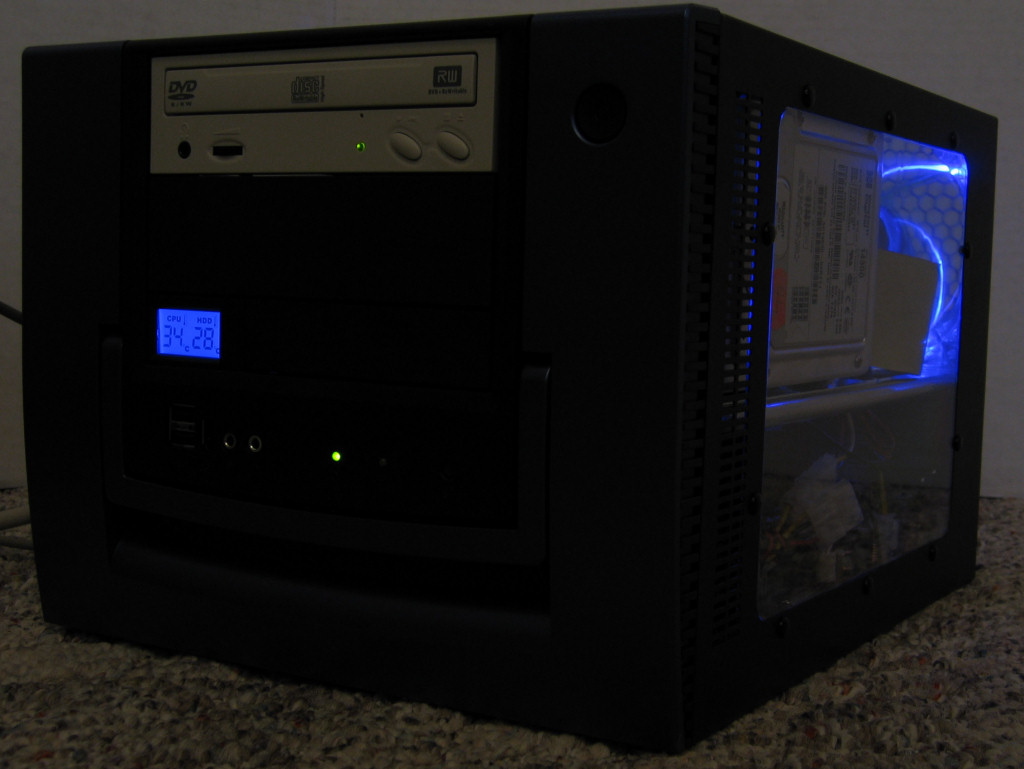
From a styling perspective, the X-QPack manages to find a nice compromise between 'extreme' and 'professional' through the use of classy, straightforward lines on the front of the case and a triple-window removable piece.
Click to Enlarge
Aspire ships the case with plenty of protection for all this plexiglas - there's covering on the inside and outside of all three windows and also a small piece covering the LCD display on the front.
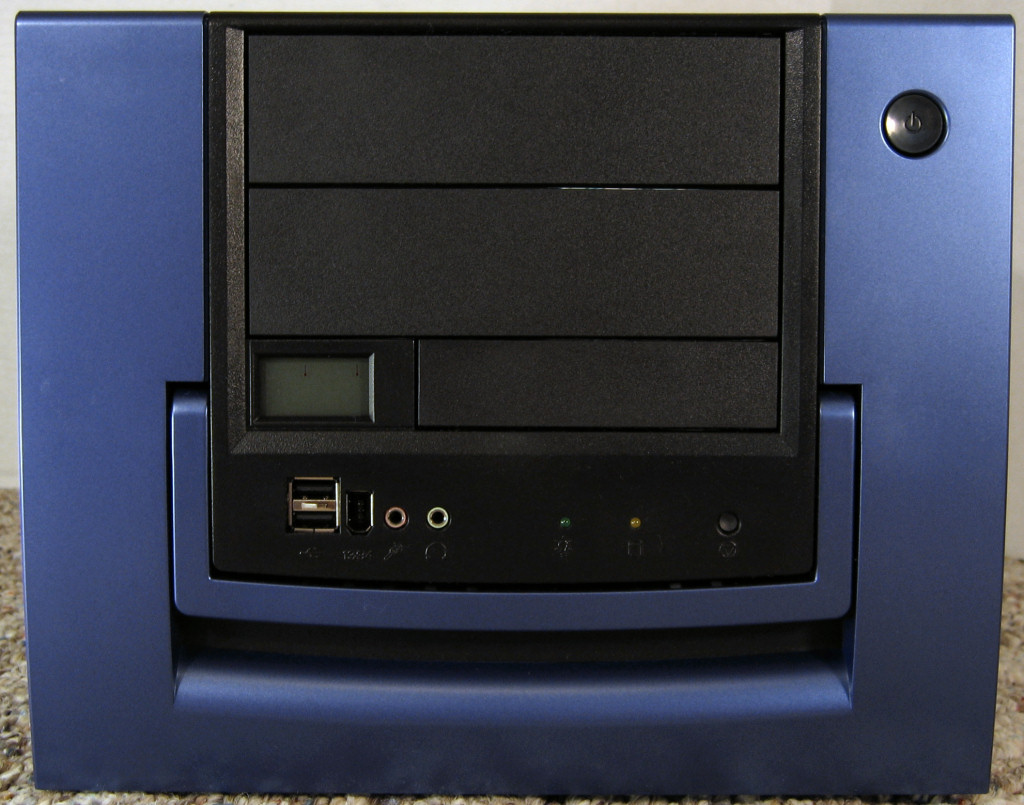
Click to Enlarge
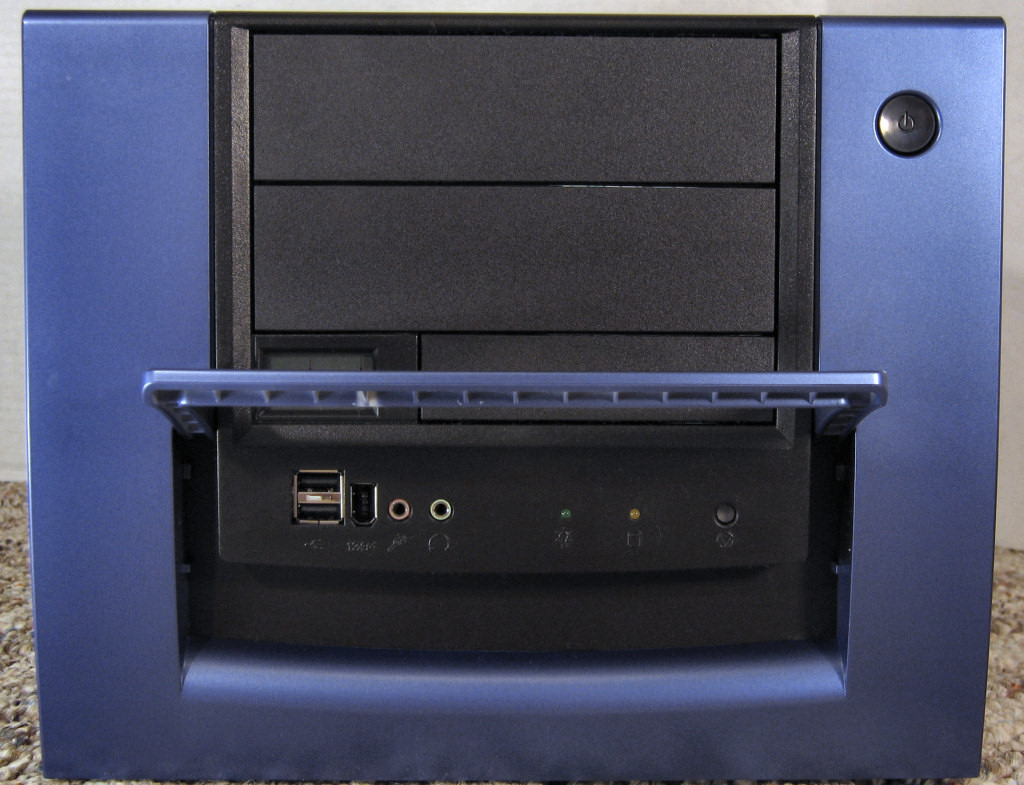
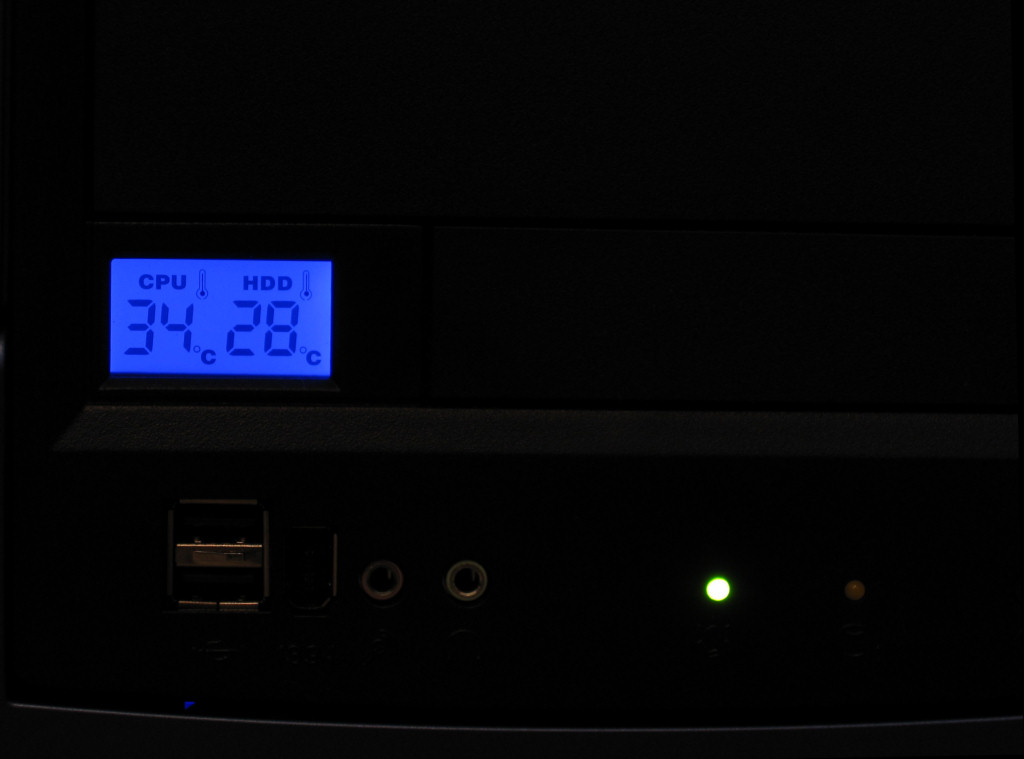
Looking at the front in more detail we can clearly see the carrying handle as well as the LCD readout display, USB 2.0 / Firewire / audio ports, power LED, HDD activity LED, reset and power buttons. Our only complaint with the layout here is that the Firewire port might be difficult to use if you have a larger usb device plugged in at the time, but this is a rather common problem when it comes to front port-clusters.
Click to Enlarge
Another quick glance confirms the unit's claim to being able to fully support two external 5.25" drives and one external 3.5" drive. Only a very few other cases this compact have the ability to hold two 5.25" drives, and this is one of the first areas where the X-QPack begins to strut its stuff. Speaking of size, the chassis is definitely in a class all its own. It's larger than pretty much any shuttle XPC in both width and height, but not by much - certainly not enough to be looked over in situations where an XPC might be considered. It is primarily this unique size of the X-QPack that allows it to get so many things right.
Here is an angled shot of the third window, the one on top of the case. Here we can start to get a better idea of how the case's internals are laid out.
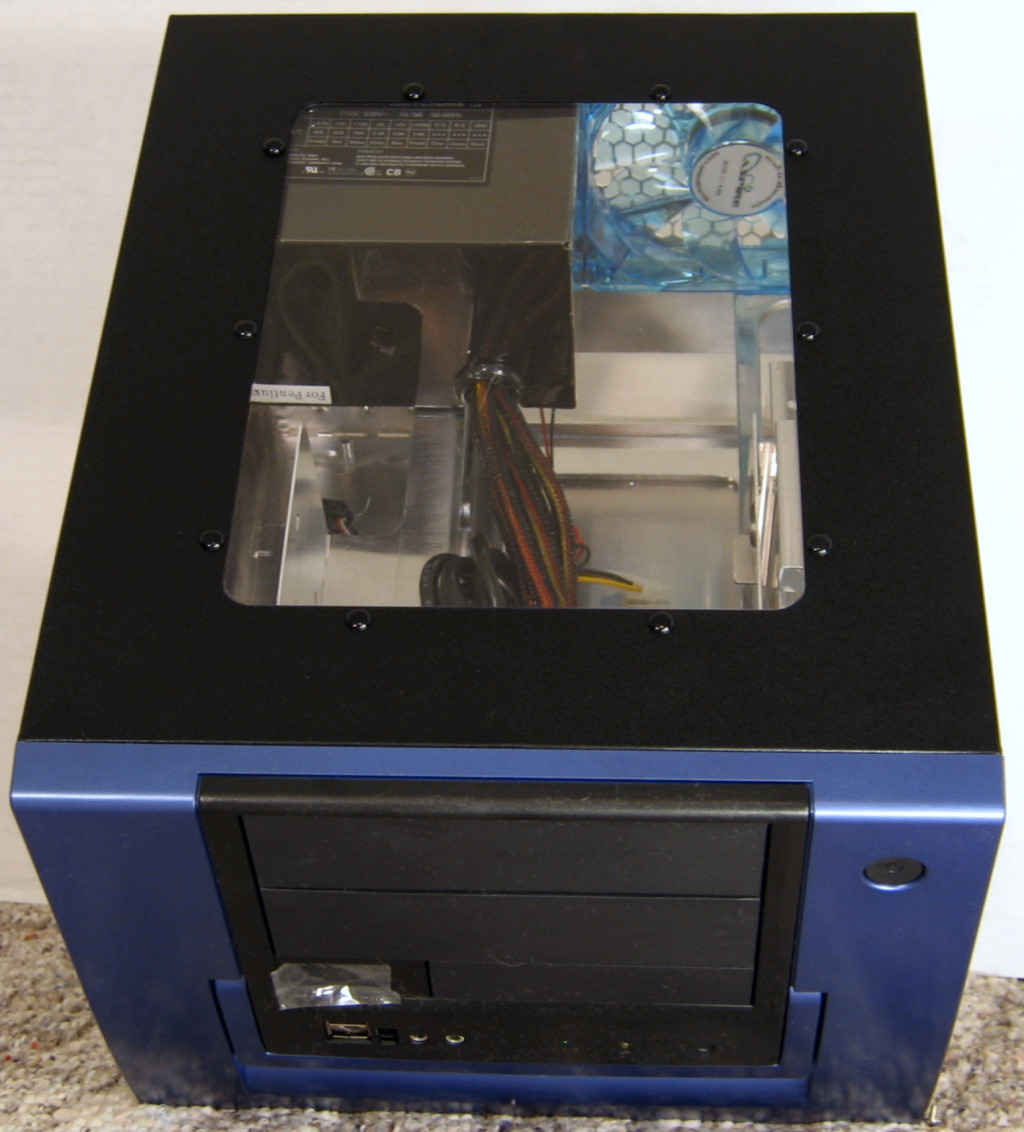
Click to Enlarge
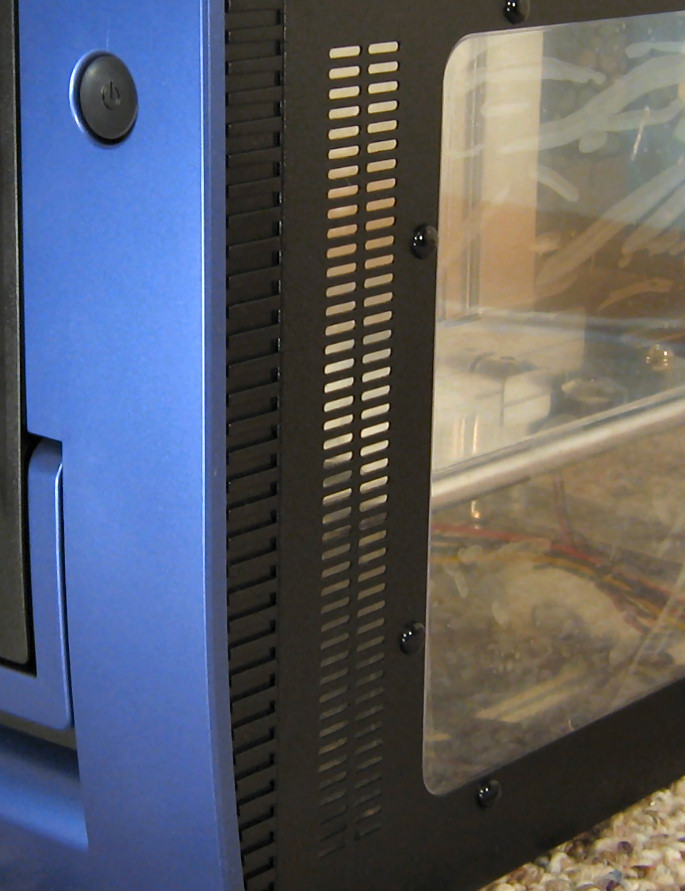
It's not too easy to tell from the pictures, but the front of the case is a rather normal plastic whereas the sides are a textured metal that resists fingerprints quite nicely. In spite of all the glory that super-gloss, car-paint style jobs get, there sure is something to be said for a case that does not need to be kept immaculate to look good.
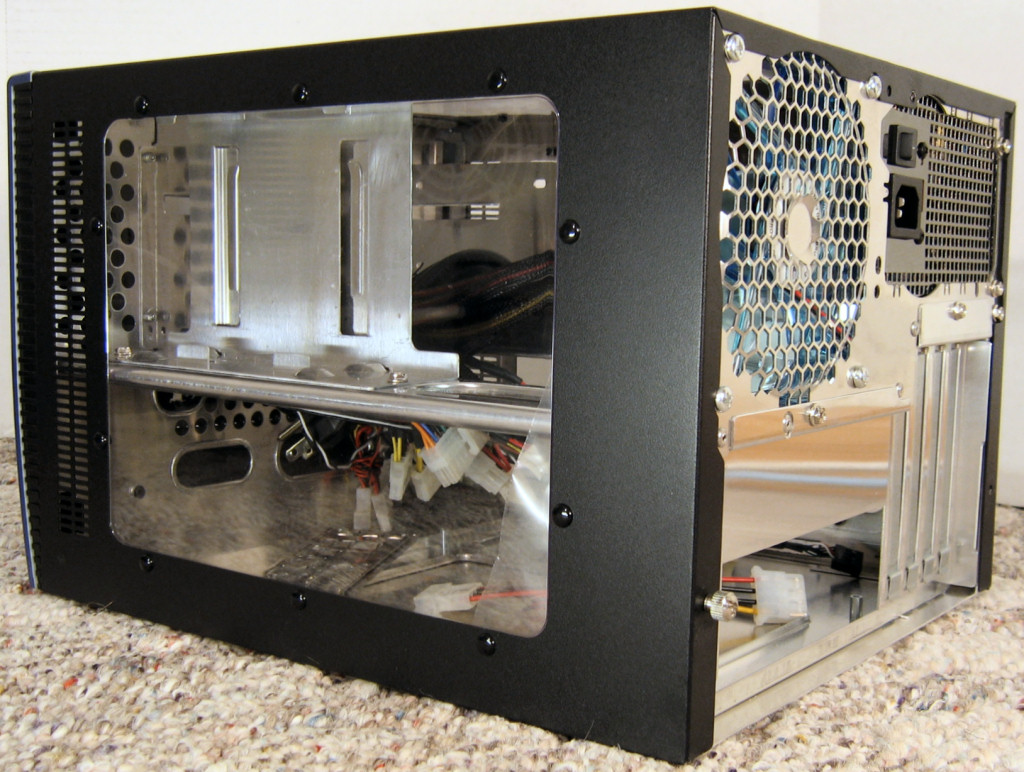
Here we can see the right side of the case again as well as the back of the unit.
Click to Enlarge
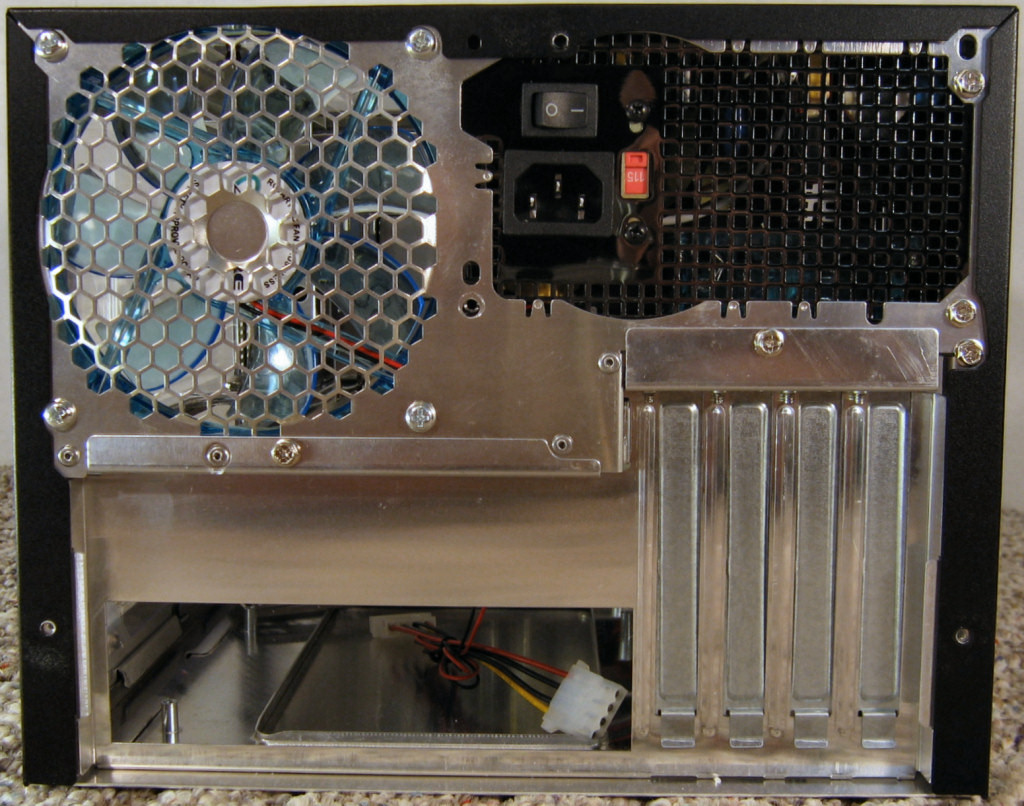
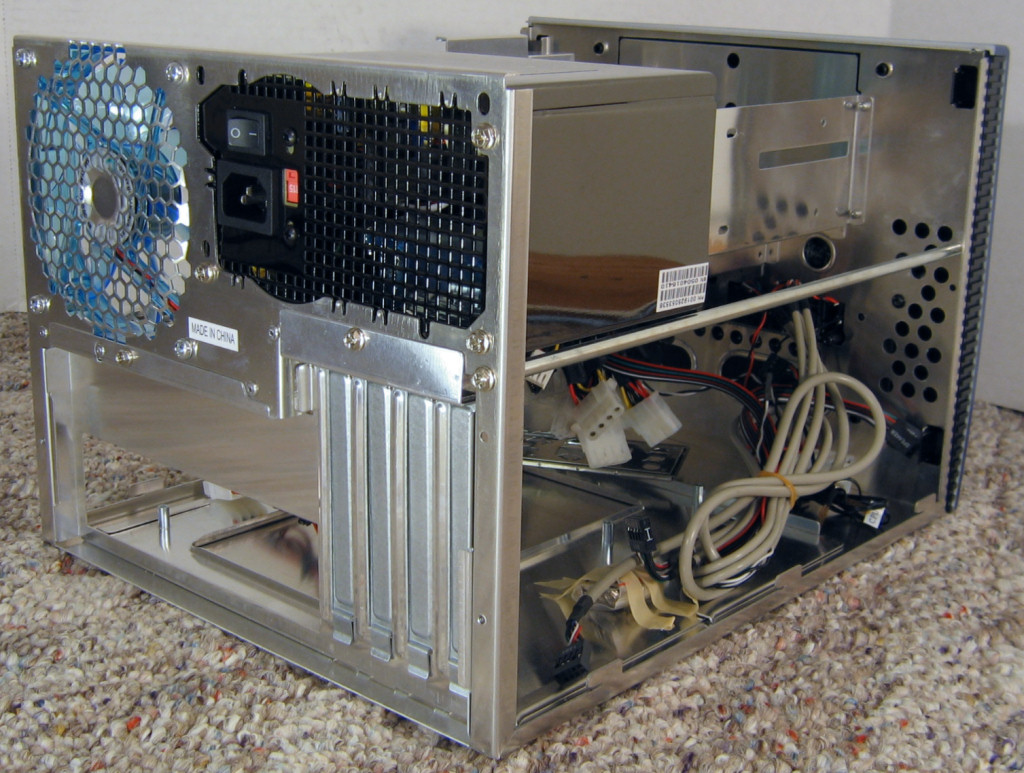
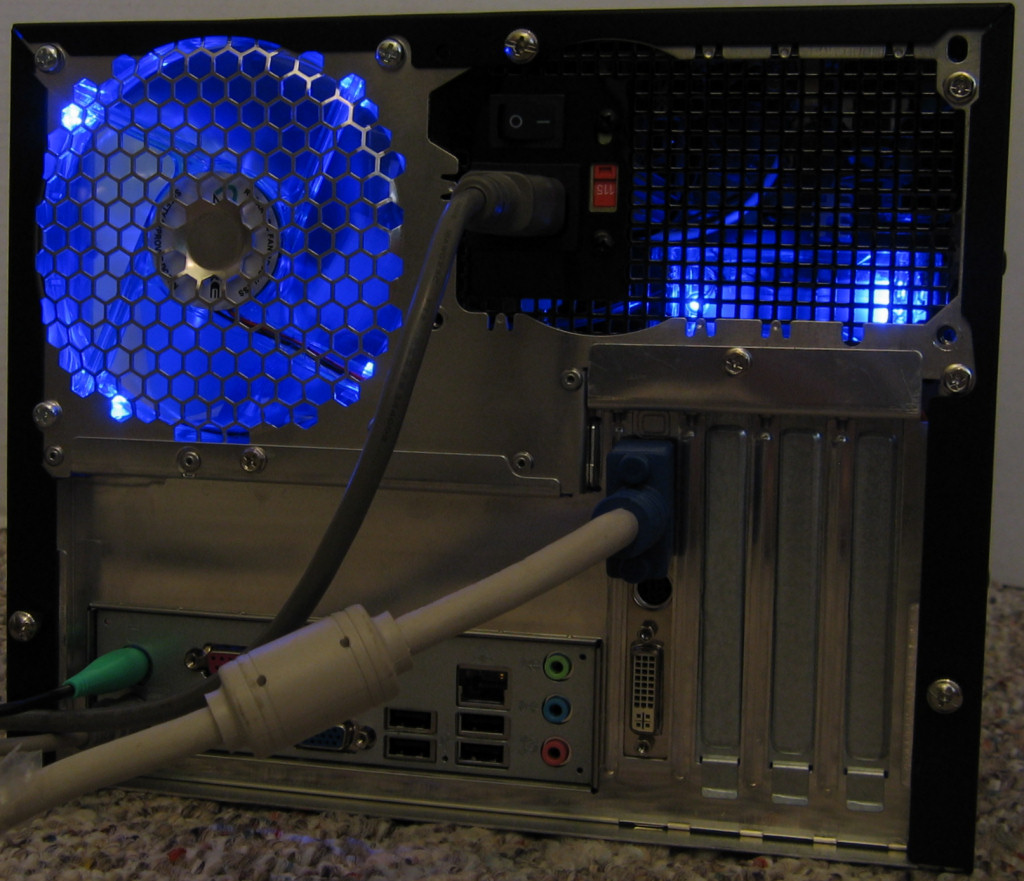
The HD cage as well as the beam that supports it is visible through the window, and looking at the back we can see the nice large 120mm exhaust fan as well as the motherboard tray. Here's another shot of just the back, with the three thumbscrews that hold the top/side panel cover all removed.
Click to Enlarge
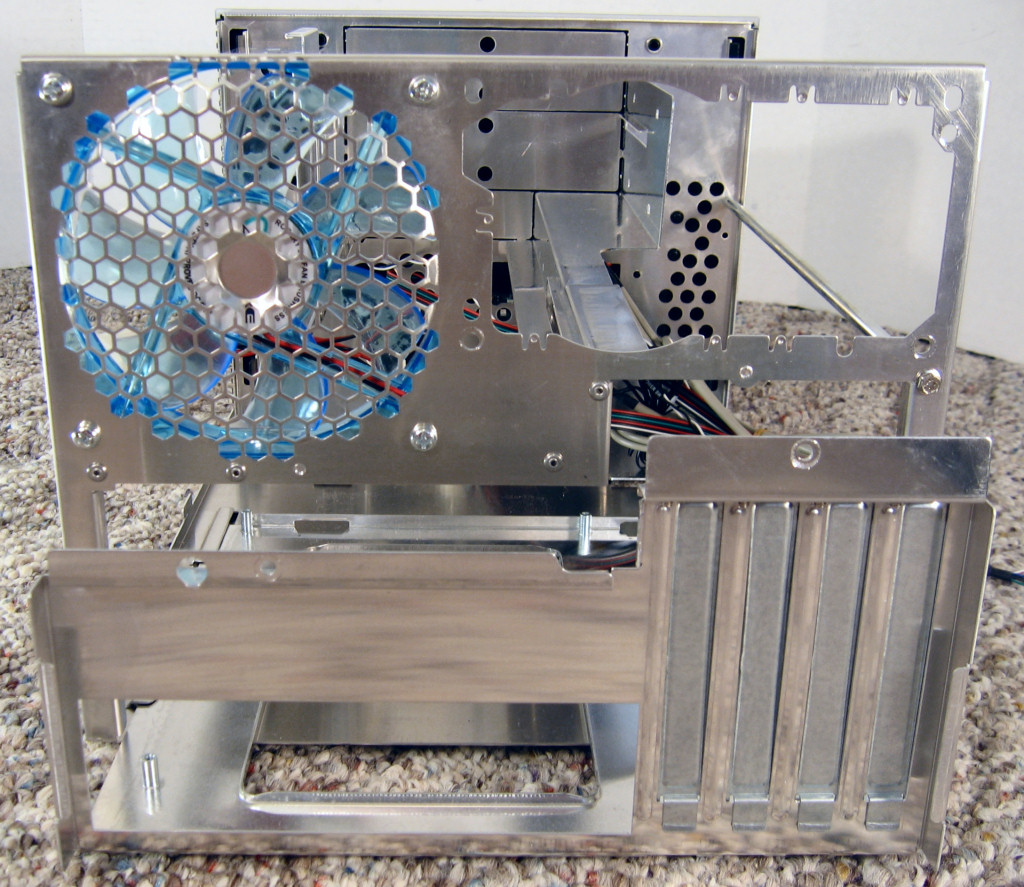
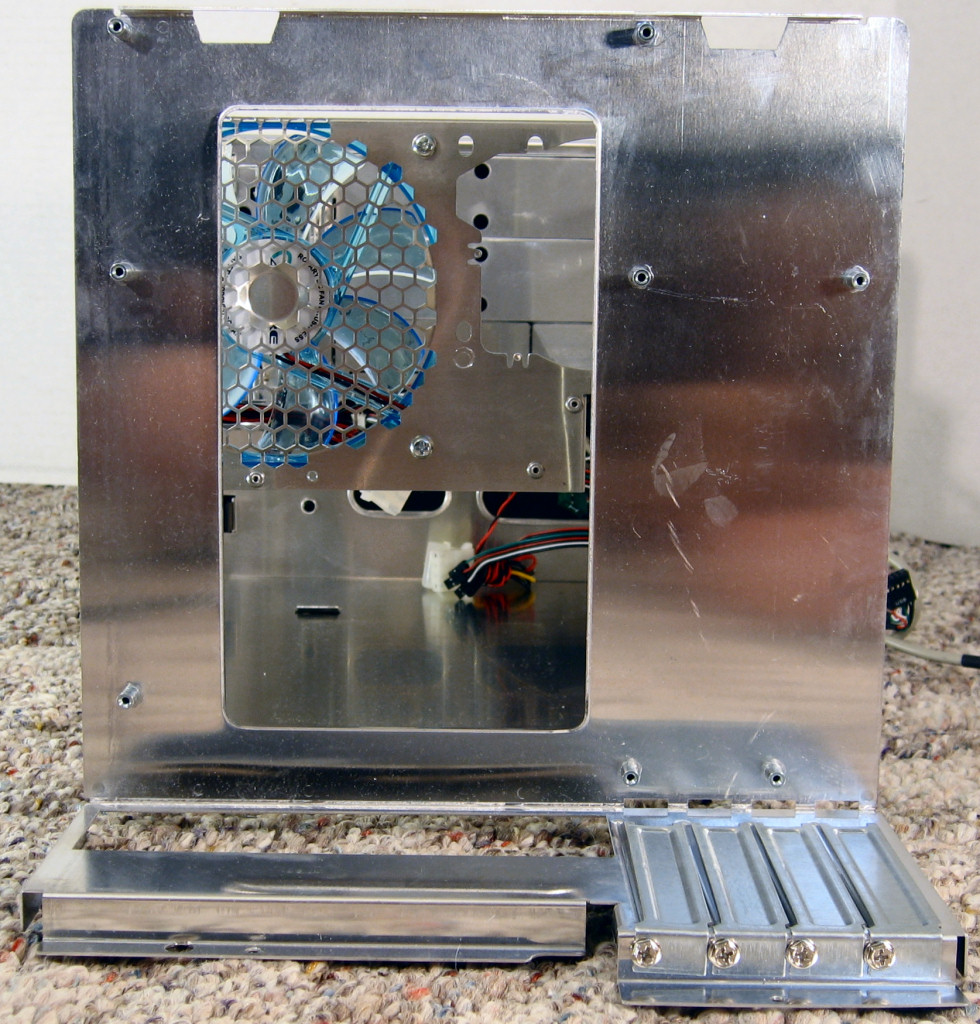
Now we can clearly see just how carefully the layout of the back of the unit has been planned. The 120mm fan fits with just enough room underneath to make the removable tray a possibility, and while the included power supply does not have the same depth as a standard ATX one, it does have the same height and width. We can also see one of the main benefits of choosing a full-fledged micro-ATX board over smaller alternatives: four PCI slots.
Click to Enlarge
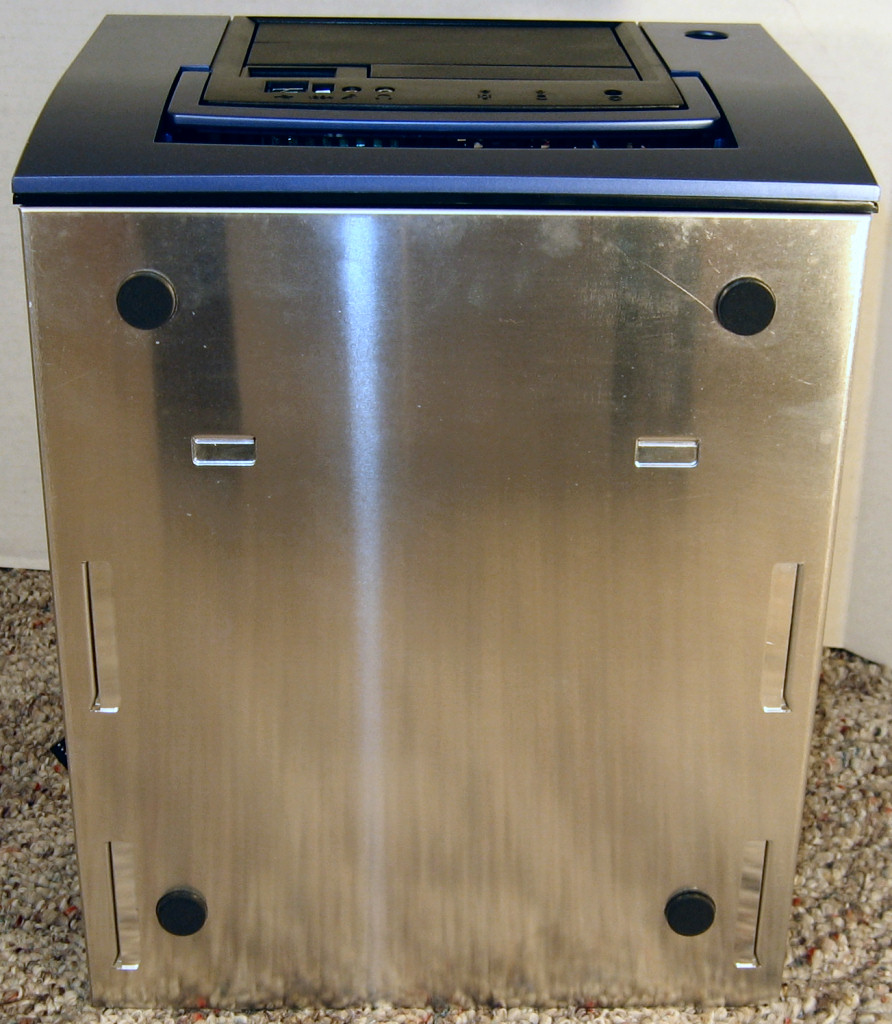
Looking at the bottom of the case we find that the X-QPack uses four dark gray rubber feet to keep the unit from sliding on any surface. Let's pop the hood and take a look at what's underneath.
Internal Design
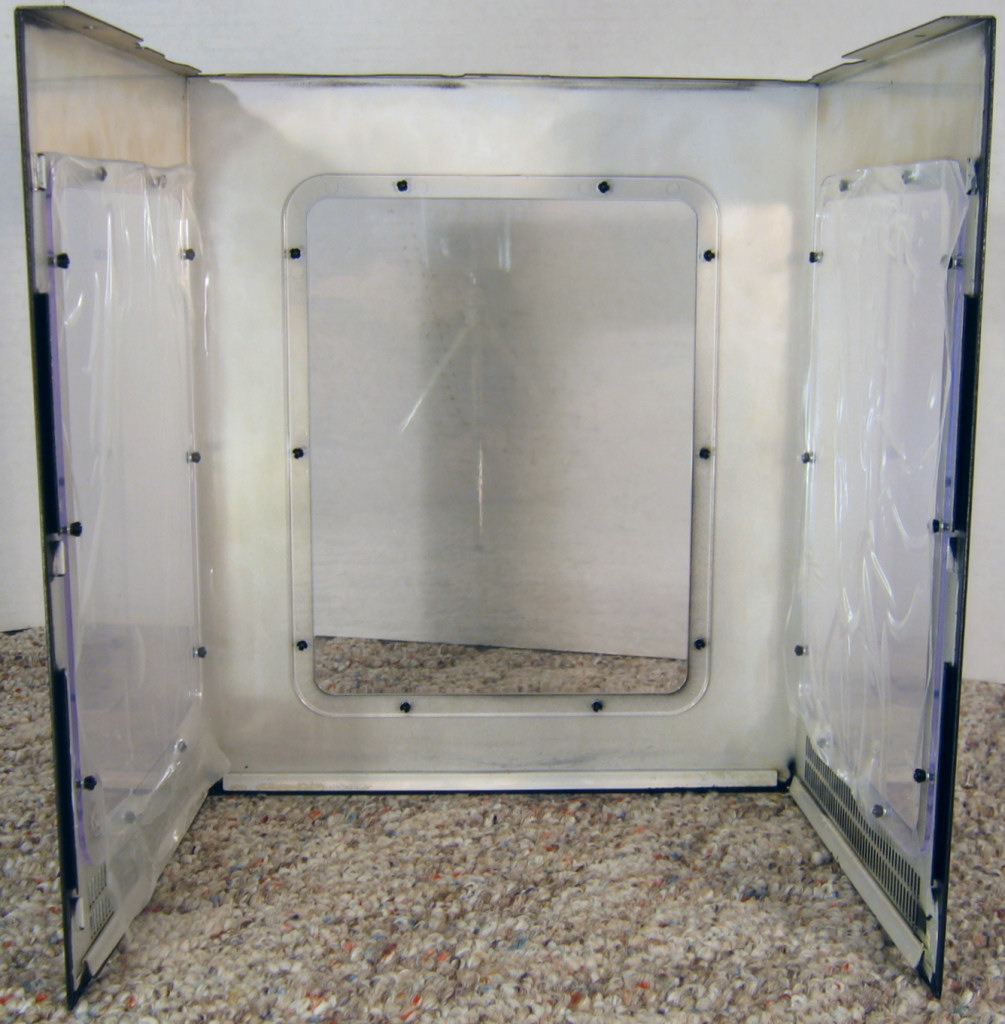
Removing the cover of the X-QPack is as easy as unscrewing the three thumbscrews in the back and sliding it off. In this shot you can still see the protective film covering the inside of the three transparent windows.
Click to Enlarge
Another of just the cover, this time with the protective film removed.
Click to Enlarge
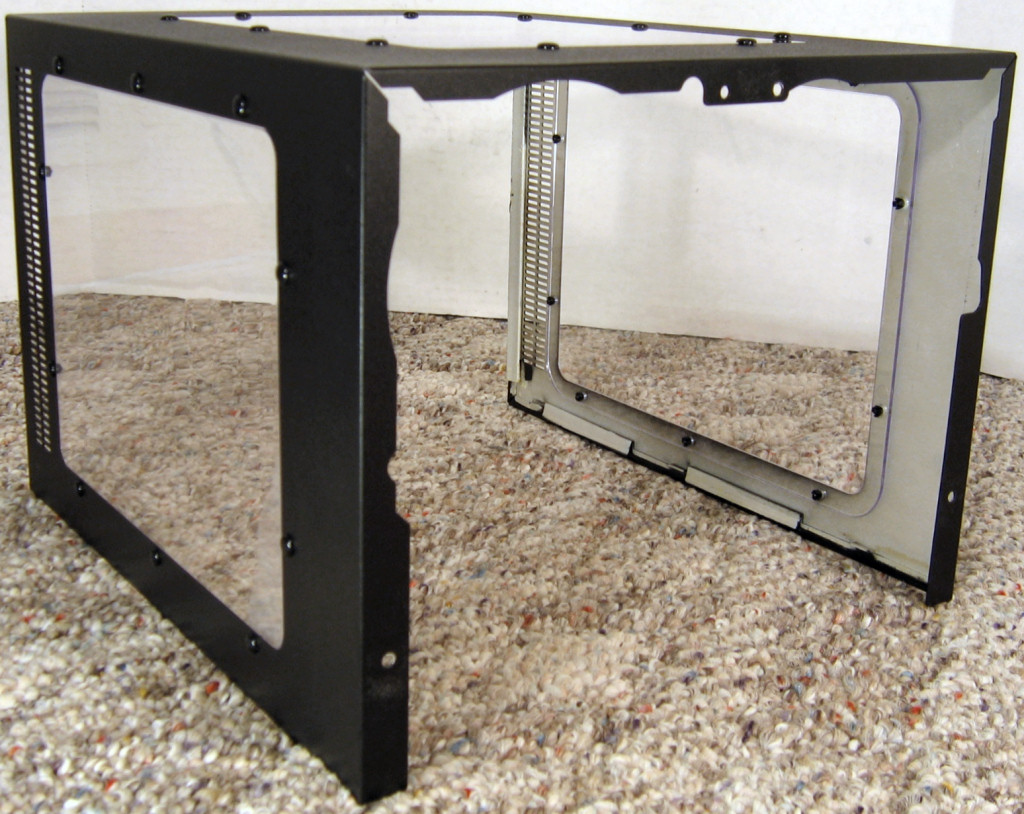
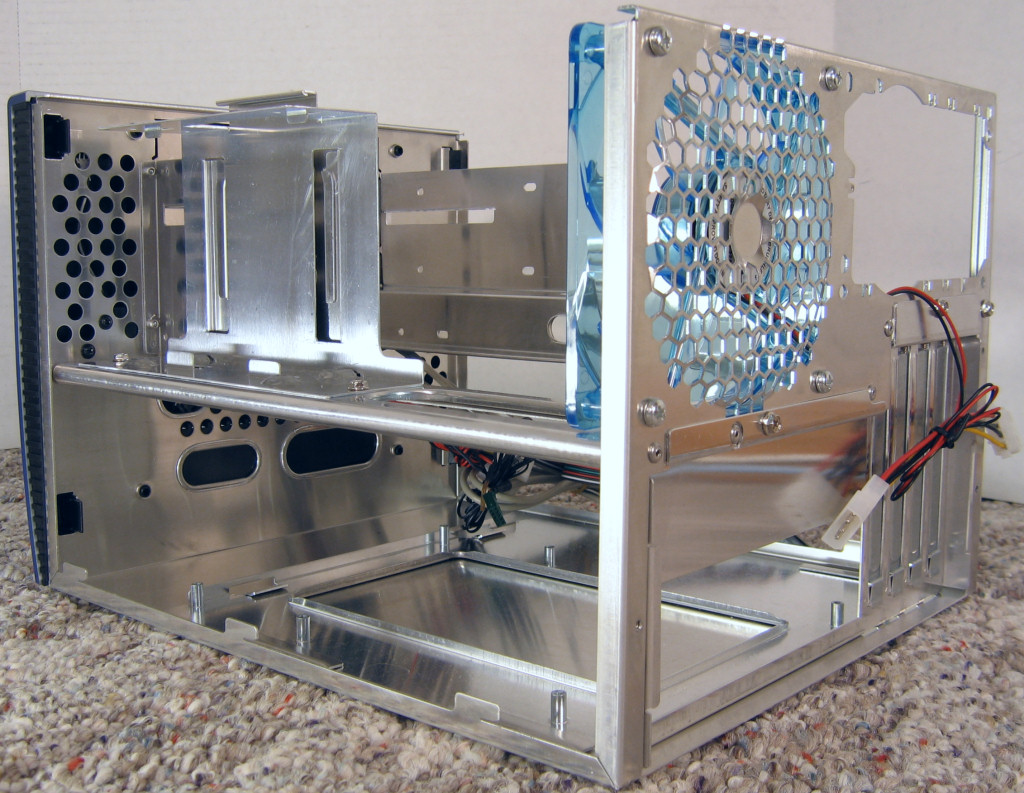
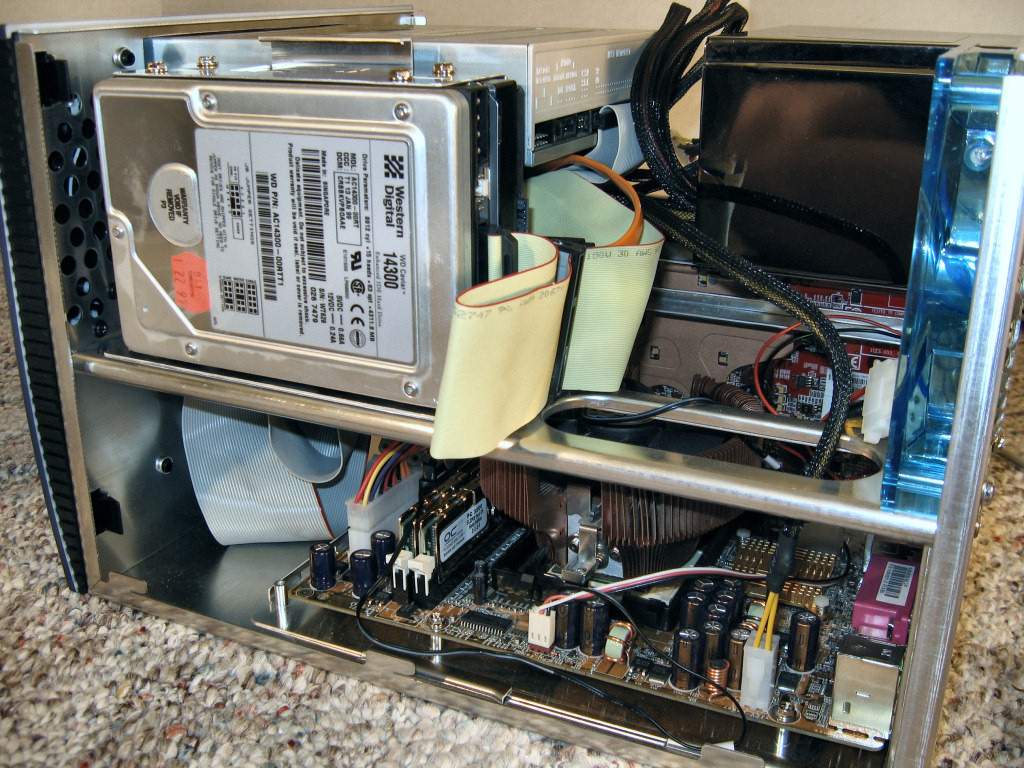
This is one of the most useful shots of the X-Pack, as it gives you the best overall idea how the case is arranged internally.
Click to Enlarge
We can immediately see the two distinct areas of the chassis; the higher of the two for the drives, power supply, and exhaust, and the lower for the motherboard, add-on cards, and, as we found out after we put a system into the unit, excessive cable clutter.
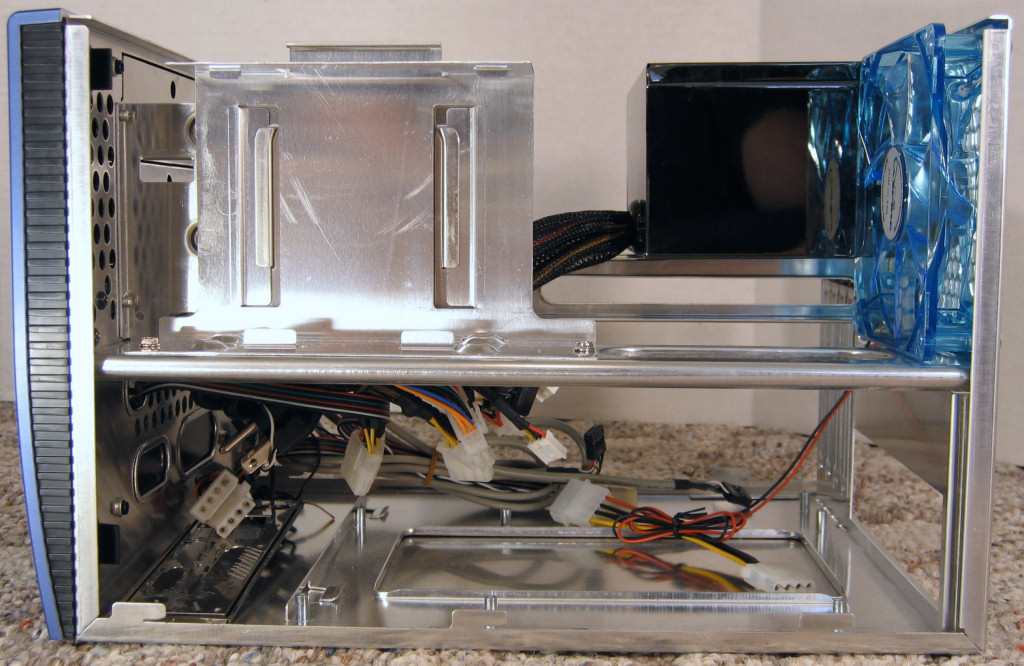
Before the power supply is taken out, the case seems like it'd be impossible to work in, and in practice we found this to be quite true.
Click to Enlarge
Once it's taken out though, there is actually quite a bit of free space inside the QPack. Here we can see all of the possible locations of the computer's drives. There's space for two hard drives, two 5.25", and one more 3.5", be it external or internal. It even looks as though a courageous modder could squeeze another one or two hard drives on the opposite side, or possibly components for a water-cooling setup.
Click to Enlarge
Internal Design cont'd
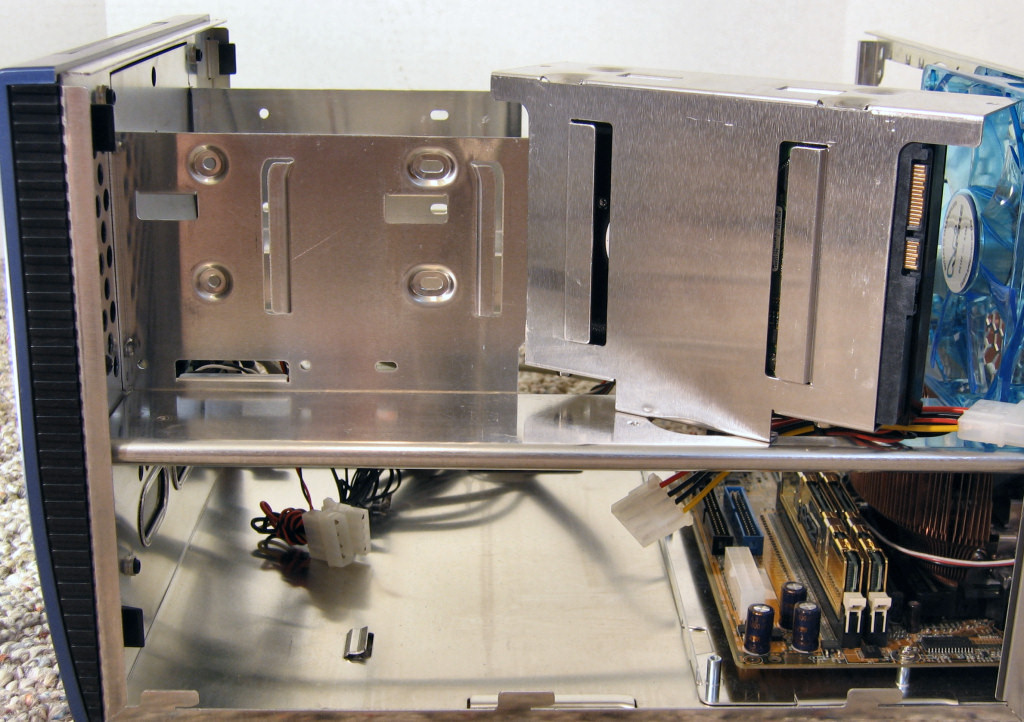
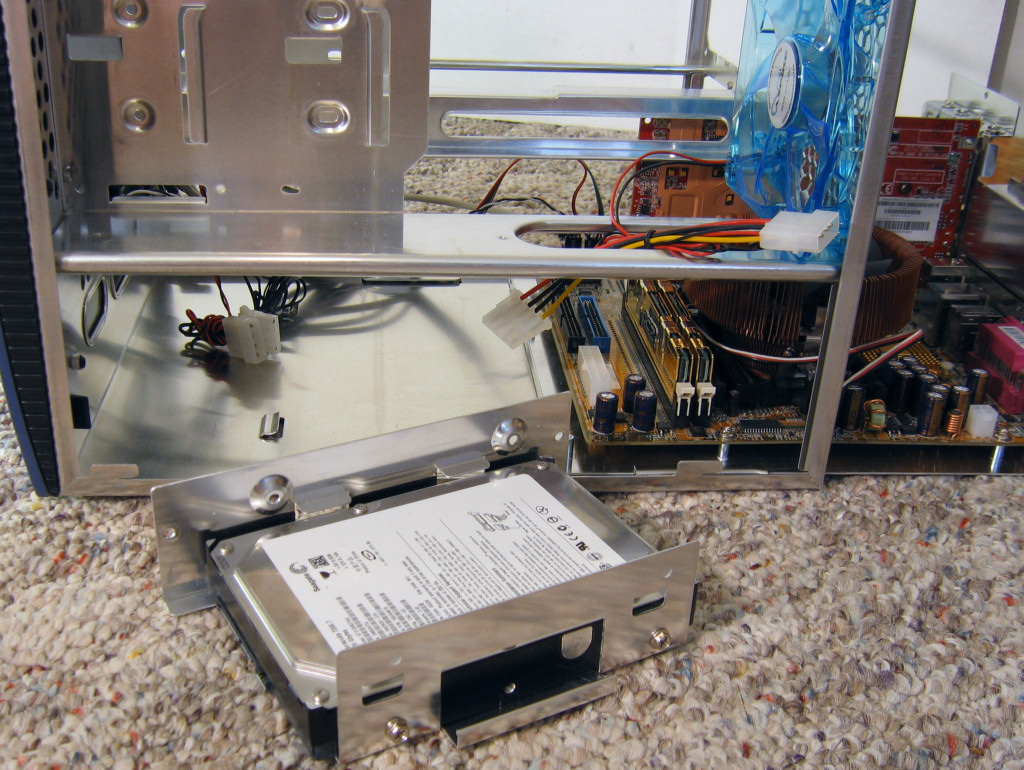
To get everything into a case this size, the manufacturer has to be pretty clever when it comes to the layout for each component. After taking out the power supply, the next piece you want to take out could be the hard drive cage. The cage on the X-QPack is held in place by two rails and two screws, visible in this close up.
Click to Enlarge
If one didn't want to put screws holding the hard drives into the cage on both sides, there's actually just barely enough room to get both drives into place without removing the cage.
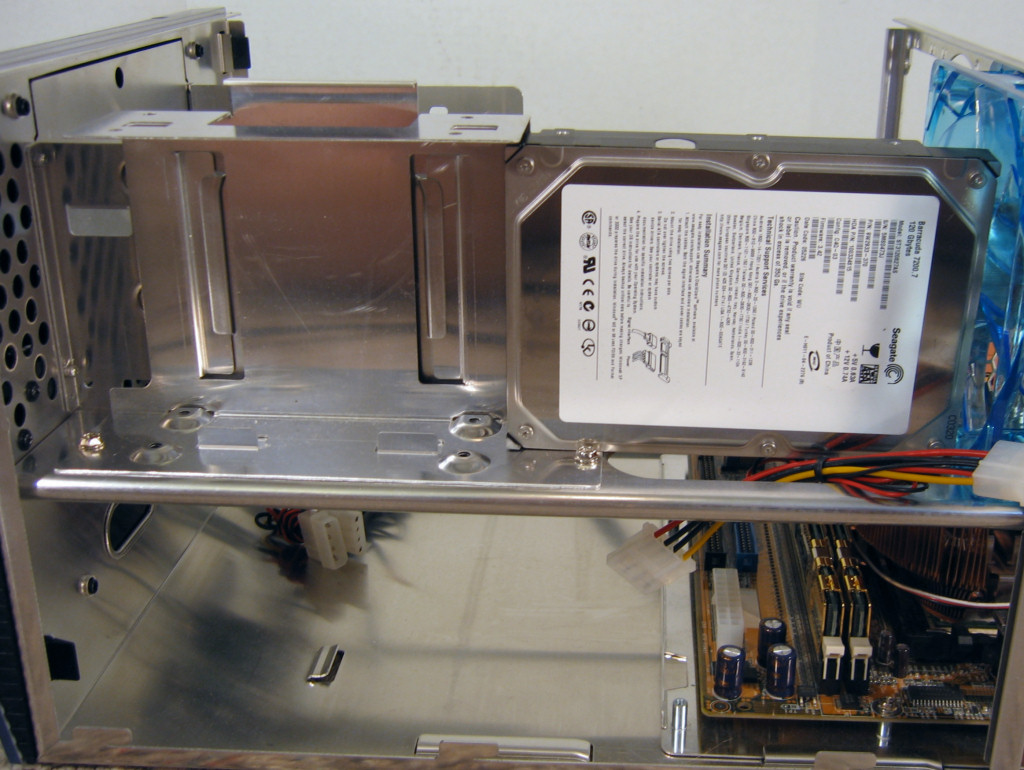
Click to Enlarge
With the hard drive secured the cage we took one more shot so you could see how to get the screws in on this side of the 5.25" mounting brackets. You can also see the rails that help make the removal and install of the HD cage so easy.
Click to Enlarge
After getting the hard drives situated, the next step would probably be to install the motherboard. After taking off the two screws in the back it simply slides right out of the rear of the case.
Click to Enlarge
Here's a shot of it propped up against the back of the case.
Click to Enlarge
Moving right along...
Cooling
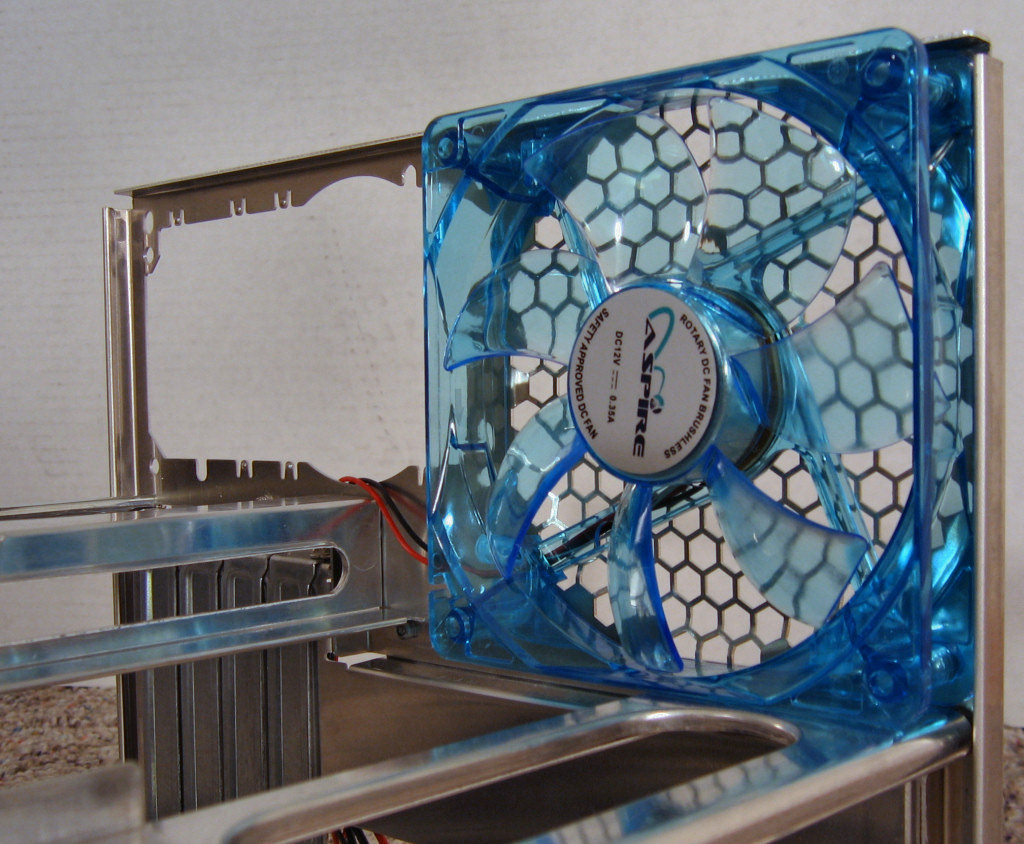
The X-QPack relies on an all-exhaust system to keep the computer cool. The main component is a semi-transparent blue LED 120mm fan.
Click to Enlarge
Larger fans allow for more air to be moved at lower noise volumes, so this is definitely a good sign that this will probably not be too noisy of a case.
The power supply has an internal 80mm fan set to exhaust as well, so these two fans working together will simply attempt to suck all of the hot air out of the back, and by creating this negative pressure inside the chassis, bring cooler air in through the perforations on both sides of the case.
Click to Enlarge
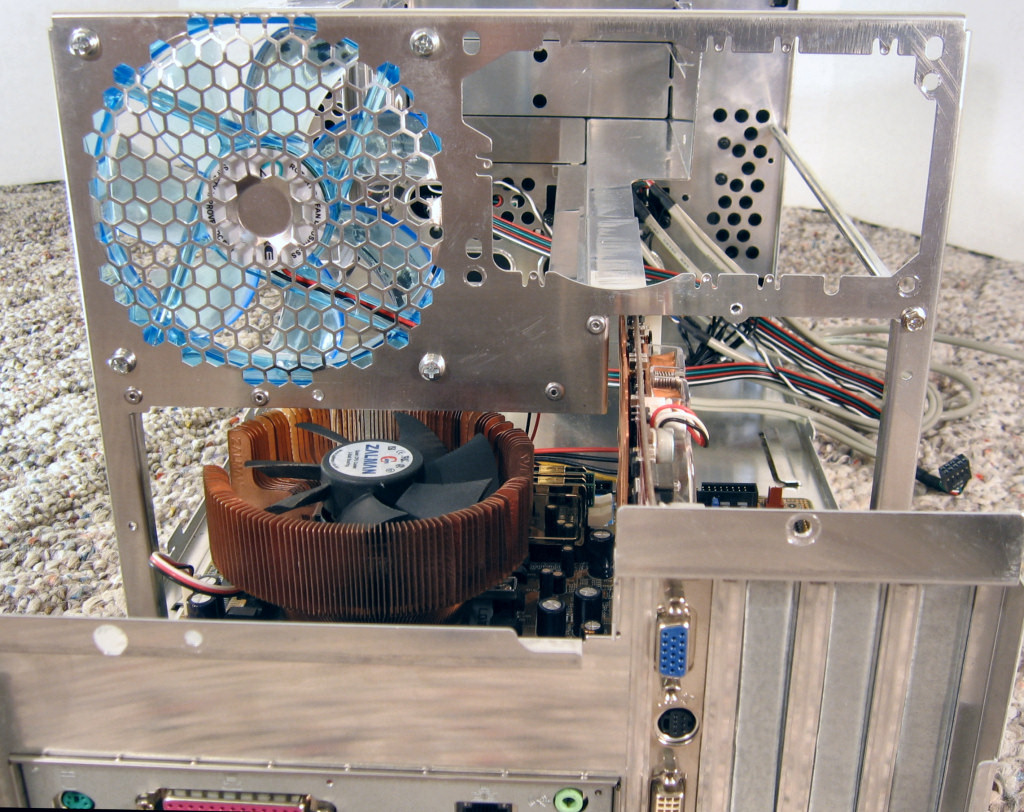
Something else to keep in mind when it comes to cooling in this case is that there simply isn't enough clearance for some of the larger heatsink/fan combos for CPUs out there. Our test bed has a Zalman CNPS7000cu heatsink/fan and it fits with only about half an inch of clearance when sliding the tray back into position.
Click to Enlarge
Construction
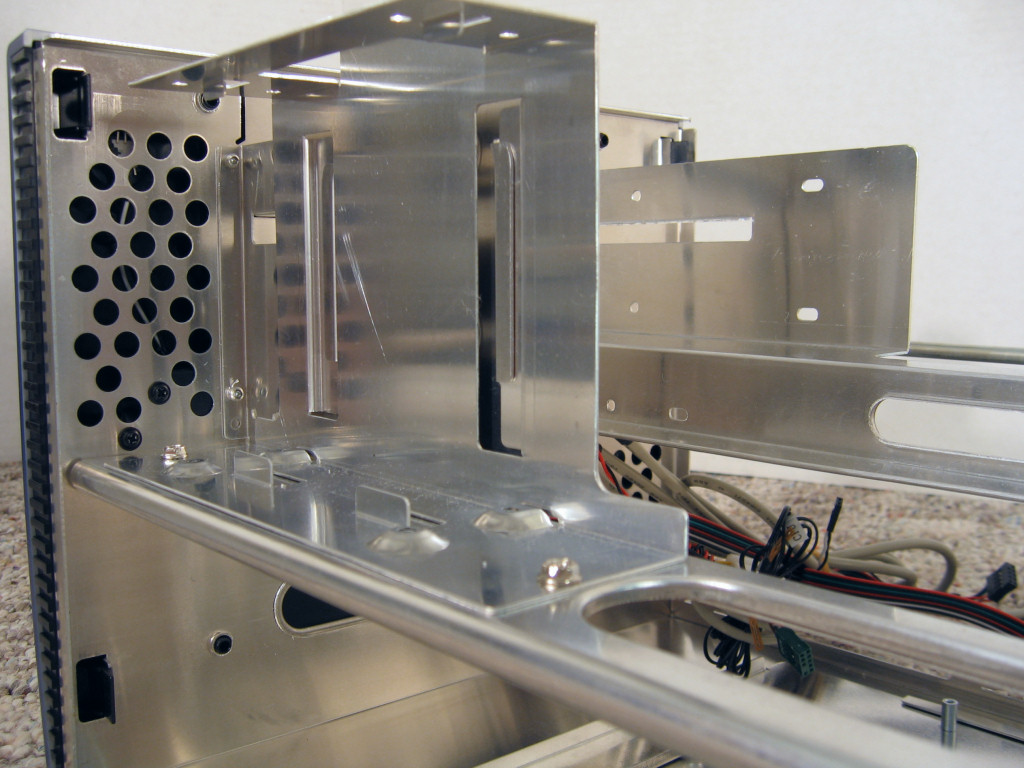
Overall we are very happy at the way the X-QPack is put together. Parts such as the motherboard tray and hard drive cage are made with aluminum to help keep the components cool and the case light, yet there are enough supporting rods and beams throughout the case to keep it very sturdy. Here are the two main supports for the power supply, one of which also helps to hold up the 5.25" drives.
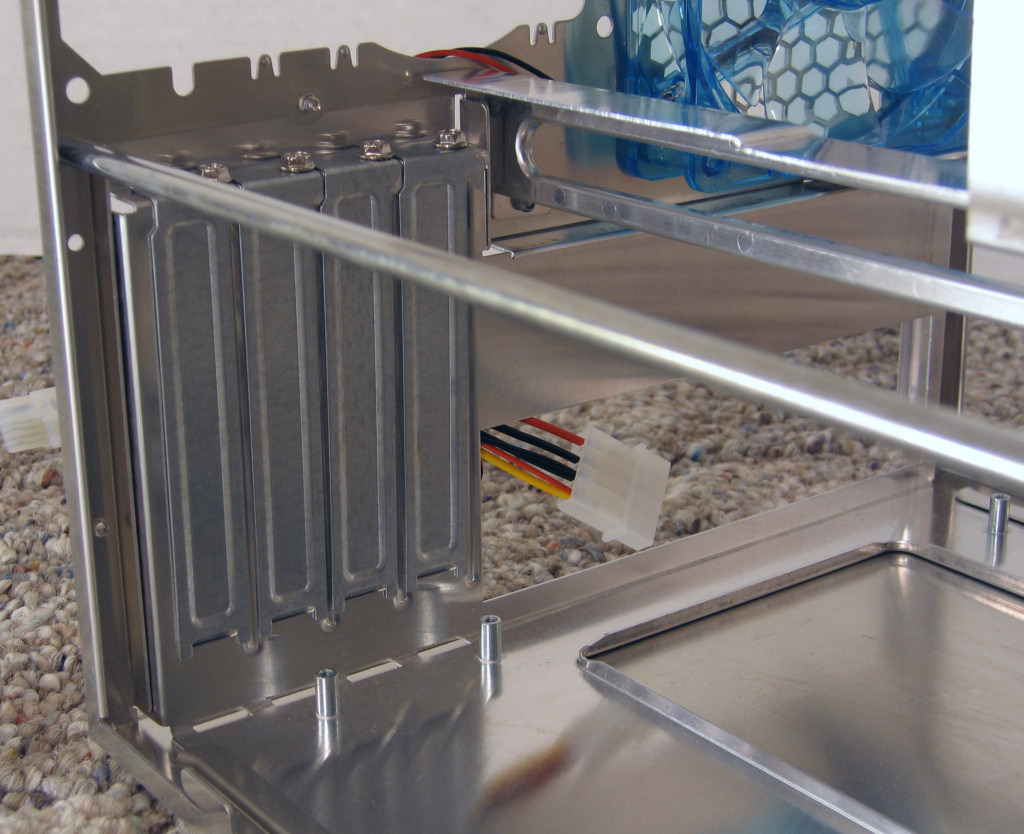
Click to Enlarge
And here you can see how the long rod will help keep the case's front or backs from flexing under the strain of holding up the power supply.
Click to Enlarge
Looking from the other side you can see the rolled edge for the hard drive support beam and how this will also help support the drives.
Click to Enlarge
Lastly, we considered the construction and design of the front-mounted carrying handle, and in practice it is easy to use, solidly built, and still manages to look good when collapsed.
Click to Enlarge
Installation
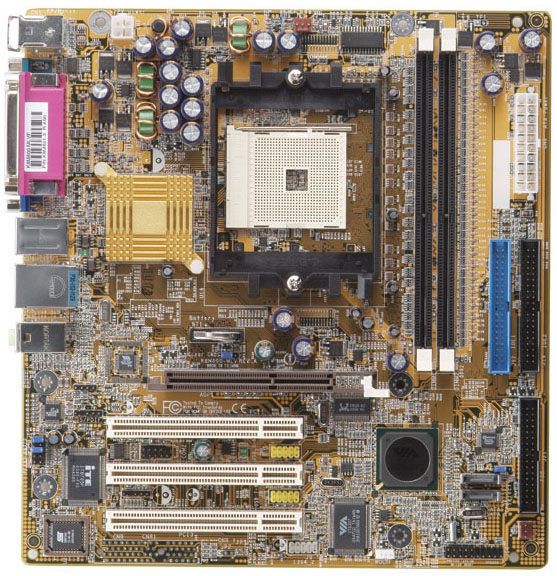
Due to the component-like nature of the X-QPack, installing our test bed was very straightforward, albeit slightly lengthy. Our motherboard fit on the tray without any problems.
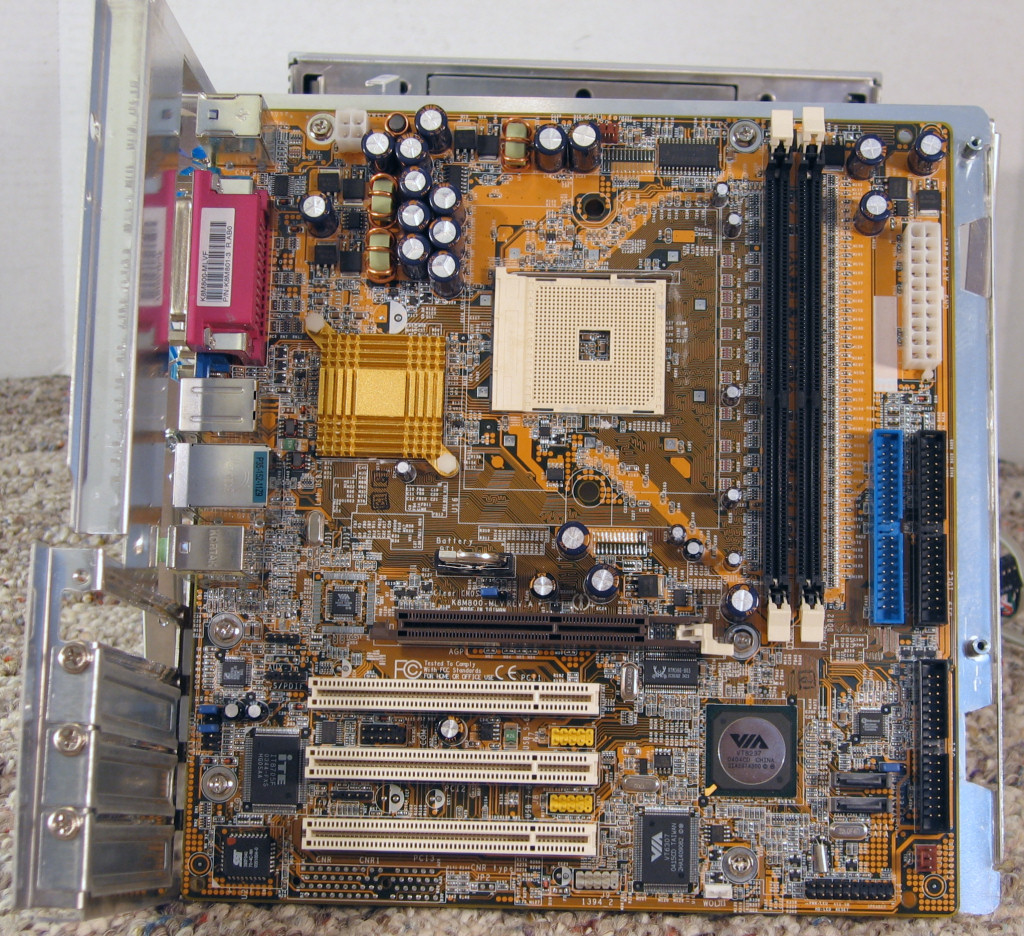
Click to Enlarge
We put the hard drives into the cage and slid the completed motherboard tray into the unit.
Click to Enlarge
We were then ready to put our DVD burner in. We do feel that the case could've benefited from tool-less features during the installation process, but with this style of chassis it might not have been very feasible.
Click to Enlarge
One can see how tight for space things are inside a case of this size, but everything considered it was actually quite easy to work in because of the careful planning of component placement.
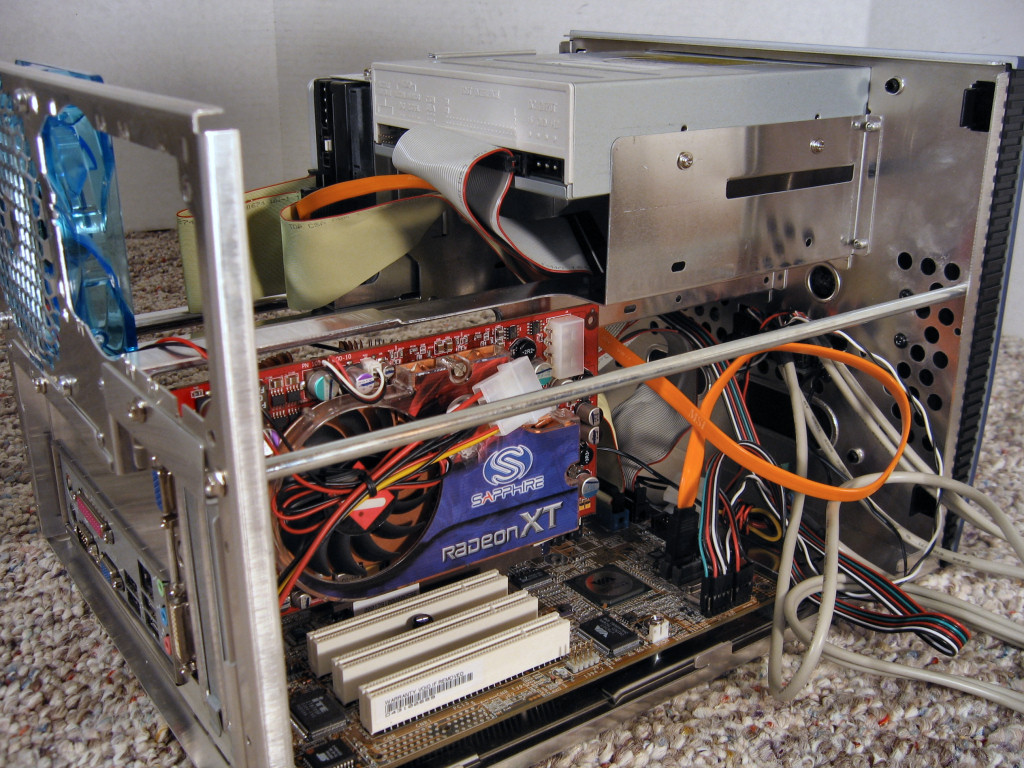
Click to Enlarge
Installation Cont'd
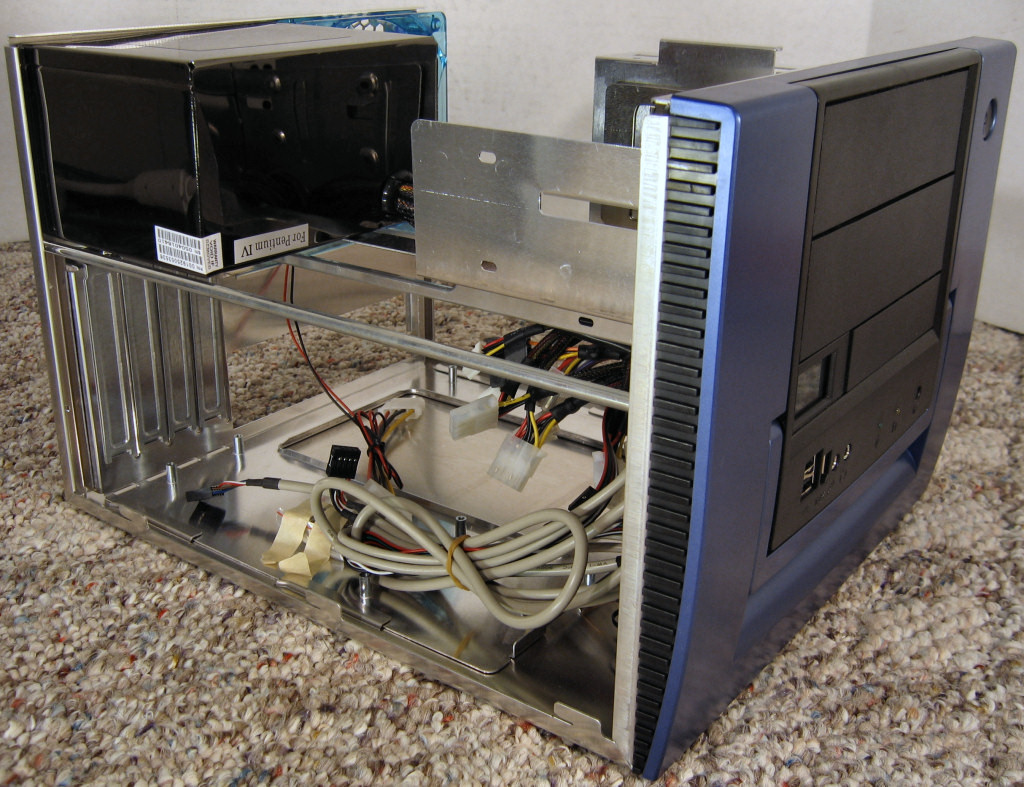
After connecting up all the cables, including the two sensors for the front-mounted temperature display, we were ready to put the custom-sized power supply back in. It is this step which reminds you just how tight everything is in this unit, but keep in mind we have a nice beefy 420 watt power supply we're working with, not a 250 or 300 watt one like the ones that come with most small form factor pc's.
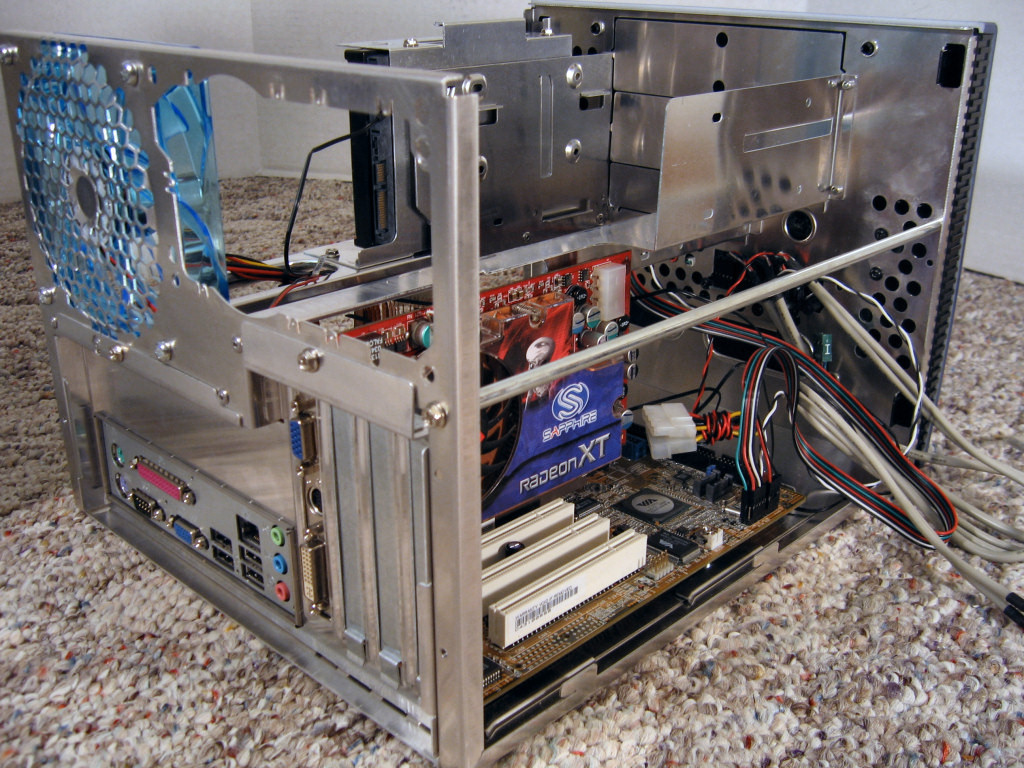
Click to Enlarge
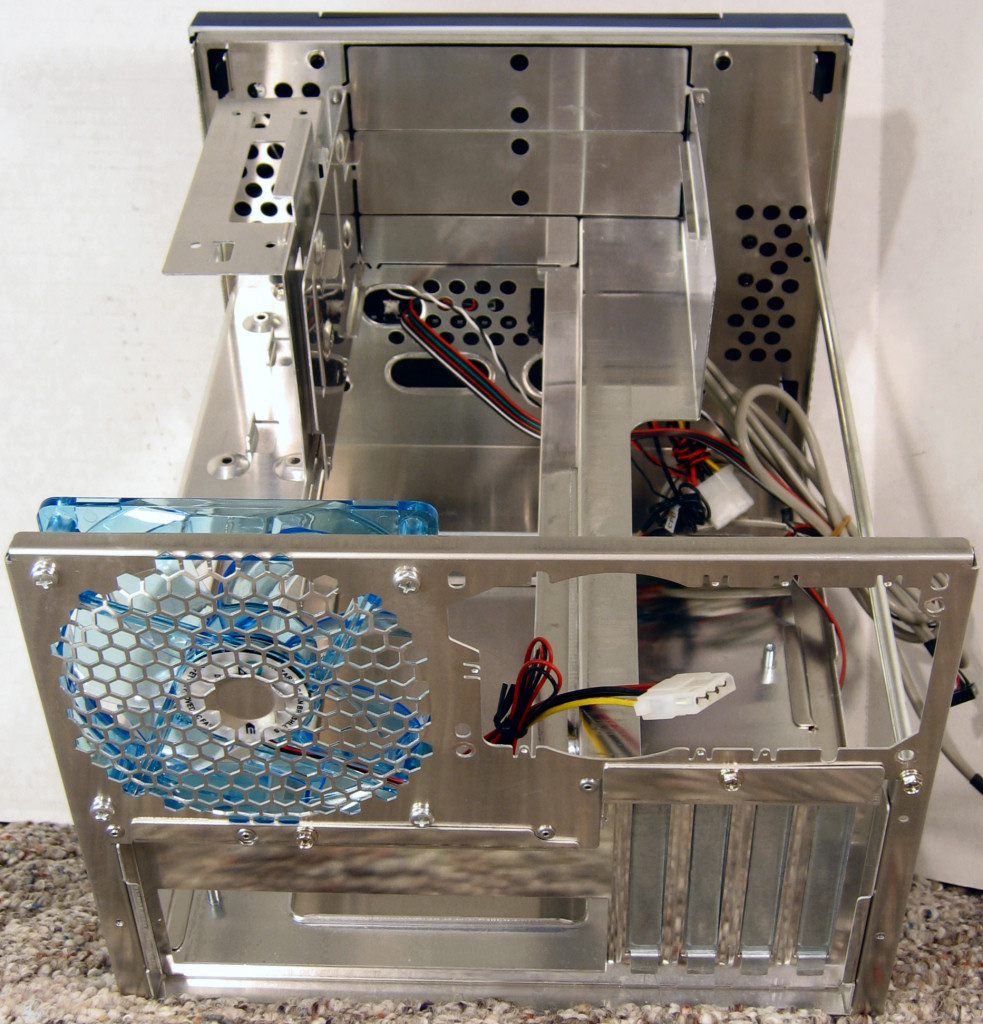
One more shot with everything installed viewed from the other side. Here one can see what we meant by using the extra space up front for 'cable management'. We should note how if our motherboard had supported external USB and Firewire connections, some of that cable clutter would be greatly reduced.
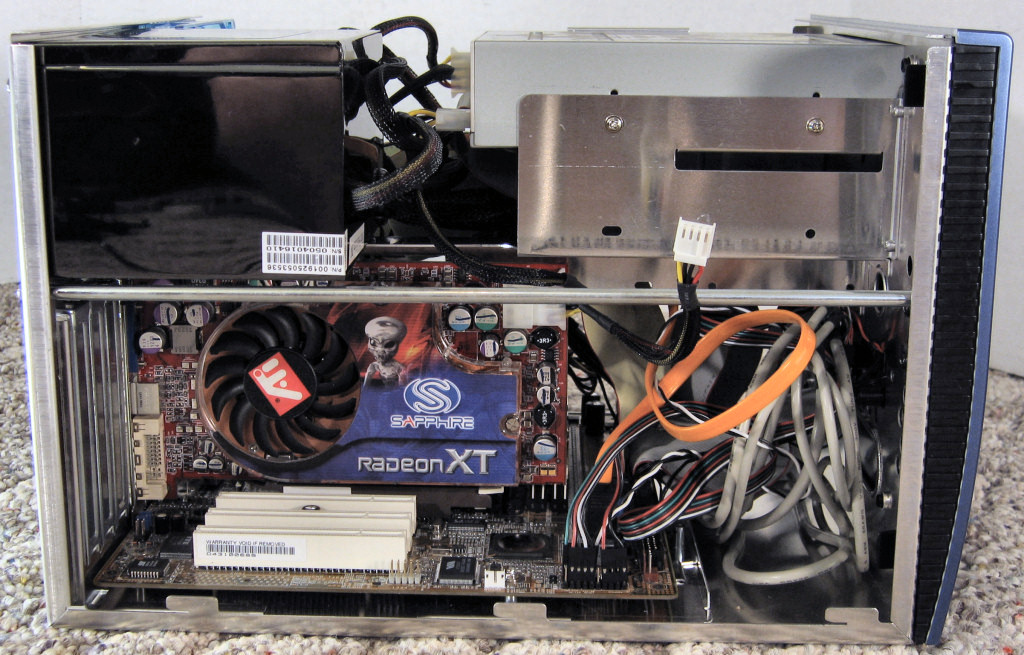
Click to Enlarge
With everything installed, it's time to put the cover back on. This is when one of the only real problems we found with this case came to light. While we didn't actually cut ourselves working on the unit, in putting the cover back on one of the side windows came down across the HDD cage and received a nasty scratch. We checked the edge and it did not appear to have been deburred at all. We looked carefully at other edges in the case and came to the conclusion that hardly any of them had been smoothed out. Many of the edges had been tucked around into bends though, which explains why we didn't hurt ourselves working on the case. Just be sure to be careful and it should not be too much of a problem, but then again Aspire could have put just a little extra attention to detail in there and made sure all the edges had been smoothed over.
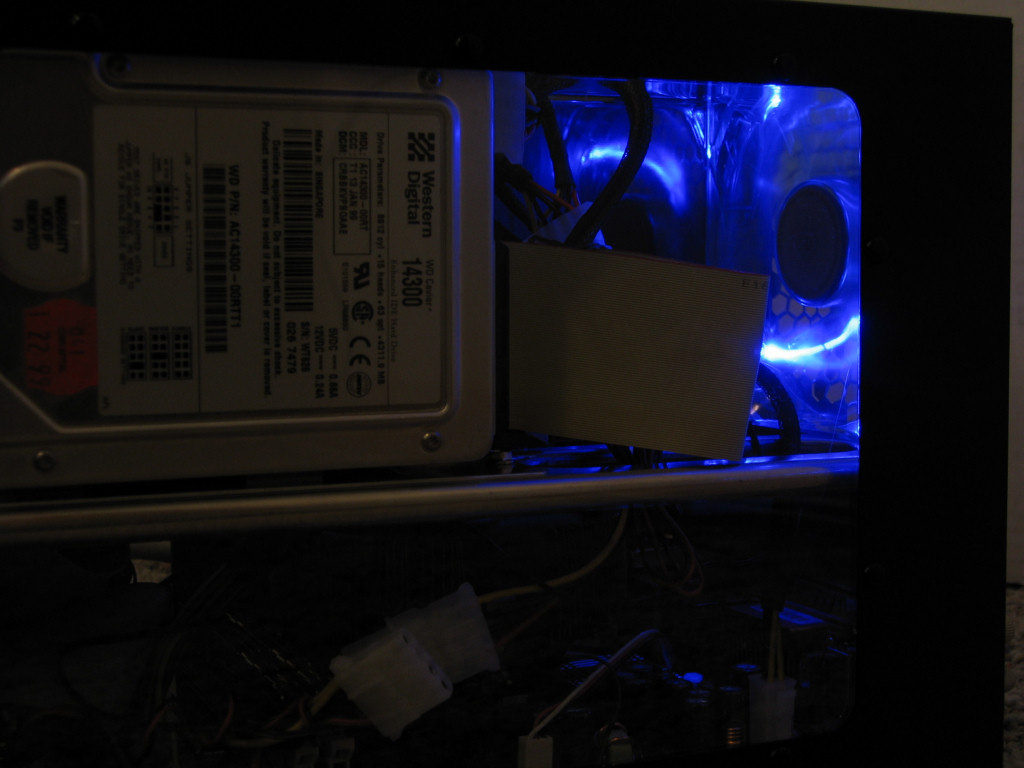
Once the cover was replaced, we noticed how overall the windows do a nice job of showing off the internal components. Here is a small gallery of pics just showing the case with everything installed, some with the unit powered on to show the LED fans.
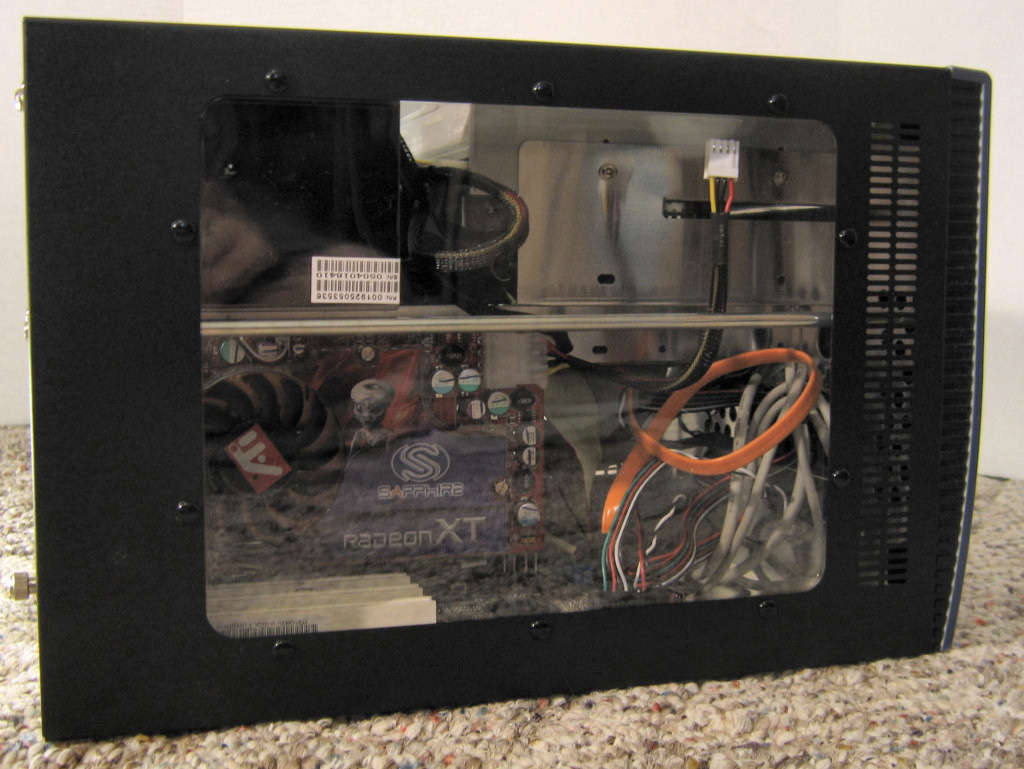
Click to Enlarge
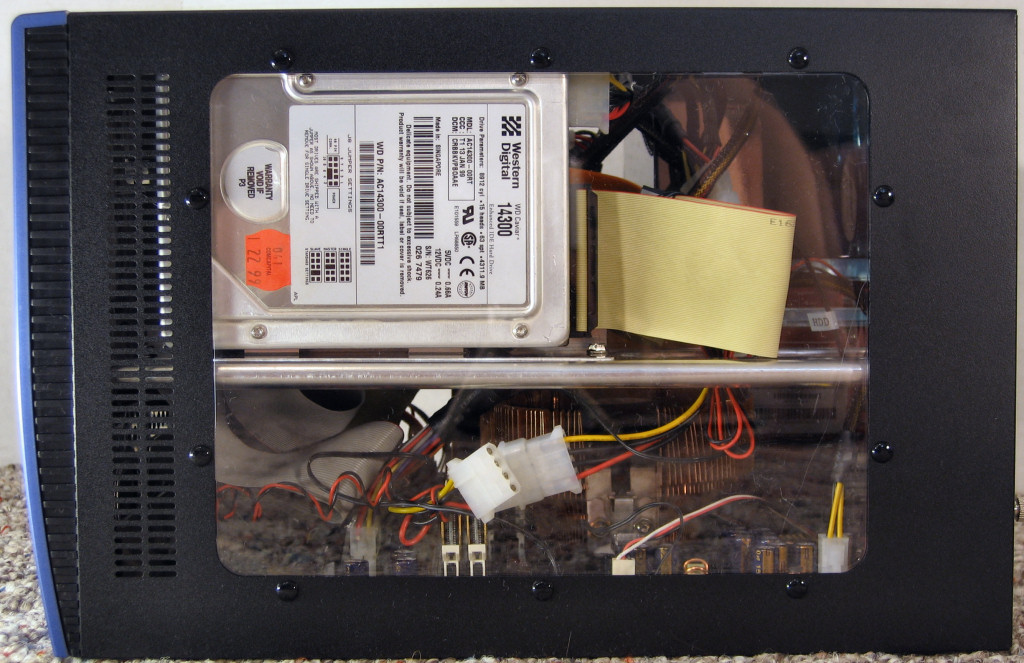
Click to Enlarge
Click to Enlarge
Click to Enlarge
Click to Enlarge
Click to Enlarge
Benchmarking - Thermal
To test the case's ability to keep temperatures of key components in check, we installed our standard micro ATX test bed, using the included power supply, along with an additional hard drive and a DVD burner into the top 5.25" bay.
| HTPC Micro ATX Test Bed | |
DFI K8M800 MLV |
|
Due to the nature of the small design and the triple-side-covering cover, it was both difficult and somewhat pointless to do an inch-by-inch analysis of ambient air temperatures. After leaving the system running for a while and waiting for our thermometers to settle, we did record the exhaust air at 28.3 degrees Celsius from the 120mm fan, and 33.3 degrees from the power supply exhaust. Considering the case was in a room with an ambient temperature of 23.0 degrees, these temperatures are well within acceptable limits. Keep in mind that the figure coming from the 120mm fan exhaust is the one to use when considering the ambient air temperature inside the case, as the extra heat generated by the power supply is not a factor. Here's a look at how the X-QPack did at keeping the components cool:
| Component Temperatures | |
CPU |
32 / 44 C |
GPU |
49 / 64 C |
HDD |
30 C |
Northbridge |
34 C |
Power Supply |
32 C |
All in all this is a very impressive showing given the case's size. The 120mm is most certainly the reason behind these good temperatures - one can feel it's moving an awful lot of air. But is it making a lot of noise too? Let's take a look at the case's total sound output.
Benchmarking - Sound
One of the biggest complaints with smaller form factor PCs is that a lot of them incorporate the usage of small, whining fans. Luckily we can safely say that the X-QPack does not fit this stereotype. To measure the Aspire enclosure we held a sound pressure level sensor twelve inches away from the closed case with our test bed installed and running. Take a look at the level compared to some of the other cases we have reviewed recently.
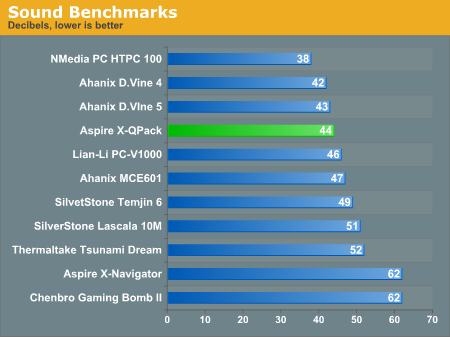
44dBa is a fantastic number for a smaller case (though there is still room for improvement). To put the number into perspective, the sound meter actually never dropped below 39dBa just sitting still our test lab, meaning that a computer built in this case could quite well be drowned out entirely by other background noises. In fact, we're quite sure we were mainly hearing the sound of the older hard drive more so than the two fans in the X-QPack. The 120mm's fan noise is much more pleasant too compared to the higher-pitched noise that smaller fans tend to make. If one demands the absolute quietest from their pc though, they could even replace this 120mm fan with a different one, or simply to add a fan controller so they could gain control over how fast the fan spins and further lower the operating noise.
Final Words
For anyone who has ever attended several lan parties, they know how much of a drag it can be to lug around a massive steel tower case fully loaded with multiple drives and other components galore. Shuttle will forever be famous for attempting to break this tradition of 'large' desktop cases, but for a lot of people their small form factor designs simply didn't allow for enough expansion, and others simply couldn't swallow the concept of getting a case that already came with a motherboard pre-selected for it.
Well with this new design from Aspire, buyers have yet another choice available to them. They can have a case that's still much more compact and portable than a standard tower case, but one that still provides 90% of the same functionality provided the user selects an appropriate micro ATX motherboard. With more and more people interested in smaller computers, motherboard manufacturers are going to continue to come up with new and improved micro ATX layouts that offer just as much power as their full-sized counterparts. Also, with so many devices getting put onto either the motherboard itself or into external devices rather than expansion cards, many users simply don't need as many expansion slots as they used to in order to get the same amount of functionality out of their PC.
In the heat and noise arena, the case does very well. We figured a maximum ambient air temperature of 28.3 degrees Celsius, and it kept our decent gaming rig's components each within relatively low ranges. Running full force we only measured a sound pressure level of 44 dBa, certainly low enough to not be a problem for the majority of users.
Considering one can get the X-QPack for $90, and that this comes with the 420 watt power supply, we simply could not recommend this case any higher for someone who wants a micro-ATX compatible case that doesn't cut many corners.


