Investigations into Socket 939 Athlon 64 Overclocking
by Jarred Walton on October 3, 2005 4:35 PM EST- Posted in
- CPUs
System Assembly
Once you have all the parts, it's time to put everything together. We're going to assume that you know the basic process, but here's our order for assembling a new system.
With the system up and running, install the OS and drivers. We use SATA drives almost exclusively for new PCs, which is why it's important to check the BIOS settings. Installing XP and the drivers is pretty simple, so we're not going to go into much detail. Use your CD and key, and then when XP is installed, you use the driver CD that comes with your motherboard. That will get you network, sound, and chipset drivers. You might want to check for newer versions online once you have networking installed, or else download them in advance on another PC and copy them to the new system. We also grab all the latest Windows Updates for any system with Internet access, though not necessarily for performance testing. Since we're only using one board, we installed all the Windows Updates along with a bunch of other software that we'll use in benchmarking. We also recommend switching your SATA hard drive to port 3 or 4 (or one of the extra ports) once Windows is installed. SATA ports 1 and 2 generally don't behave well when you begin overclocking beyond a certain threshold, and with the drivers installed, Windows should boot fine whether your primary drive is connected to port 1 or 3 or something else.
You'll note that up to this point, we haven't even talked about overclocking our new system. If you don't realize this already, let's make this clear: get your OS installed and running and test all your programs before you start overclocking! Setting up a new PC is a complex process, and even experienced system builders encounter problems. You don't want to have the Windows XP install program crash at 95% complete due to an overclock. It's not nearly as bad to have the system crash once you have it working, which is why we say to wait. Even then, it is possible to have an overclocked system crash and corrupt files, forcing you to reinstall applications or even XP from scratch. (It happened at least once in my testing, though not with socket 939.) There's a risk, but for many, the potential rewards outweigh the risk.
Once you have all the parts, it's time to put everything together. We're going to assume that you know the basic process, but here's our order for assembling a new system.
- Remove all components from boxes and lay them out on the workbench in an orderly fashion. (Check for order errors.)
- Install the CPU into the motherboard socket with the motherboard resting on the padded foam cushion with which it shipped.
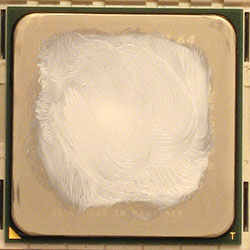
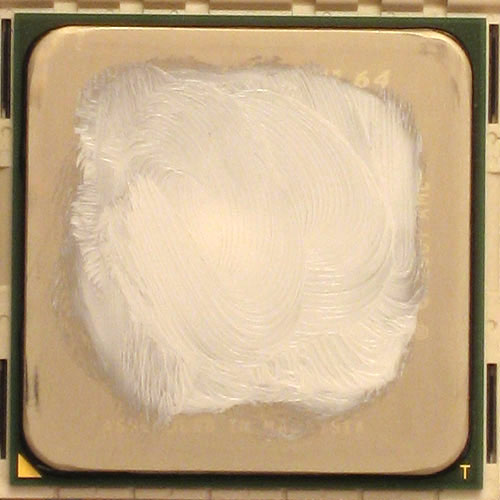
Click to enlarge. - Apply a small amount of thermal paste to the center of the CPU heat spreader, then smooth it out a bit using your finger, a razor blade, etc. The idea is to get a thin layer on the heat sink, and you don't need to cover the whole CPU surface; once the HSF is installed, the thermal grease will flatten out to cover the rest of the CPU surface and you don't want a lot of extra grease. (Technically, AMD voids your CPU warranty if you don't use approved thermal grease. We've never had to deal with a failed Athlon 64 chip yet, so we can't comment on how they would respond. Overclocking is already voiding the warranty, so we're not worried about "approved" thermal compounds.)
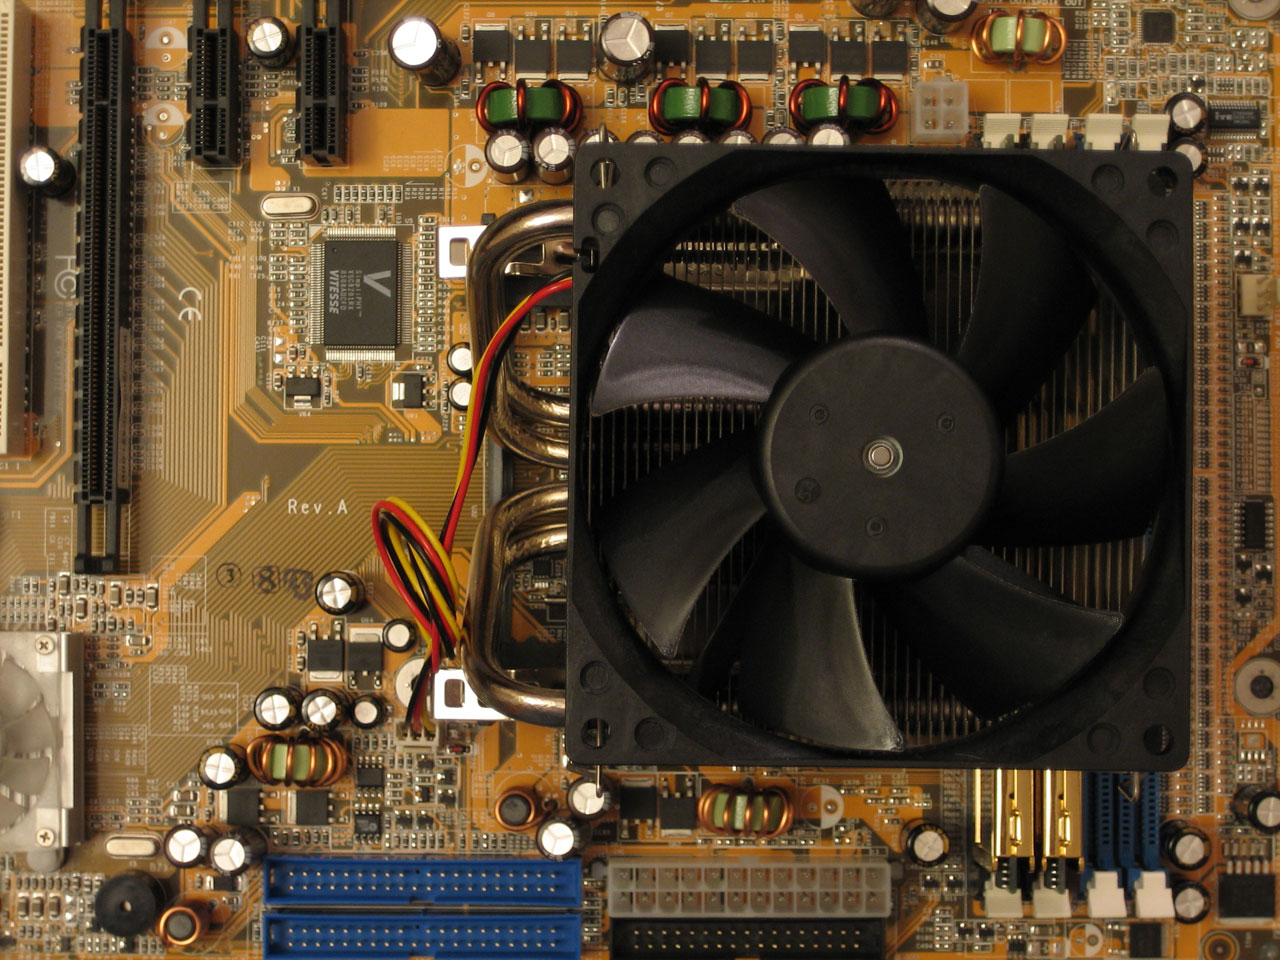
- Install the heat sink onto the CPU - carefully. Depending on which HSF that you decide to purchase, you may need to change the mounting bracket, back plate, etc. One of the reasons why we like the Thermalright HSF is because you don't need to change the back plate (which is sometimes "glued" onto the motherboard). Don't forget to connect the fan to the 3-pin CPU header on the motherboard.
- Install the RAM into the appropriate slots. For the DFI board, that would be slots 3 and 4 (the two closest to the CPU). Other manufacturers number their slots differently and may separate the RAM for dual channel operation. Read the manual for your motherboard.

Click to enlarge. - If your case doesn't already have the power supply installed, it's generally best to install that now. Otherwise, the HSF for the CPU can get in the way. This varies by case, of course, but we almost always find it easier to get the PSU in before anything else.
- Install the motherboard mounts (usually little brass colored screws/bolts) into the case. Only put the mounts in places that match up to the holes on the motherboard. The DFI INFINITY has seven holes and thus requires seven mounts. You don't want extra mounts installed, as they could create a short on the bottom of the motherboard. Also, swap out your case's backplate for the one provided with your motherboard. (We have yet to encounter a case with a backplate that matches any motherboard that we've purchased.)
- Place the motherboard carefully into the case; you may have to work a little to get the backplate to line up with the rear I/O panel of the motherboard. Don't force anything. Once the board is in place, install the screws that secure the motherboard. Note that before installing the motherboard, depending on the case and your dexterity, it might be easier to connect the wires for the front panel of the case - power and HDD LEDs, reset and power switches, and speaker are almost always present. In our experience, the colored wires are usually the positive feed and the black (or white) wires are for ground. (I still get the LEDs backwards half the time, I think. If your HDD/Power lights don't come on, reverse the pins.)
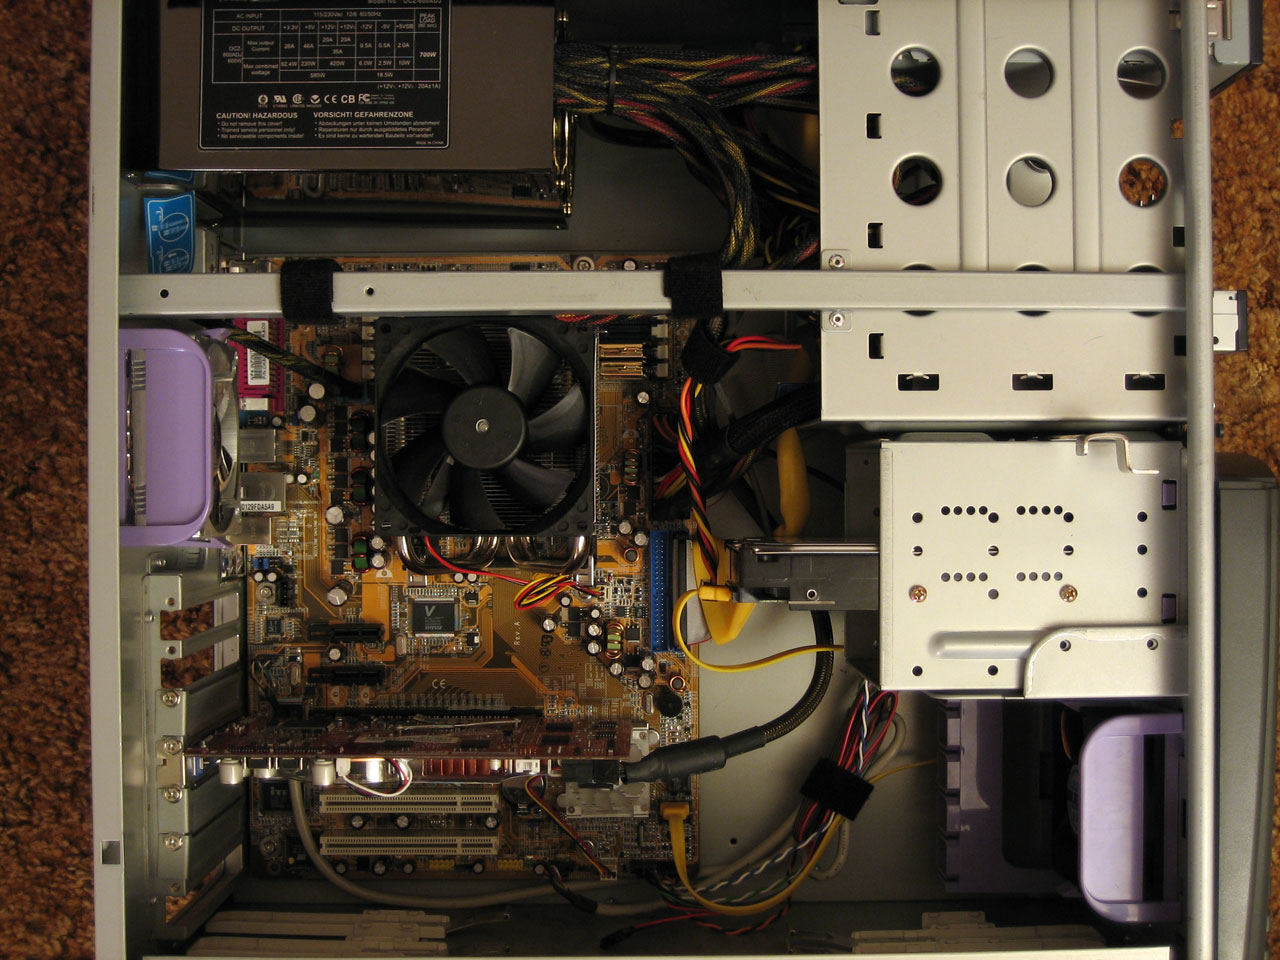
- Install your graphics card, hard drive(s), DVD drive(s), cables, etc. We try to keep all the cables tidy, and you can use zip ties, velcro wraps, or even twisty ties if you don't mind a slightly ghetto approach. You might want to wait a minute before really securing all cables, just to be sure that all of the parts work properly. For now, plug the main SATA drive into SATA port 1. (If you're dead set on using RAID for your OS drive, you'll need a floppy disk with a driver on it.)
- Install any other fans or components, and make sure everything has power. Check the voltage switch on the rear of the PSU to make sure that it's set to 115V (or 230V depending on your location). Then plug in the power cord from the wall to the rear of your PSU, hold your breath, and turn on the system. Verify that all the fans are spinning.

Click to enlarge. - If the computer doesn't turn on, check that everything is seated properly and begin troubleshooting. Take it slow and don't jump to conclusions (i.e. "My RAM is bad!") Check the connections from the front panel of the case, as you might have simply installed the power switch cable incorrectly. Check all the other cables as well. If you have spare parts that you know work properly, try swapping them one at a time. Try running with just the CPU, graphics and RAM installed (no HDD or DVD). You might also want to remove the motherboard from the case and try powering on the system with the board sitting on the padded cushion (and anti-static bag) on your work area. If that works, check for anything in the case that might be grounding the board. You can try fully disassembling the PC and trying again, with the hope that perhaps you'll find your error in the process. Beyond that, you're on your own. Try the forums for help if you can't figure it out, but be patient and polite.
With the system up and running, install the OS and drivers. We use SATA drives almost exclusively for new PCs, which is why it's important to check the BIOS settings. Installing XP and the drivers is pretty simple, so we're not going to go into much detail. Use your CD and key, and then when XP is installed, you use the driver CD that comes with your motherboard. That will get you network, sound, and chipset drivers. You might want to check for newer versions online once you have networking installed, or else download them in advance on another PC and copy them to the new system. We also grab all the latest Windows Updates for any system with Internet access, though not necessarily for performance testing. Since we're only using one board, we installed all the Windows Updates along with a bunch of other software that we'll use in benchmarking. We also recommend switching your SATA hard drive to port 3 or 4 (or one of the extra ports) once Windows is installed. SATA ports 1 and 2 generally don't behave well when you begin overclocking beyond a certain threshold, and with the drivers installed, Windows should boot fine whether your primary drive is connected to port 1 or 3 or something else.
You'll note that up to this point, we haven't even talked about overclocking our new system. If you don't realize this already, let's make this clear: get your OS installed and running and test all your programs before you start overclocking! Setting up a new PC is a complex process, and even experienced system builders encounter problems. You don't want to have the Windows XP install program crash at 95% complete due to an overclock. It's not nearly as bad to have the system crash once you have it working, which is why we say to wait. Even then, it is possible to have an overclocked system crash and corrupt files, forcing you to reinstall applications or even XP from scratch. (It happened at least once in my testing, though not with socket 939.) There's a risk, but for many, the potential rewards outweigh the risk.


101 Comments
View All Comments
edlight - Tuesday, January 3, 2006 - link
I've found a way to overclock and retain the Power Now/Cool'n'Quiet.I let the motherboard do it's Cool'n'Quiet thing but I don't load the AMD driver. I run CrystalCPUID, which lets me set up the multiplier and voltage of each of the 3 cpu steps.
The voltage setting of the motherboard, for my Gigabyte, has to be on Auto for Crystal to be able to change it.
The highest Crystal can go with my 1.4v 3000+ Winnie is 1.45v.
This let me take it up to 3800+ -- a speed of 2.4. 240 x 10.
So it's running at 1.2 -- 240 x 5 -- most of the time. I set it at 1.2v there and froze it there and p95'd it overnight, as I did to the other 2 speeds.
For me this is a great compromise between running "cool 'n quiet" and high performance.
It's only a small percentage speed jump to 2.6, but requires alot of voltage and heat.
I can't say what the maximum voltage would be for a Venice. Crystal lets me choose higher voltages than 1.45, but it doesn't actually set them.
RaulAssis - Wednesday, December 21, 2005 - link
Some people reported that the Cool 'n' Quiet feature could work in a OC system. Maybe not all bioses support correct scaling of voltages when the system is OC and the Cool 'n' Quiet feature is turned on.JarredWalton - Wednesday, December 21, 2005 - link
With any moderate OC, CnQ is going to cause problems. It dynamically adjusts multipliers and voltages... something that will usually screw up an overclocked system. I would strongly discourage trying to use CnQ with an OC'ed setup. Some motherboard BIOSes actually disable CnQ automatically if you enable overclocking features.mrmoti - Wednesday, November 30, 2005 - link
If I understand correctly:Performance RAM running at DDR400 2-2-2-8 and Value RAM running at DDR400 2.5-3-3-8
At same OC on the processor, Performance RAM outperformed the Value RAM by 5% to 10%, being the price something between 80% to 100% more.
So, what's the impact of runnig faster memory at high lateny? Say DDR500 at 3-4-4-8
Because looking at the table of estimated latencies, (Performance) DDR400 2-2-2-5 has an estimated latency of 46.5, where (Value) DDR400 2.5-3-3-7 has an estimated latency of 49.75, an improve of 6.5% being in the range of 5% to 10% better.
By the same table, DDR500 3-4-4-8 has an estimated latency of 42.4, an improvement of 8.8% over the Performance DDR400 and 14.7% over the Value DDR400, based only in latencies.
Can anybody run a benchmark confirming/denying this?
Being the case that the price of DDR500 with those timings is in the middle between Performance and Value RAM
T Rush - Sunday, October 16, 2005 - link
One of the main focuses of this article seems to be value -vs- performance RAMs when over clocking, but you chose to run the performance RAM at settings where is doesn't perform, shame on you Jarred Walton, very disappointedIf you look at the settings you used to test the two RAMs at...
http://images.anandtech.com/reviews/cpu/amd/athlon...">http://images.anandtech.com/reviews/cpu...niceover...
...you see that the MAX speed you where able to run the OCZ Rev2 at was not in it's "performance envelope", as the OCZ Rev2 is one of the worst performers in this speed range http://www.anandtech.com/memory/showdoc.aspx?i=256...">http://www.anandtech.com/memory/showdoc.aspx?i=256... <OCZ Rev2 at 266MHz, and all the other "performance RAMs" beat it
But if you look at how the OCX Rev2 does work at much higher speeds, where it does perform...
http://www.anandtech.com/memory/showdoc.aspx?i=256...">http://www.anandtech.com/memory/showdoc.aspx?i=256...
...you find that it is performing much differently than what you tested at, and would have shown a much larger performance lead over the value RAM
How did you get this on to Anandtech? How could you show such a bad comparison of value -vs- performance RAM on a site which has always shown so much information about how these RAMs perform?
I not only blame you, but also the editors for not catching how badly you have managed to make performance RAM look. It is clear you were trying to prove that cheap RAM can falsely perform as well as high-end performance RAMs. If you truly wanted to show what performance RAM can do when over clocking you either needed to run the OCZ Rev2 at much faster speeds, or use a different performance RAM that works well at the sub 270MHz speeds you tested at.
JarredWalton - Sunday, October 16, 2005 - link
This is one set of RAM run through extensive tests on one platform. I've seen the same RAM run faster in some other systems, but not a whole lot. Just because some DIMMs reach DDR636 doesn't mean that all of them do. I could run this RAM at 3-4-4-8-2T timings at DDR600, but it actually ran worse than 2.5-3-3-8-1T with the lower memory ratio.What is clear is that I wasn't trying to "prove" anything. I was running some comparison tests with a system using two different types of RAM, and I'm sorry that you don't like the results. What I did prove was that someone one a budget could build a very fast system. An FX or San Diego core with higher quality RAM and a better motherboard would be better overall, but price/performance it would get stomped by this <$1000 setup.
T Rush - Monday, October 17, 2005 - link
I don't find the OCZ Rev2 to be a good example of the high performance RAM everyone thinks it is, as it doesn’t perform well at the speeds you (and most everyone else) use…not compared to other good over clocking RAMsGranted some of the other performance RAMs do cost much more than the value RAMs, and even more than the OCZ Rev2, but they would have shown a greater performance difference than the value RAM which in your tests was not able to run any faster than its stock rated speeds or timings
Your testing shows that running RAM at faster speeds adds very little performance over stock speed value RAM, and that is because the timings/speed relationships of that peculiar performance RAM at those peculiar higher speeds were not good.
As I said before, all the other performance RAMs beat it, and perform much better at speeds under 270MHz than the OCZ Rev2 does
Using the right RAM at the right speeds to run the best timings is the true art to over clocking, as RAM timings and speeds can allow the AMD64 to perform at much higher levels when over clocked
I do not disagree with your results, as that is how those RAMs perform:
Value RAM only being able to run its rated speeds and timings, not being able to over clock at all.
OCZ Rev2 running at higher speeds but with such bad timings that it shows very little performance gains unless you are able to run it at CAS 2.5 in the 300MHz range
I am not a fan of the OCZ Rev2 because of this, but I am a fan of performance RAM over value RAM, even on a budget system.
If you read clue22’s reply “so basically what the everybody is saying about the value RAM vs. low latency more expensive RAM is that for the athlon 64 it is basically a waste of money (i.e. you only get about 5% performance gain), but usually spend 100% or more money to get the "better" RAM.”
…and cyptonomicon’s “and its nice to see those ram comparisons. good to see those results on the latest a64 platform and confirm once again that the ram makes only a few percentage points difference”
…next intellon’s “I understand how/why the memory quality is not too imoprtant (5-9% increase for 100 bucks = not worthy)”
Clearly by using the OCZ Rev2 you did not show what spending a little bit more for better performing RAM can do. You have shown that running RAM at speeds with timings where it doesn’t perform well is a waste of money, but this does not answer any questions about value -vs- performance RAM
JarredWalton - Monday, October 17, 2005 - link
I've got X2 benchmarks with four different types of RAM in the works:OCZ VX
OCZ Plat Rev2 (TCCD)
Mushkin Value
PDP 2x1GB 2-3-2-5-1T
Other than the fact that 2GB of RAM helps out certain tasks (BF2 load times!), the total performance difference with those configurations is still not huge. With a 3.5V RAM voltage, the VX would do better, but even then the difference isn't above 10%.
T Rush - Thursday, October 20, 2005 - link
for a budget system I would say the socket 754 is better...as the motherboards and CPUs are cheaper...and you can get ClawHammer CPUs with the larger performance 1MB L2 cachethe only thing you miss out on with the 754 is the dual channel memory mode(which only adds very little performance anyway)...but by over clocking the core:memory speed you can easily match the performance gained by the greater bandwidth of the dual channel mode (this could be why the socket 939 doesn't show large gains from overclocking with the memory 'in-sync'..as it can't use all the bandwidth the faster memory gives)
with a mid-range system you could pick a 10X multi 3200+ Venice, or even a 11X multi 3500+ Venice(either of those would have a much better CPU multi for overclocking than the 3000+'s 9X multi) which would allow you to keep the HTT/HTL speed at a more reasonable level(270MHz and 245MHz to reach 2.7GHz CPU speed...where a 9X multi CPU would need a 300MHz HTT speed to run the CPU that fast)
...but the 3200+ and 3500+ are costing $190 to $250...so for not much more you could have a performance San Diego core on the 939 platform (3700+ 11X multi SD is only $267 now)
...so for $80 to $40 more I would go for the larger San Diego core...I would also spend the ~$20 more for CAS 2 RAM (over $90 Value RAM)...thats like just $100...for a computer with much better parts...and say you use this system for 18 months, that works out to less than $6 a month for a using higher quality parts
Deathcharge - Saturday, October 15, 2005 - link
Jarred this was a great article and did come at a great time as i am in the market for buying a bang for the buck system. One thing you didnt mention (although i saw that in the CPU-z screen shots) is the CPU steppinghttp://www.amdcompare.com/us-en/desktop/default.as...">http://www.amdcompare.com/us-en/desktop/default.as...
the 3200+ venice core comes in 3 different stepping and i belive the one you used in your article is the E3 stepping which is being replaced with the E6 stepping. Any info on how well the new stepping OC? initial reports from around the net indicate that it doesnt OC very well for some reason would love to read your comments on this.
Do you know if it is possible to OC to 2500 or 2600O with stock HSF as i would really like to save the money spent on the TT-90 and get a 7800GT (as opposed to x800xl). one final thing would OCZ value VX require active cooling?
thanks and keep up the good work, really enjoyed reading it and would look forward to future articles