Averting Disaster - A Guide To Computer Backups (2014)
by Brett Howse on May 21, 2014 9:00 AM EST- Posted in
- IT Computing
- Mac
- Apple
- Windows
- Cloud Computing
- macOS
Built-in Backup Tools - OS X
Apple introduced Time Machine back with the Leopard release in 2007. Time Machine is an all-in-one built-in backup utility, allowing both file and image level backups with versioning. Time Machine will back up to internal or external disks, as well as the AirPort Time Capsule which is Apple’s own NAS specifically for backups. You can also back up to another Mac running at least Leopard, and with Mountain Lion Apple added the ability to backup to multiple destinations, with the backups alternating among the backup targets to provide additional levels of redundancy. Officially, Time Machine is not supported on other NAS devices. It does not work natively with Server Message Block (SMB) or Network File System (NFS) shares but instead requires the Apple Filing Protocol (AFP). If you are not going to use an AirPort device, ensure the NAS you select specifically supports Time Machine. Time Machine is simple to use, and yet powerful enough to be an almost complete backup solution for the Mac. Let’s look at how to set it up:
- First you need to configure a backup disk. Ensure you have your backup disk connected, or your AirPort Time Capsule configured, and then open the Time Machine menu from the menu bar by clicking the Time Machine icon and choosing Open Time Machine Preferences…
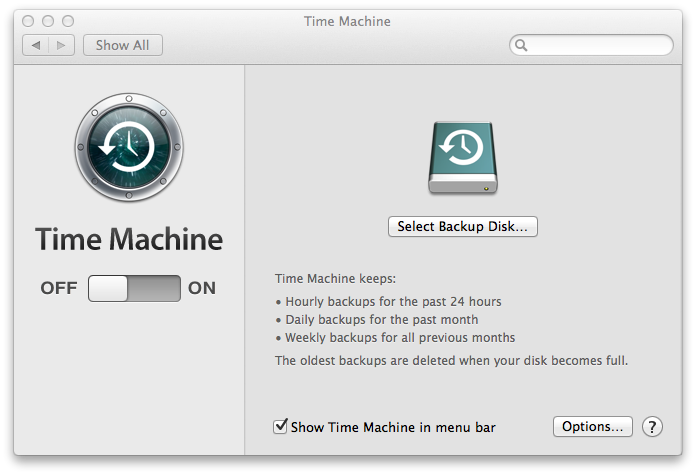
- On the Time Machine menu, click Select Backup Disk…
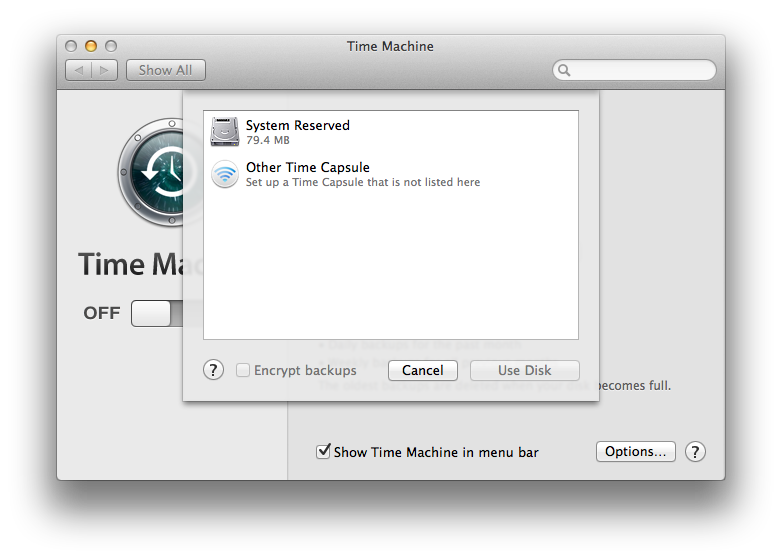
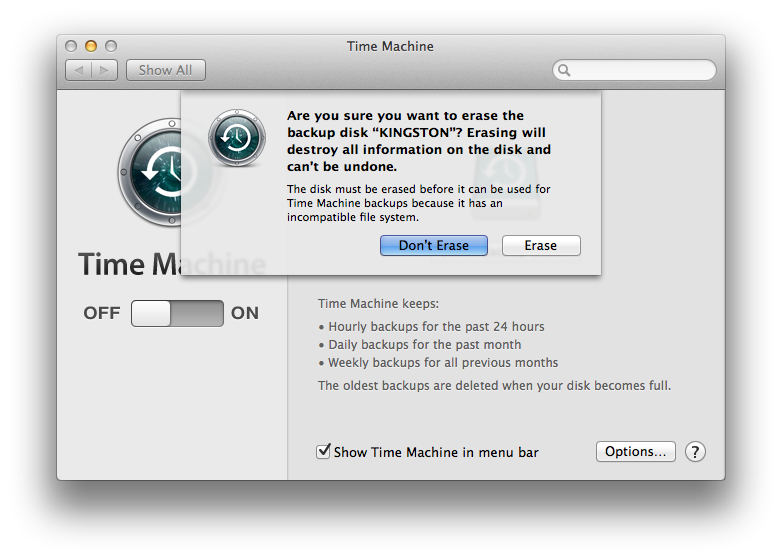
- Here it will display the available backup targets. Choose the backup target you’d like to use, whether it is an attached hard disk or the AirPort Time Capsule and click Use Disk. If the hard disk is not formatted with HFS+, you will be prompted to erase the disk and reformat which will of course delete any data currently on the backup target.
- Now that you’ve selected a disk, Time Machine will automatically start backing up.
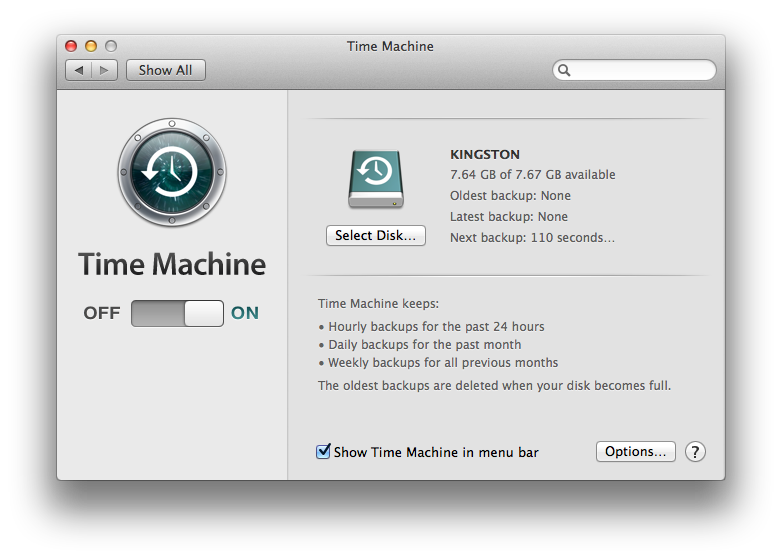


Time Machine does a full backup of your system, and then it starts to back up every hour. If the backup target is unavailable it will delay the backup until it is available again. Because only changes are backed up, each successive backup is relatively quick. If you would like to exclude some files from being backed up, click the Options button in the Time Machine menu to add exclusions.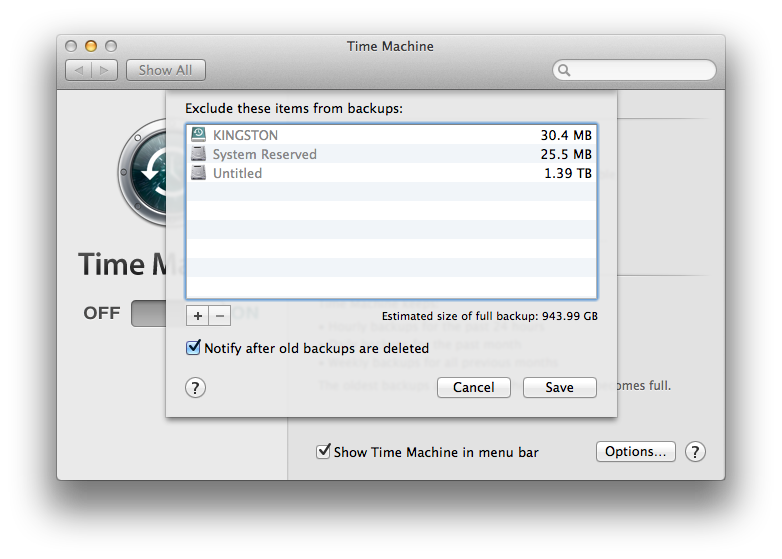
Other advanced options are not available, so there is no way to increase or decrease the frequency of backups or specify how many versions of a file to keep. The program will just back up indefinitely until it fills the available backup target, at which point it begins to delete the oldest files first.
Restoring files is relatively easy as well:
- Navigate to the folder where the file you want to recover should be (example – Documents).
- Click on the Time Machine icon in the menu bar and choose Enter Time Machine.
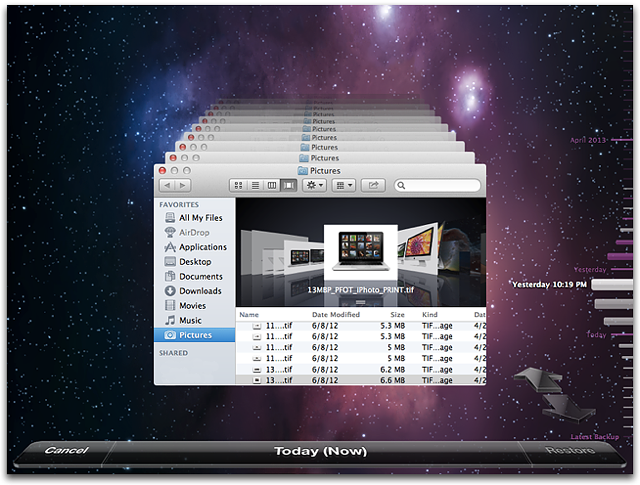
- This will open the restore interface, which shows a list of all of the previous backups sequentially. Using the arrows allows you to move from one backup to the next, or you can utilize the date bar on the right side which will allow you to move back to a known date. Selecting a backup date will then display the folder exactly as it was during the backup.
- Once you’ve located the file you wish to restore, select the file, and then click Restore. If the file was deleted, it will just be restored, but if the file still exists in its original location, you will be prompted to overwrite the file.
Time Machine can also be used within certain programs such as contacts, and restores operate in the same manner as files.
To restore the entire system to a previous state, hold down the Command and R keys at startup to enter the Recovery mode. In Recovery mode, one of the options is to restore from a Time Machine backup.


133 Comments
View All Comments
SirMaster - Wednesday, May 21, 2014 - link
There is no way around it.If you are keeping data, you need to budget for 2x that space at a minimum, otherwise you cannot truly afford to keep that much data.
Mark_gb - Wednesday, May 21, 2014 - link
I just built my first systen in nearly 20 years. I need a backup system. And so far, despite the fact that I have both a Blu-ray and DVD burners in this box, Windows 8.1 does not appear to be willing to let me just burn a (series of) full system backup disk(s) once a week that I can take anywhere I want.Isnt this 2014 or is Microsoft still stuck in 1988?
theduckofdeath - Wednesday, May 21, 2014 - link
It's not a big consumer demand, that's why they are cutting back on backup. There are literally 100's of 3rd party alternatives from $0 up to any price you feel like paying for extra features and performance.Duckeenie - Wednesday, May 21, 2014 - link
You almost answer your own question here. Discs in 2014?zero2dash - Wednesday, May 21, 2014 - link
Crashplan can back up to/from a NAS and/or network drives; it's not baked in to the client out of the box, but there are workarounds to do so. I pull files off a network drive at home, and we back up to our Synology NAS at work on servers ranging from 2003 R2 to 2012. Pre-2008 is more of a PITA (because you have to create a scheduled task), but it's still fairly easy to do.Brett Howse - Wednesday, May 21, 2014 - link
You can understand me not writing about workarounds. Also this is 100% on Crashplan not sure why they don't add the support it's not very difficult.NCM - Wednesday, May 21, 2014 - link
The trouble with CrashPlan, or any of the other remote storage solutions, is that for larger backups you're severely limited by the physics of data transfer. For instance at any given moment we have 1.5-2TB of active business files on our main volume, and depending on the day, at least 15GB to be backed up nightly. However sometimes we have 100-200GB in the nightly backup.It would take an eternity to upload our initial backup and an only slightly lesser eternity to download it again in case of total loss. When there's one of the big backups to be made it probably could not be completed in one night, even though we have a reasonably fast 50/10 Gbs (nominal) connection. Instead we have multiple redundant backups, and regularly rotate them through off-site storage.
One of the things I've found from painful experience (mostly with Retrospect) is not to use backup software that stores in a proprietary format. There's simply too much risk of the software's recovery process not working as expected, at which point you're stuck.
DanNeely - Wednesday, May 21, 2014 - link
Generally agreed. AWS has an option to do initial data import by shipping a box of hard drives. Any full system image or enterprise level cloud backup system needs to offer physical media import/export options.If your business's daily new data volume is high enough you can still swamp nightly updates; but disk based options would really extend the level of users who could effectively make use of such services.
Currently for personal data I've got full local backups, periodically rotated offsite USB drives, and document/media files backed up in Amazon's cloud. A full drive image in the cloud would be nice; but the recovery time is just too long. If my parents were running something faster than cheapskate DSL, I'd probably setup a nas box at their house and sync to it; but currently I couldn't do that without crushing their connection.
Kevin G - Wednesday, May 21, 2014 - link
Deduplication and compression here would help out but how much is entirely dependent on your data.Though with such large data sets in a business environment, it sounds like a solution like Commvault, CDP or Avamar would be better suited. They still use proprietary formats but at this level it is hard to avoid to get features like deduplication.
Brett Howse - Wednesday, May 21, 2014 - link
As Kevin G said, deduplication would make that fairly easy.There's nothing wrong with backups to tape for your situation, but tapes are a pain. Avamar or other backup systems would be able to handle that with ease though.