Averting Disaster - A Guide To Computer Backups (2014)
by Brett Howse on May 21, 2014 9:00 AM EST- Posted in
- IT Computing
- Mac
- Apple
- Windows
- Cloud Computing
- macOS
Built-in Backup Tools - OS X
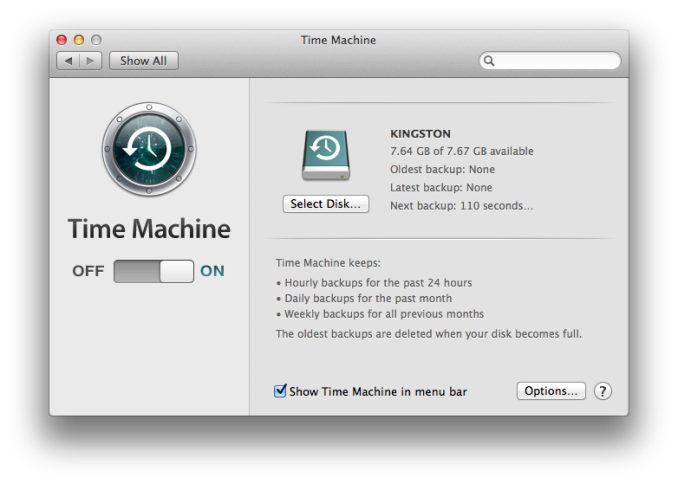
Apple introduced Time Machine back with the Leopard release in 2007. Time Machine is an all-in-one built-in backup utility, allowing both file and image level backups with versioning. Time Machine will back up to internal or external disks, as well as the AirPort Time Capsule which is Apple’s own NAS specifically for backups. You can also back up to another Mac running at least Leopard, and with Mountain Lion Apple added the ability to backup to multiple destinations, with the backups alternating among the backup targets to provide additional levels of redundancy. Officially, Time Machine is not supported on other NAS devices. It does not work natively with Server Message Block (SMB) or Network File System (NFS) shares but instead requires the Apple Filing Protocol (AFP). If you are not going to use an AirPort device, ensure the NAS you select specifically supports Time Machine. Time Machine is simple to use, and yet powerful enough to be an almost complete backup solution for the Mac. Let’s look at how to set it up:
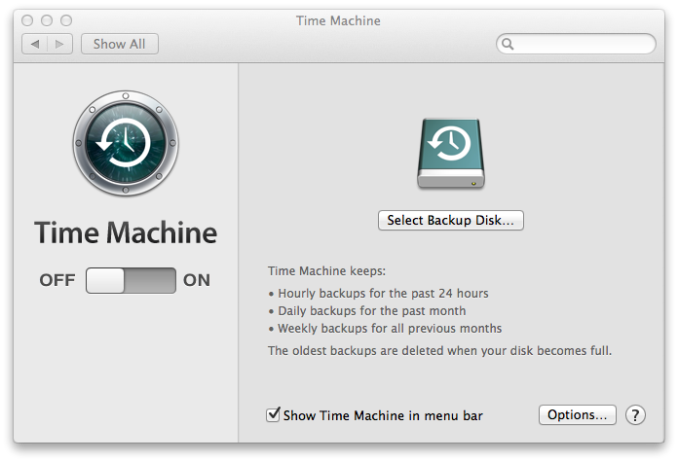
- First you need to configure a backup disk. Ensure you have your backup disk connected, or your AirPort Time Capsule configured, and then open the Time Machine menu from the menu bar by clicking the Time Machine icon and choosing Open Time Machine Preferences…
- On the Time Machine menu, click Select Backup Disk…
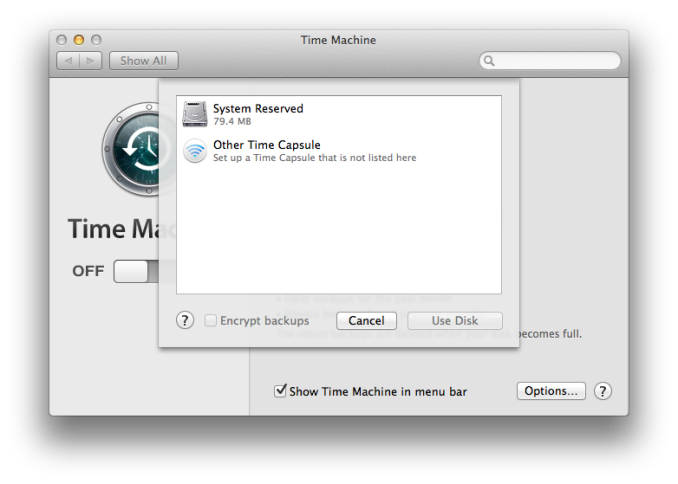
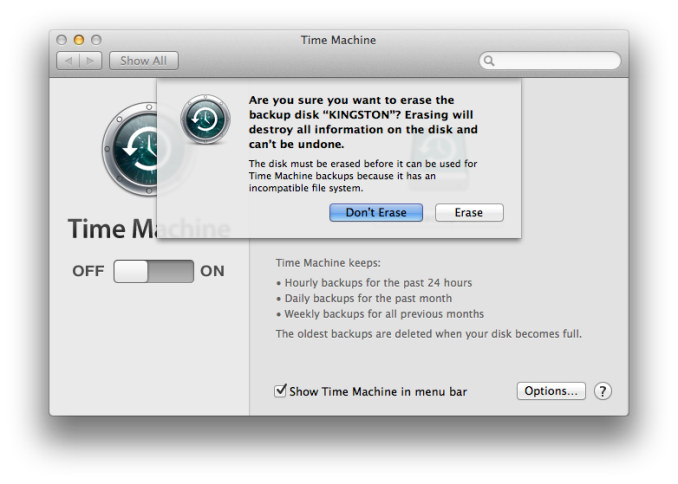
- Here it will display the available backup targets. Choose the backup target you’d like to use, whether it is an attached hard disk or the AirPort Time Capsule and click Use Disk. If the hard disk is not formatted with HFS+, you will be prompted to erase the disk and reformat which will of course delete any data currently on the backup target.
- Now that you’ve selected a disk, Time Machine will automatically start backing up.
Time Machine does a full backup of your system, and then it starts to back up every hour. If the backup target is unavailable it will delay the backup until it is available again. Because only changes are backed up, each successive backup is relatively quick. If you would like to exclude some files from being backed up, click the Options button in the Time Machine menu to add exclusions.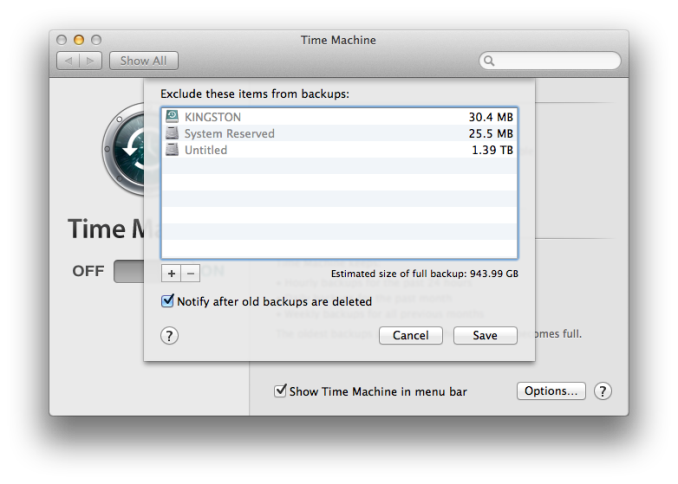
Other advanced options are not available, so there is no way to increase or decrease the frequency of backups or specify how many versions of a file to keep. The program will just back up indefinitely until it fills the available backup target, at which point it begins to delete the oldest files first.
Restoring files is relatively easy as well:
- Navigate to the folder where the file you want to recover should be (example – Documents).
- Click on the Time Machine icon in the menu bar and choose Enter Time Machine.
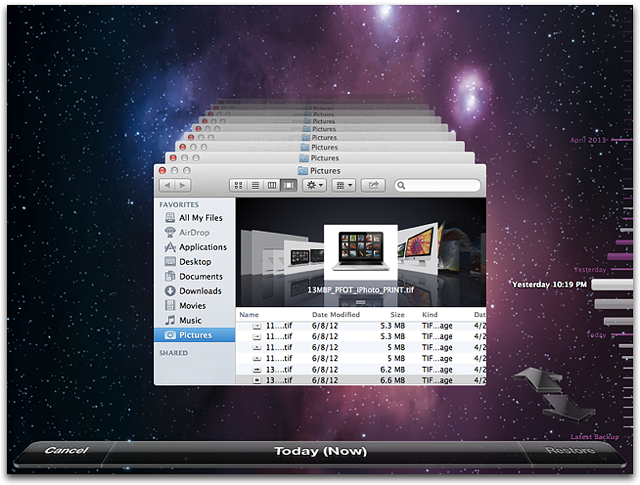
- This will open the restore interface, which shows a list of all of the previous backups sequentially. Using the arrows allows you to move from one backup to the next, or you can utilize the date bar on the right side which will allow you to move back to a known date. Selecting a backup date will then display the folder exactly as it was during the backup.
- Once you’ve located the file you wish to restore, select the file, and then click Restore. If the file was deleted, it will just be restored, but if the file still exists in its original location, you will be prompted to overwrite the file.
Time Machine can also be used within certain programs such as contacts, and restores operate in the same manner as files.
To restore the entire system to a previous state, hold down the Command and R keys at startup to enter the Recovery mode. In Recovery mode, one of the options is to restore from a Time Machine backup.






133 Comments
View All Comments
wumpus - Thursday, May 22, 2014 - link
The whole point of RAID *is* to protect you from things like bit rot. The difference between RAID5 and RAID6 is that RAID6 protects you from two rotted bits in a single sector (more specifically, two different drives with failures in the same location). You should be able to avoid this with RAID5 by periodically reading the entire drive and correcting any single error you find (called "scrubbing").Mr Perfect - Thursday, May 22, 2014 - link
It's not really a sure thing with the RAID though. The array has no idea which version is correct, and which one is rotten. The best it can do is take a consensus and go with whatever version of the file the most drives agree is correct. They did an article about bit rot over at Ars Technica, and the author's RAID 5 happily used the rotten version.http://arstechnica.com/information-technology/2014...
bsd228 - Thursday, May 22, 2014 - link
not, really, wumpus. The whole point of RAID (minus 0) is to protect you from a disk failure. By itself it does not deal with bit rot at all. On a mirror, who is right? In typical implementations, disk 0 is presumed to have the correct copy. ZFS (and I believe MS's knockoff, ReFS) implemented scrubbing with checksumming to give a means to identifying the correct copy.beginner99 - Thursday, May 22, 2014 - link
I use Microsoft's free tool SyncToy. With it you can synchronize folders to anywhere else, like an external hdd. And of course only updates are synched and you can specify in which direction to sync. I use it to backup my media collection. The external hard drive can then be stored off-site (at work). The advantage I see with this is that the media files are copied over and are readable on the backup directly. You can take the external hdd on the road and have your full media collection at hand. With image files you will have to first restore them before being able to use them.Important documents should be stored in the "cloud". This can be a simple encrypted zip sent by email and it will be stored on the email server (say gmail) or whatever. That was possible like over a decade ago already.
gsvelto - Thursday, May 22, 2014 - link
I do most of my backups from Linux: I use rsync to sync my home directory and other relevant files outside of /home and ntfsclone to backup my Windows drives. The latter option is definitely slower than incremental backups or somesuch but allows me to restore a Windows installation very quickly w/o need for reinstalling. It's also handy when moving Windows from a hard drive to another.AlexIsAlex - Thursday, May 22, 2014 - link
Another aspect to backups is bit rot. Both on the backup media (are the files in the backup still good?) and on the live media (do I need to restore this file from backup, as it has become corrupted?)For a decent backup system, I want checkusms stored with the backed up data, and verified regularly. I also want the backup to actually read all files to be backed up from the source, even if they are not supposed to be modified since the last backup, and check that they still have the same checksum. Unfortunately, this takes rather a long time, but I don't see any alternative to discovering months down the line that some rarely accessed files have become corrupted, and worse, been backed up in a corrupted state.
boomie - Thursday, May 22, 2014 - link
>Windows 8 fixes that issue, but creates new ones by no longer allowing automated image backupsWell, I didn't think supposed IT pros at anandtech would be so casual as to be afraid of command line.
If you cannot live in this world without regular image backups, who prevents you from adding a task in task scheduler with wbadmin call?
Come on now.
ruthan - Thursday, May 22, 2014 - link
There are extended tutorials to Windows native backup setting, but for Winserver essentials, here are very compressed version of descriptions. Could you more explain it - for example - "Once the connector software is installed" - this is big shortcut - after installation is backup set up from server or from local machine?How is linux / macs backup support, because of this is real different, Windows backup solution isnt now big problem. From my experience - best solution are form Acronis and Paragon, but they have lots of limitations and known issues.
davidpappleby - Thursday, May 22, 2014 - link
We have two laptops, and two desktops. Each has a boot drive and a separate physical backup drive for images using acronis. All pictures/music/data reside on the server which has separate backup drives for its OS and data (again with acronis). I'll be looking into S3 again as a result of this article (last time I looked I thought 2tb was too much). My wife has an external drive we use as off site backup of her important data (downside is that that is current only).Mikuni - Thursday, May 22, 2014 - link
Mega gives 10GB for free, encrypted storage, why wasn't it mentioned?