MSI P55-GD65 - Mid-Range P55 for the Masses
by Gary Key on October 10, 2009 12:00 PM EST- Posted in
- Motherboards
MSI P55-GD65 Layout
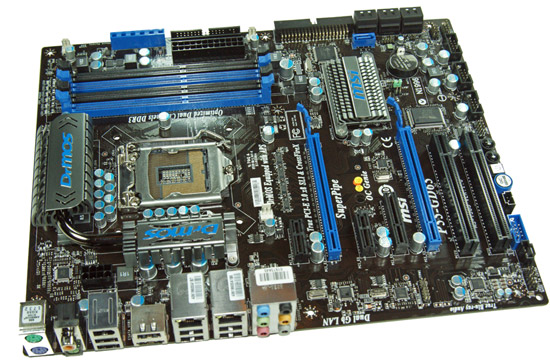
The GD-65’s board design is from MSI’s standard issue performance series. The basically all black design with a blue hue for certain accessories is a great look. The subtle gunmetal finished heatsink designs are tasteful and certainly leagues better than their old rollercoaster units.
It is obvious a lot of thought went in the general layout as it is also very good, but not perfect. The single blue JMicron powered SATA port is located on the other side of the six black P55 SATA slots and is difficult to reach in an CF/SLI setup. Of course, we still have a floppy port (why?) and an IDE port on a board that is suppose to take us into the future, not back to 1995.
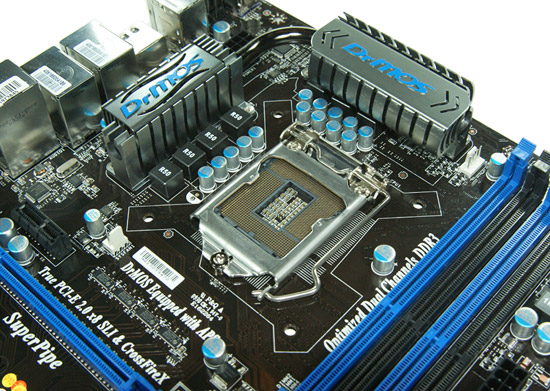
MSI utilizes a high quality DrMOS six-phase PWM setup on this board. Unlike traditional designs, each DrMOS phase circuit contains the MOSFET and driver IC in a single package. Based on our testing this setup will handle power requirements just as well as any eight to twelve phase design utilized on competing boards from Gigabyte, ASRock, ASUS or others. In fact, switching speeds are up to four times faster than traditional MOSFET/Choke setups along with a side benefit of cooler temperatures.
The GD65 supports dynamic power-phase switching along with onboard LEDs that notify you how many phases are active at any given time. MSI claims power is delivered to the CPU with 92% efficiency. We believe them based on clamp load measurements. Also, MSI has gone back to the drawing board on their heatpipe design with a new setup aptly named SuperPipes. No it is not a plumber’s dream come true, MSI’s heatpipes are now 60% larger at 8mm for improved cooling. In fact, DrMOS temperatures reached 36.3C under full load conditions with our i7/860 running at 4.3GHz with only our CPU cooler providing airflow around the PWM area.
The CPU area is generally open and will accommodate larger coolers like the Thermalright Ultra 120 eXtreme. Large push/pull coolers like the Vigor Monsoon III LT will block the first DIMM slot. A pattern we are seeing with just about every P55 board.
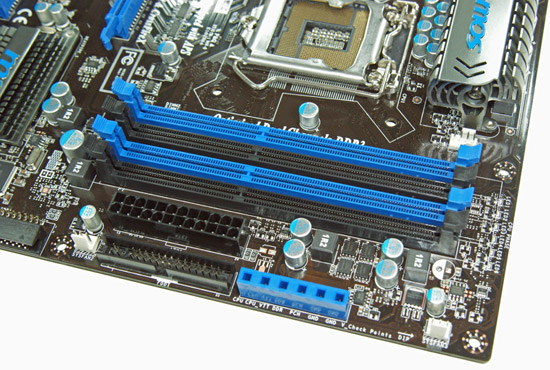
The floppy drive port (once again, why?), 24-pin ATX power connector, four DIMM slots, and V-Check block are located in the lower right hand corner of the board. This board supports dual channel memory configurations and 16GB of DDR3 memory when using 4GB DIMMS. Installing the memory with a video card inserted in the first x16 slot is easy.
The V-Check option is the blue plastic rectangle with six square holes. This box houses pins that offer voltage check points for VTT, DDR, CPU and PCH voltages. A user can take a multimeter and get a real-time readout of voltages instead of relying on BIOS or software readouts. We typically found readings to be within 0.01V~0.03V of what various software programs offered.
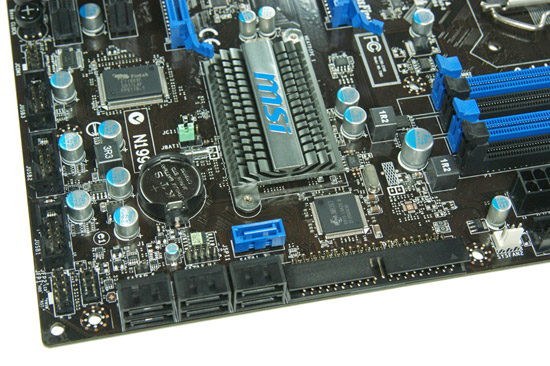
A low-profile heastsink design keeps the P55 chipset cool (not that it really needs it) and will not interfere with longer graphics cards in either slot. The six 3Gbps SATA ports offered by the P55 are along the edge of the board with right angle connectors. The only drawback is that this design can be troublesome in enclosures with the drive cage pushed up against the board but overall it is a preferred solution. The blue SATA port is run off the JMicron JMB363 as is the IDE port. We would rather see the IDE port dropped and the extra SATA port moved to the I/O panel as an eSATA option.
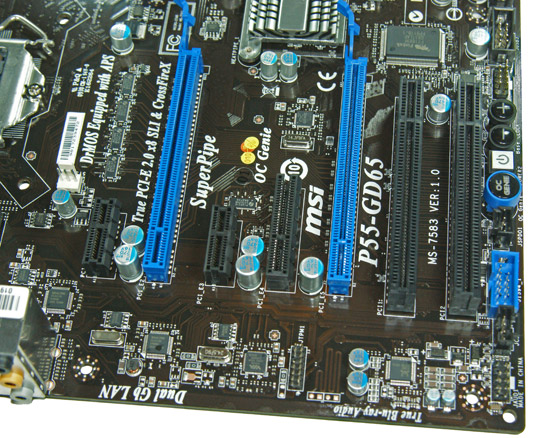
MSI includes two PCIe x16 slots (dual x8 with the second slot populated, both slots are run off the processor), two PCIe x1 slots (P55), two PCI slots (P55), and a PCIe x4 slot (P55). The second PCIe x1 and first PCI slot will be physically unavailable when utilizing a dual slot video card in both x16 slots.
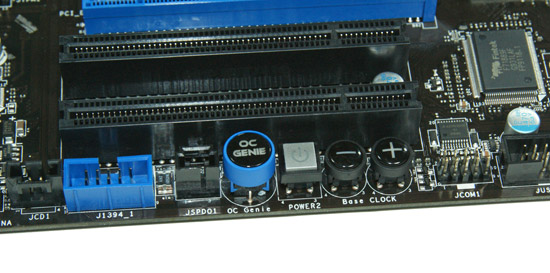
MSI includes their OC Genie and bclock buttons in addition to a power button. However, somebody probably fell asleep in the layout department as MSI failed to include reset and clear CMOS buttons. The two buttons most overclockers are going to use at one point or another.
MSI's "OC Genie" is a great technology that offers a hardware based solution to automatic overclocking. Basically, the user shuts down the system, presses the button, and starts the system again. The OC Genie will automatically take the system through a series of tests to overclock the CPU and memory. The whole process takes only a few seconds when it works.
We say “when it works” as we encountered several compatibility problems with various power supplies. Out of the eleven power supplies we utilize for compatibility testing, five of them caused OC Genie to lock hard, each time requiring a clear CMOS event to recover from the lock.
When it did work, our Core i5/750 was clocked to 3.3GHz and our Core i7/860 was clocked to 3.7GHz. We wished for a little more speed on the 750, but overall, the voltages and memory settings were in the safe zone and if a user is nervous about overclocking, this is a really quick and incredibly easy way to get additional performance from your system.
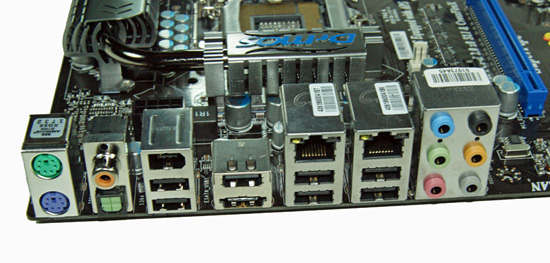
The I/O panel is loaded with goodies. We have seven USB 2.0 ports, PS/2 mouse and keyboards ports, a eSATA/USB powered port from the JMicron JMB363, IEEE 1394a port offered by the VIA VT6315N chipset, dual Gigabit Ethernet LAN ports via the Realtek RTL8111D chipset, optical out/coaxial out S/PDIF ports, and an audio panel that provides 8-channel audio output from the Realtek ALC 889 HD audio codec.


43 Comments
View All Comments
goinginstyle - Saturday, October 10, 2009 - link
It's on the front page. A change up in the article layout from all indications. It's different but good in my opinion as there is no need is reading the same stuff twice.Minion4Hire - Sunday, October 11, 2009 - link
I really liked it. Keeps everything concise. You get a full synopsis on one page, and yet all the benchmarks and hard numbers are still available if you want to compare. It's really a great format for those who just want to get the feel of a product; they don't have to skim page after page looking to compile useful relevant snippets of information.Again, I REALLY like this format. And I'm a benchmark junkie! :D
Mahomedsmith - Thursday, December 30, 2010 - link
How to insert and design the board?<a href="http://southbeachjava.org/">South Beach Java</a>