Thermalright HR-03 GT: Heavyweight GPU Cooling
by Matt Campbell on March 3, 2008 2:00 AM EST- Posted in
- Cases/Cooling/PSUs
HR-03 GT Installation
First, we must say that Thermalright's installation directions on their website are vastly superior to the black-and-white, small font instruction card they ship in the box. To their credit, they do direct you to the website on the card, and they can easily modify and/or improve the information there over time.
Once you apply the RAM sinks, you'll end up with something that looks like this.

This is where we first started to be annoyed. The adhesiveness of the RAM sinks is not that great, and a couple of them did not want to stay put. Make sure to use alcohol and clean any residue meticulously. This also seems to be a common problem, as it's listed as question two in Thermalright's Online FAQ. They claim with a proper cleaning the sinks will not be movable. If you're still worried and intend this as a long-term installation, you may want to consider the use of thermal epoxy. With that, they really will be immovable.
Next, install the heatsink. There are two methods for this: One wraps the heatsink behind the card, while the other curves it out front. We opted for option 2, as we didn't have enough clearance to the CPU cooler in our test system. Make sure to inspect your case clearances before selecting your install method.
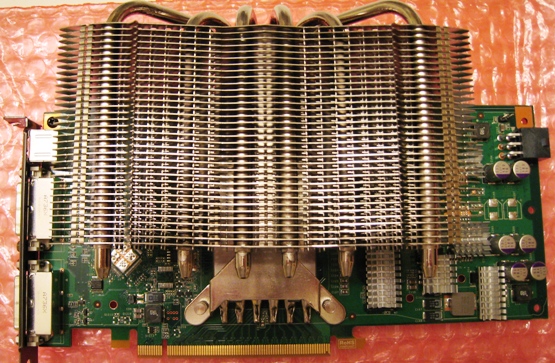
Yes, it's large. From the front of the heatsink to the rear of the card, it's exactly two inches. The screw caps protruding from the back add another 0.25". Add a 92x25mm fan to that, and the depth grows to 3" to the board, or 3.25" with the screw caps. For reference, an 8800 Ultra is only 1.625" thick at its deepest point.
When it comes to fans, there are a lot of options in the 92mm category. We've used Scythe and Panaflo in the past with good results; they provide good amount of airflow with very little noise. Either the Panaflo H1A or the Scythe Kama are a good choice; noise figures are not noted in this article as both were inaudible over ambient case noise. We used the Kama for temperature testing, with the fan mounted to blow air into the heatsink (towards the card).
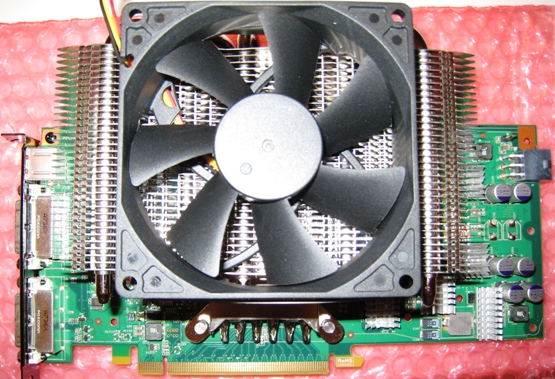
The fan clips are another area of annoyance - the mounting mechanism is not that intuitive, nor is it that secure in this product. With a bit of patience and perseverance, however, it's possible to mount a fan. Now let's look at the results of our effort.


43 Comments
View All Comments
Wesley Fink - Monday, March 3, 2008 - link
As you will see in the review we did compare the Thermalright to both the stock nVidia cooler and the Sparkle fanless 8800GT cooler. The results for all three are in the performance chart on page 4.I have revised the article a bit to make it clearer that the article compares the Thermalright HR-03, the stock nVidia cooler, and the Sparkle fanless 8800GT.
fendell - Monday, March 3, 2008 - link
It's in the name I guess, ThermalRIGHT? ;)I do wonder tho, why didnt you overclock the card and include Temps at various speeds as well?
soydeedo - Monday, March 3, 2008 - link
"I do wonder tho, why didnt you overclock the card and include Temps at various speeds as well?"I was wondering the same. When someone is looking for info on such a heavy duty cooler, that should be the obvious test.