Thermalright HR-03 GT: Heavyweight GPU Cooling
by Matt Campbell on March 3, 2008 2:00 AM EST- Posted in
- Cases/Cooling/PSUs
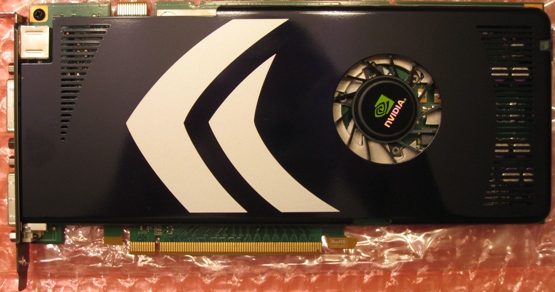
8800 GT Stock Cooler Removal
Removal of NVIDIA's stock cooler can seem a bit daunting if you haven't done it before, but it's actually quite straightforward. First, let's look at what we're starting with:
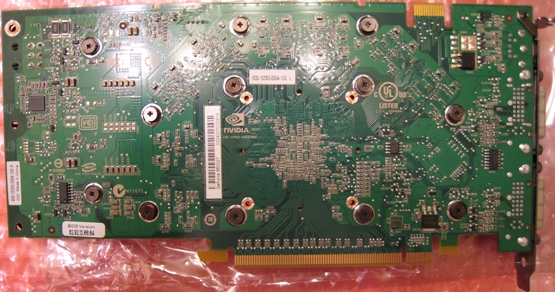
There's nothing going on in the front, but flipping the card over reveals twelve screws on the back. The first step is to remove those screws. They're spring loaded, so they come out quite easily.

With the screws removed, the HSF on the front should come away quite easily, leaving you with something that looks like this.
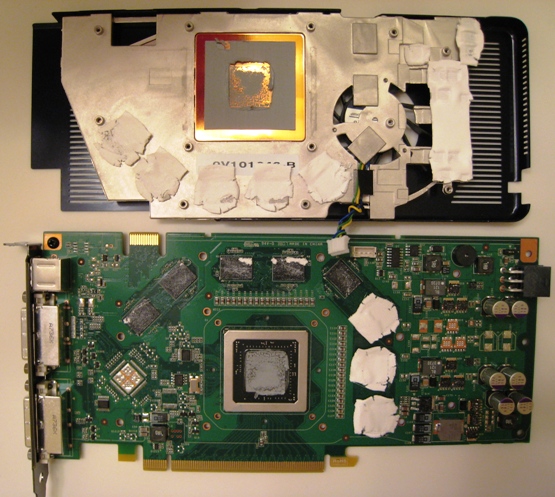
Unplug the fan and you can set the cooler aside. All that remains is to remove any pads from the card and clean everything up with some alcohol. (Be sure to clean the surfaces thoroughly!) Now it's time for the HR-03 GT installation….


43 Comments
View All Comments
Wesley Fink - Monday, March 3, 2008 - link
As you will see in the review we did compare the Thermalright to both the stock nVidia cooler and the Sparkle fanless 8800GT cooler. The results for all three are in the performance chart on page 4.I have revised the article a bit to make it clearer that the article compares the Thermalright HR-03, the stock nVidia cooler, and the Sparkle fanless 8800GT.
fendell - Monday, March 3, 2008 - link
It's in the name I guess, ThermalRIGHT? ;)I do wonder tho, why didnt you overclock the card and include Temps at various speeds as well?
soydeedo - Monday, March 3, 2008 - link
"I do wonder tho, why didnt you overclock the card and include Temps at various speeds as well?"I was wondering the same. When someone is looking for info on such a heavy duty cooler, that should be the obvious test.