Dell XPS M1730: SLI, Penryn, and Overclocking
by Jarred Walton on February 28, 2008 10:00 AM EST- Posted in
- Laptops
Cover Me - I'm Goin' In!
 |
If you want to get at the motherboard/internals, start by lifting up the plastic access panel above the keyboard. Four screws hold the keyboard in place, and once you remove those carefully lift up the keyboard and then disconnect the ribbon cable underneath. Under the keyboard, you will find three mini-PCI slots; on the test system, an Intel 4965AGN wireless adapter occupies one of these slots.
That's as far as most users will need to go, but if you actually want to get down to the motherboard you'll have two remove the four screws holding the main LCD panel in place, and you will also need to remove the two screws and the mini LCD panel above the keyboard. You'll also need to disconnect the power and display cables for the LCD, plus the wireless networking antenna. Take your time and move slowly.
 |
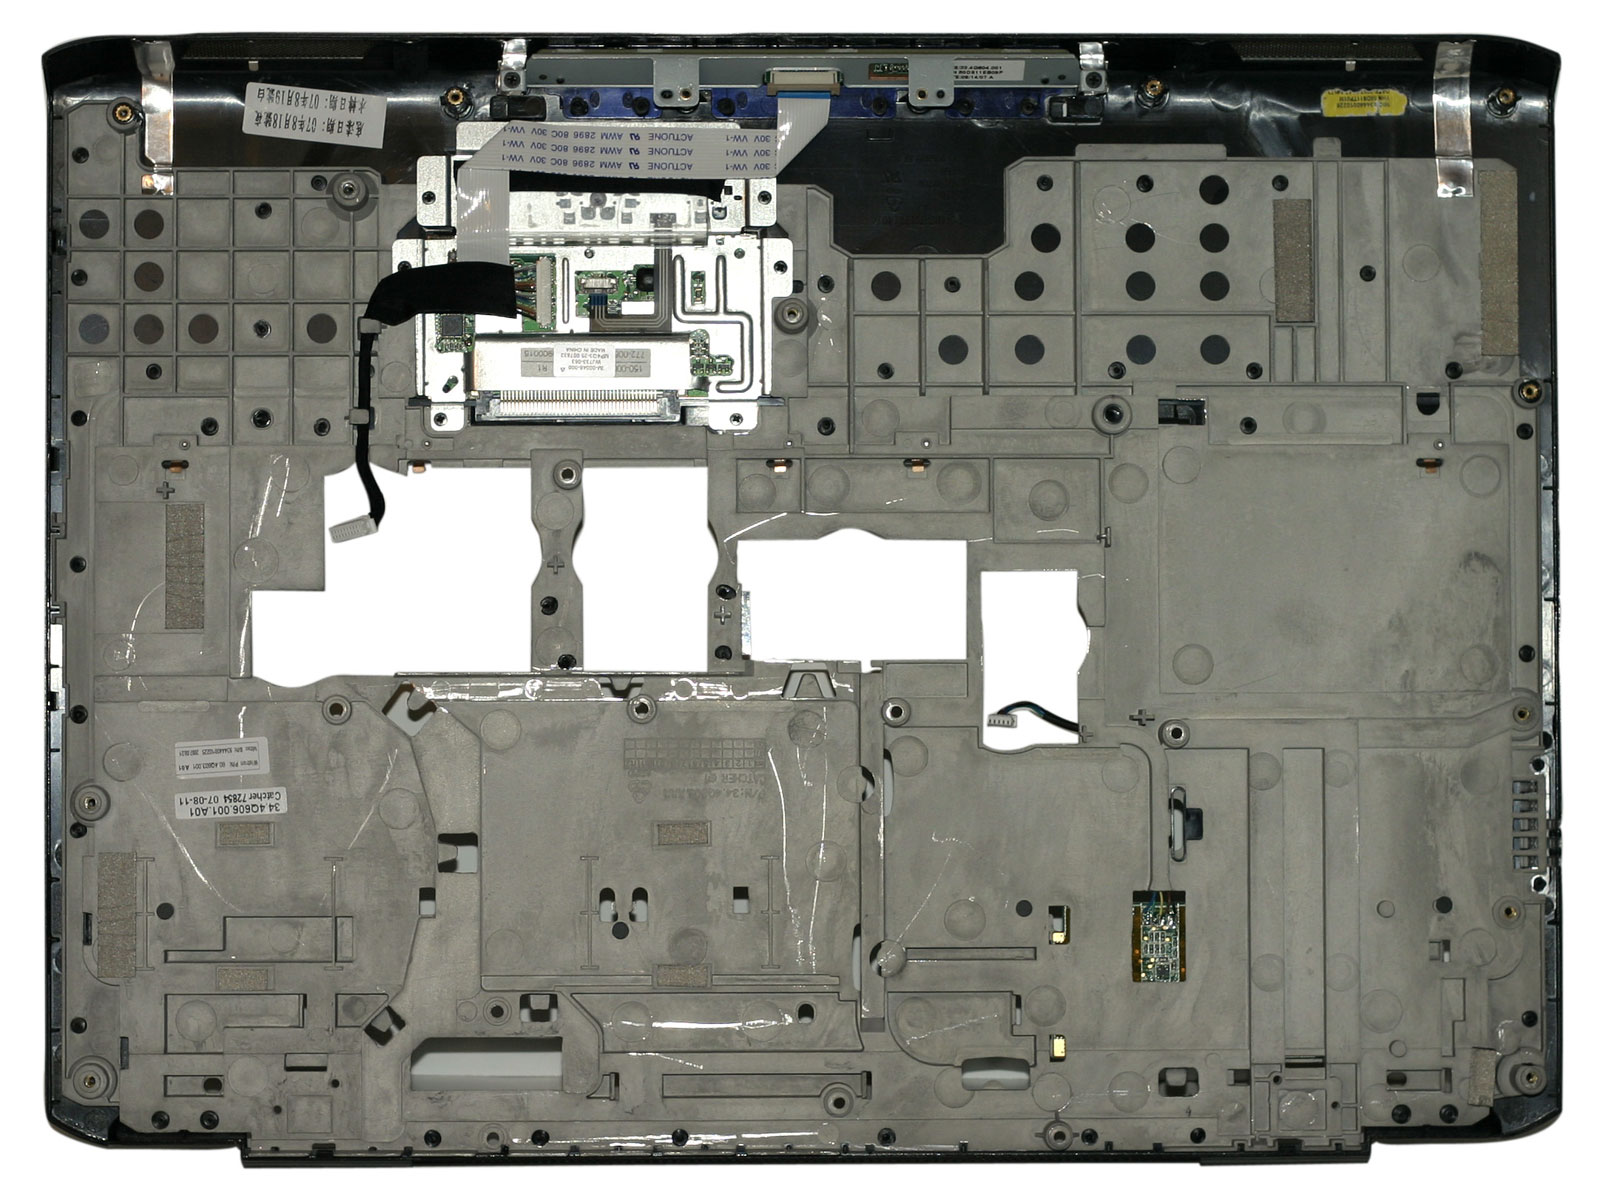 |
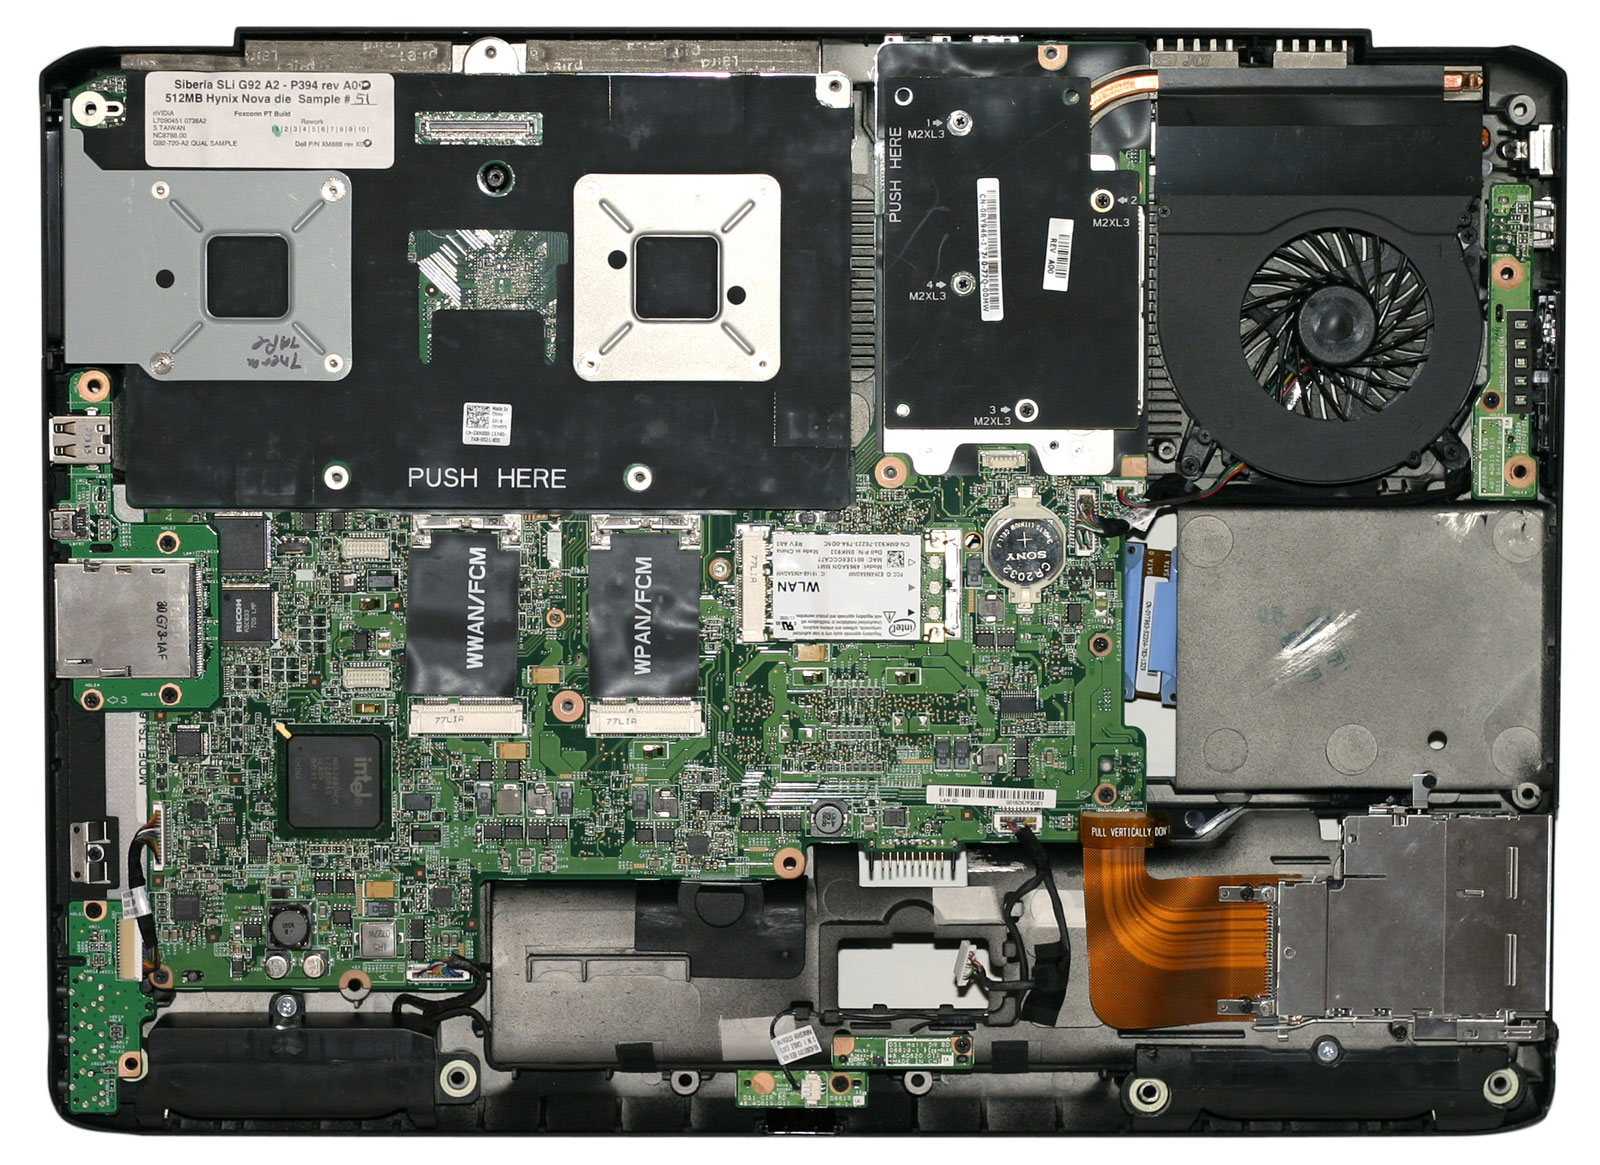
At this point, in order to remove the plastic shell that's home to the touchpad you will need to remove a whole bunch of screws. There are 14 screws on the bottom, one of which hides underneath the hard drive cover. Nine more screws secure the panel from the top - five of these are under the keyboard area, and two more are along the top of the notebook underneath the main LCD panel. When you've removed all of the screws, the plastic cover should pull off without requiring an excessive amount of force. Again, make sure to disconnect the various cables/ribbon cables before you pry things apart.
 |
 |
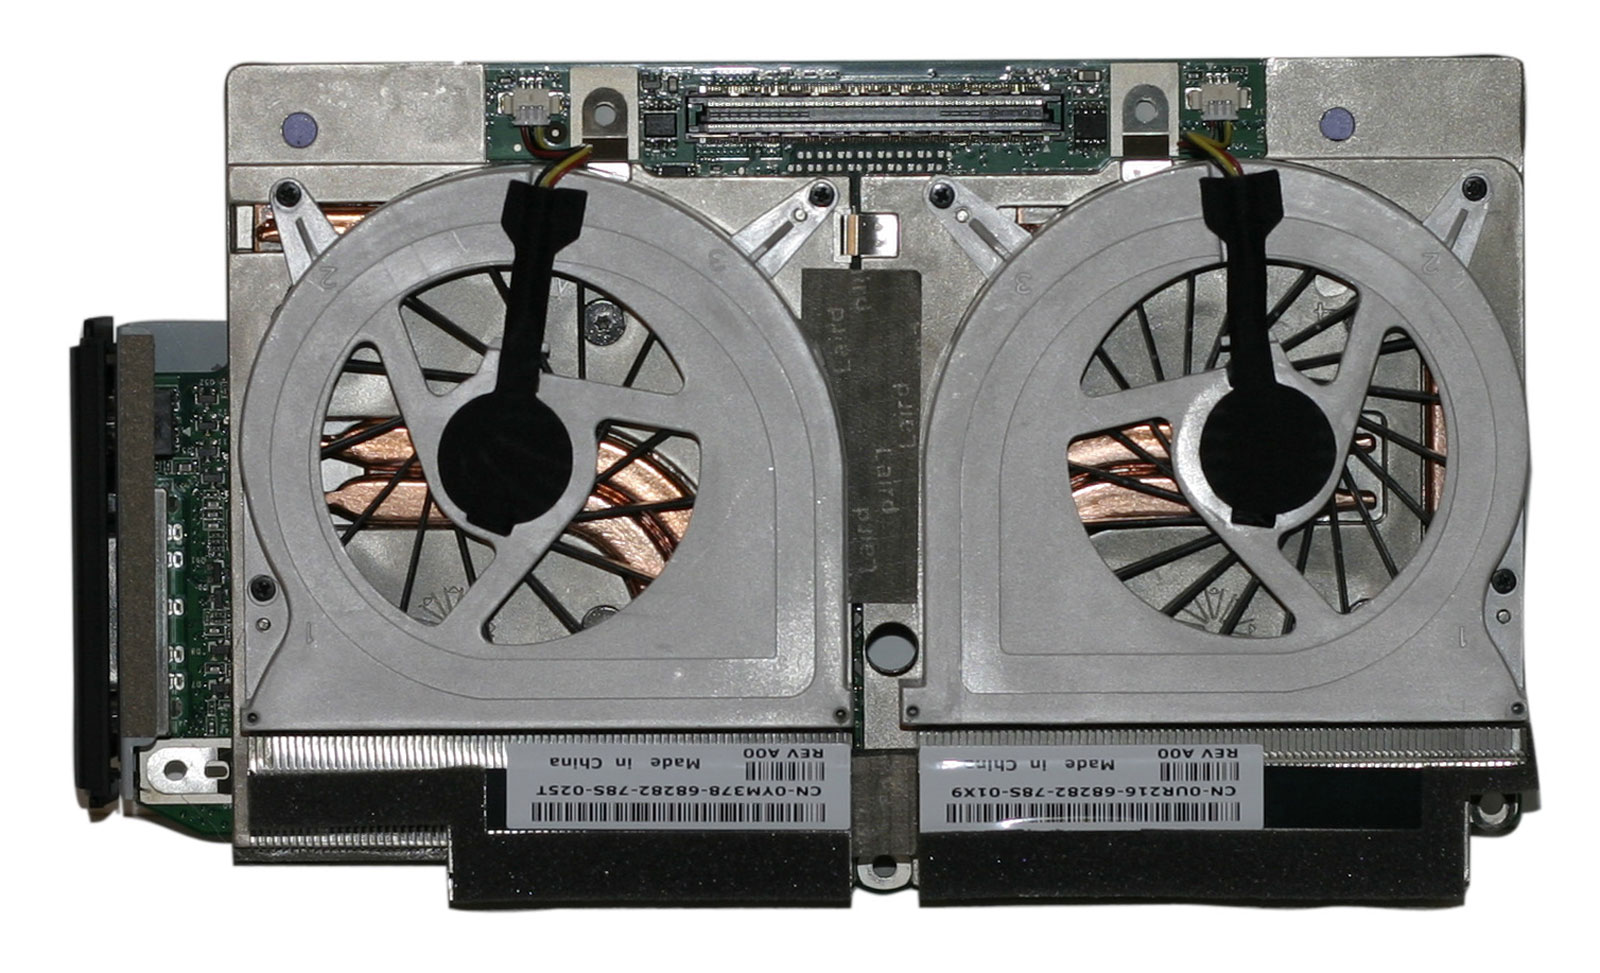 |
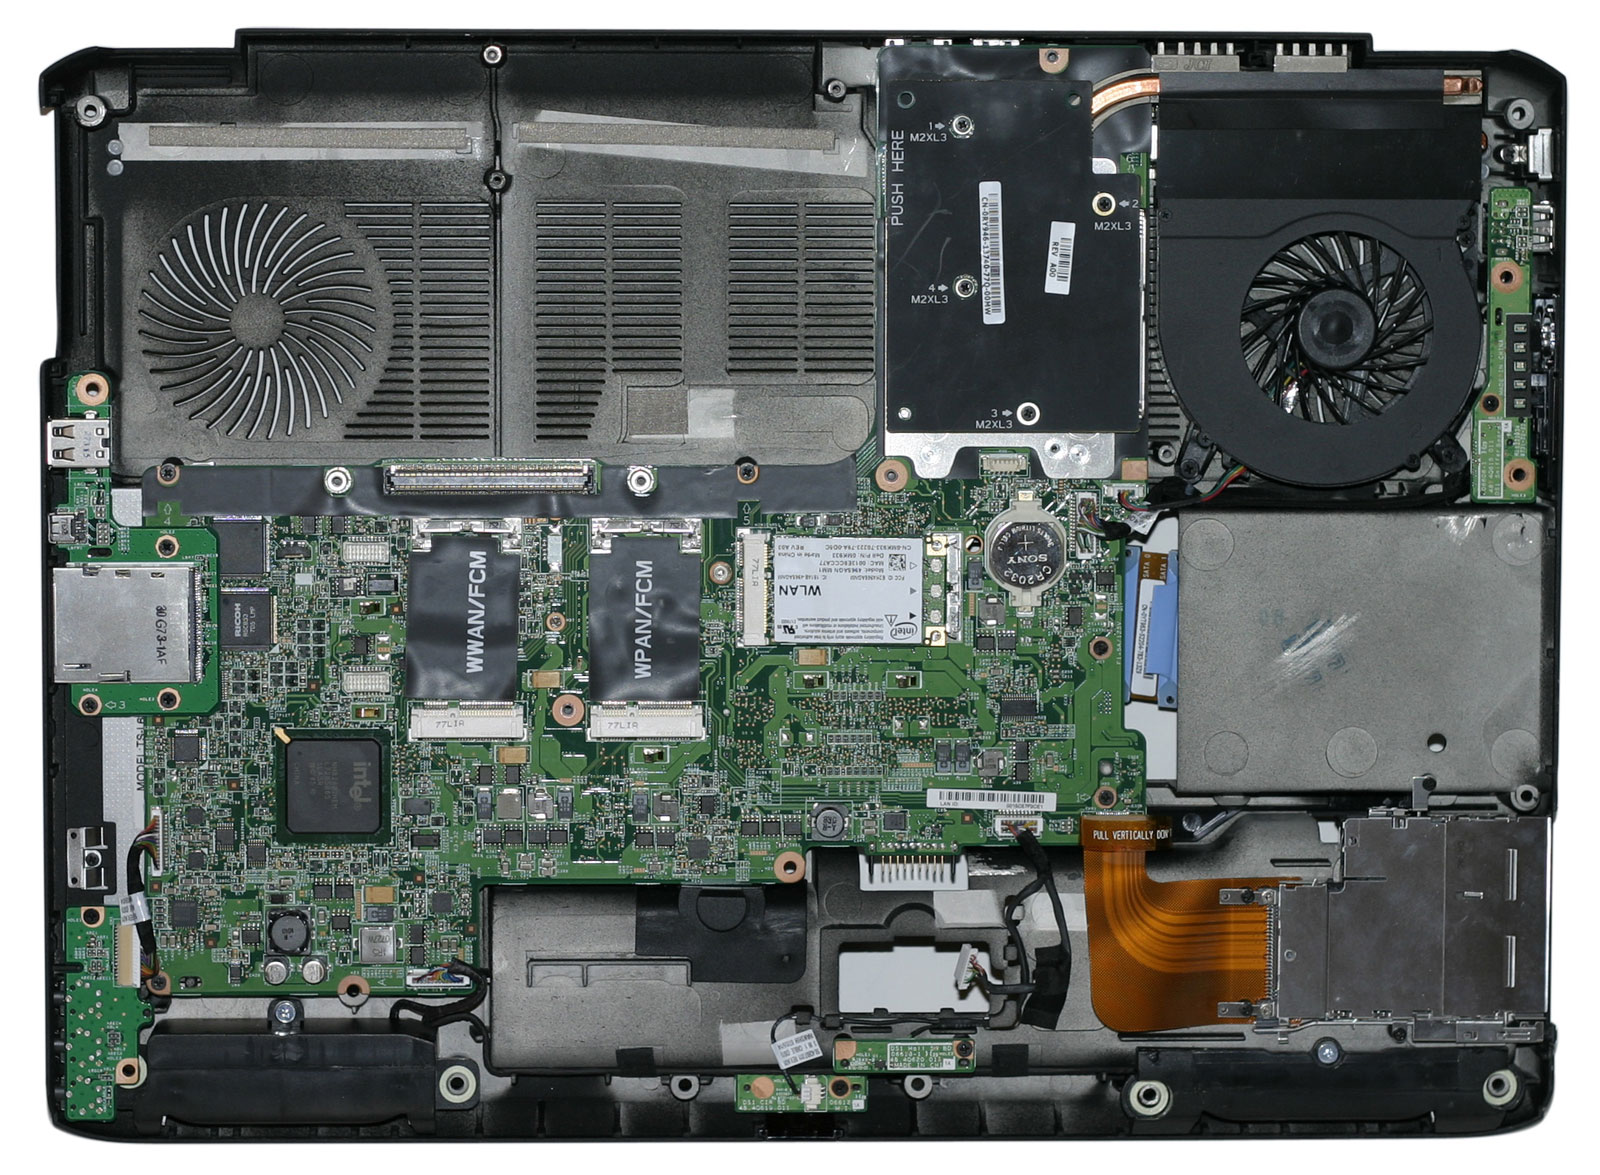
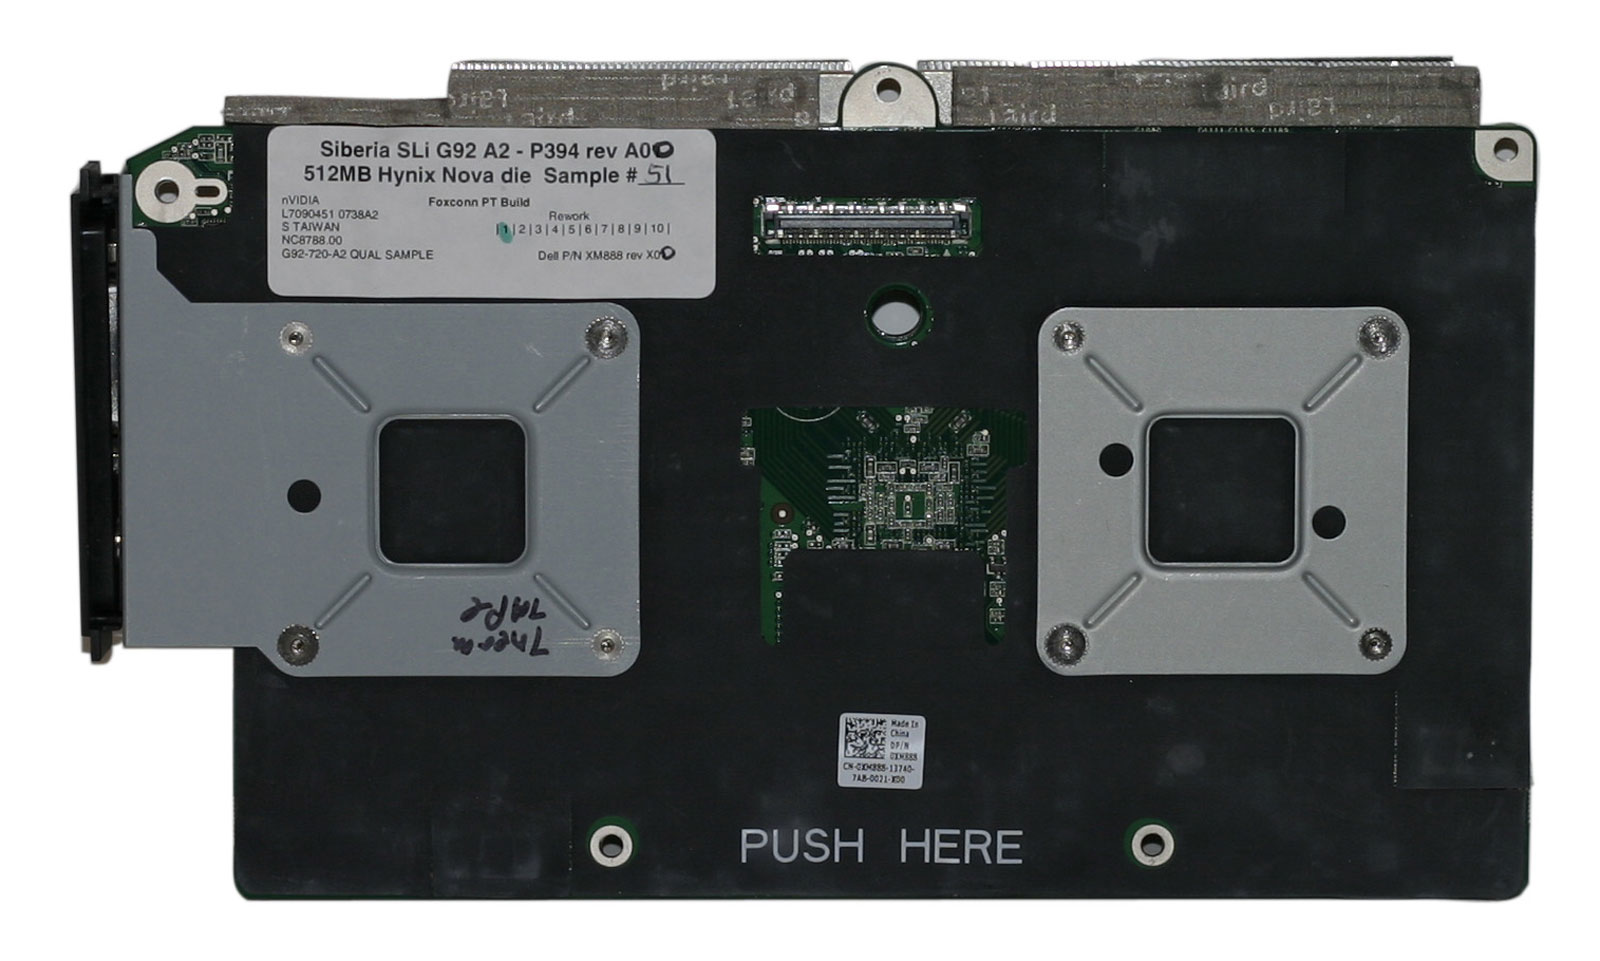
At the top left of the motherboard we find the GPU (GPUs) module, which is easy to remove. It can presumably be upgraded should Dell decide to provide such an option in the future. The top right is home to the Northbridge and CPU, covered by a heatsink/fan and secured with several more screws. While we didn't fully dismantle the chassis, the PhysX 100M sits up in the top-right between the CPU and Northbridge according to Dell.
Dismantling the whole system to get at the CPU isn't particularly difficult, but it does require a bit of time. During testing, we were on a conference call with Dell and NVIDIA at one point, and one of the NVIDIA people asked if there was an easier way to swap CPUs. The answer: no, not really. If you plan on swapping CPUs back and forth repeatedly over a short period of time, about the only shortcut you can take is to not put all of the screws back in place. Luckily, for most people upgrading laptop CPUs is a rare occurrence. Give yourself 30 to 60 minutes and you should be able to do it without difficulty. The only thing you really need is a small Phillips head screwdriver, preferably one with a magnetic tip to help extract the screws. (Yes, we know that magnets are supposed to be dangerous around electronics... we haven't killed anything yet, and we hate losing screws.)


32 Comments
View All Comments
FXi - Friday, February 29, 2008 - link
If folks are going to be told that a laptop performs extremely well, I think it would be fair to throw at least a single desktop system (mainstream enthusiast level, nothing over the top) into the charts for comparisons. I realize it could stunt the graphs a bit, but folks really need to understand what they are buying into with these machines, and all too often they think they are getting something that is 90% of a desktop's power, and that's rarely the case.If it breaks the grapsh too badly, throw a couple of graphs in the end of the article (much like you have a couple of pages dedicated to "overclocking performance") that give the fair comparison. I'm not saying that lappies aren't worth it, just people should be fully aware of what they are paying for.
7Enigma - Friday, February 29, 2008 - link
I would completely agree with you up until the conclusion of the article. I have never owned a laptop, and probably won't for quite some time. Because of this I don't follow the laptop-only parts (CPU/GPU/RAM/etc.) much and so thought, "This is a crazy fast laptop but I wonder how it compares to a Q6600 with 8800GTX".The conclusion really put the laptop in perspective for me. Basically its a top of the line desktop system from a year ago. That's all I needed to hear. I think it is quite a feat to have a laptop capable of performance a year behind current tech. Yes it is more desktop in a small form factor, but it is a easily portable computer that behaves like a very capable desktop system.
With all that said, I can't wait to build my new system after 3 years with my current un-upgraded one. Just waiting on the 45nm quads and the new 9800's to pull the trigger...
funky24 - Friday, February 29, 2008 - link
man they got the best job in the whole world do u keep all hardware u test here ,man that is one mean laptop would kill to have it lolPlasmaBomb - Monday, March 3, 2008 - link
Nope, they have to give it back :(Baked - Thursday, February 28, 2008 - link
This is totally necessary... You can probably murder somebody w/ the power brick if they try to take the "notebook" from you.PlasmaBomb - Thursday, February 28, 2008 - link
What size and rating does the power brick on this beast have?JarredWalton - Thursday, February 28, 2008 - link
It's the biggest power brick I've seen to date, rated at 230W output. So assuming ~80% efficiency, even at the maximum load with overclocking it still has some remaining capacity. Heck, the power brick probably weighs as much as a Mac Air! ;)PlasmaBomb - Saturday, March 1, 2008 - link
Cheers for the info, any chance of a piccy?It must get rather hot, if indeed it's 80% efficient it is dumping 50W when drawing 260W from the plug!
JarredWalton - Sunday, March 2, 2008 - link
Image added. And it could be less than 80% efficient, but the point is the laptop uses nearly as much power as an entry level desktop with discrete graphics.Direct link to image:
http://images.anandtech.com/reviews/mobile/2008/de...">One big power brick
PlasmaBomb - Monday, March 3, 2008 - link
Cheers for the pics, good job btw :)