Falcon Northwest FragBox SLI: Dare to Dream
by Jarred Walton on May 3, 2006 9:00 AM EST- Posted in
- Systems
Assembly (Cont'd)
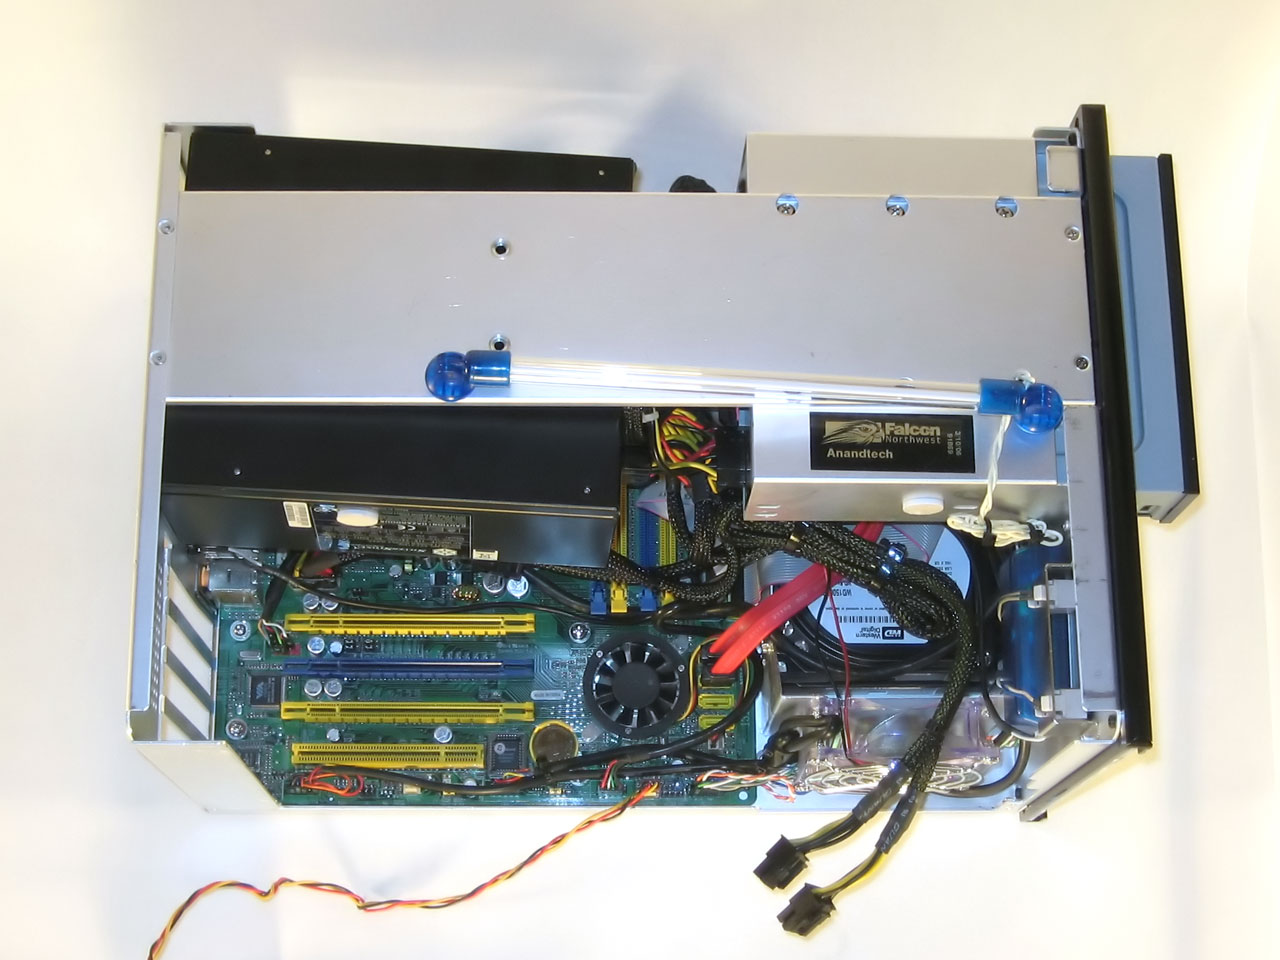
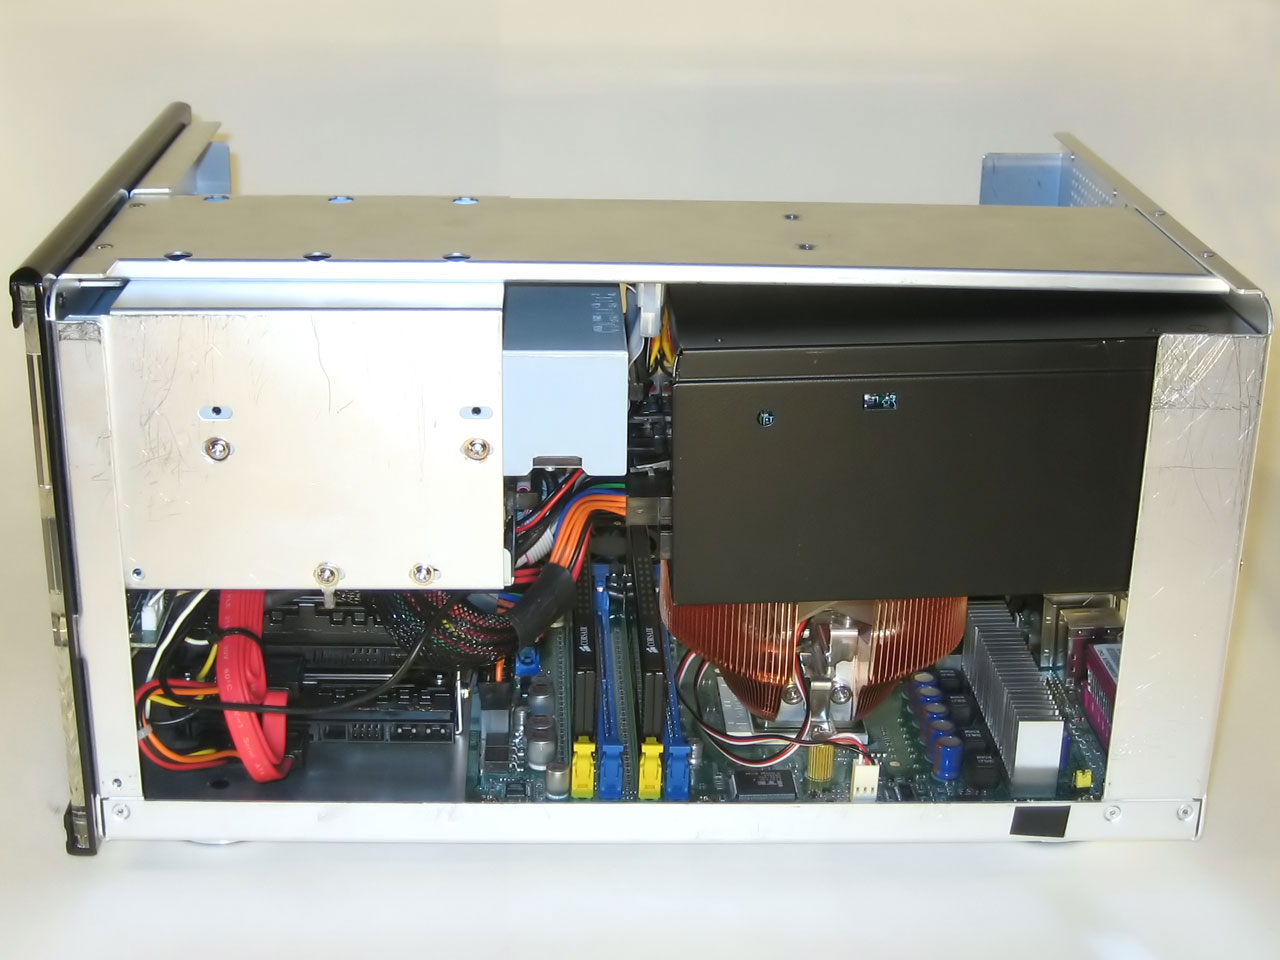
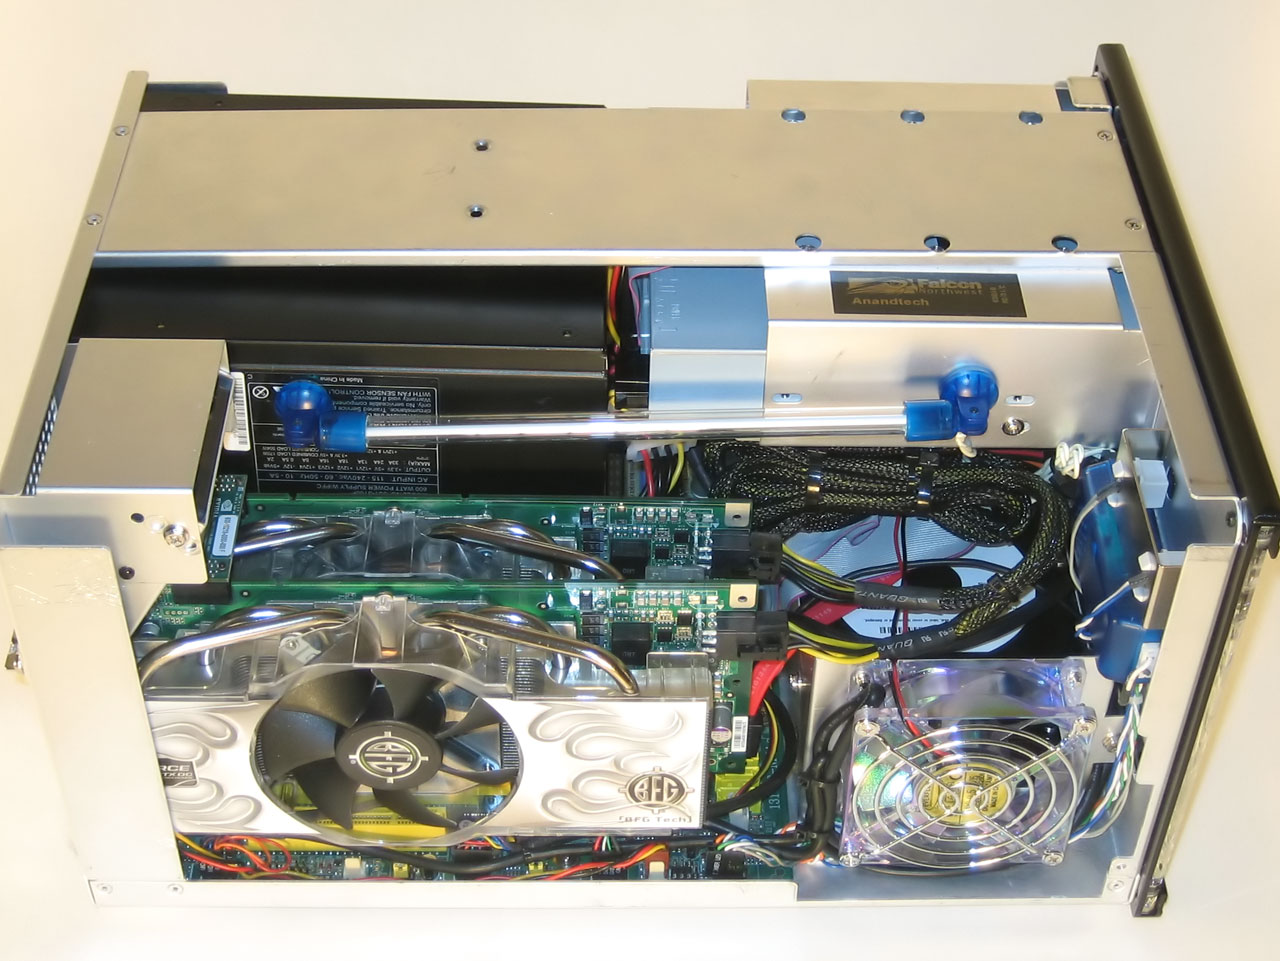
Once the processor is installed, getting power supply back into place -- along with all the cables -- definitely requires a bit of finesse. Because of the way the wires are routed, we found it easiest to slide the power supply into place from the GPU side.
The first picture above has the power supply partially in place, and you can see that you have to have the optical drive pushed forward to accomplish this. A shelf helps to hold the power supply up, but the rear of the unit does tend to sag a bit. As we said, it's a relatively heavy PSU, which was good for quality and cooling does tend to put a bit more strain on the case. Once everything is installed, you'll find that the rear of the PSU basically rests against the rear of the DVD drive. Then all you have to do is clean up the cable clutter -- Falcon's generous use of zip ties certainly helps here, and we would recommend you use something similar.
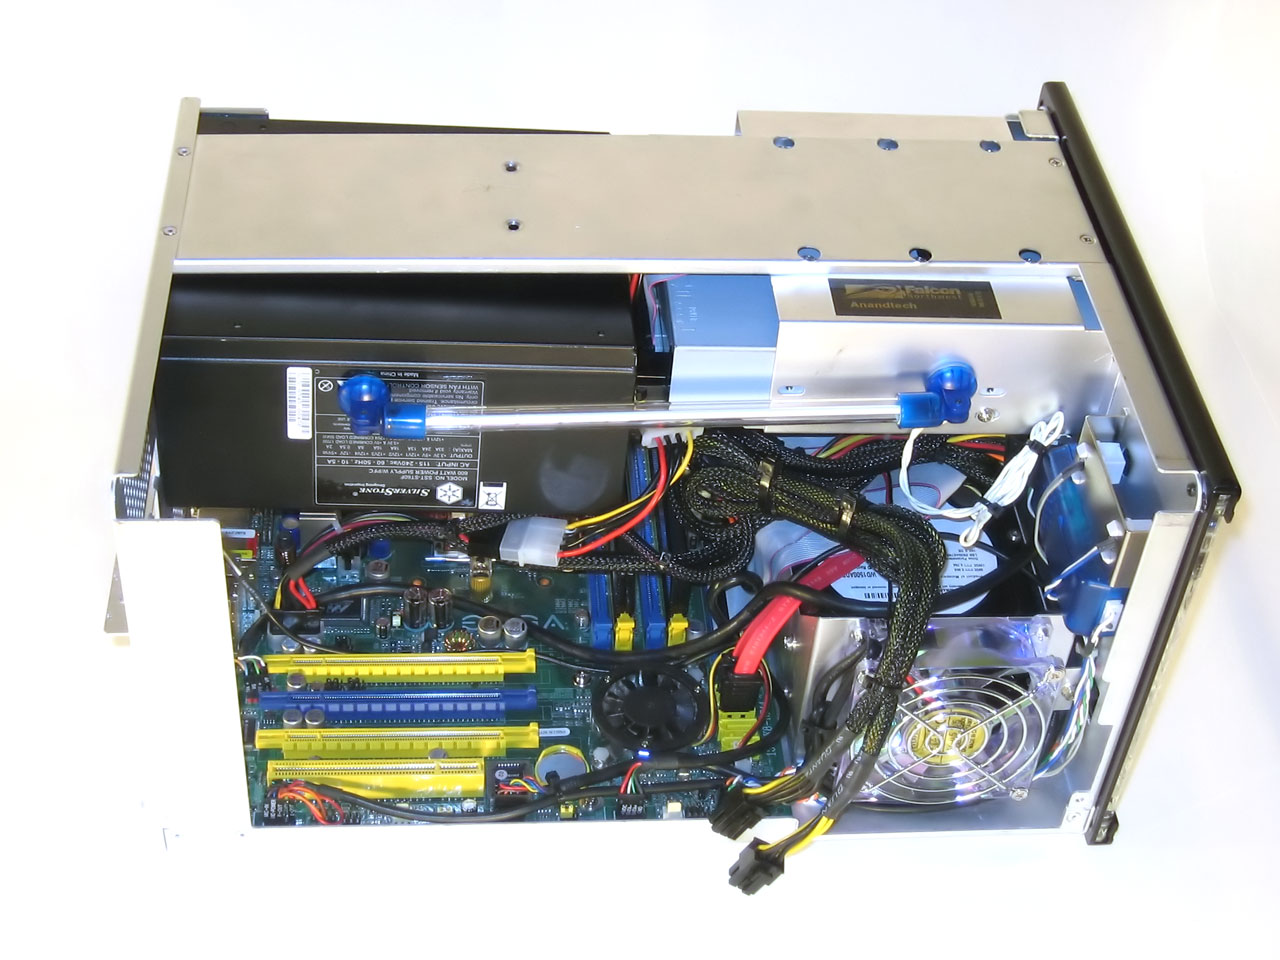
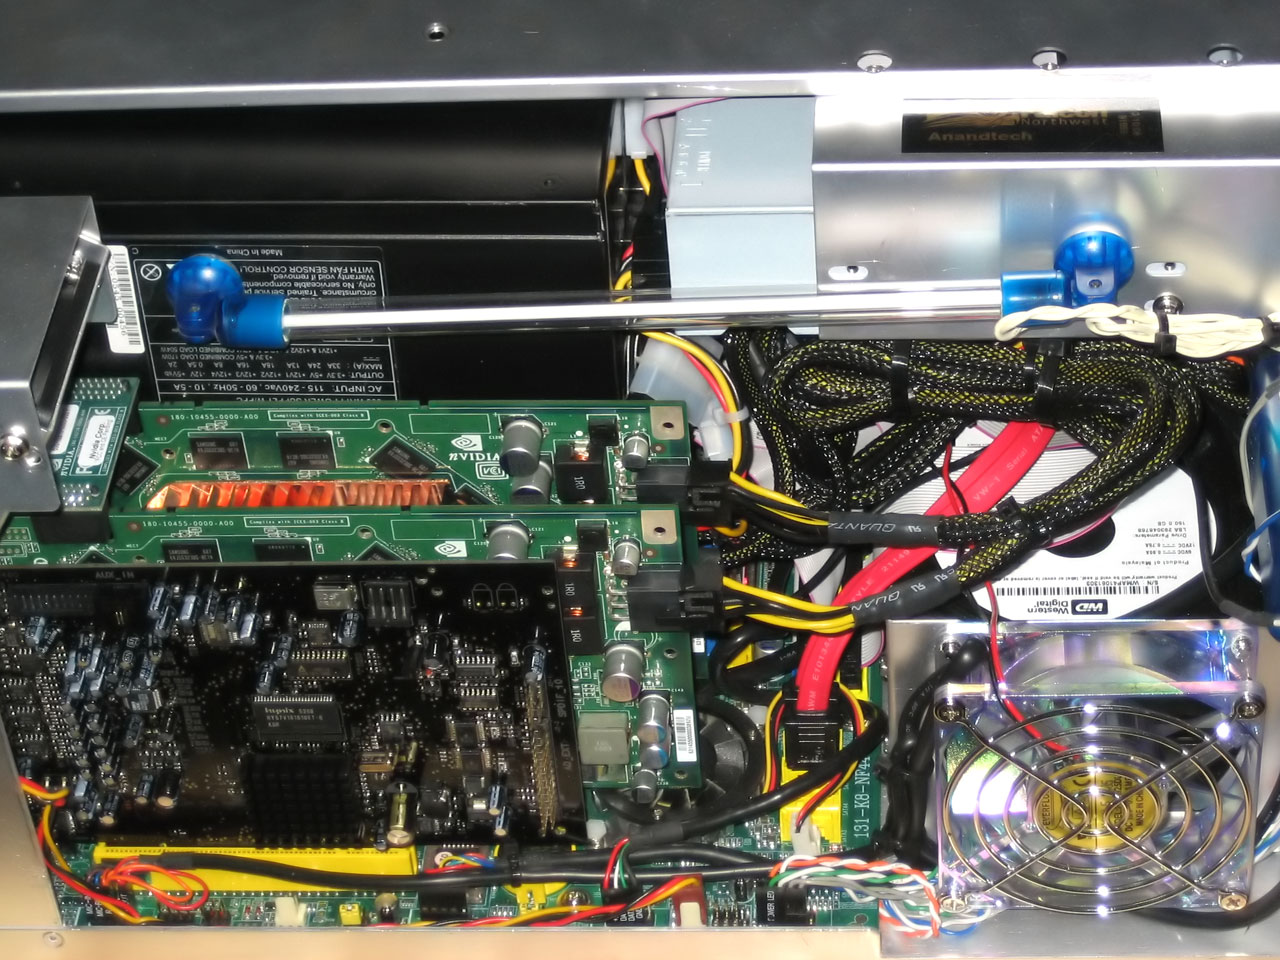
With everything else installed, all that's left is to decide what sort of graphics you want to run, install them, clean up the last few stray ends, and close the system back up. You want to go with two single slot graphics cards and a sound card, or do you prefer the higher performance offered by to dual slot GPUs? That's about the only area where you really have to compromise in going with the micro ATX case and motherboard.
In terms of assembly and upgrades, the GPUs and expansion slots can be accessed without too much difficulty. The extra fan blowing across the GPU area does need to be removed first, but we'd rather deal with that than have the graphics cards overheat. In fact, we would say the rear case perforations that allow this fan to draw in air could actually do with being a bit larger in order to allow even more airflow, but that's a minor concern. This rear fan blows across the expansion slots towards the front of the case, where the hard drives are located and where a second fan serves as an exhaust.
The one area that requires quite a bit of work to access is the CPU socket. You need to remove the PSU to get at it, which means you also have to remove the screws from the optical drive and slide that forward. You will need to remove the GPUs as well in order to get the PSU out of the way. The process necessitates unplugging all of the internal connections to the PSU, of course, at which point it's relatively easy to get at the CPU socket. Naturally, if you were to replace the motherboard, you would need to remove everything from the case first, but that's a rare task.
Overall, the case design is decent, but it's geared more towards performance than ease of use. If we return to the aforementioned competitors, the Shuttle SN26P is still noticeably smaller, but it also lacks the ability to use two dual-slot GPUs - or two single-slot GPUs and an add-in sound card or TV tuner. The fact that it comes as a pre-assembled barebones with all of the necessary cables pre-routed also makes it the easiest to assemble by far. The Hornet Pro is about the same as the FragBox in terms of difficulty of assembly: some areas are easier, others take more time, but overall they're about equal. Ironically, the SN26P works great with the large Corsair DIMMs, though of course you can only use two DIMMs total in the Shuttle units.
If you're after SFF/uATX with SLI - or you could get a different motherboard with the uATX systems and forget about SLI support - any one of these three DIY/barebones options are worth considering. They're all on the higher end of the price spectrum, but they're also on the higher end of the performance and design spectrum. After all, you don't need SLI in order to play games, and you certainly don't need a smaller case - consider the higher prices something of a luxury tax for people that don't want your typical PC. For a high-end SLI setup, you're looking at about $200 extra to switch from an ATX case to one of these cases. $200 is a lot of money for budget and mid-range systems, but if you're looking at spending $3000+ on a top-performing system, an extra $200 really isn't a big deal. If you can't afford an extra $200, you probably shouldn't be looking at a $3000 system in the first place; whether you actually want the smaller case or not is the real question.
Once the processor is installed, getting power supply back into place -- along with all the cables -- definitely requires a bit of finesse. Because of the way the wires are routed, we found it easiest to slide the power supply into place from the GPU side.
 |
 |
 |
| Click to enlarge | ||
The first picture above has the power supply partially in place, and you can see that you have to have the optical drive pushed forward to accomplish this. A shelf helps to hold the power supply up, but the rear of the unit does tend to sag a bit. As we said, it's a relatively heavy PSU, which was good for quality and cooling does tend to put a bit more strain on the case. Once everything is installed, you'll find that the rear of the PSU basically rests against the rear of the DVD drive. Then all you have to do is clean up the cable clutter -- Falcon's generous use of zip ties certainly helps here, and we would recommend you use something similar.
 |
 |
| Click to enlarge | |
With everything else installed, all that's left is to decide what sort of graphics you want to run, install them, clean up the last few stray ends, and close the system back up. You want to go with two single slot graphics cards and a sound card, or do you prefer the higher performance offered by to dual slot GPUs? That's about the only area where you really have to compromise in going with the micro ATX case and motherboard.
In terms of assembly and upgrades, the GPUs and expansion slots can be accessed without too much difficulty. The extra fan blowing across the GPU area does need to be removed first, but we'd rather deal with that than have the graphics cards overheat. In fact, we would say the rear case perforations that allow this fan to draw in air could actually do with being a bit larger in order to allow even more airflow, but that's a minor concern. This rear fan blows across the expansion slots towards the front of the case, where the hard drives are located and where a second fan serves as an exhaust.
The one area that requires quite a bit of work to access is the CPU socket. You need to remove the PSU to get at it, which means you also have to remove the screws from the optical drive and slide that forward. You will need to remove the GPUs as well in order to get the PSU out of the way. The process necessitates unplugging all of the internal connections to the PSU, of course, at which point it's relatively easy to get at the CPU socket. Naturally, if you were to replace the motherboard, you would need to remove everything from the case first, but that's a rare task.
Overall, the case design is decent, but it's geared more towards performance than ease of use. If we return to the aforementioned competitors, the Shuttle SN26P is still noticeably smaller, but it also lacks the ability to use two dual-slot GPUs - or two single-slot GPUs and an add-in sound card or TV tuner. The fact that it comes as a pre-assembled barebones with all of the necessary cables pre-routed also makes it the easiest to assemble by far. The Hornet Pro is about the same as the FragBox in terms of difficulty of assembly: some areas are easier, others take more time, but overall they're about equal. Ironically, the SN26P works great with the large Corsair DIMMs, though of course you can only use two DIMMs total in the Shuttle units.
If you're after SFF/uATX with SLI - or you could get a different motherboard with the uATX systems and forget about SLI support - any one of these three DIY/barebones options are worth considering. They're all on the higher end of the price spectrum, but they're also on the higher end of the performance and design spectrum. After all, you don't need SLI in order to play games, and you certainly don't need a smaller case - consider the higher prices something of a luxury tax for people that don't want your typical PC. For a high-end SLI setup, you're looking at about $200 extra to switch from an ATX case to one of these cases. $200 is a lot of money for budget and mid-range systems, but if you're looking at spending $3000+ on a top-performing system, an extra $200 really isn't a big deal. If you can't afford an extra $200, you probably shouldn't be looking at a $3000 system in the first place; whether you actually want the smaller case or not is the real question.


32 Comments
View All Comments
segagenesis - Wednesday, May 3, 2006 - link
Obviously this wont be cheap, but what an interesting feat of engineering. For a SFF computer this should literally have flames shooting out the back.Gary Key - Wednesday, May 3, 2006 - link
If they had utilized a Pentium 955EE it would have had flames coming out from all directions. :) Just kidding, not really, but we found it amazing how well this case design took thermal requirements under consideration when utilizing SLI and a FX series processor.